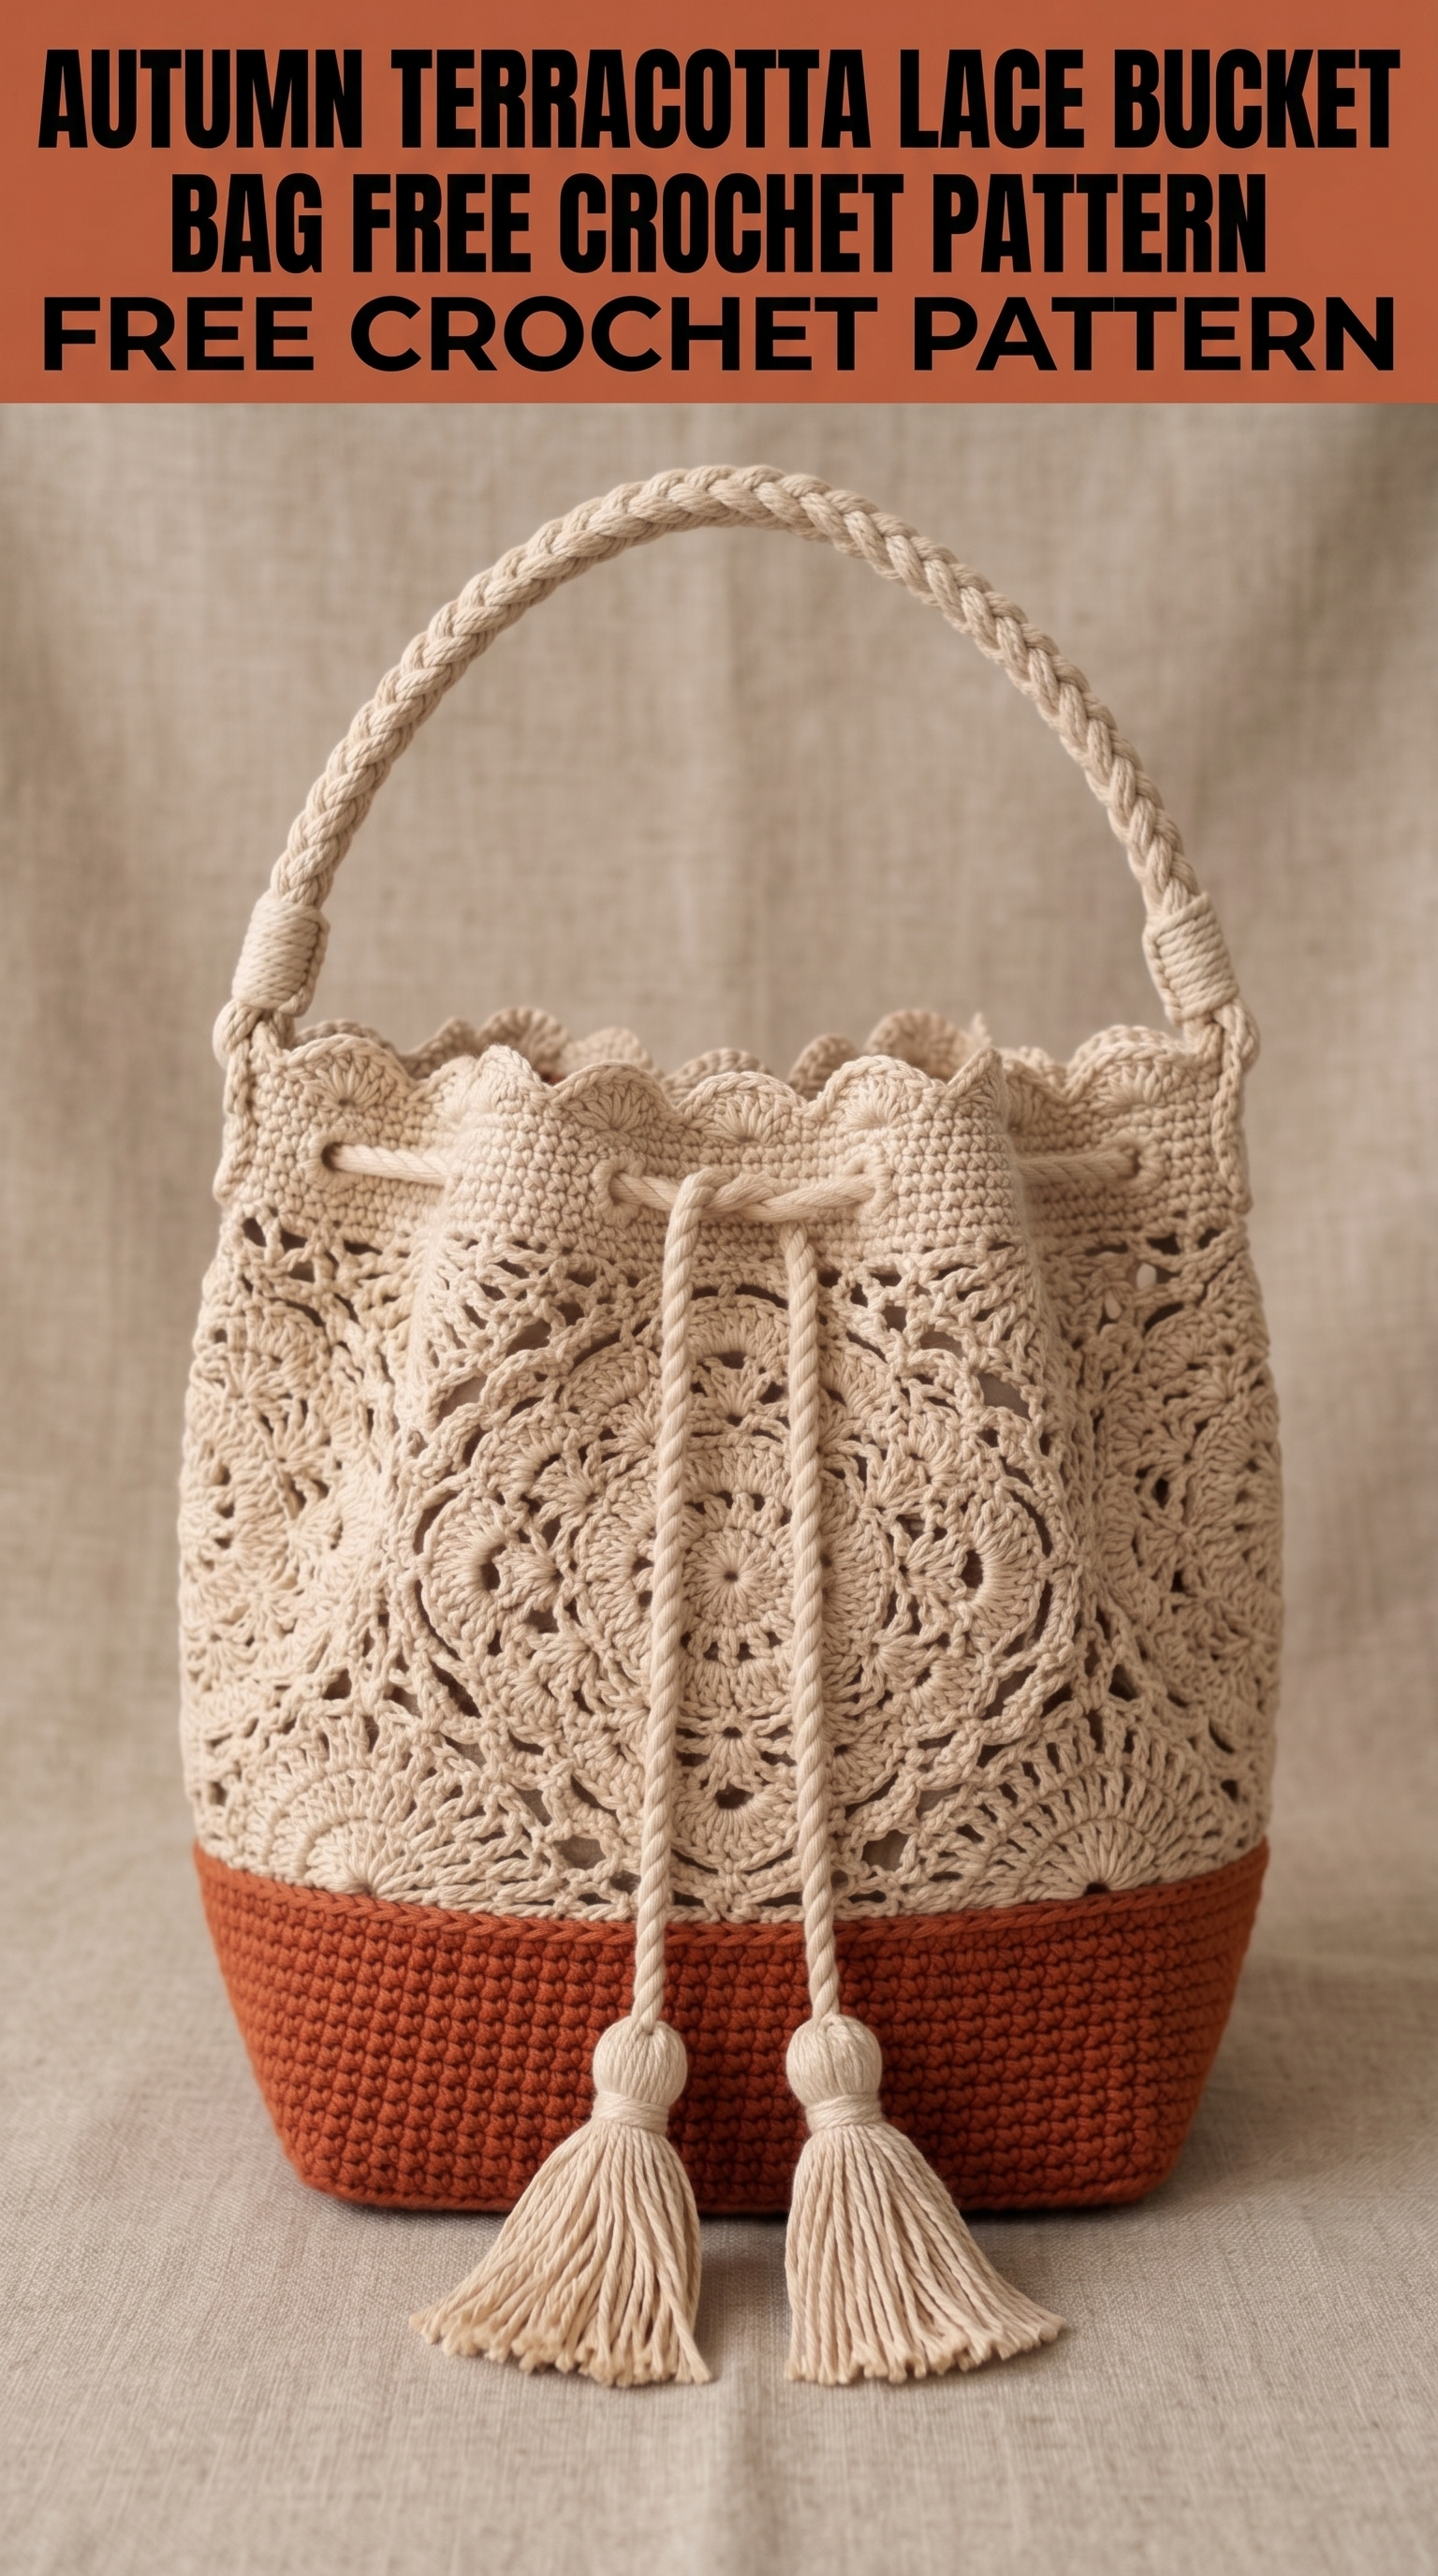
This stunning crochet bucket bag combines delicate lace medallions with a sturdy terracotta base, and honestly, it might be the prettiest bag I have ever made. The contrast between the airy cream lacework and the dense rust-colored bottom creates something that looks straight out of a boutique window. But here is the secret: if you can crochet a granny square and work in the round, you can absolutely make this bag.
I designed this lace bucket bag crochet pattern to be approachable for confident beginners and satisfying for intermediate crocheters who want a showstopper project. The construction breaks down into manageable pieces, and I will walk you through every single step.
Let me show you how to crochet this beauty from start to finish.
Why You Will Love This Crochet Bucket Bag Pattern
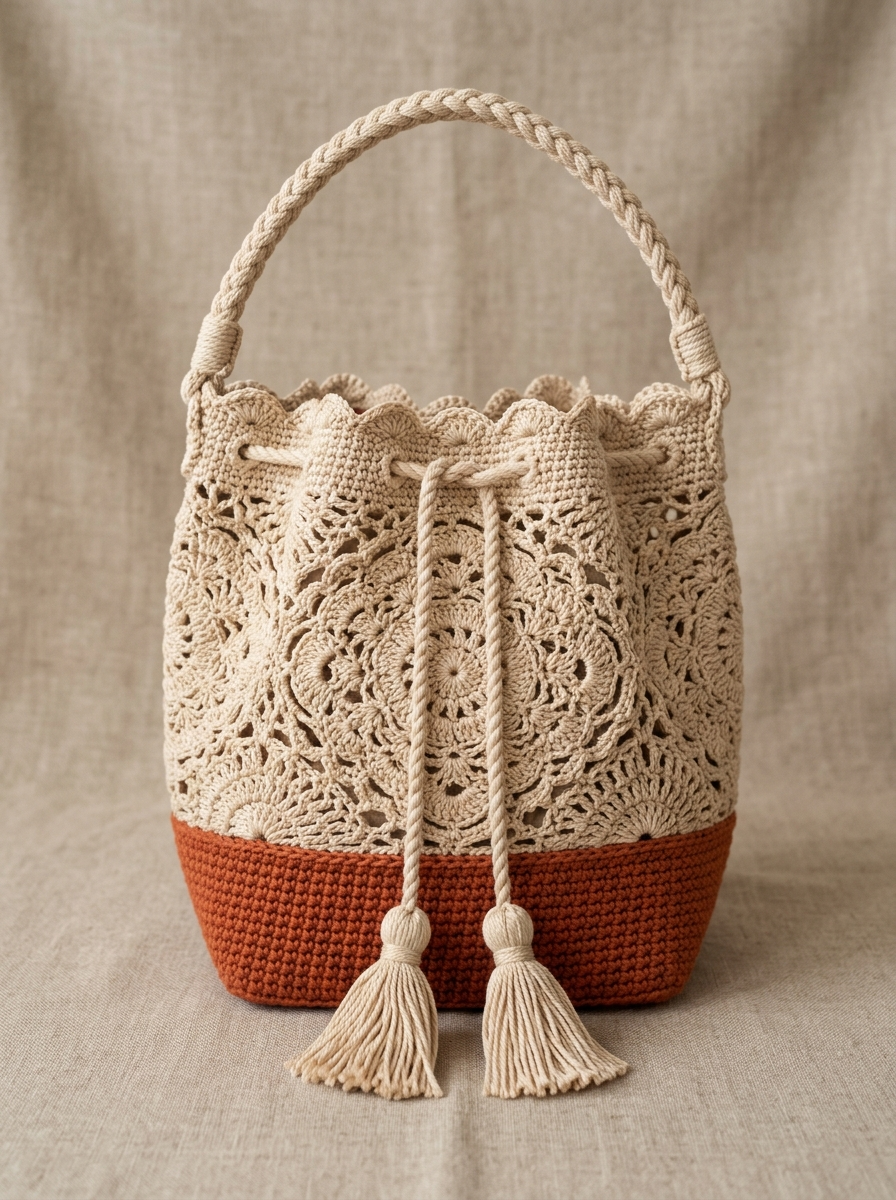
This bag hits that sweet spot between elegant and practical. The lace medallion upper section gives it a romantic, vintage feel while the solid base keeps your belongings secure and prevents that saggy bottom problem we all hate in crocheted bags.
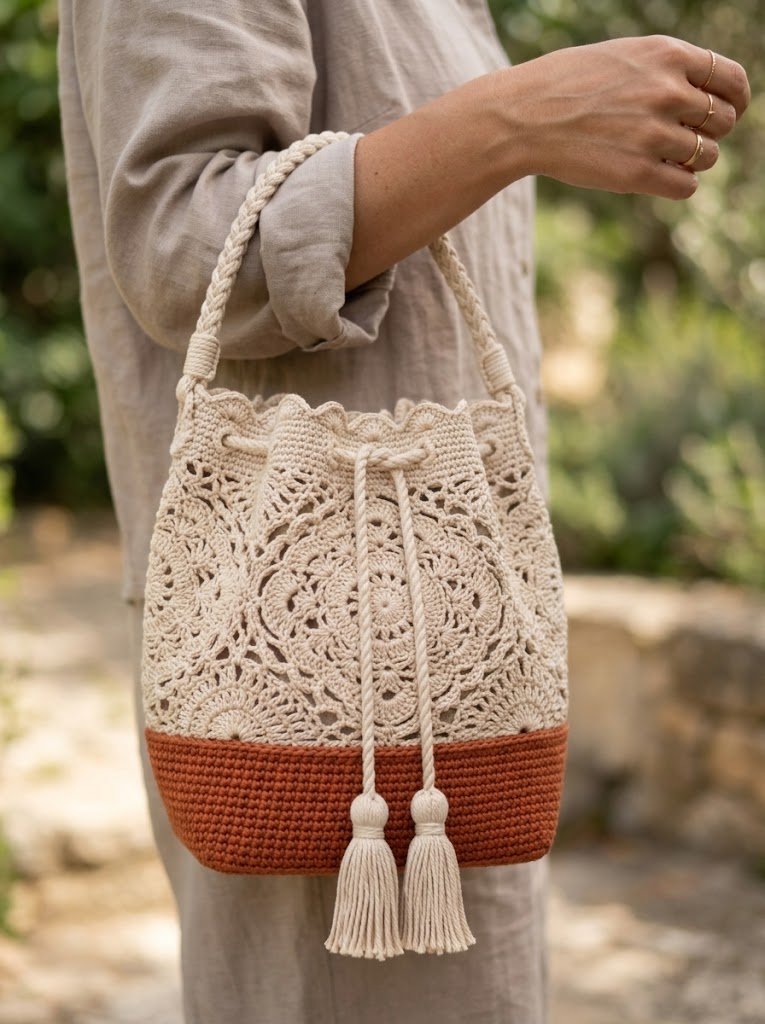
The braided rope handle feels substantial in your hand. The scalloped edge adds polish without extra fussiness. And those tassels on the drawstring cord? Chef’s kiss.
What makes this pattern special:
Skill Level and What You Need to Know
I am calling this intermediate level, but do not let that scare you off. If you have made granny squares before and feel comfortable working in continuous rounds, you have the skills.
Techniques you should know:
New techniques this pattern teaches:
Materials List
Gather everything before you start. Nothing worse than running out of yarn halfway through a motif.
Yarn:
I strongly recommend 100% cotton yarn for this project. Cotton holds stitch definition beautifully in lacework and gives the bag structure. Mercerized cotton adds subtle sheen that makes those medallions pop. Avoid acrylic here because it tends to stretch and lose shape with daily use.
Hook:
Notions:
Gauge (Please Do Not Skip This)
I know, I know. Gauge swatches feel tedious. But for a bag, gauge matters for two reasons: size and structure.
Lace medallion gauge: Each completed medallion measures approximately 4 inches (10 cm) across using 3.5mm hook
Solid base gauge: 20 single crochet stitches and 22 rows equals 4 inches (10 cm) using 3.0mm hook
If your gauge is looser, go down a hook size. Tighter? Go up. A too-loose gauge means a floppy bag that stretches out of shape.
Finished Dimensions
Abbreviations and Stitch Glossary
Let me define every stitch before we begin. Refer back here whenever you need a refresher.
ch = chain: yarn over, pull through loop on hook
sl st = slip stitch: insert hook, yarn over, pull through stitch AND loop on hook in one motion
sc = single crochet: insert hook, yarn over, pull up loop (2 loops on hook), yarn over, pull through both loops
hdc = half double crochet: yarn over, insert hook, yarn over, pull up loop (3 loops), yarn over, pull through all 3 loops
dc = double crochet: yarn over, insert hook, yarn over, pull up loop (3 loops), yarn over, pull through 2 loops, yarn over, pull through remaining 2 loops
tr = treble crochet: yarn over twice, insert hook, yarn over, pull up loop (4 loops), [yarn over, pull through 2 loops] three times
ch-sp = chain space: the gap created by chain stitches in previous row
sk = skip: pass over the indicated stitch without working into it
inc = increase: work 2 stitches into same stitch
st(s) = stitch(es)
Pattern Instructions
Part 1: Lace Medallions (Make 8)
These circular lace motifs form the decorative upper section of your bucket bag. Work all medallions with Color A (cream) and 3.5mm hook.
Round 1: Make a magic ring. Ch 3 (counts as first dc throughout), work 15 dc into ring. Sl st to top of beginning ch-3 to join. Pull ring closed. (16 dc)
Round 2: Ch 3, dc in same st. 2 dc in each st around. Sl st to join. (32 dc)
Round 3: Ch 4 (counts as dc plus ch-1), sk next st, *dc in next st, ch 1, sk next st.* Repeat from * around. Sl st to 3rd ch of beginning ch-4. (16 dc, 16 ch-1 spaces)
Round 4: Sl st into ch-1 sp. Ch 3, 2 dc in same sp, ch 2. *3 dc in next ch-1 sp, ch 2.* Repeat from * around. Sl st to join. (16 clusters of 3 dc, 16 ch-2 spaces)
Round 5: Ch 3, dc in next 2 sts, 3 dc in ch-2 sp. *Dc in next 3 sts, 3 dc in ch-2 sp.* Repeat from * around. Sl st to join. (96 dc)
Round 6: Ch 5 (counts as dc plus ch-2), sk 2 sts. *Dc in next st, ch 2, sk 2 sts.* Repeat from * around. Sl st to 3rd ch of beginning ch-5. (32 dc, 32 ch-2 spaces)
Round 7: Sl st into ch-2 sp. Ch 3, 4 dc in same sp. *5 dc in next ch-2 sp.* Repeat from * around. Sl st to join. (160 dc in 32 shell clusters)
Round 8 (Final Round): Ch 1, sc in same st. *Ch 3, sk 1 st, sc in next st.* Repeat from * around, ending with ch 3, sl st to first sc. Fasten off, leaving 12 inch tail for joining. (80 sc, 80 ch-3 loops)
Each finished medallion should measure approximately 4 inches across. Make all 8 medallions before joining.
Part 2: Joining the Medallions
This is where your bag starts taking shape. We will join the medallions in two rows of four, then connect those rows into a cylinder.
Joining method: Hold two medallions with wrong sides together. Using yarn needle and matching tail, whip stitch through corresponding ch-3 loops along one edge, joining approximately 5 to 6 loops per seam. The join should be flat, not bunched.
Bottom row: Join 4 medallions side by side in a horizontal strip. Then join the first and last medallion to form a ring.
Top row: Repeat with remaining 4 medallions.
Connecting rows: Place top ring above bottom ring. Join along the touching edges, offsetting slightly so the medallions nestle together naturally. The lace should flow continuously without obvious seam lines.
Set aside your medallion cylinder. Take a breath. The tricky part is done.
Part 3: Solid Base
Switch to Color B (terracotta) and 3.0mm hook. We are working in continuous spiral rounds here, so place a stitch marker at the beginning of each round and move it up as you go.
Round 1: Make a magic ring. Work 6 sc into ring. Do not join. (6 sc)
Round 2: 2 sc in each st around. (12 sc)
Round 3: *Sc in next st, 2 sc in next st.* Repeat around. (18 sc)
Round 4: *Sc in next 2 sts, 2 sc in next st.* Repeat around. (24 sc)
Round 5: *Sc in next 3 sts, 2 sc in next st.* Repeat around. (30 sc)
Continue this increase pattern (adding one more sc between increases each round) until your circle measures approximately 6 inches in diameter. This should be around Round 15. (approximately 90 sc)
Building the sides:
Stop increasing. Work even in sc for approximately 3 inches, or about 16 to 18 rounds. This creates the solid terracotta bucket portion. Your stitch count stays the same throughout.
Fasten off, leaving a long tail for attaching to the lace section.
Part 4: Attaching Base to Lace Body
Turn the medallion cylinder so the bottom edge faces you. Place the solid base inside, wrong sides together, with the terracotta section sitting below the lace.
Using Color A and your yarn needle, whip stitch the top edge of the solid base to the bottom of the lace medallion section. Work all the way around, keeping stitches even and tension consistent. The terracotta should overlap slightly behind the lace for stability.
Part 5: Drawstring Channel and Scallop Edge
Drawstring Channel Round:
Join Color A at any point along the top edge of the uppermost medallion row. Using 3.5mm hook:
Ch 3, dc in next st. *Ch 1, sk 1 st, dc in next st.* Repeat around. Sl st to join. This creates small openings for your drawstring cord.
Scallop Edge:
Ch 1, sc in same st. *Sk 2 sts, 5 dc in next st (shell made), sk 2 sts, sc in next st.* Repeat from * around. Sl st to first sc. Fasten off.
The scallops should form gentle waves around the entire bag opening.
Part 6: Braided Handle
Cut 9 strands of Color A yarn, each approximately 60 inches long. Divide into 3 groups of 3 strands each.
Tie all strands together at one end with an overhand knot. Secure this end to a stable surface (clip to a clipboard or tape to table).
Braid tightly for approximately 18 to 20 inches.
Tie off the other end with another overhand knot. Trim any uneven ends.
Attach handle: Using matching yarn, securely stitch each end of the braided handle to opposite sides of the bag, just below the scallop edge. Wrap yarn around the attachment point several times for reinforcement.
Part 7: Drawstring Cord and Tassels
Drawstring cord:
Cut 6 strands of Color A, each 50 inches long. Divide into 2 groups of 3. Twist each group tightly in the same direction. Hold both twisted groups together and allow them to twist around each other in the opposite direction. This creates a strong twisted cord.
Thread cord through the drawstring channel, entering and exiting on opposite sides of the bag.
Tassels (make 2):
Wrap Color A yarn around a 4 inch piece of cardboard approximately 30 times. Slide off cardboard carefully. Tie tightly at one end (this becomes the top). Cut the loops at the opposite end.
Wrap a separate piece of yarn around the tassel about half an inch below the top tie, creating the tassel head. Secure and hide ends inside the tassel.
Attach one tassel to each end of the drawstring cord.
Finishing Touches
Weave in all remaining ends. Seriously, all of them. Loose ends work their way out with daily use and will drive you crazy.
Blocking: Wet block the entire bag by soaking in lukewarm water for 15 minutes. Gently squeeze out excess water (do not wring). Stuff with plastic bags or towels to shape. Allow to dry completely.
Optional lining: For extra durability and to keep small items from poking through the lace, consider adding a fabric lining. A simple drawstring pouch in cotton fabric works beautifully.
Customization Ideas
Troubleshooting Common Issues
Medallions are different sizes: Check your gauge. Variations usually mean inconsistent tension.
Bag is too floppy: Your gauge may be too loose. Try going down a hook size for the base, or add fabric stiffener.
Lace looks uneven: Blocking works miracles. Do not judge until after you have blocked.
Joining seams are visible: Try a mattress stitch join instead of whip stitch for nearly invisible seams.
You Did It
Making this Autumn Terracotta Lace Bucket Bag is genuinely satisfying work. The first time you slide that drawstring closed and see your finished bag, you will feel like a crochet rockstar. Because you are.
Thank you so much for trusting me with your crafting time. I would absolutely love to see your finished bag. Tag me on Instagram or share your photos in my Facebook group. Seeing your creations honestly makes my whole week.
Now go show off that beautiful new bag. You earned it.
