There’s something about a handmade garment that just hits different. This Sage Garden Bell Sleeve Crochet Top has become one of my absolute favorite makes. The moment I finished attaching those dimensional roses, I knew this piece was special. If you’ve been wanting to try garment construction but felt intimidated, this is your sign. The body is mostly simple stitches worked flat, and those stunning bell sleeves are easier than they look.
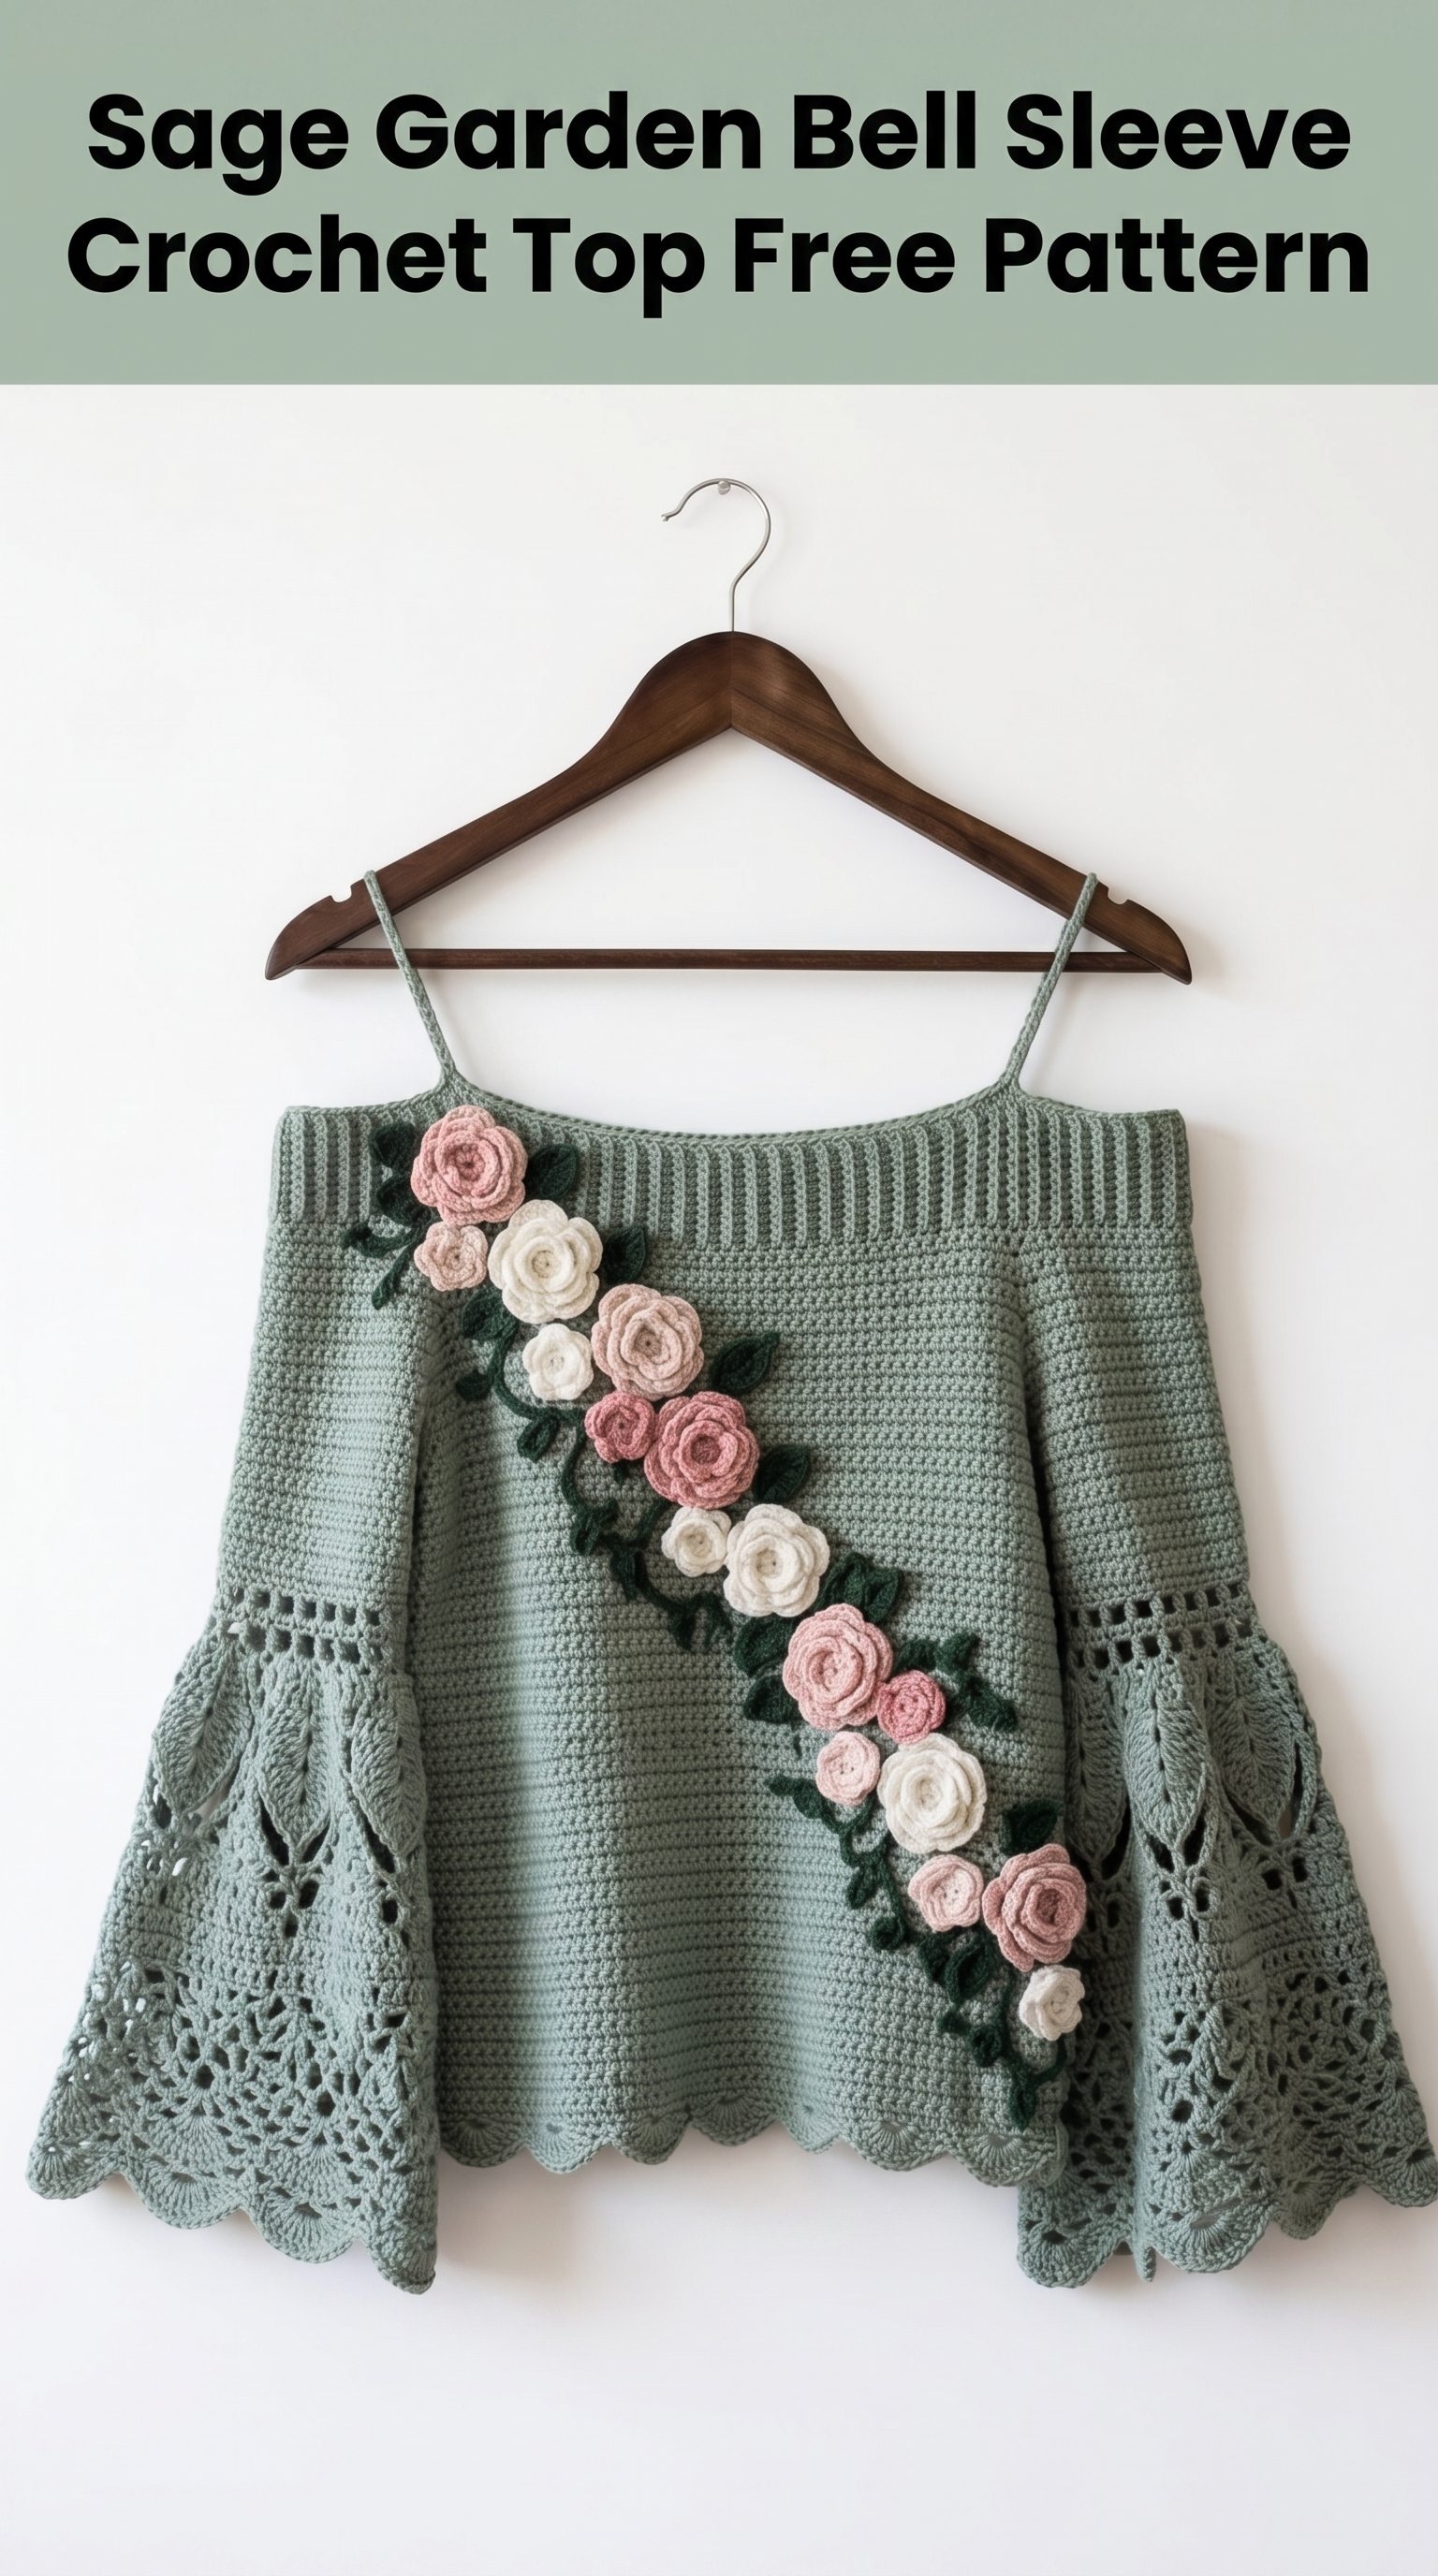
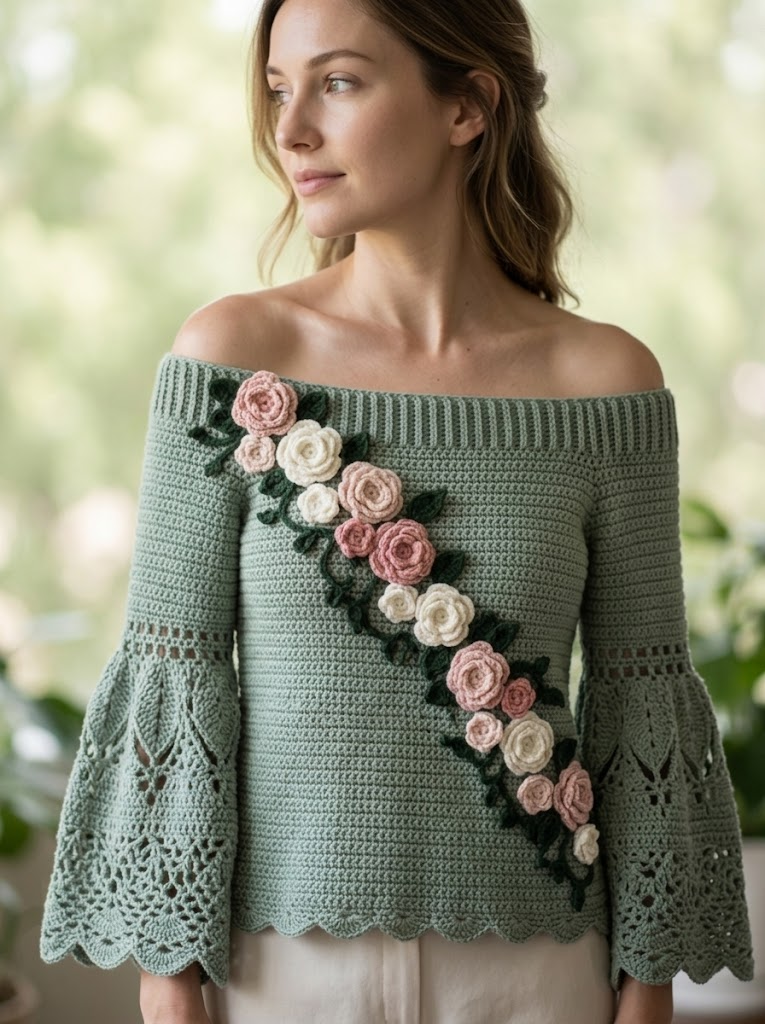
This crochet pattern combines a relaxed, flowy silhouette with romantic floral appliqués and dramatic lace bell sleeves. The sage green creates a soft, vintage vibe that works beautifully for spring brunches, summer evenings, or layered over a turtleneck in fall. Trust me when I say you can absolutely make this. Let’s break it down together.
Why You’ll Love This Crochet Tutorial
This top checks so many boxes. The ribbed neckline gives it structure and a polished look. The body uses basic stitches, so you can zone out and enjoy the rhythm of your hook. The bell sleeves add drama without being fussy to construct. And those roses? They’re worked separately and sewn on, so you can customize placement however you like.
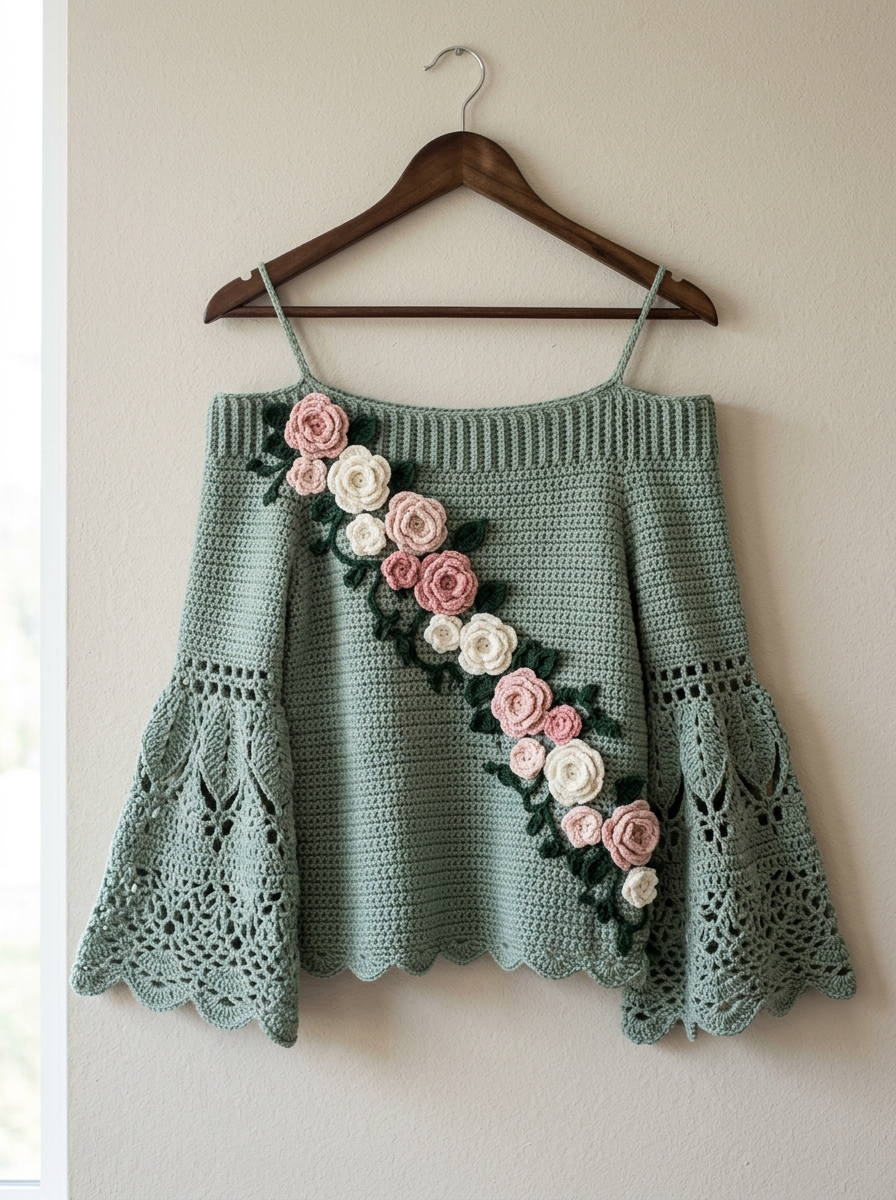
The finished garment has a romantic, cottagecore aesthetic that photographs beautifully. It’s the kind of piece people will stop you to compliment. And when you tell them you made it yourself? Pure magic.
Skill Level
Intermediate. You should be comfortable with basic stitches, working in rows, increasing and decreasing, and seaming pieces together. The lace sections on the sleeves require attention to the pattern, but I’ll walk you through every step. If you’ve made a simple sweater or cardigan before, you’re ready for this.
Finished Measurements
This pattern is written for Size Medium with a finished bust of approximately 38 inches and a length of 20 inches from shoulder strap to hem. The bell sleeves measure approximately 18 inches around at the widest point.
To adjust sizing: Add or subtract multiples of 2 stitches to your foundation chain for the body panels. Each 2-stitch repeat adds roughly 1 inch to the width.
Materials Needed
Yarn:
Hook:
Notions:
Gauge
18 stitches and 20 rows = 4 inches in half double crochet using 4.0mm hook.
Please, please check your gauge. I know it’s tedious. But garment fit depends entirely on hitting gauge. Make a swatch, wash it, measure it. Your future self will thank you.
Abbreviations and Stitch Definitions
Let me define every stitch you’ll need. Read through these before starting so nothing catches you off guard.
Pattern Notes
Step by Step Crochet Pattern Instructions
Back Panel
Foundation: With MC and 4.0mm hook, ch 88.
Row 1 (RS): Hdc in 3rd ch from hook and in each ch across. Turn. (86 hdc)
Row 2: Ch 2 (counts as hdc), hdc in each st across. Turn. (86 hdc)
Rows 3 through 50: Repeat Row 2. (86 hdc)
Your panel should measure approximately 19 inches wide and 10 inches tall at this point.
Armhole Shaping:
Row 51: Ch 2, hdc in next 4 sts, hdc2tog over next 2 sts, hdc to last 6 sts, hdc2tog, hdc in last 4 sts. Turn. (84 sts)
Row 52: Ch 2, hdc in each st across. Turn. (84 sts)
Rows 53 through 56: Repeat Rows 51 and 52 twice more. (80 sts after Row 55)
Rows 57 through 70: Ch 2, hdc in each st across. Turn. (80 sts)
Strap Section:
Row 71: Ch 2, hdc in next 7 sts. Turn, leaving remaining sts unworked. (8 sts)
Rows 72 through 90: Ch 2, hdc in each st across. Turn. (8 sts)
Fasten off first strap.
Skip center 64 sts. Join yarn to next st with sl st.
Row 71 (second strap): Ch 2, hdc in each st across. Turn. (8 sts)
Rows 72 through 90: Ch 2, hdc in each st across. Turn. (8 sts)
Fasten off. Weave in ends.
Front Panel
Work exactly as Back Panel through Row 70.
Strap Section:
Work straps same as back panel.
Fasten off. Weave in ends.
Ribbed Neckline Band
This creates that beautiful textured band across the top.
Foundation: With MC, ch 12.
Row 1: Sc in 2nd ch from hook and in each ch across. Turn. (11 sc)
Row 2: Ch 1, sc in BLO of each st across. Turn. (11 sc)
Repeat Row 2 until band measures approximately 36 inches (or desired length to stretch around neckline opening).
Fasten off, leaving a long tail for seaming.
Bell Sleeves (Make 2)
These sleeves are the showstopper. Take your time with the lace section.
Foundation: With MC, ch 50.
Row 1 (RS): Hdc in 3rd ch from hook and in each ch across. Turn. (48 hdc)
Rows 2 through 8: Ch 2, hdc in each st across. Turn. (48 hdc)
Begin Increases for Bell Shape:
Row 9: Ch 2, 2 hdc in first st, hdc to last st, 2 hdc in last st. Turn. (50 sts)
Row 10: Ch 2, hdc in each st across. Turn. (50 sts)
Rows 11 through 20: Repeat Rows 9 and 10 five more times. (60 sts after Row 19)
Row 21: Ch 2, 2 hdc in first st, hdc to last st, 2 hdc in last st. Turn. (62 sts)
Rows 22 through 26: Ch 2, hdc in each st across. Turn. (62 sts)
Lace Border Section:
This is where the magic happens. The openwork creates that gorgeous drape.
Row 27: Ch 4 (counts as dc + ch 1), sk next st, *dc in next st, ch 1, sk 1 st*; repeat from * across, dc in last st. Turn. (31 dc, 30 ch-1 sps)
Row 28: Ch 3 (counts as dc), dc in first ch-sp, *ch 2, sk next dc, sc in next ch-sp, ch 2, sk next dc, (dc, ch 1, dc) in next ch-sp*; repeat from * across, adjusting as needed to end with dc in last st. Turn.
Row 29: Ch 3, *5 dc in next ch-2 sp (shell made), sc in next sc, 5 dc in next ch-2 sp*; repeat from * across, dc in last st. Turn.
Row 30: Ch 1, sc in first st, *ch 3, sk 2 dc, sc in center dc of shell, ch 3, sc in next sc*; repeat from * across. Turn.
Row 31: Ch 3, *3 dc in ch-3 sp, dc in sc, 3 dc in ch-3 sp*; repeat from * across, dc in last sc. Turn.
Scallop Edging:
Row 32: Ch 1, sc in first st, *sk 2 sts, 5 dc in next st, sk 2 sts, sc in next st*; repeat from * across.
Fasten off. Weave in ends.
Roses (Make 8 to 10)
Make a mix using CC-A (dusty pink) and CC-B (cream). I made 5 pink and 4 cream.
Use 3.5mm hook for tighter petals.
Foundation: Ch 40.
Row 1: Sc in 2nd ch from hook, *sk 2 ch, 5 dc in next ch, sk 2 ch, sc in next ch*; repeat from * across. (6 scallops)
Do not turn. Roll the strip into a spiral, starting from the beginning of your work. The scallops will naturally form rose petals. Stitch through the base with yarn needle to secure. Leave a tail for attaching to garment.
Leaves (Make 12 to 16)
Use CC-C (dark green) and 3.5mm hook.
Foundation: Ch 10.
Row 1: Sc in 2nd ch from hook, hdc in next ch, dc in next 2 ch, tr in next ch, dc in next 2 ch, hdc in next ch, 3 sc in last ch.
Working along opposite side of foundation chain: hdc in next ch, dc in next 2 ch, tr in next ch, dc in next 2 ch, hdc in next ch, sl st in last ch.
Fasten off, leaving tail for attaching.
Assembly Instructions
Take a breath. You’ve made all the pieces. Now we put this beauty together.
1. Block all pieces. Wet block or steam block to measurements. This makes seaming so much easier.
2. Seam body panels. With RS facing, place front and back panels together. Using mattress stitch or whip stitch, seam side edges from hem up to armhole shaping (approximately 10 inches on each side). Leave armhole openings.
3. Attach straps. Sew front straps to back straps at shoulder.
4. Attach ribbed neckline. Pin ribbed band around top edge of neckline opening, stretching slightly to fit. Whip stitch in place, easing around curves.
5. Seam sleeves. Fold each sleeve in half lengthwise, RS together. Seam from cuff to top, leaving lace section open and airy.
6. Attach sleeves. Pin sleeve tops into armhole openings, centering sleeve seam at side seam. Whip stitch around entire armhole.
7. Add scalloped hem to body. With RS facing, join MC at side seam. Work scallop edging same as sleeve Row 32 around entire bottom edge of body. Sl st to first sc to join. Fasten off.
8. Attach roses and leaves. Lay garment flat. Arrange roses in a diagonal cascade from left shoulder toward right hip (or however you prefer). Pin in place. Stitch roses securely through bases. Tuck leaves behind and around roses. Stitch leaves in place.
9. Final weave in. Check every single end. Weave in any remaining tails. Trim close.
10. Final block (optional). Give finished garment a light steam to set everything in place.
Helpful Tips for Success
On the lace sleeves: If the pattern rows feel confusing, work a small swatch first. Once you see how the shells and chains interact, it clicks.
On rose placement: I arranged my roses starting with the largest ones and filling in with smaller blooms. Step back and look before you commit to stitching.
On yarn choice: Cotton and cotton blends give beautiful drape for this design. Avoid anything too stiff or it will hide that lovely bell shape.
On gauge: I cannot stress this enough for garments. A small gauge difference means a completely different size.
Closing Thoughts
This Sage Garden Bell Sleeve Crochet Top is truly a labor of love, but every stitch is worth it. When you slip it on for the first time and see those sleeves move, you’ll understand. This beginner friendly approach to garment construction builds skills you’ll use forever.
Thank you so much for choosing this pattern. I hope every row brings you joy.
When you finish your top, I would absolutely love to see it. Tag me on Instagram or share in my Facebook group. Seeing your versions makes my whole day. Happy stitching, friend.
*Looking for more crochet tutorials? Check out my other step by step patterns for garments, accessories, and home decor.*
