There is something about a handmade beach bag that just hits different. This Coastal Blue Ombre Beach Tote has become my absolute favorite summer project, and I cannot wait to walk you through exactly how to make one yourself. The gradient effect looks impressive, but I promise it is surprisingly straightforward once you understand the technique. If you can work a single crochet in the round, you can absolutely make this crochet pattern.
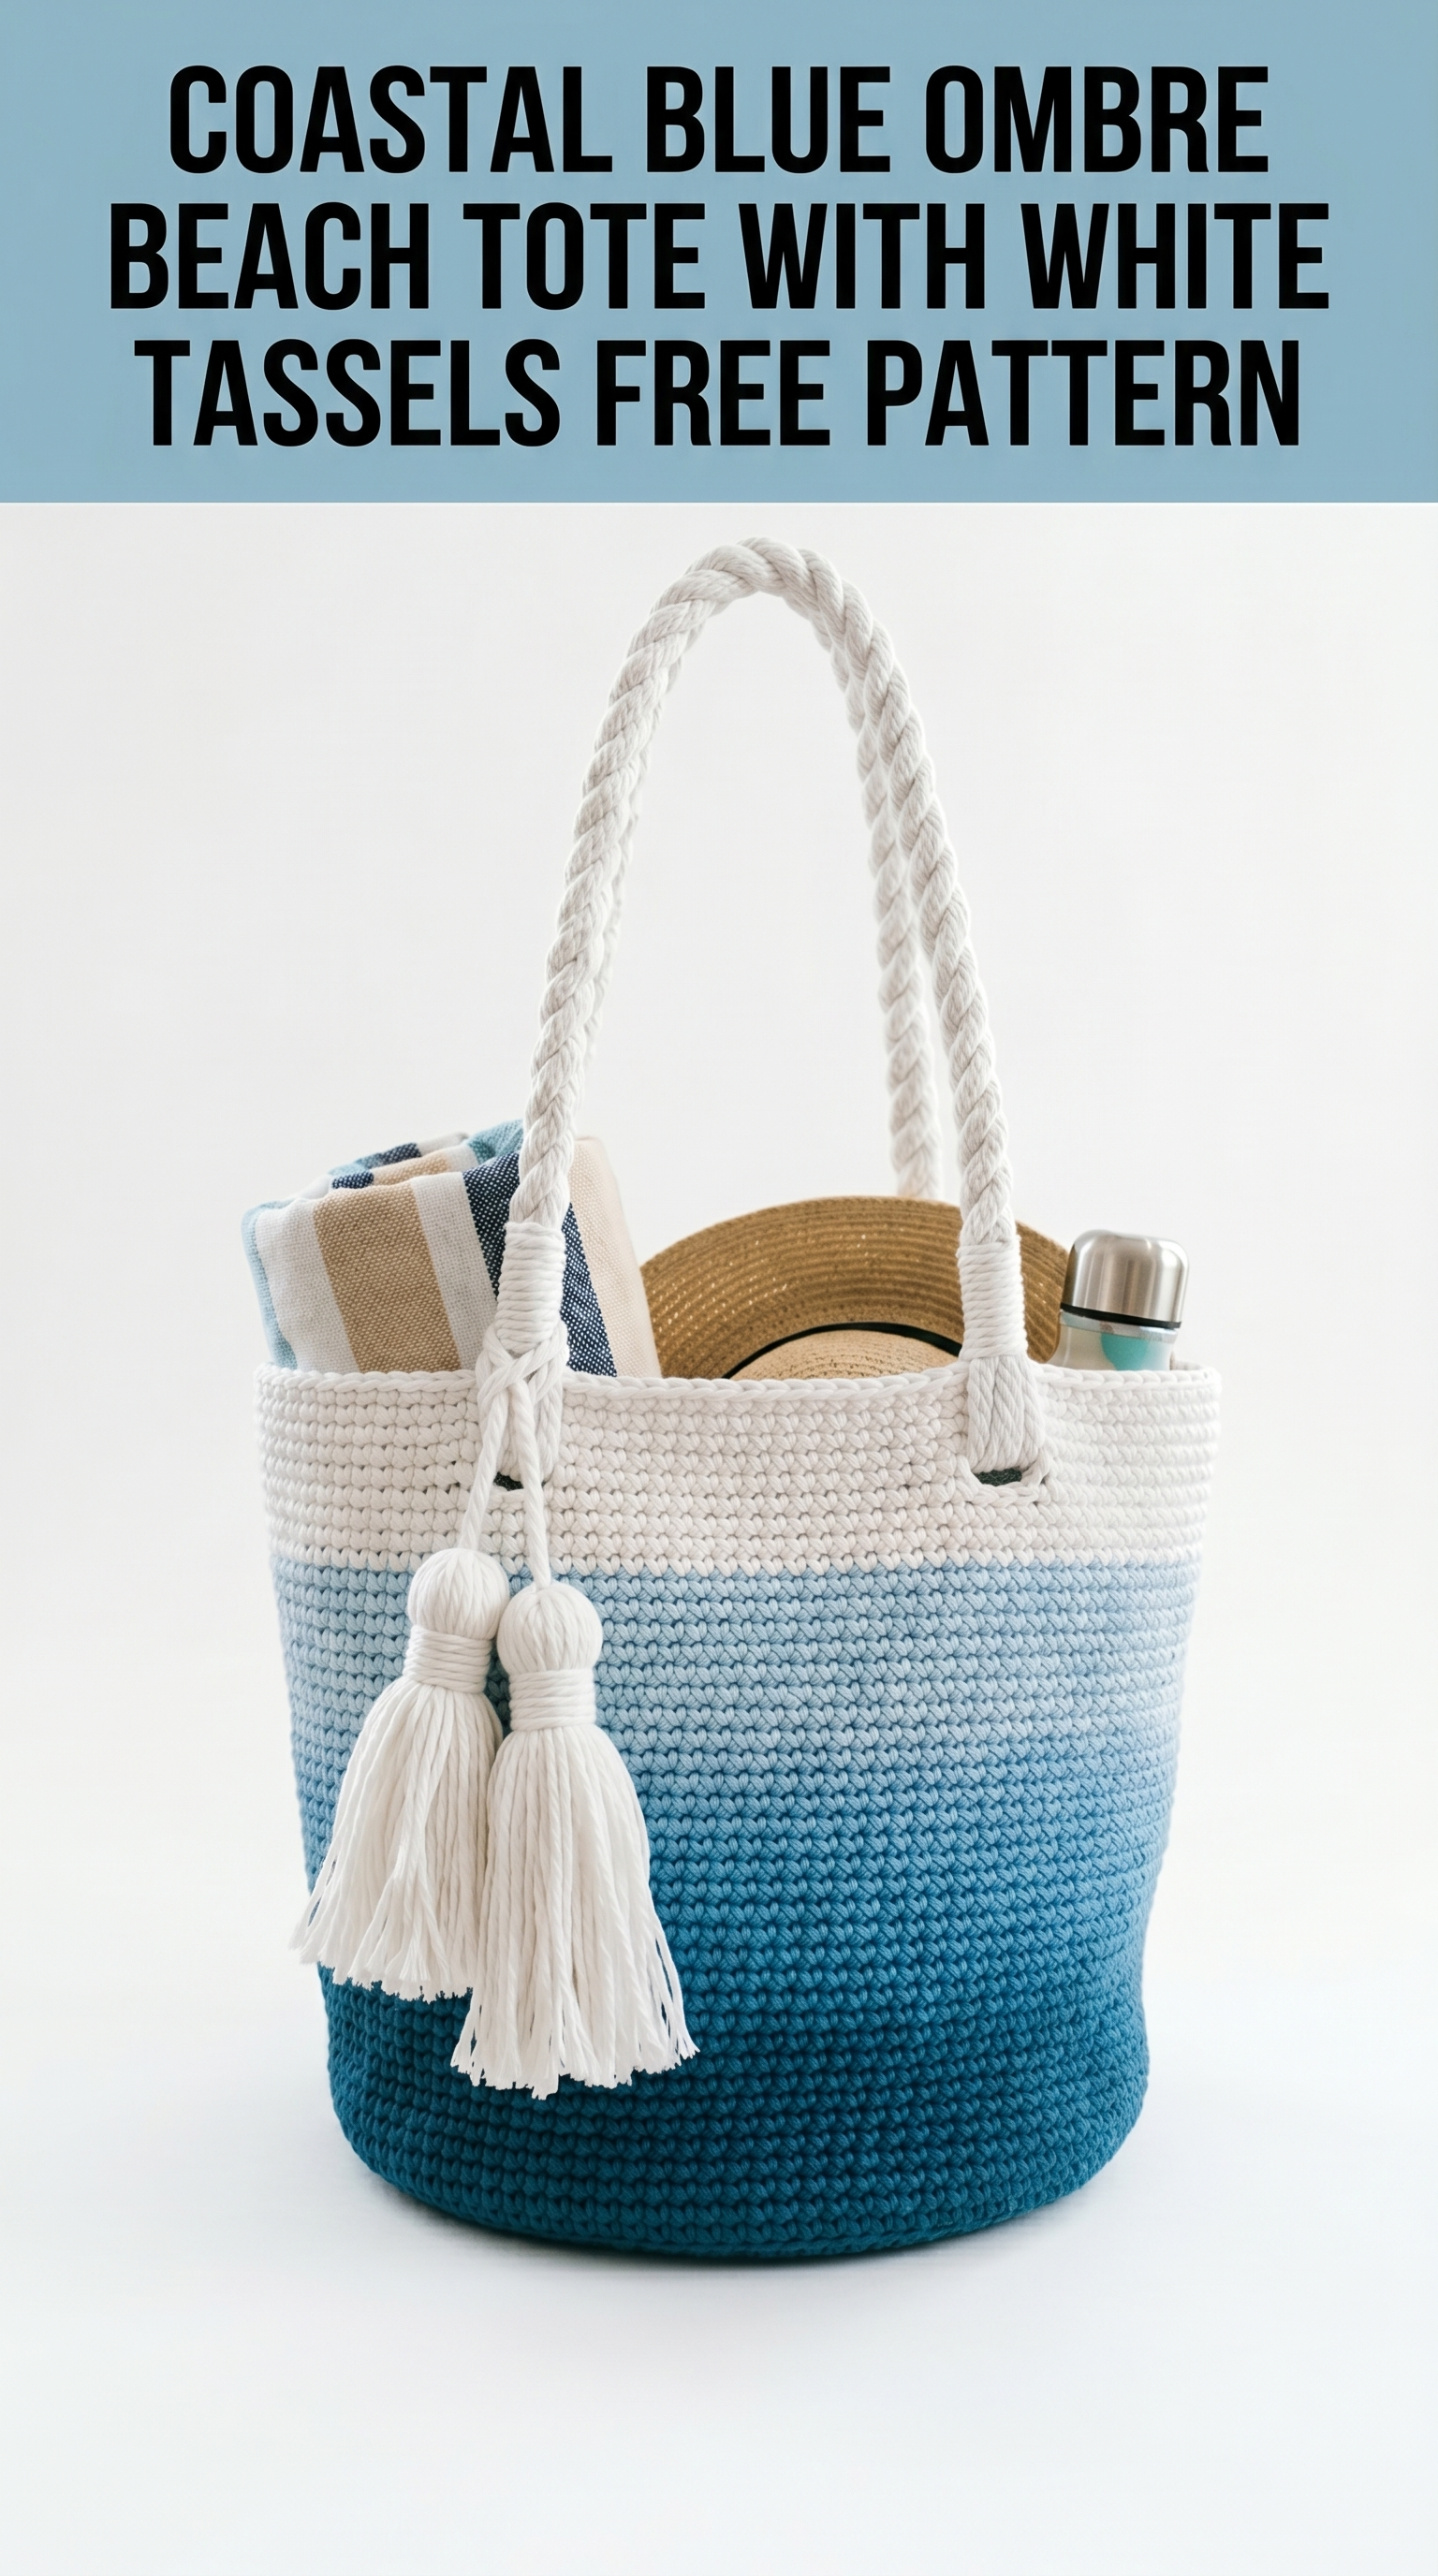
This sturdy tote features a beautiful four-color ombre fade from deep ocean blue at the base up through lighter blues to crisp white at the top. The thick rope handles and playful white tassels give it that perfect coastal vibe. Whether you are heading to the beach, the farmers market, or just need a gorgeous project bag, this tote delivers.
Skill level: Confident beginner to intermediate. You will need comfort with working in continuous rounds and changing colors cleanly.
Why This Beach Tote Pattern Works So Well
Let me tell you why I designed this crochet pattern the way I did. The single crochet stitch creates an incredibly dense, sturdy fabric that holds its shape beautifully even when loaded with towels, sunscreen, and snacks. The flat bottom sits upright on sand without tipping over. And that ombre effect? It is created simply by changing yarn colors at specific rounds. No fancy colorwork or complicated techniques required.
The finished dimensions are approximately 14 inches tall and 12 inches wide at the base, expanding slightly toward the top. This gives you plenty of room for beach essentials while keeping the bag manageable to carry.
Materials You Will Need
Before we dive into this crochet tutorial, gather these supplies:
Yarn:
- Color A (Deep Teal Blue): 2 skeins worsted weight cotton yarn, approximately 200 yards total
- Color B (Medium Blue): 1.5 skeins worsted weight cotton yarn, approximately 150 yards
- Color C (Light Blue): 1.5 skeins worsted weight cotton yarn, approximately 150 yards
- Color D (White/Cream): 2 skeins worsted weight cotton yarn, approximately 200 yards
I recommend 100% cotton or a cotton blend for this project. Cotton gives the bag structure, durability, and that slight sheen you see in the photos. Acrylic will work but tends to stretch more over time with heavy loads.
Hook:
- Size H/8 (5.0mm) crochet hook
Using a slightly smaller hook than typically recommended for worsted weight creates that tight, structured fabric. If your stitches look loose or holey, size down to a G/6 (4.0mm).
Additional Supplies:
- Stitch marker
- Yarn needle for weaving ends
- Cotton rope handles: Two pieces, approximately 24 inches each (you can purchase pre-made rope handles or braid your own from the white yarn)
- Scissors
- Optional: fabric stiffener spray for extra structure
Abbreviations and Stitch Definitions
Let me break down every stitch term you will encounter:
- ch = chain: Yarn over, pull through loop on hook. This creates the foundation.
- sl st = slip stitch: Insert hook, yarn over, pull through stitch AND loop on hook in one motion. Used for joining.
- sc = single crochet: Insert hook into stitch, yarn over and pull up a loop (2 loops on hook), yarn over and pull through both loops. This is the only stitch you need for the entire bag body.
- inc = increase: Work 2 single crochets into the same stitch. This adds one stitch to your count.
- st(s) = stitch(es)
- rnd(s) = round(s)
Gauge Check
Gauge: 14 sc and 16 rows = 4 inches in single crochet worked flat
Take a few minutes to check your gauge before starting. I know, I know. Nobody loves making gauge swatches. But with a bag this size, being off by even one stitch per inch can mean the difference between a perfect tote and one that is comically large or disappointingly small.
Step by Step Crochet Pattern Instructions
Part 1: The Flat Base
We start at the very bottom center of the bag and work outward in a flat oval shape. This creates that nice structured base that sits flat.
With Color A (Deep Teal Blue):
Foundation: Ch 21
Rnd 1: Starting in 2nd ch from hook, sc in each of the next 19 ch. In the last ch, work 3 sc (this turns the corner). Now rotate your work to continue along the bottom of the foundation chain. Sc in each of the next 18 ch. Work 2 sc in the last st. Place stitch marker. Do not join. (42 sts)
Important note: You will work in continuous rounds from here on. This means you do NOT slip stitch to join at the end of each round. You just keep spiraling. Move your stitch marker up at the end of each round so you always know where your round began.
Rnd 2: Inc in first st, sc in next 18 sts, inc in next 3 sts, sc in next 18 sts, inc in last 2 sts. (48 sts)
Rnd 3: Sc in first st, inc in next st, sc in next 18 sts, (sc in next st, inc in next st) 3 times, sc in next 18 sts, (sc in next st, inc in next st) twice. (54 sts)
Rnd 4: Sc in first 2 sts, inc in next st, sc in next 18 sts, (sc in next 2 sts, inc in next st) 3 times, sc in next 18 sts, (sc in next 2 sts, inc in next st) twice. (60 sts)
Rnd 5: Sc in first 3 sts, inc in next st, sc in next 18 sts, (sc in next 3 sts, inc in next st) 3 times, sc in next 18 sts, (sc in next 3 sts, inc in next st) twice. (66 sts)
Rnd 6: Sc in first 4 sts, inc in next st, sc in next 18 sts, (sc in next 4 sts, inc in next st) 3 times, sc in next 18 sts, (sc in next 4 sts, inc in next st) twice. (72 sts)
Rnd 7: Sc in first 5 sts, inc in next st, sc in next 18 sts, (sc in next 5 sts, inc in next st) 3 times, sc in next 18 sts, (sc in next 5 sts, inc in next st) twice. (78 sts)
Your base should measure approximately 11 inches long and 5 inches wide at this point. It will look like a flat oval. Give yourself a little pat on the back. The hardest part is done.
Part 2: Building the Sides
Now comes the satisfying part where the bag suddenly takes shape.
Rnd 8: Working in back loops only (this creates a crisp edge where the base meets the sides), sc in each st around. (78 sts)
From this point forward, work in both loops as normal.
Rnds 9-25: Sc in each st around. (78 sts) – 17 rounds total in Color A
Your deep teal section should measure approximately 4.5 inches tall from the base edge.
Color Change to Color B (Medium Blue)
Rnd 26: To change colors cleanly, work your last sc of Round 25 until you have 2 loops on your hook. Drop Color A, yarn over with Color B, and pull through both loops. Continue in Color B.
Sc in each st around. (78 sts)
Rnds 27-37: Sc in each st around. (78 sts) – 12 rounds total in Color B
Leave a 6 inch tail when you finish with each color for weaving in later.
Color Change to Color C (Light Blue)
Rnd 38: Change to Color C using the same color change method.
Sc in each st around. (78 sts)
Rnds 39-49: Sc in each st around. (78 sts) – 12 rounds total in Color C
Color Change to Color D (White/Cream)
Rnd 50: Change to Color D.
Sc in each st around. (78 sts)
Rnds 51-63: Sc in each st around. (78 sts) – 14 rounds total in Color D
Rnd 64: Sl st in each st around to create a finished edge. Fasten off and weave in all ends.
Part 3: Attaching the Rope Handles
This is where your tote really comes together.
Positioning: Mark two points on each side of the bag, approximately 3 inches in from each side seam. The handles should attach about 1 inch below the top edge.
Method 1 (Recommended): Using your yarn needle and a doubled length of white yarn, stitch the rope handles securely to the inside of the bag. Make at least 8-10 passes through the rope and the crocheted fabric at each attachment point. The handles take all the weight, so do not skimp here.
Method 2: If your rope has a looser weave, you can thread yarn through the rope itself and sew it flat against the bag.
Part 4: Making the Tassels
The chunky white tassels add that perfect coastal finishing touch.
Materials per tassel: Approximately 30 yards of white yarn
Step 1: Cut a piece of cardboard approximately 5 inches tall. Wrap white yarn around the cardboard about 40-50 times.
Step 2: Cut a 12 inch strand of yarn. Thread it under all the wrapped yarn at the top of the cardboard and tie tightly with a double knot. This forms the tassel top.
Step 3: Cut through all the yarn loops at the bottom of the cardboard.
Step 4: Cut another 12 inch strand. Wrap it tightly around the tassel about 1 inch below the top knot, creating that signature “head” shape. Tie securely and hide the ends inside the tassel body.
Step 5: Trim the tassel ends evenly.
Make two tassels and attach them to a braided cord. Tie the cord through the top row of stitches on the front of your bag, letting the tassels dangle decoratively.
Tips for Best Results
Maintaining even tension: Cotton yarn can be grippy and tire your hands. Take breaks. Your tension may tighten as you fatigue, causing the bag to curve inward. If you notice this happening, consciously loosen your grip.
Color transitions: For the smoothest ombre effect, change colors at the same point in your round each time. The transition will naturally spiral slightly, which is totally normal and adds to the handmade charm.
Blocking: After finishing, lightly wet block your bag by spraying it with water and shaping it over a bowl or rolled towel. Let dry completely before adding handles.
Weight capacity: This dense single crochet fabric can handle significant weight, but remember that yarn does stretch. For extra heavy loads, consider adding a fabric lining.
Customization Ideas
This crochet pattern is wonderfully versatile. Try these variations:
- Sunset ombre: Use coral, peach, yellow, and cream
- Monochromatic: Make the entire bag in one color for a more minimal look
- Stripes: Alternate two colors every 2-3 rounds instead of doing large color blocks
- Add pockets: Crochet a small rectangle and sew it inside for your phone
You Did It!
Congratulations on completing your gorgeous Coastal Blue Ombre Beach Tote. Honestly, this crochet pattern produces such a professional looking result that people will not believe you made it yourself. The density of the single crochet fabric, the smooth color gradient, those chunky rope handles and playful tassels. It all comes together beautifully.
I hope this step by step tutorial gave you everything you needed to feel confident tackling this project. If any part felt confusing, please drop a comment below and I will help you work through it.
Thank you so much for choosing to make this pattern. It means the world to me that you trusted my instructions with your precious crafting time.
I would absolutely love to see your finished totes! Tag me on Instagram or share your photos in my Facebook group. Seeing your creations is genuinely the best part of my job. Every beach tote is a little different, and I cannot wait to see which colors you chose and how you styled those tassels.
Happy crocheting, friend. Now go fill that bag with sunscreen and snacks and enjoy some well deserved beach time.
x