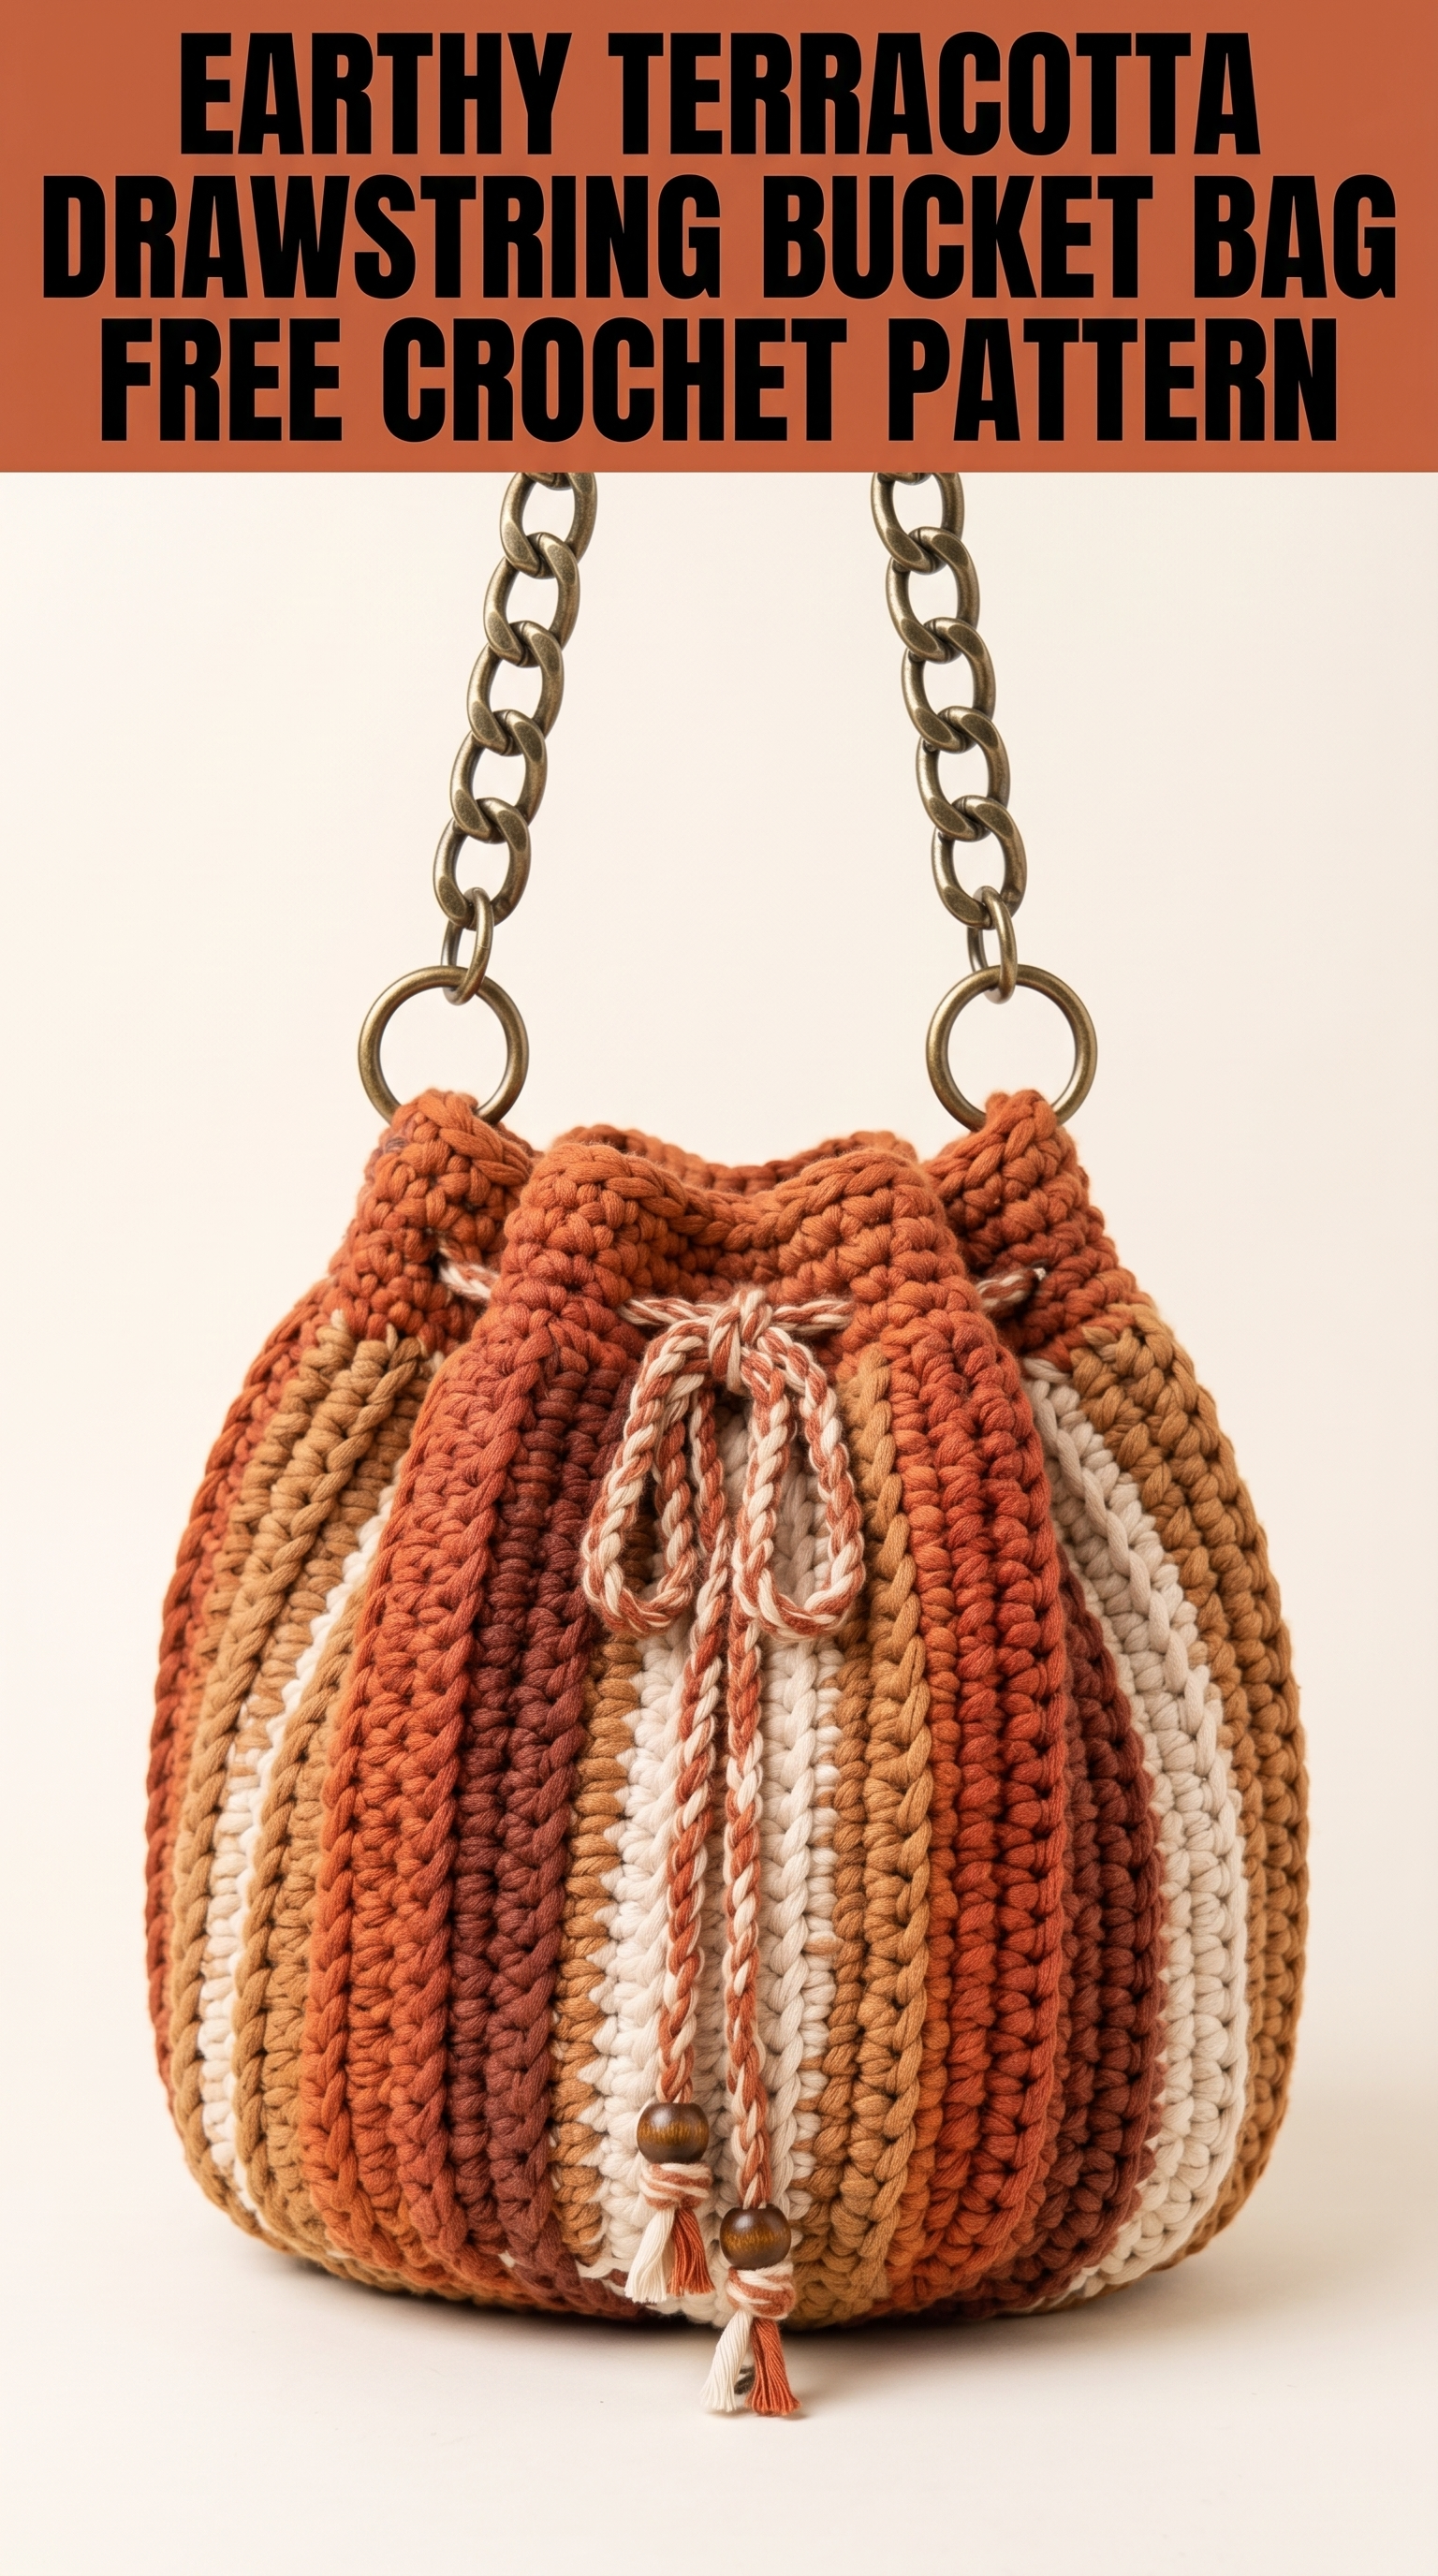
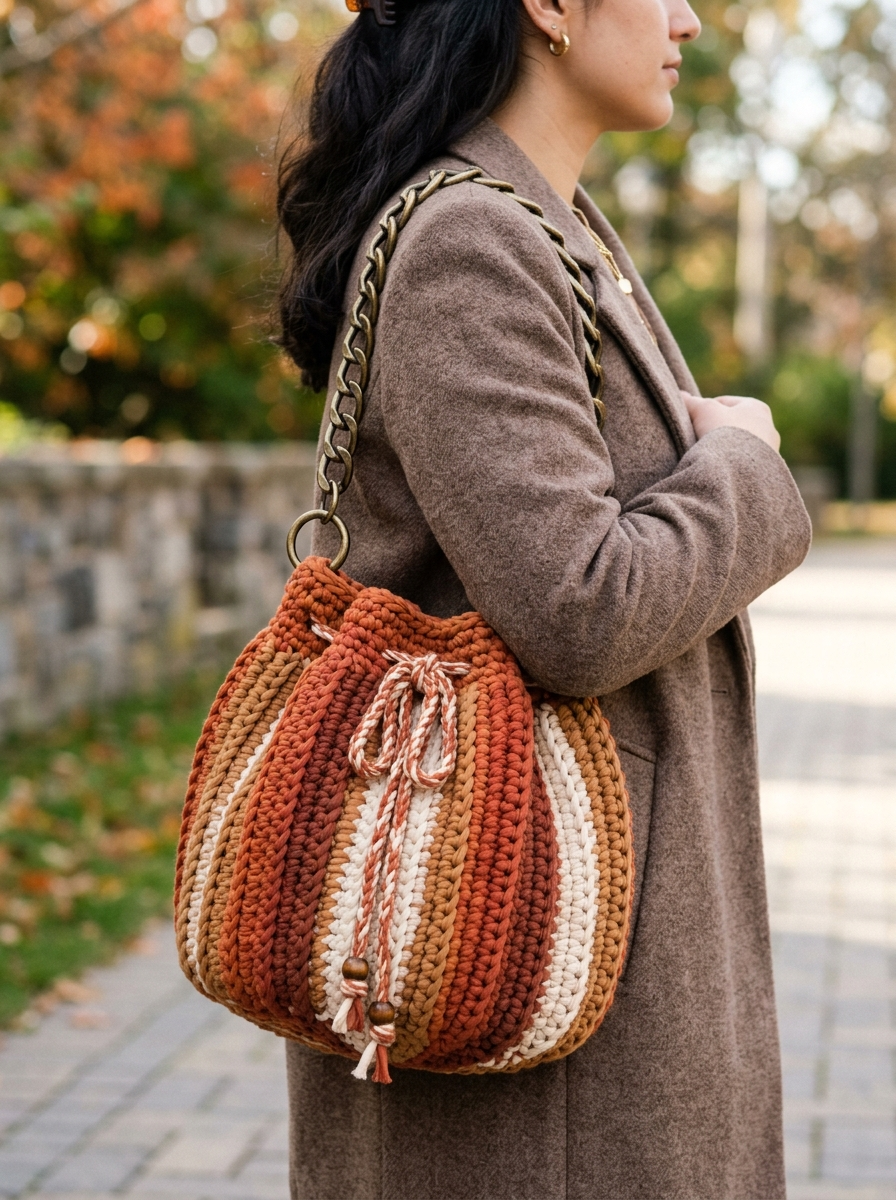
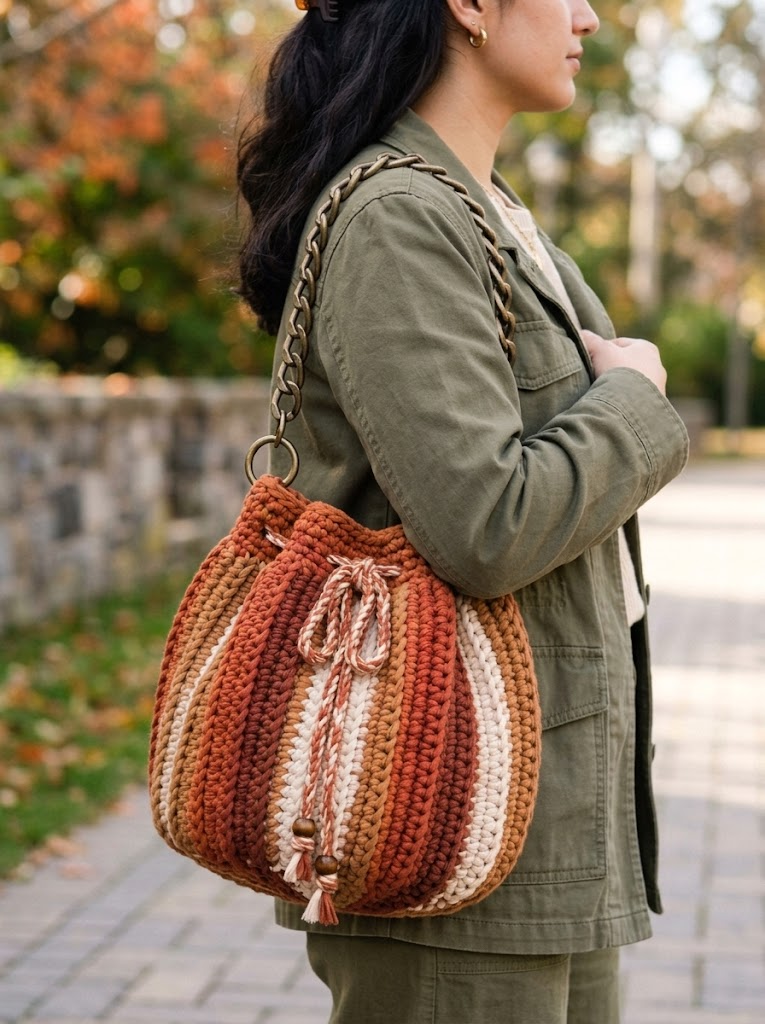
This stunning bucket bag is about to become your favorite fall accessory. The warm terracotta, caramel, and cream color palette gives it that cozy autumn vibe, while the chunky construction means you will finish it faster than you might expect. I designed this crochet pattern with texture and practicality in mind. The vertical stripe effect creates visual interest without complicated colorwork, and the drawstring closure keeps your essentials secure.
If you can work basic stitches in the round, you can absolutely make this bag. The construction is simpler than it looks. Promise.
Why You Will Love This Crochet Tutorial
This bucket bag hits that sweet spot between stylish and functional. The chunky yarn creates a sturdy fabric that holds its shape beautifully. You do not need to add a liner unless you want one. The brass chain strap adds a touch of sophistication, and the twisted drawstring cord with wooden bead accents gives it that handcrafted boho feel.
The vertical stripes happen naturally as you work. No complicated intarsia. No carrying yarn across the back. Just simple color changes at the start of each section. This step by step pattern walks you through every detail.
Finished Dimensions
Width: Approximately 10 inches across at widest point
Height: Approximately 9 inches tall (not including strap)
Depth: Approximately 8 inches deep at base
The bag has a rounded bucket shape that cinches at the top with the drawstring closure.
Materials Needed
Yarn:
I recommend a tube yarn or t-shirt yarn for this project. The slightly textured, matte finish you see in the photo comes from this type of yarn. It creates excellent stitch definition and a sturdy finished fabric.
Hook:
Notions:
Gauge
8 single crochet stitches and 8 rows = 4 inches in single crochet worked in the round
Gauge matters here for sizing. Too loose and your bag will be floppy. Too tight and you will run out of yarn. Take a few minutes to check before starting.
Skill Level
Intermediate Beginner
You should be comfortable with:
Abbreviations and Stitch Definitions
ch = chain: Yarn over, pull through loop on hook. This creates your starting foundation.
sl st = slip stitch: Insert hook, yarn over, pull through stitch AND loop on hook in one motion. Used for joining and moving across stitches invisibly.
sc = single crochet: Insert hook into stitch, yarn over, pull up a loop (two loops on hook), yarn over, pull through both loops. This is your main stitch for the entire bag.
inc = increase: Work two single crochet stitches into the same stitch. This adds one stitch to your count.
st(s) = stitch(es)
BLO = back loop only: Instead of inserting your hook under both loops at the top of the stitch, insert it under only the back loop (the one farthest from you). This creates a ridge on the right side.
Pattern Notes
This bag is worked from the bottom up in continuous rounds. You will not join at the end of each round. Instead, use a stitch marker to track the beginning of each round and move it up as you go.
The vertical stripes are created by working designated sections in each color. You will carry the unused colors loosely up the inside of the bag. Do not cut your yarn after each color section. Simply drop the old color and pick up the new one.
When changing colors, complete the last stitch of the old color until you have two loops on your hook. Then yarn over with the new color to complete the stitch. This creates a cleaner color transition.
The Pattern
Base of the Bag
The base is worked in the round with increases to create a flat oval shape. Use Color B (caramel) for the entire base.
Round 1: With Color B, create a magic ring. Work 6 sc into the ring. Pull tight to close. Place stitch marker. (6 sts)
Round 2: Inc in each st around. (12 sts)
Round 3: *Sc in next st, inc in next st* repeat around. (18 sts)
Round 4: *Sc in next 2 sts, inc in next st* repeat around. (24 sts)
Round 5: *Sc in next 3 sts, inc in next st* repeat around. (30 sts)
Round 6: *Sc in next 4 sts, inc in next st* repeat around. (36 sts)
Round 7: *Sc in next 5 sts, inc in next st* repeat around. (42 sts)
Round 8: *Sc in next 6 sts, inc in next st* repeat around. (48 sts)
Round 9: *Sc in next 7 sts, inc in next st* repeat around. (54 sts)
Round 10: *Sc in next 8 sts, inc in next st* repeat around. (60 sts)
Your base should measure approximately 7 to 8 inches across. If it is too small, add another increase round. If too large, try a smaller hook.
Sides of the Bag
Now we create the sides by working without increases. This is also where the vertical stripe magic happens.
Transition Round (Round 11): Working in BLO only, sc in each st around. (60 sts)
This back loop only round creates a defined edge between the base and sides. It helps the bag stand upright.
Setting Up the Stripe Pattern:
For the vertical stripes, you will divide your 60 stitches into 6 sections of 10 stitches each. The color sequence repeats twice around the bag:
Rounds 12 through 30: Continuing in continuous rounds, work sc in each stitch, changing colors according to the stripe pattern above. Carry unused yarns loosely along the inside. (60 sts per round)
That is 19 rounds for the sides. Your bag should measure approximately 7 to 8 inches tall at this point.
Helpful Tip: The first few rounds of colorwork feel awkward. The inside will look messy with all those carried strands. This is completely normal. By round 5 or 6, you will find your rhythm. The carried yarns also add structure to your bag.
Drawstring Eyelets
These openings allow you to thread the drawstring cord through.
Round 31: *Sc in next 3 sts, ch 2, skip 2 sts, sc in next 5 sts* repeat this pattern around, adjusting as needed to create 6 evenly spaced eyelets. (60 sts including chains)
Round 32: Sc in each st and each ch around. (60 sts)
Upper Edge
Work 2 more rounds to finish the top edge.
Rounds 33 and 34: Sc in each st around using Color B. (60 sts)
Fasten off. Weave in all ends securely.
Finishing
Attaching the Rings
Position one brass ring on each side of the bag, approximately at the level of Round 25 (about 2 inches down from the top edge). The rings should be directly opposite each other.
Using a length of Color B yarn and your tapestry needle, whip stitch around each ring, securing it firmly to the bag fabric. Go around the ring several times for durability. This bag will carry weight, so make these attachments strong.
Adding the Chain Strap
Thread your chain strap through both rings. Most chain straps have lobster clasps or jump rings that attach easily. If your chain does not have built in hardware, use pliers to open a link and attach directly to the rings.
Creating the Drawstring Cord
Twisted Cord Method:
Cut two 60 inch lengths each of Color A and Color C. Hold all four strands together. Secure one end to a doorknob or have a friend hold it.
Twist the strands tightly in one direction until they begin to kink when you relax the tension slightly.
Fold the twisted cord in half, holding the center point. Allow the two halves to twist around each other naturally.
Knot both ends to secure.
You should have a beautiful twisted cord approximately 28 inches long with a marbled terracotta and cream appearance.
Threading the Drawstring
Starting at the front center of your bag, weave the cord through the eyelets, going over and under around the entire circumference. Both cord ends should emerge at the front.
Adding Wooden Beads
Thread one wooden bead onto each cord end. Tie a knot below each bead to secure. Trim any excess cord and unravel the ends slightly to create small tassels if desired.
Customization Ideas
Color Options: This pattern works beautifully in any color scheme. Try navy, gray, and white for a nautical look. Or go bold with jewel tones like emerald, plum, and gold.
Strap Variations: Swap the chain for a crocheted strap using the same yarn. Simply chain until you reach your desired length, then single crochet back along the chain for a flat, sturdy strap.
Size Adjustments: For a smaller bag, stop increasing at Round 8 (48 sts) and work fewer rounds for the sides. For a larger tote, continue increasing through Round 12 and add extra height rounds.
Care Instructions
Hand wash in cool water with mild detergent. Reshape while damp and lay flat to dry. The cotton yarn may stretch slightly with use but will return to shape after washing.
Avoid hanging the bag when heavily loaded for extended periods. Store flat or stuffed with tissue paper to maintain shape.
Final Thoughts
I hope you love making this Earthy Terracotta Drawstring Bucket Bag as much as I enjoyed designing it. There is something so satisfying about watching those vertical stripes grow round after round. And that moment when you add the chain strap and suddenly it looks like something from a boutique? Pure joy.
This crochet pattern creates a bag sturdy enough for everyday use and beautiful enough for special occasions. Pack it for farmers market trips, weekend brunches, or just running errands in style.
Thank you so much for choosing this pattern. Your support means the world to me, and I genuinely cannot wait to see your finished bags.
Tag me on Instagram or share in my Facebook group when you finish yours. I love seeing how everyone interprets the colors and makes this bag their own. Watching the different yarn choices and color combinations from makers around the world is honestly one of my favorite parts of this creative community.
Happy hooking, friend. You have got this.
