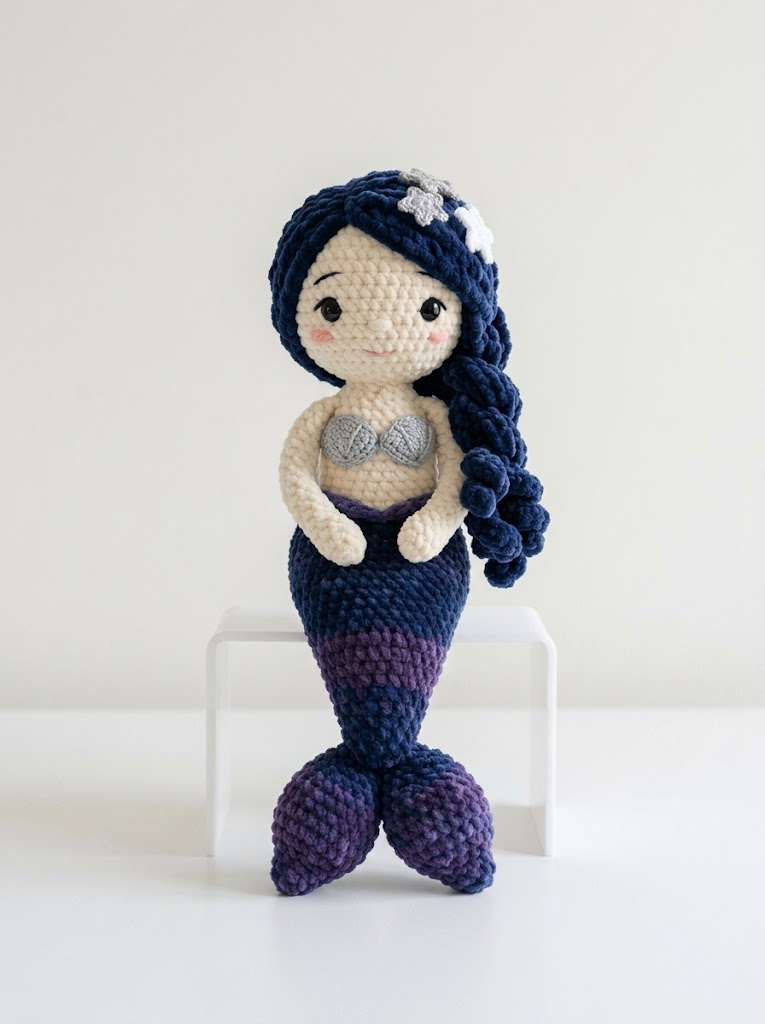
This enchanting amigurumi mermaid doll is about to become your new favorite project. With her flowing navy curls, silvery shell top, and gorgeous purple gradient tail, she looks like she swam straight out of a magical undersea kingdom. I designed this Midnight Galaxy Mermaid Plush crochet pattern for intermediate crocheters who want to create something truly show-stopping.
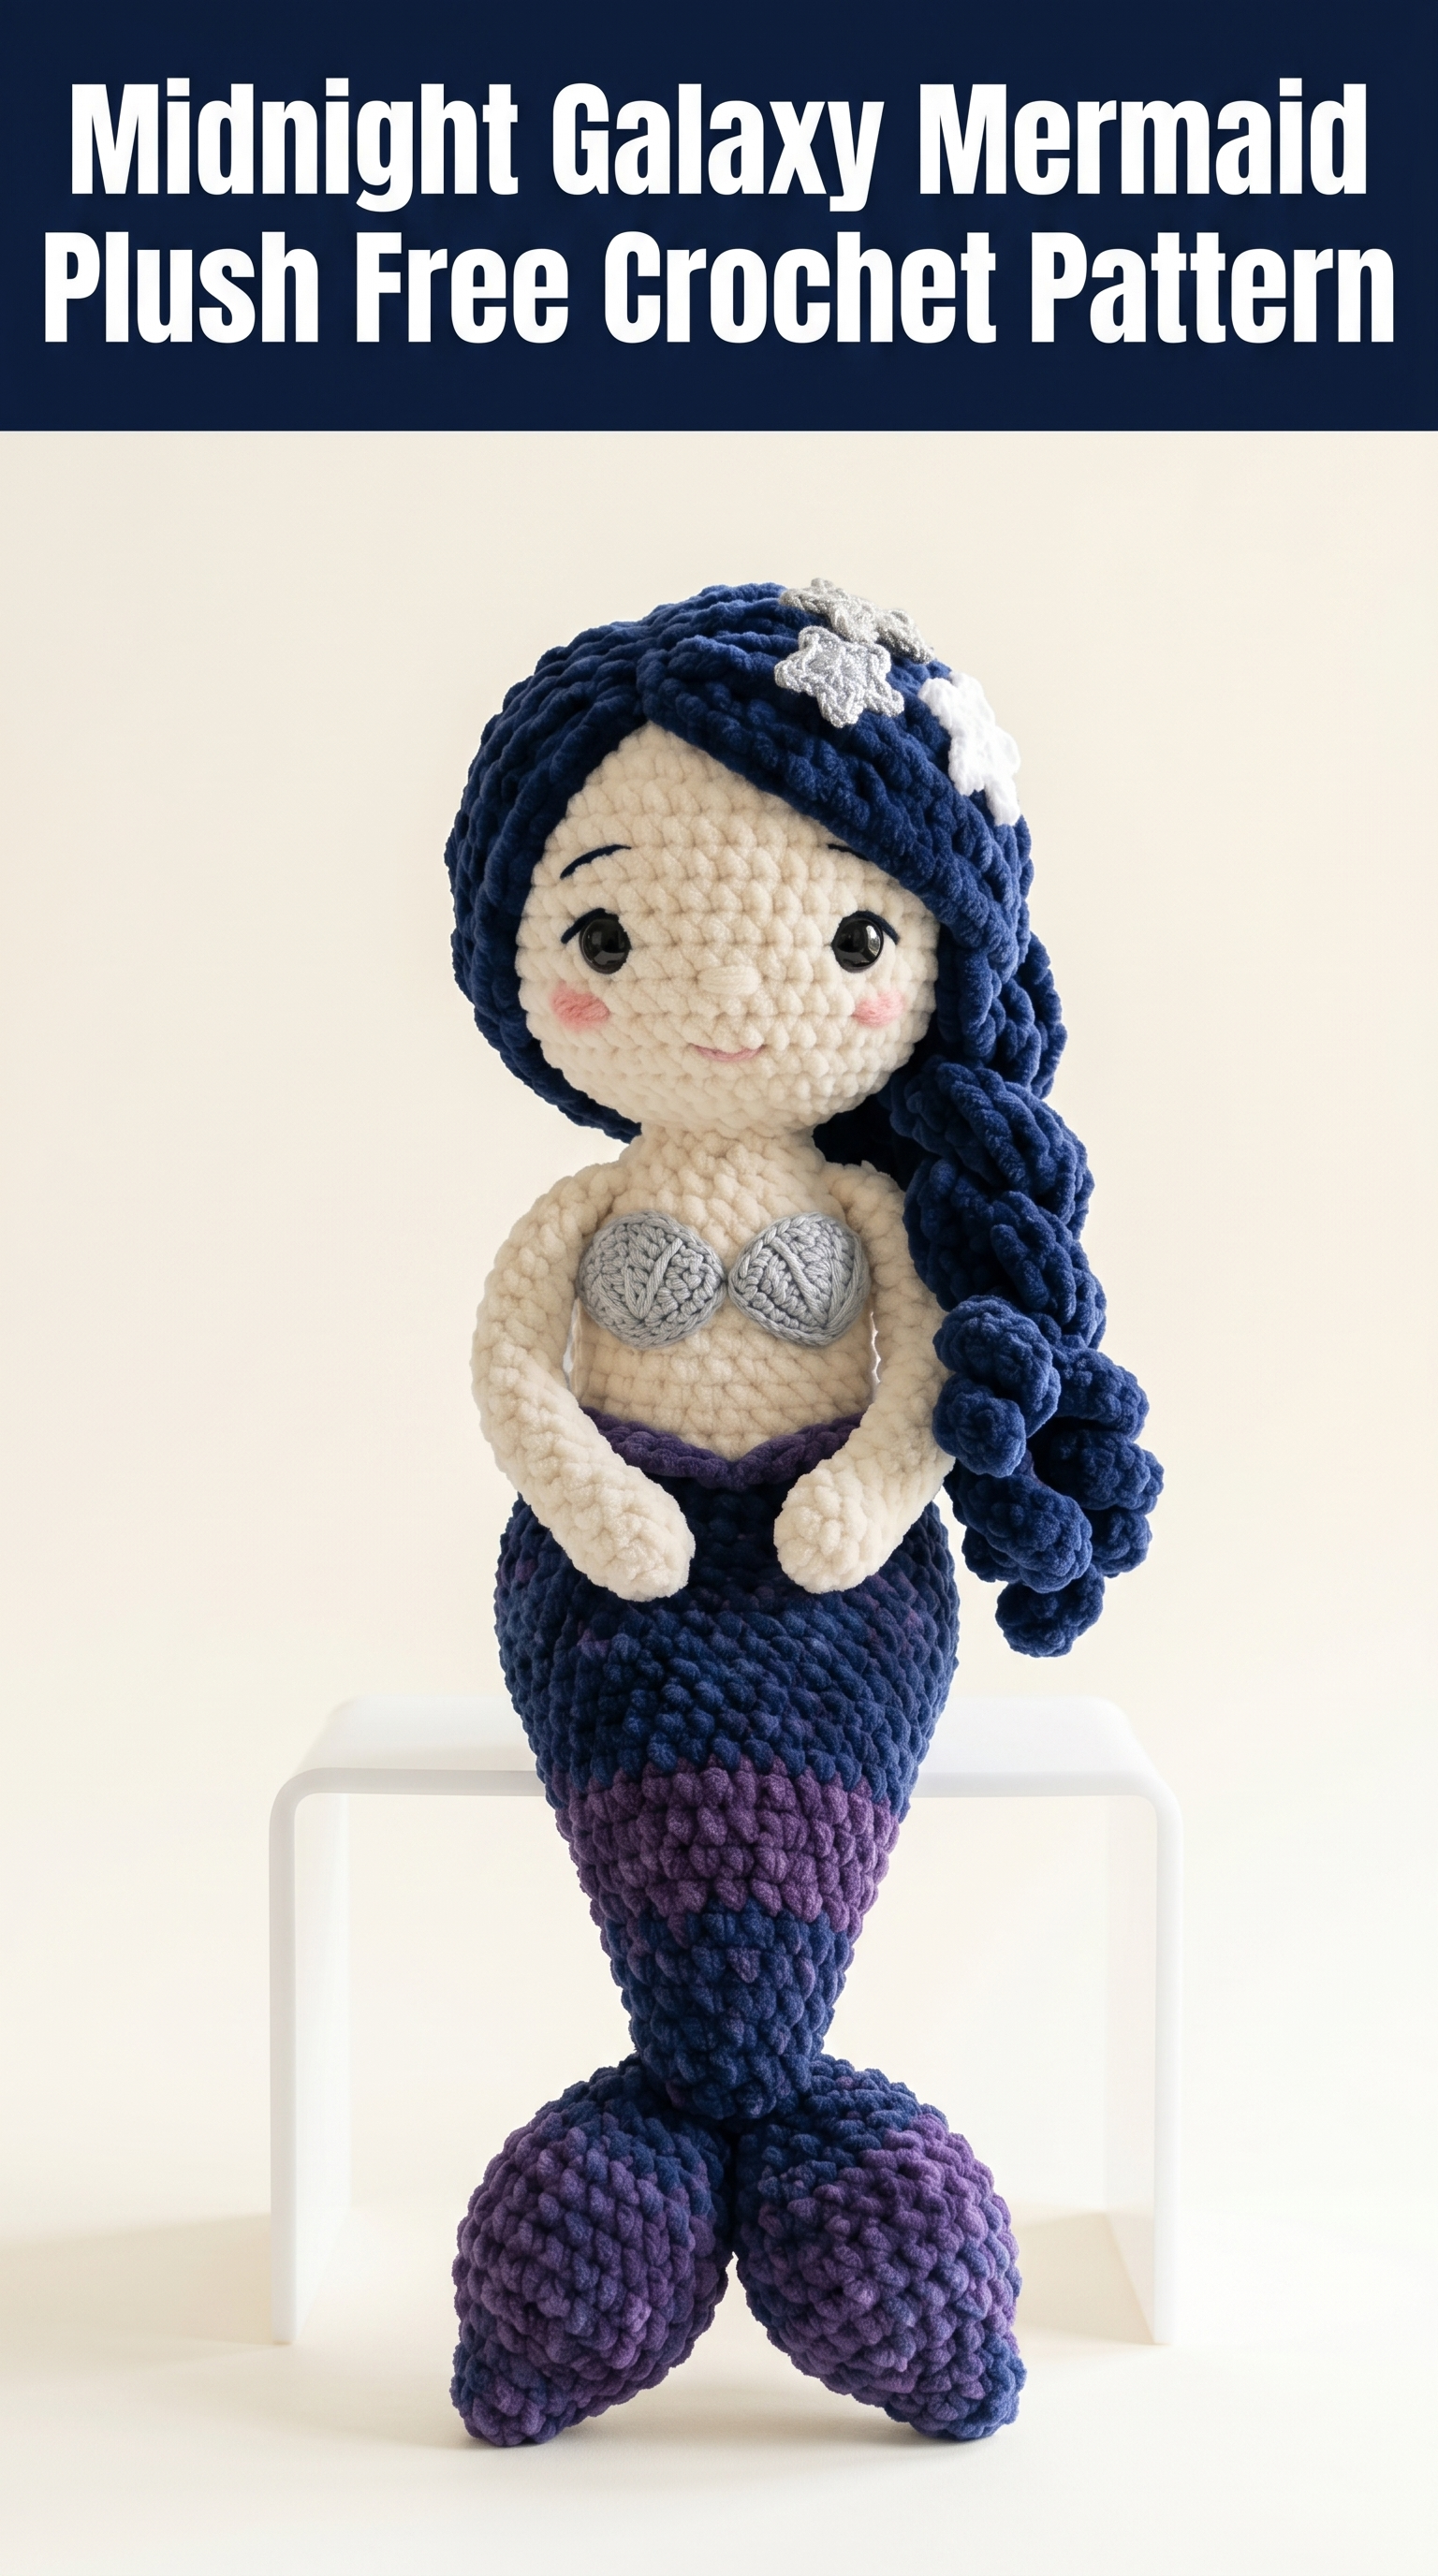
Do not let her intricate appearance intimidate you. If you can single crochet in the round and have made a basic amigurumi before, you absolutely have the skills for this beauty. She comes together in separate pieces that you assemble at the end, so you can take breaks and work at your own pace.
Standing approximately 14 inches tall, this mermaid makes a stunning gift for the ocean lover in your life or a gorgeous addition to your own handmade collection.
Why You Will Love This Crochet Pattern
This mermaid plush combines everything I adore about amigurumi design. The color palette feels sophisticated yet whimsical. Those cascading spiral curls create incredible texture and movement. And the crocodile stitch tail fins add a dimensional, scale-like effect that genuinely looks like mermaid magic.
The step by step crochet tutorial breaks down each component clearly. You will work the head and body as connected pieces, then create the tail separately before joining. The hair uses a simple spiral technique that looks complex but works up quickly once you get into the rhythm.
I also love how customizable this pattern is. Swap the navy for teal, change the purple to coral, or give her blonde curls instead. Make her your own.
Materials Needed
Gather these supplies before you begin:
Yarn
– Cream or beige for skin: approximately 80 yards
– Navy blue for hair and upper tail: approximately 100 yards
– Purple for lower tail and fins: approximately 60 yards
– Silver or light gray for shell top: approximately 15 yards
– White for flower accent: small amount
– Black, pink, and brown for facial features: small amounts
I used a cotton blend yarn for this project. Cotton gives excellent stitch definition for amigurumi and holds up well for display pieces. Acrylic works beautifully too and comes in endless color options.
Hook
For amigurumi, you typically want to go down one or two hook sizes from what the yarn label suggests. This creates a tighter fabric so the stuffing does not show through.
Notions
Stitch Abbreviations and Definitions
Let me walk you through every stitch abbreviation before we dive in. Reference this section anytime you need a refresher.
ch = chain: Yarn over, pull through the loop on your hook. This creates the foundation for many projects.
sl st = slip stitch: Insert hook, yarn over, pull through both the stitch and the loop on your hook in one motion. Used for joining and invisible movement.
sc = single crochet: Insert hook into stitch, yarn over and pull up a loop (2 loops on hook), yarn over and pull through both loops. Your bread and butter stitch for amigurumi.
inc = increase: Work 2 single crochets into the same stitch. This adds one stitch to your count.
dec = invisible decrease: Insert hook through the front loops only of the next 2 stitches, yarn over and pull through both front loops, yarn over and pull through both loops on hook. Creates a neater decrease than traditional methods.
FLO = front loop only: Work into just the front loop of the stitch instead of both loops.
BLO = back loop only: Work into just the back loop of the stitch.
MR = magic ring: An adjustable starting ring that closes completely with no hole. Essential for amigurumi.
Gauge and Finished Size
Gauge: 5 sc and 5 rows = 1 inch in single crochet worked in continuous rounds
Gauge matters less in amigurumi than in garments, but checking yours ensures your mermaid turns out the expected size. If your stitches are too loose, go down a hook size. Too tight, go up.
Finished Dimensions: Approximately 14 inches tall from top of head to tip of tail fins
Pattern Notes Before You Begin
This pattern uses continuous rounds unless otherwise noted. This means you do not join at the end of each round. Instead, you spiral upward continuously. Place a stitch marker in the first stitch of each round and move it up as you go. Trust me, this saves so much confusion.
Stuff pieces firmly as you work. It is much easier to add stuffing gradually than to try to push it through a small opening at the end.
All pieces are worked with the right side facing out. If your stitches look smoother on one side than the other, that smoother side should face outward.
Head and Body Instructions
The head and body connect as one continuous piece. You will start at the top of the head and work down to the waist where the tail attaches.
Head (Cream Yarn)
Round 1: 6 sc in MR (6 sts)
Round 2: Inc in each st around (12 sts)
Round 3: [Sc 1, inc] 6 times (18 sts)
Round 4: [Sc 2, inc] 6 times (24 sts)
Round 5: [Sc 3, inc] 6 times (30 sts)
Round 6: [Sc 4, inc] 6 times (36 sts)
Round 7: [Sc 5, inc] 6 times (42 sts)
Rounds 8 to 15: Sc in each st around (42 sts) – 8 rounds total
Insert safety eyes between rounds 10 and 11, approximately 8 stitches apart. Add them now before the opening becomes too small.
Round 16: [Sc 5, dec] 6 times (36 sts)
Round 17: [Sc 4, dec] 6 times (30 sts)
Round 18: [Sc 3, dec] 6 times (24 sts)
Begin stuffing the head firmly now.
Round 19: [Sc 2, dec] 6 times (18 sts)
Neck and Body (Continue with Cream)
Rounds 20 to 22: Sc in each st around (18 sts) – 3 rounds for neck
Round 23: [Sc 2, inc] 6 times (24 sts)
Round 24: [Sc 3, inc] 6 times (30 sts)
Rounds 25 to 32: Sc in each st around (30 sts) – 8 rounds for body
Round 33: [Sc 3, dec] 6 times (24 sts)
Round 34: Sc in each st around (24 sts)
Stuff the body firmly. Fasten off and leave a long tail for sewing.
Arms (Make 2)
Using Cream Yarn
Round 1: 6 sc in MR (6 sts)
Round 2: [Sc 1, inc] 3 times (9 sts)
Rounds 3 to 18: Sc in each st around (9 sts) – 16 rounds
Stuff lightly, mainly in the hand area. The arms should be somewhat floppy. Flatten the opening and sew closed. Leave a tail for attaching to the body.
Tail Section
The tail creates that beautiful gradient effect by transitioning from navy to purple.
Upper Tail (Navy Yarn)
Round 1: 6 sc in MR (6 sts)
Round 2: Inc in each st around (12 sts)
Round 3: [Sc 1, inc] 6 times (18 sts)
Round 4: [Sc 2, inc] 6 times (24 sts)
Rounds 5 to 8: Sc in each st around (24 sts)
Round 9: Working in BLO, sc in each st around (24 sts) – this creates the ridge for the waistband
Rounds 10 to 22: Sc in each st around (24 sts) – 13 rounds
Switch to purple yarn at Round 23.
Lower Tail (Purple Yarn)
Rounds 23 to 30: Sc in each st around (24 sts)
Round 31: [Sc 2, dec] 6 times (18 sts)
Rounds 32 to 35: Sc in each st around (18 sts)
Round 36: [Sc 1, dec] 6 times (12 sts)
Stuff the tail firmly as you work. Fasten off and leave a tail for sewing to the body.
Tail Fins (Make 2)
These dimensional fins use a variation of the crocodile stitch technique to create overlapping scales.
Using Purple Yarn
Foundation: Ch 12
Row 1: Sc in 2nd ch from hook and each ch across, turn (11 sts)
Row 2: Ch 1, sc in each st across, turn (11 sts)
Rows 3 to 6: Repeat Row 2
Shaping the Fin
Row 7: Ch 1, dec, sc 7, dec, turn (9 sts)
Row 8: Ch 1, dec, sc 5, dec, turn (7 sts)
Row 9: Ch 1, dec, sc 3, dec, turn (5 sts)
Row 10: Ch 1, dec, sc 1, dec (3 sts)
Fasten off. Make two fins. Fold each fin in half lengthwise and whip stitch the edges together, leaving the top open. Stuff lightly. Attach to the bottom of the tail, angling outward slightly.
Shell Top
Using Silver/Gray Yarn
The shell bra consists of two small cup shapes connected by a strap.
Each Cup (Make 2)
Round 1: 5 sc in MR (5 sts)
Round 2: Inc in each st around (10 sts)
Round 3: [Sc 1, inc] 5 times (15 sts)
Row 4: Flatten the opening. Working through both layers, sc 7 across to close. Ch 8 for the strap on the first cup only.
Join the cups with slip stitches through the chain. Add a ch 15 tie to each outer edge for tying around the back. Fasten off.
Hair
The gorgeous spiral curls create incredible texture and movement. This technique is surprisingly simple once you try it.
Base Cap (Navy Yarn)
Work a partial sphere that sits on top and around the head:
Round 1: 6 sc in MR (6 sts)
Round 2: Inc in each st around (12 sts)
Round 3: [Sc 1, inc] 6 times (18 sts)
Round 4: [Sc 2, inc] 6 times (24 sts)
Round 5: [Sc 3, inc] 6 times (30 sts)
Round 6: [Sc 4, inc] 6 times (36 sts)
Round 7: [Sc 5, inc] 6 times (42 sts)
Rounds 8 to 12: Sc in each st around (42 sts)
Do not fasten off. The cap should fit over the top and back of the head.
Spiral Curls (Make 25 to 30)
These attach around the edge of the hair cap.
For each curl: Ch 20. Starting in 2nd ch from hook, work 3 sc in each ch across. The chain will naturally spiral and twist.
Fasten off each curl with a tail for sewing. Attach curls densely around the cap edge, layering them for fullness.
Flower Hair Accessory
Using White Yarn
Ch 4, sl st to first ch to form a ring.
Round 1: [Ch 3, 2 dc in ring, ch 3, sl st in ring] 5 times to create 5 petals.
Fasten off. Sew to the hair above one ear.
Facial Features
Using the photo as your guide:
Eyebrows: Embroider small curved lines in brown above each eye using a satin stitch or backstitch.
Mouth: Create a small curved smile in pink or coral using backstitch. Keep it simple and sweet.
Blush: Dab a tiny bit of pink chalk or actual blush onto the cheeks using a cotton swab. This adds so much life to the face.
Assembly Instructions
Take your time with this step. Proper assembly makes all the difference.
1. Attach the tail to the bottom of the body. Align the pieces and whip stitch securely all around. The waistband ridge should sit at the natural waist.
2. Sew the arms to each side of the body at Round 25, angling them slightly forward.
3. Position the hair cap on the head, covering the top and back while leaving the face clear. Pin in place first, then sew securely using matching yarn.
4. Tie the shell top around the body, positioning it at bust level. You can tack it in place with a few hidden stitches for security.
5. Add the flower to the hair, sewing through both the flower and the hair cap.
6. Weave in all ends meticulously. For amigurumi, I like to weave ends through the stuffing cavity where they disappear completely.
Tips for Crochet Pattern Success
Marking your rounds religiously prevents miscounting. I cannot stress this enough.
Stuffing matters. Polyester fiberfill gives the best results. Stuff more firmly than you think necessary since the filling compacts over time.
Facial placement changes everything about the expression. Test eye position with pins before committing to safety eyes.
Blocking is optional for amigurumi, but you can gently steam individual pieces if they look uneven.
Make This Pattern Your Own
The beauty of this beginner friendly crochet pattern lies in its versatility. Consider these variations:
Change her hair color to red, blonde, or even rainbow pastels. Swap the purple tail for teal, coral, or sunset orange. Add beaded embellishments to her hair or tail. Create a tiny crocheted sea star or seahorse companion.
I would love to see your interpretation of this design.
Thank You for Making With Me
I genuinely appreciate you choosing this pattern for your next project. Creating this mermaid plush crochet tutorial brought me so much joy, and I hope the making process brings you joy too.
When you finish your mermaid, please share a photo with me on Instagram or Facebook. Tag your creation so I can celebrate your beautiful work. Seeing your finished projects honestly makes my day.
Happy crocheting, friend. May your stitches be even and your yarn never tangle.
