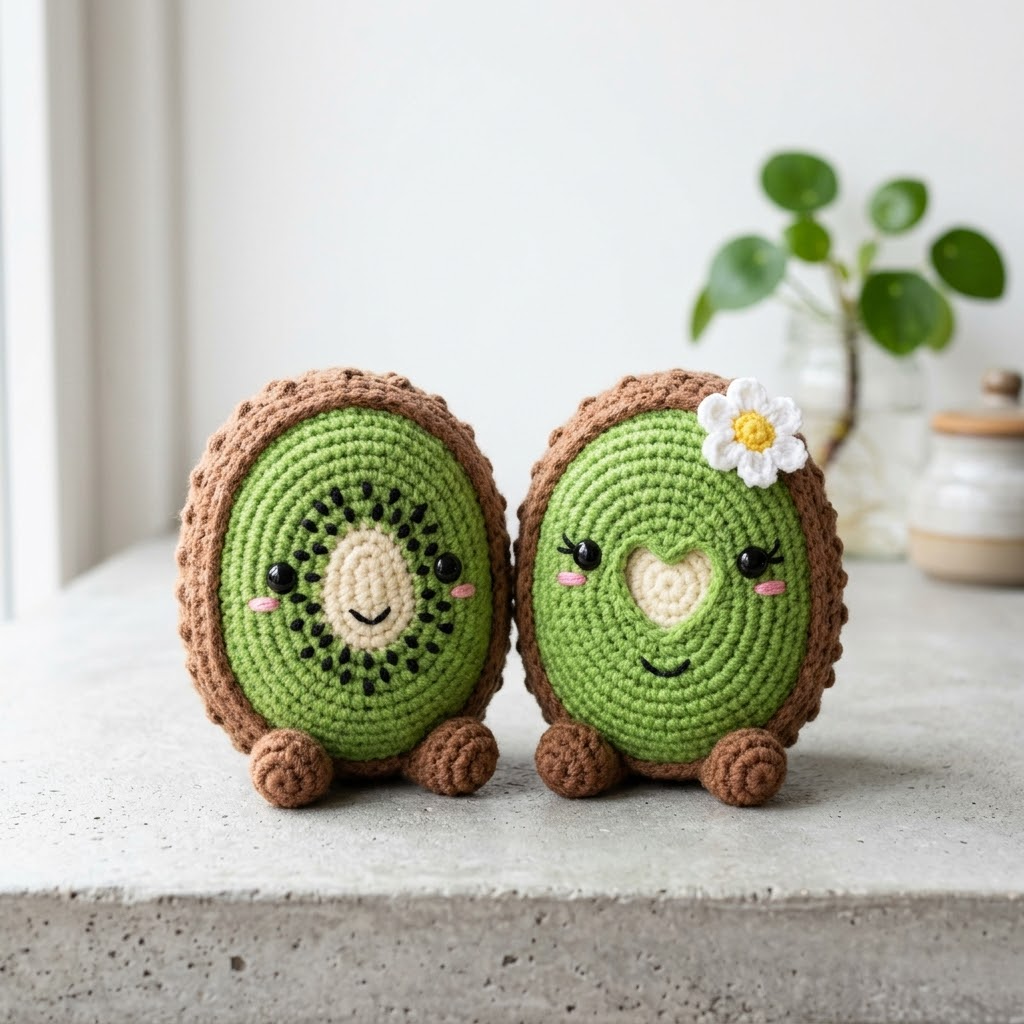
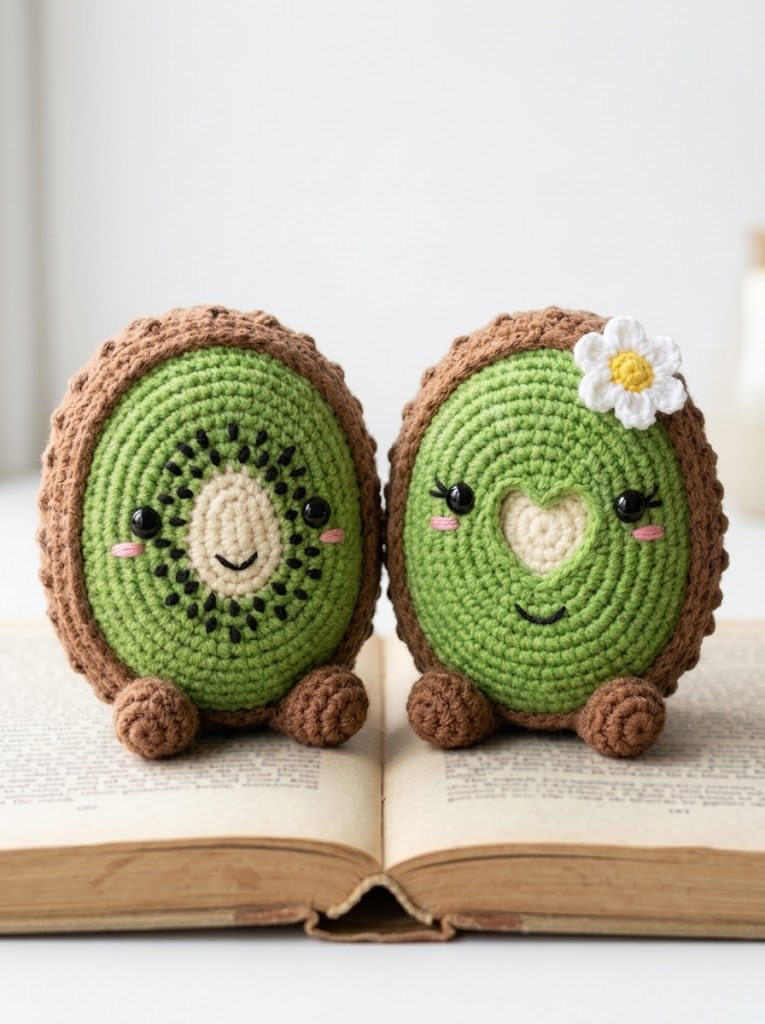
These little kiwi sweethearts have completely stolen my heart, and I think they are about to steal yours too. This adorable crochet pattern creates a matching pair of kawaii style kiwi fruit characters, one designed like a classic sliced kiwi with tiny embroidered seeds, and one styled as a cute avocado inspired variation with a heart shaped pit. Both feature that signature fuzzy brown skin, tiny little feet, and the sweetest embroidered faces you have ever seen.

If you have made a few amigurumi projects before, you are absolutely ready for this one. The construction is straightforward with basic increases and decreases, and I will walk you through every single step. Even if you are newer to amigurumi, the flat oval shape is much more forgiving than complex 3D shapes. Let me show you exactly how to bring these cuties to life.
Why This Kiwi Couple Crochet Pattern Works So Well
What makes this particular design so charming is the attention to realistic detail combined with that irresistible kawaii aesthetic. The brown outer edge mimics the actual fuzzy texture of real kiwi skin, while the concentric rings of green create that distinctive look of sliced kiwi fruit. The cream colored center and embroidered seed details really sell the whole effect.
The second kiwi variation features a heart shaped center instead of the traditional oval pit area, making this pair perfect for couples, best friends, or anyone who appreciates a matching set with a romantic twist. That tiny crocheted daisy on top adds an extra touch of personality and is completely optional if you prefer a simpler look.
These finished amigurumi measure approximately 4 inches tall and 3 inches wide, making them the perfect size for desk decorations, nursery decor, or sweet handmade gifts.
Materials You Will Need
Yarn:
– Light green (main flesh color), approximately 30 yards
– Medium brown (outer skin), approximately 25 yards
– Cream or off white (center pit), approximately 5 yards
– Small amount of black (for seed embroidery and mouth)
– Small amount of pink (for cheek details)
– White and yellow (for optional daisy flower), approximately 3 yards each
I used a cotton blend yarn for a clean stitch definition and smooth finish. Acrylic works beautifully too and gives a slightly softer look. Avoid fuzzy or textured yarns for the green sections since you want those concentric rings to really pop.
Hook:
Notions:
Stitch Abbreviations and Definitions
Let me break down every stitch you will encounter in this pattern:
Magic Ring (MR): An adjustable starting loop that closes completely without leaving a hole. You wrap yarn around your fingers, pull up a loop, and work your first round of stitches into that ring before pulling it tight.
Chain (ch): The most basic crochet stitch. Yarn over, pull through the loop on your hook. Creates a foundation or adds height.
Single Crochet (sc): Insert hook into stitch, yarn over and pull up a loop (2 loops on hook), yarn over and pull through both loops. This is your primary stitch throughout.
Increase (inc): Work 2 single crochet stitches into the same stitch. This adds one stitch to your count. If a row has 6 stitches and you increase in each one, you end with 12 stitches.
Decrease (dec): Also called invisible decrease or sc2tog. Insert hook through front loops only of next 2 stitches, yarn over and pull through both, yarn over and pull through remaining loops. This removes one stitch from your count.
Slip Stitch (sl st): Insert hook, yarn over, pull through stitch and loop on hook in one motion. Used for joining and finishing.
Front Loop Only (FLO): Work into only the front loop of each stitch instead of both loops. Creates a ridge effect.
Back Loop Only (BLO): Work into only the back loop. Also creates texture and definition.
Gauge and Tension Notes
For amigurumi, your tension should be tight enough that stuffing does not show through the stitches. If you can see white fiberfill peeking through your green yarn, go down a hook size. Most crocheters find they need to use a smaller hook than the yarn label suggests when making stuffed toys.
A good test is to work a small flat circle. Hold it up to the light. If you see lots of little holes, tighten up your tension or switch to a 3.0mm hook instead.
Pattern Instructions
This pattern is worked in continuous rounds for the front panels and joined rounds for the outer edge. Do not turn your work unless specified.
Kiwi Front Panel (Make 2 Per Kiwi)
You will create two identical oval panels, then join them together with the brown edging. This creates that flat, sliced fruit look.
Center (Cream Color):
Round 1: Using cream yarn, make a magic ring, ch 1, work 6 sc into the ring. Pull tight. (6 sts)
Round 2: Inc in each st around. (12 sts)
Round 3: *Sc 1, inc* repeat around. (18 sts)
Fasten off cream, leaving a short tail to weave in. For the heart shaped variation, shape this center section into a point at the bottom by working 3 sc, inc, 3 sc, inc, then 3 sc, sc2tog for the final round instead.
Middle Section (Light Green):
Join light green yarn to any stitch with a slip stitch.
Round 4: Working in back loops only, *sc 2, inc* repeat around. (24 sts)
Round 5: *Sc 3, inc* repeat around. (30 sts)
Round 6: *Sc 4, inc* repeat around. (36 sts)
Round 7: *Sc 5, inc* repeat around. (42 sts)
Round 8: *Sc 6, inc* repeat around. (48 sts)
Round 9: Sc in each st around. (48 sts)
Fasten off, leaving a long tail for sewing. Make a second identical panel.
Outer Brown Edge
This section joins your two panels together while creating that textured kiwi skin effect.
Joining Round:
Place both green panels together with wrong sides facing inward. Using brown yarn, join with a slip stitch through both layers at any point along the edge.
Round 1: Working through both panels together, sc evenly around the entire edge, placing approximately 48 to 52 stitches total. Work 3 sc into each corner area to keep the oval shape from puckering. (approximately 50 sts)
Round 2: *Sc 1, bobble stitch* repeat around. For the bobble, yarn over, insert hook, pull up loop, yarn over, pull through 2 loops, repeat 3 more times in same stitch, yarn over and pull through all 5 loops on hook. This creates that fuzzy, bumpy texture of real kiwi skin.
Before closing completely, stuff firmly with fiberfill. Push stuffing into all areas evenly.
Round 3: Sc in each stitch around, working bobbles into the previous round’s single crochets and single crochets into the previous bobbles. (approximately 50 sts)
Sl st to first stitch. Fasten off and weave in ends.
Little Feet (Make 4)
Round 1: Using brown yarn, make a magic ring, work 6 sc into ring. (6 sts)
Round 2: Inc in each st around. (12 sts)
Rounds 3 through 5: Sc in each st around. (12 sts)
Stuff lightly. Flatten the opening and sew closed. Attach two feet to the bottom front of each kiwi, spacing them about 1 inch apart.
Optional Daisy Flower
Center:
Using yellow yarn, make a magic ring, work 6 sc, sl st to join. Fasten off.
Petals:
Using white yarn, join to any stitch of yellow center. *Ch 3, sl st in 2nd ch from hook, sl st in next ch, sl st into next stitch of center* repeat 5 times for 5 petals. Fasten off and sew to top of one kiwi.
Face Details and Embroidery
This is where your kiwis really come to life, so take your time with this step.
Safety Eyes:
Position your safety eyes between rounds 6 and 7 of the green section, spacing them approximately 6 to 8 stitches apart. Insert them before joining your panels together. The backing clicks on from the inside.
Eyelashes:
Using black embroidery floss, stitch 2 to 3 small straight stitches above each eye, angling outward like little lashes. This gives that sweet, feminine look visible in the photos.
Cheeks:
Using pink yarn or embroidery floss, create small oval shapes on either side of where the mouth will go. You can use satin stitch (parallel lines close together) or simply stitch a small pink oval outline.
Mouth:
Using black floss, create a small curved smile below and between the eyes. A simple curved line works perfectly, or add a tiny vertical line in the center for that classic kawaii expression.
Seed Details (Classic Kiwi Version):
Using black yarn and a yarn needle, embroider small straight stitches radiating outward from the cream center. Real kiwi seeds form a ring pattern, so place your stitches in an oval arrangement around the cream section. Keep stitches small and even. Approximately 16 to 20 seed stitches creates a realistic effect.
Assembly Tips
When sewing the feet in place, position them so the kiwis can stand up on their own. Angle the feet slightly outward for stability. Use matching brown yarn and small whip stitches for an invisible join.
If your kiwi feels floppy, add more stuffing before closing the final seam. Amigurumi should feel firm but not rock hard.
Customization Ideas
Once you have mastered this basic kiwi couple crochet pattern, the variations are endless. Try different colored centers for a rainbow fruit collection. Add tiny crocheted arms for a more character like appearance. Create a whole fruit bowl by making oranges, apples, and lemons using the same basic oval construction method.
For a baby safe version, embroider the eyes instead of using safety eyes, and skip any small embellishments that could become choking hazards.
Troubleshooting Common Issues
Panels are different sizes: Count your stitches at the end of each round. If you are off, it is easier to frog back a round than to try forcing mismatched pieces together.
Oval is too round: Make sure you are increasing evenly and not bunching increases on one side. The increases should spiral around gradually.
Brown edge is pulling or puckering: Add extra stitches in the corner areas. You need more stitches to go around curves than straight edges.
Stuffing is visible: Your tension is too loose. For future projects, try a smaller hook size.
Wrapping Up This Sweet Project
Thank you so much for choosing to make this pastel kiwi couple amigurumi crochet pattern. I genuinely hope you enjoy every stitch of bringing these little cuties to life. There is something so satisfying about creating handmade characters with personality, and this matching pair makes such a thoughtful handmade gift for so many occasions.
I would absolutely love to see your finished kiwis. Please tag me on Instagram or share your photos in my Facebook group. Seeing your makes truly brightens my day and inspires other crafters to try new projects.
Happy crocheting, friend. You have got this.
