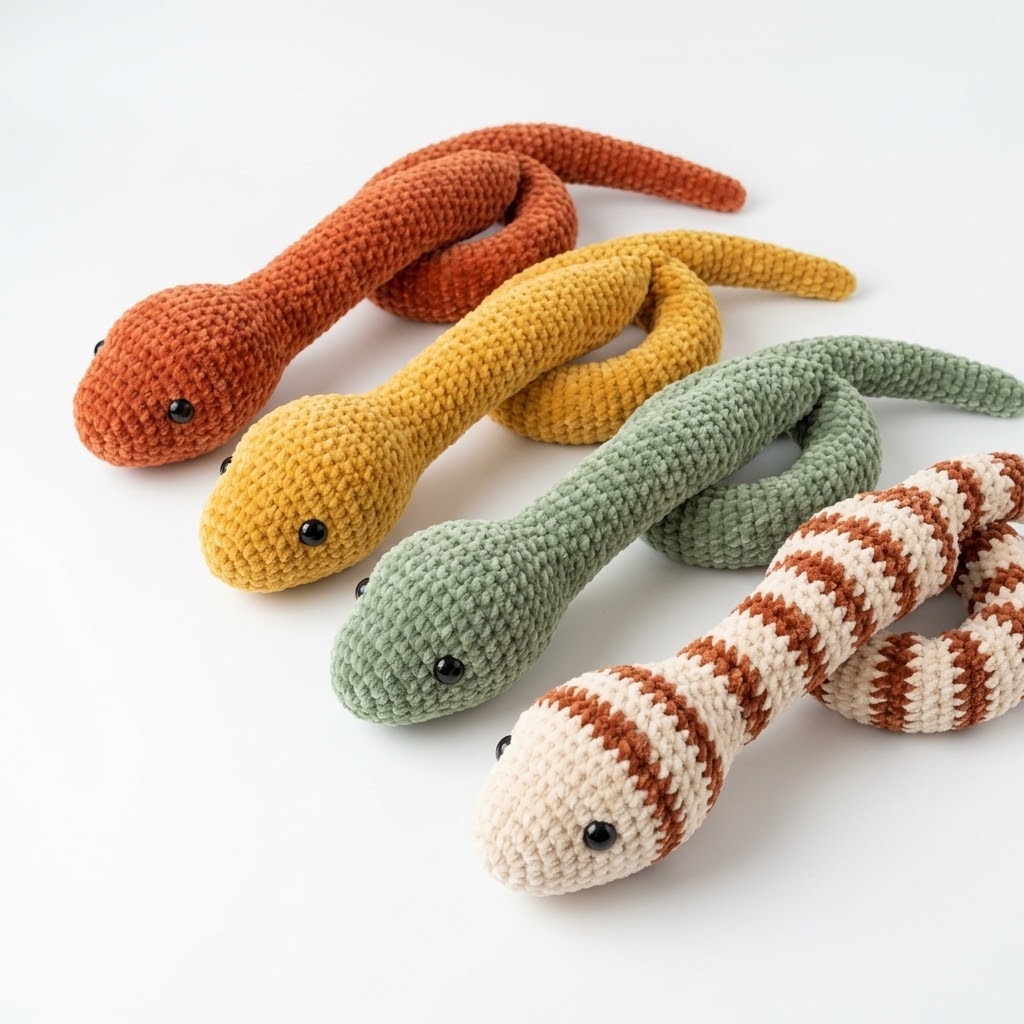
These adorable amigurumi snakes have quickly become one of my favorite makes. There is something so satisfying about crocheting a project that works up in one continuous piece with almost no sewing required. If you can crochet in the round and know how to increase and decrease, you can absolutely make these cuties.
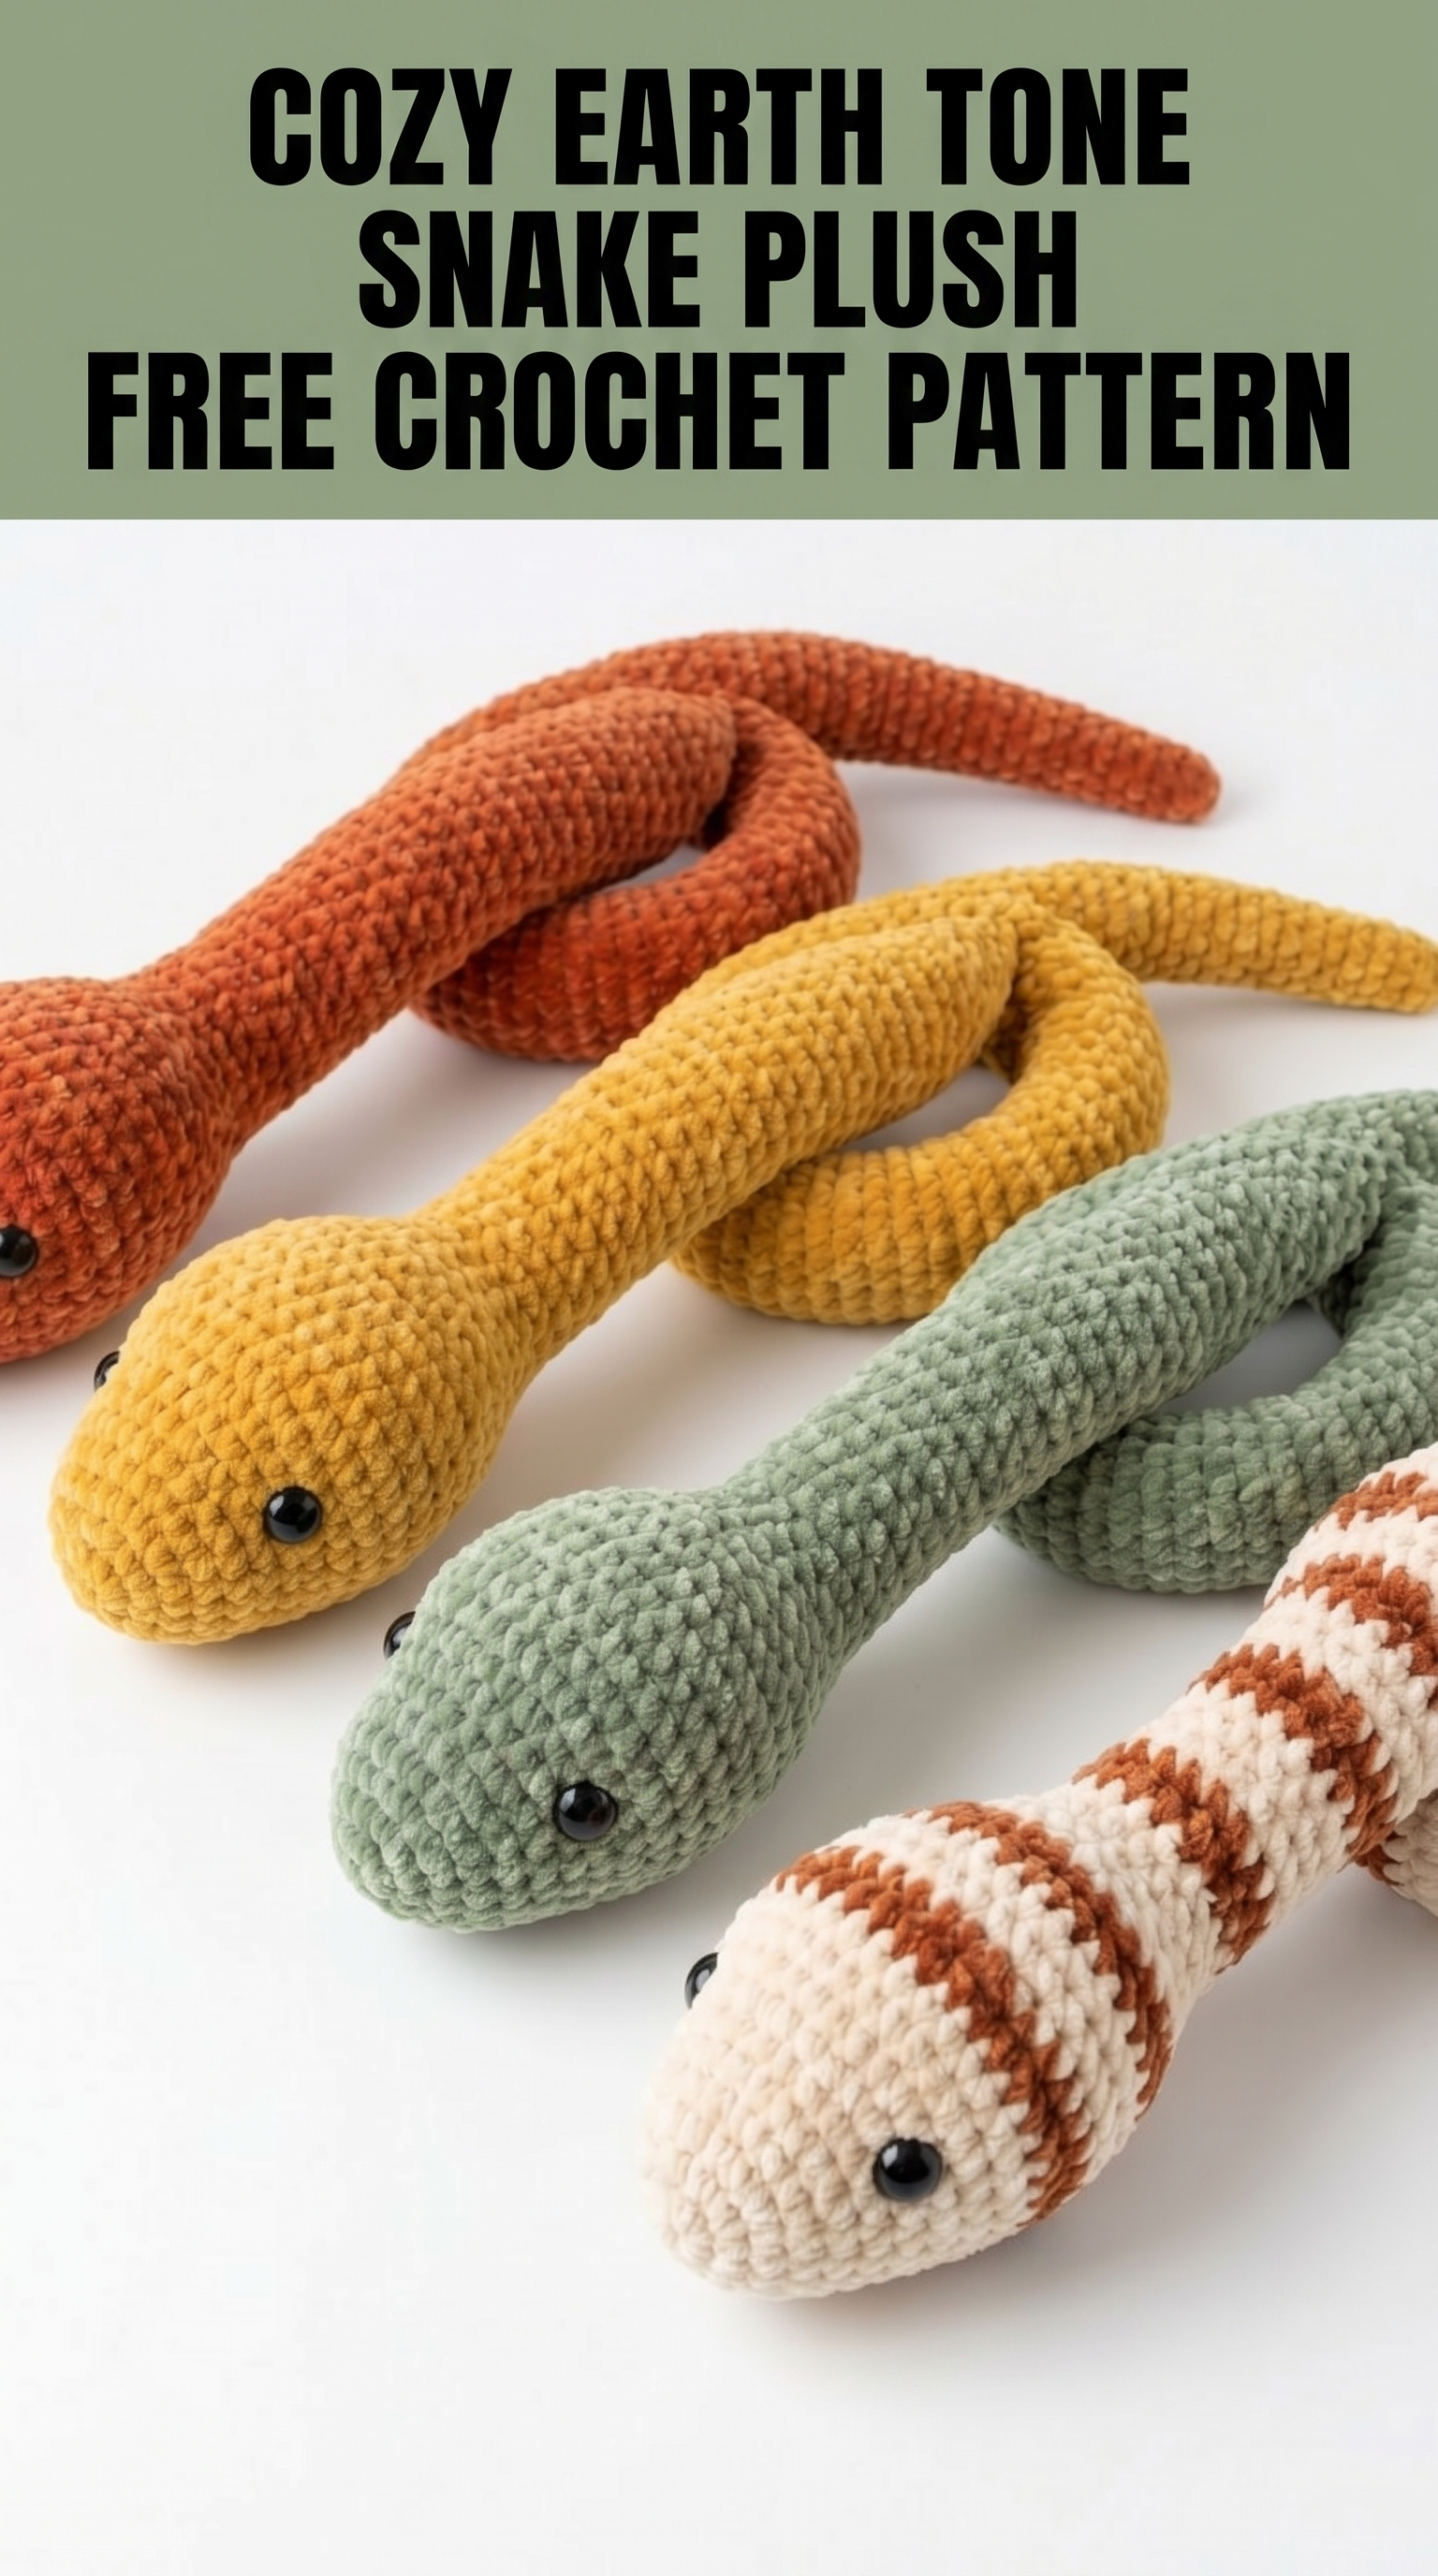
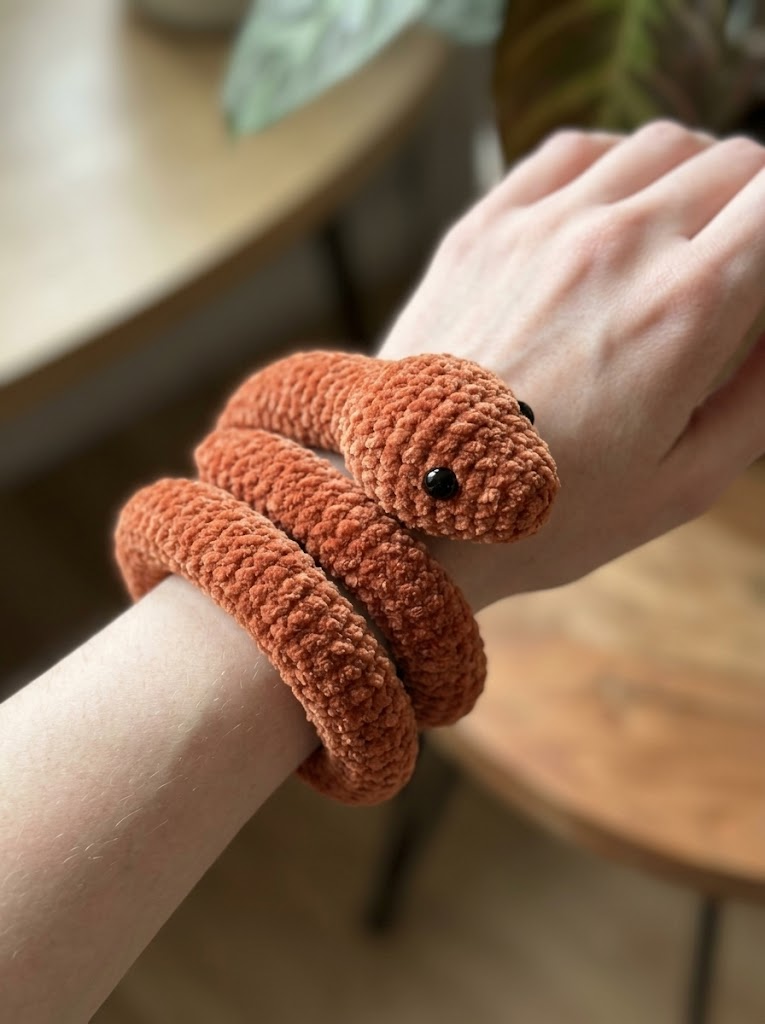
The finished snakes measure approximately 18 to 20 inches long, making them perfect as a quirky stuffed toy, a fun draft stopper, or even a unique gift for the snake lover in your life. I designed this crochet pattern to be beginner friendly while still creating a polished, professional looking result.
Let me walk you through everything you need to recreate these cozy earth tone snake plushies from scratch.
Why You Will Love This Amigurumi Snake Crochet Pattern
This crochet tutorial is perfect for crafters who want a satisfying project without complicated assembly. The entire snake body works up as one long tube. You start at the head, shape it with simple increases and decreases, then crochet a long body section that tapers naturally into a pointed tail.
No sewing pieces together. That alone makes this pattern a winner in my book.
The design uses basic single crochet stitches throughout. The magic is in the shaping. You will learn how gradual increases and decreases create that smooth rounded head and tapered tail without any fussy techniques.
Plus, these snakes look amazing in solid colors or stripes. The striped version in cream and rust shows how a simple color change can create a completely different character.
Materials You Will Need
Before we dive into the step by step instructions, gather these supplies.
Yarn:
Suggested Colors Based on the Image:
Hook:
Notions:
Skill Level and Techniques
Skill Level: Confident Beginner to Intermediate
You should be comfortable with these techniques:
If you have made a basic amigurumi ball before, you are ready for this project.
Abbreviations and Stitch Definitions
Let me break down every stitch and term you will encounter. I always define these upfront so you can reference back easily.
Magic Ring (MR): An adjustable starting loop that closes completely with no hole in the center. You wrap yarn around your fingers, pull up a loop, then work your first stitches into that ring.
Chain (ch): The foundation stitch. Yarn over, pull through the loop on your hook.
Single Crochet (sc): Insert hook into stitch, yarn over and pull up a loop (two loops on hook), yarn over and pull through both loops.
Increase (inc): Work two single crochet stitches into the same stitch. This adds one stitch to your count.
Invisible Decrease (dec): Insert hook through front loops only of the next two stitches, yarn over and pull through both front loops, yarn over and pull through both loops on hook. This creates a neater decrease than the standard method.
Slip Stitch (sl st): Insert hook, yarn over, pull through stitch and loop on hook in one motion.
Fasten Off (FO): Cut yarn, pull tail through final loop to secure.
Stitch (st/sts): Refers to individual stitches.
Gauge
Gauge matters for amigurumi. Work a small test swatch in single crochet.
4 sc and 4 rows = approximately 1 inch
More importantly, your fabric should be tight enough that you cannot see through it when held up to light. If you see gaps, go down a hook size.
The Complete Snake Crochet Pattern
This pattern is worked in continuous rounds. Do not join rounds with a slip stitch unless instructed. Use a stitch marker to track the beginning of each round. Move it up as you go.
Head Section
Round 1: Make a magic ring, work 6 sc into the ring. Pull tight to close. (6 sts)
Round 2: Inc in each st around. (12 sts)
Round 3: *Sc 1, inc* repeat around. (18 sts)
Round 4: *Sc 2, inc* repeat around. (24 sts)
Round 5: *Sc 3, inc* repeat around. (30 sts)
Rounds 6 through 10: Sc in each st around. (30 sts) Work 5 rounds even.
Insert safety eyes between Rounds 7 and 8. Position them about 8 to 10 stitches apart, centered on what will be the face. The eyes should sit on the wider part of the head, not too close to the nose tip.
Take your time with eye placement. I like to use pins first to preview the position before committing.
Round 11: *Sc 3, dec* repeat around. (24 sts)
Round 12: Sc in each st around. (24 sts)
Round 13: *Sc 2, dec* repeat around. (18 sts)
Begin stuffing the head firmly at this point. You want a nice plump shape but not so tight that it distorts the stitches.
Round 14: *Sc 4, dec* repeat around. (15 sts)
Neck Transition
The neck is slightly narrower than the head. This creates that cute snake silhouette.
Rounds 15 through 20: Sc in each st around. (15 sts) Work 6 rounds even.
Add more stuffing as you go. Pack it gently but thoroughly.
Body Section
Here is where we build the long snakey body. The body maintains a consistent width for most of its length.
Round 21: *Sc 4, inc* repeat around. (18 sts)
Rounds 22 through 75: Sc in each st around. (18 sts) Work 54 rounds even.
Pro tip: This is the perfect Netflix crocheting section. Once you establish the rhythm, you can work almost on autopilot. Just remember to stuff as you go. It is much harder to stuff a long tube after the fact.
I recommend stuffing every 10 to 15 rounds. Use a chopstick or pencil to push fiberfill down into the body. Stuff firmly but not rock hard. You want the snake to be flexible enough to pose and curl.
Tail Section
Now we taper down to that cute pointed tail.
Round 76: *Sc 4, dec* repeat around. (15 sts)
Rounds 77 through 82: Sc in each st around. (15 sts) Work 6 rounds even.
Round 83: *Sc 3, dec* repeat around. (12 sts)
Rounds 84 through 89: Sc in each st around. (12 sts) Work 6 rounds even.
Round 90: *Sc 2, dec* repeat around. (9 sts)
Rounds 91 through 96: Sc in each st around. (9 sts) Work 6 rounds even.
Round 97: *Sc 1, dec* repeat around. (6 sts)
Rounds 98 through 100: Sc in each st around. (6 sts) Work 3 rounds even.
Finish stuffing the tail. The tip should be lightly stuffed so it stays flexible.
Round 101: Dec 3 times. (3 sts)
Fasten off. Cut a 6 inch tail. Thread through remaining stitches, pull tight to close. Weave in the end securely.
Striped Variation Instructions
For the gorgeous cream and rust striped snake shown in the image, follow the same pattern with these color changes.
Color A: Cream (main color)
Color B: Rust (stripe color)
Work the head in Color A through Round 10. Then alternate colors every 4 rounds throughout the body section.
How to change colors cleanly:
On the last stitch before your color change, work the single crochet until you have two loops on your hook. Drop Color A, pick up Color B, and pull through both loops. Continue with the new color.
Carry the unused color loosely along the inside of your work. This prevents having to cut and rejoin constantly.
The stripes create a beautiful zigzag effect because you are working in a spiral. This is not a flaw. It is a charming feature of amigurumi construction.
Finishing Your Snake Plush
Weave in all ends using a yarn needle. Bury tails inside the stuffed body for a clean look.
Shape your snake by gently bending and curling the body. The tight single crochet fabric holds curves nicely.
Optional embellishments:
Some crafters like to add a forked tongue. Cut a small piece of red or pink felt, snip a V shape at one end, and hand stitch it just below the magic ring center point.
You could also embroider nostrils with a few small stitches of black yarn.
Tips for Amigurumi Success
Tension consistency is everything. Try to maintain even tension throughout your work. If your first few rounds are tighter than your body section, the head will look noticeably different.
Invisible decreases really do make a difference. The traditional decrease leaves visible bumps. Front loop only decreases lay flat and blend into the surrounding fabric.
Stuff as you go. I cannot emphasize this enough for long tube projects. Wrestling fiberfill through a tiny opening is frustrating and usually results in uneven stuffing.
Safety eyes must be secured before closing. Once those plastic backings click on, the eyes are permanent. Double check placement before committing.
How to Customize Your Snake
This basic crochet pattern is endlessly adaptable.
Make it longer: Simply add more body rounds. Each additional 10 rounds adds roughly 2 inches.
Make it chunkier: Use a 4mm hook and bulky weight yarn. Adjust eye size to 8 or 9mm.
Make it tiny: Use fingering weight yarn and a 2.5mm hook. Use 4mm eyes. Perfect for keychains.
Add personality: Embroider eyebrows, add felt spots, or create a rattle by inserting a small jingle bell in the tail before closing.
Final Thoughts on This Snake Plush Crochet Pattern
I hope this step by step crochet tutorial helps you create your own slithery friend. These amigurumi snakes are genuinely fun to make. The repetitive body section is meditative, the shaping is satisfying, and the finished result always gets compliments.
Whether you choose a solid earth tone or go bold with stripes, your snake will have tons of personality. The tight single crochet construction means these plushies are durable enough for play and cute enough for display.
Thank you so much for choosing this pattern. I would absolutely love to see your finished snakes. Tag me on Instagram or share in my Facebook group. Seeing your creations genuinely makes my day.
Happy crocheting, friend. You have got this.
