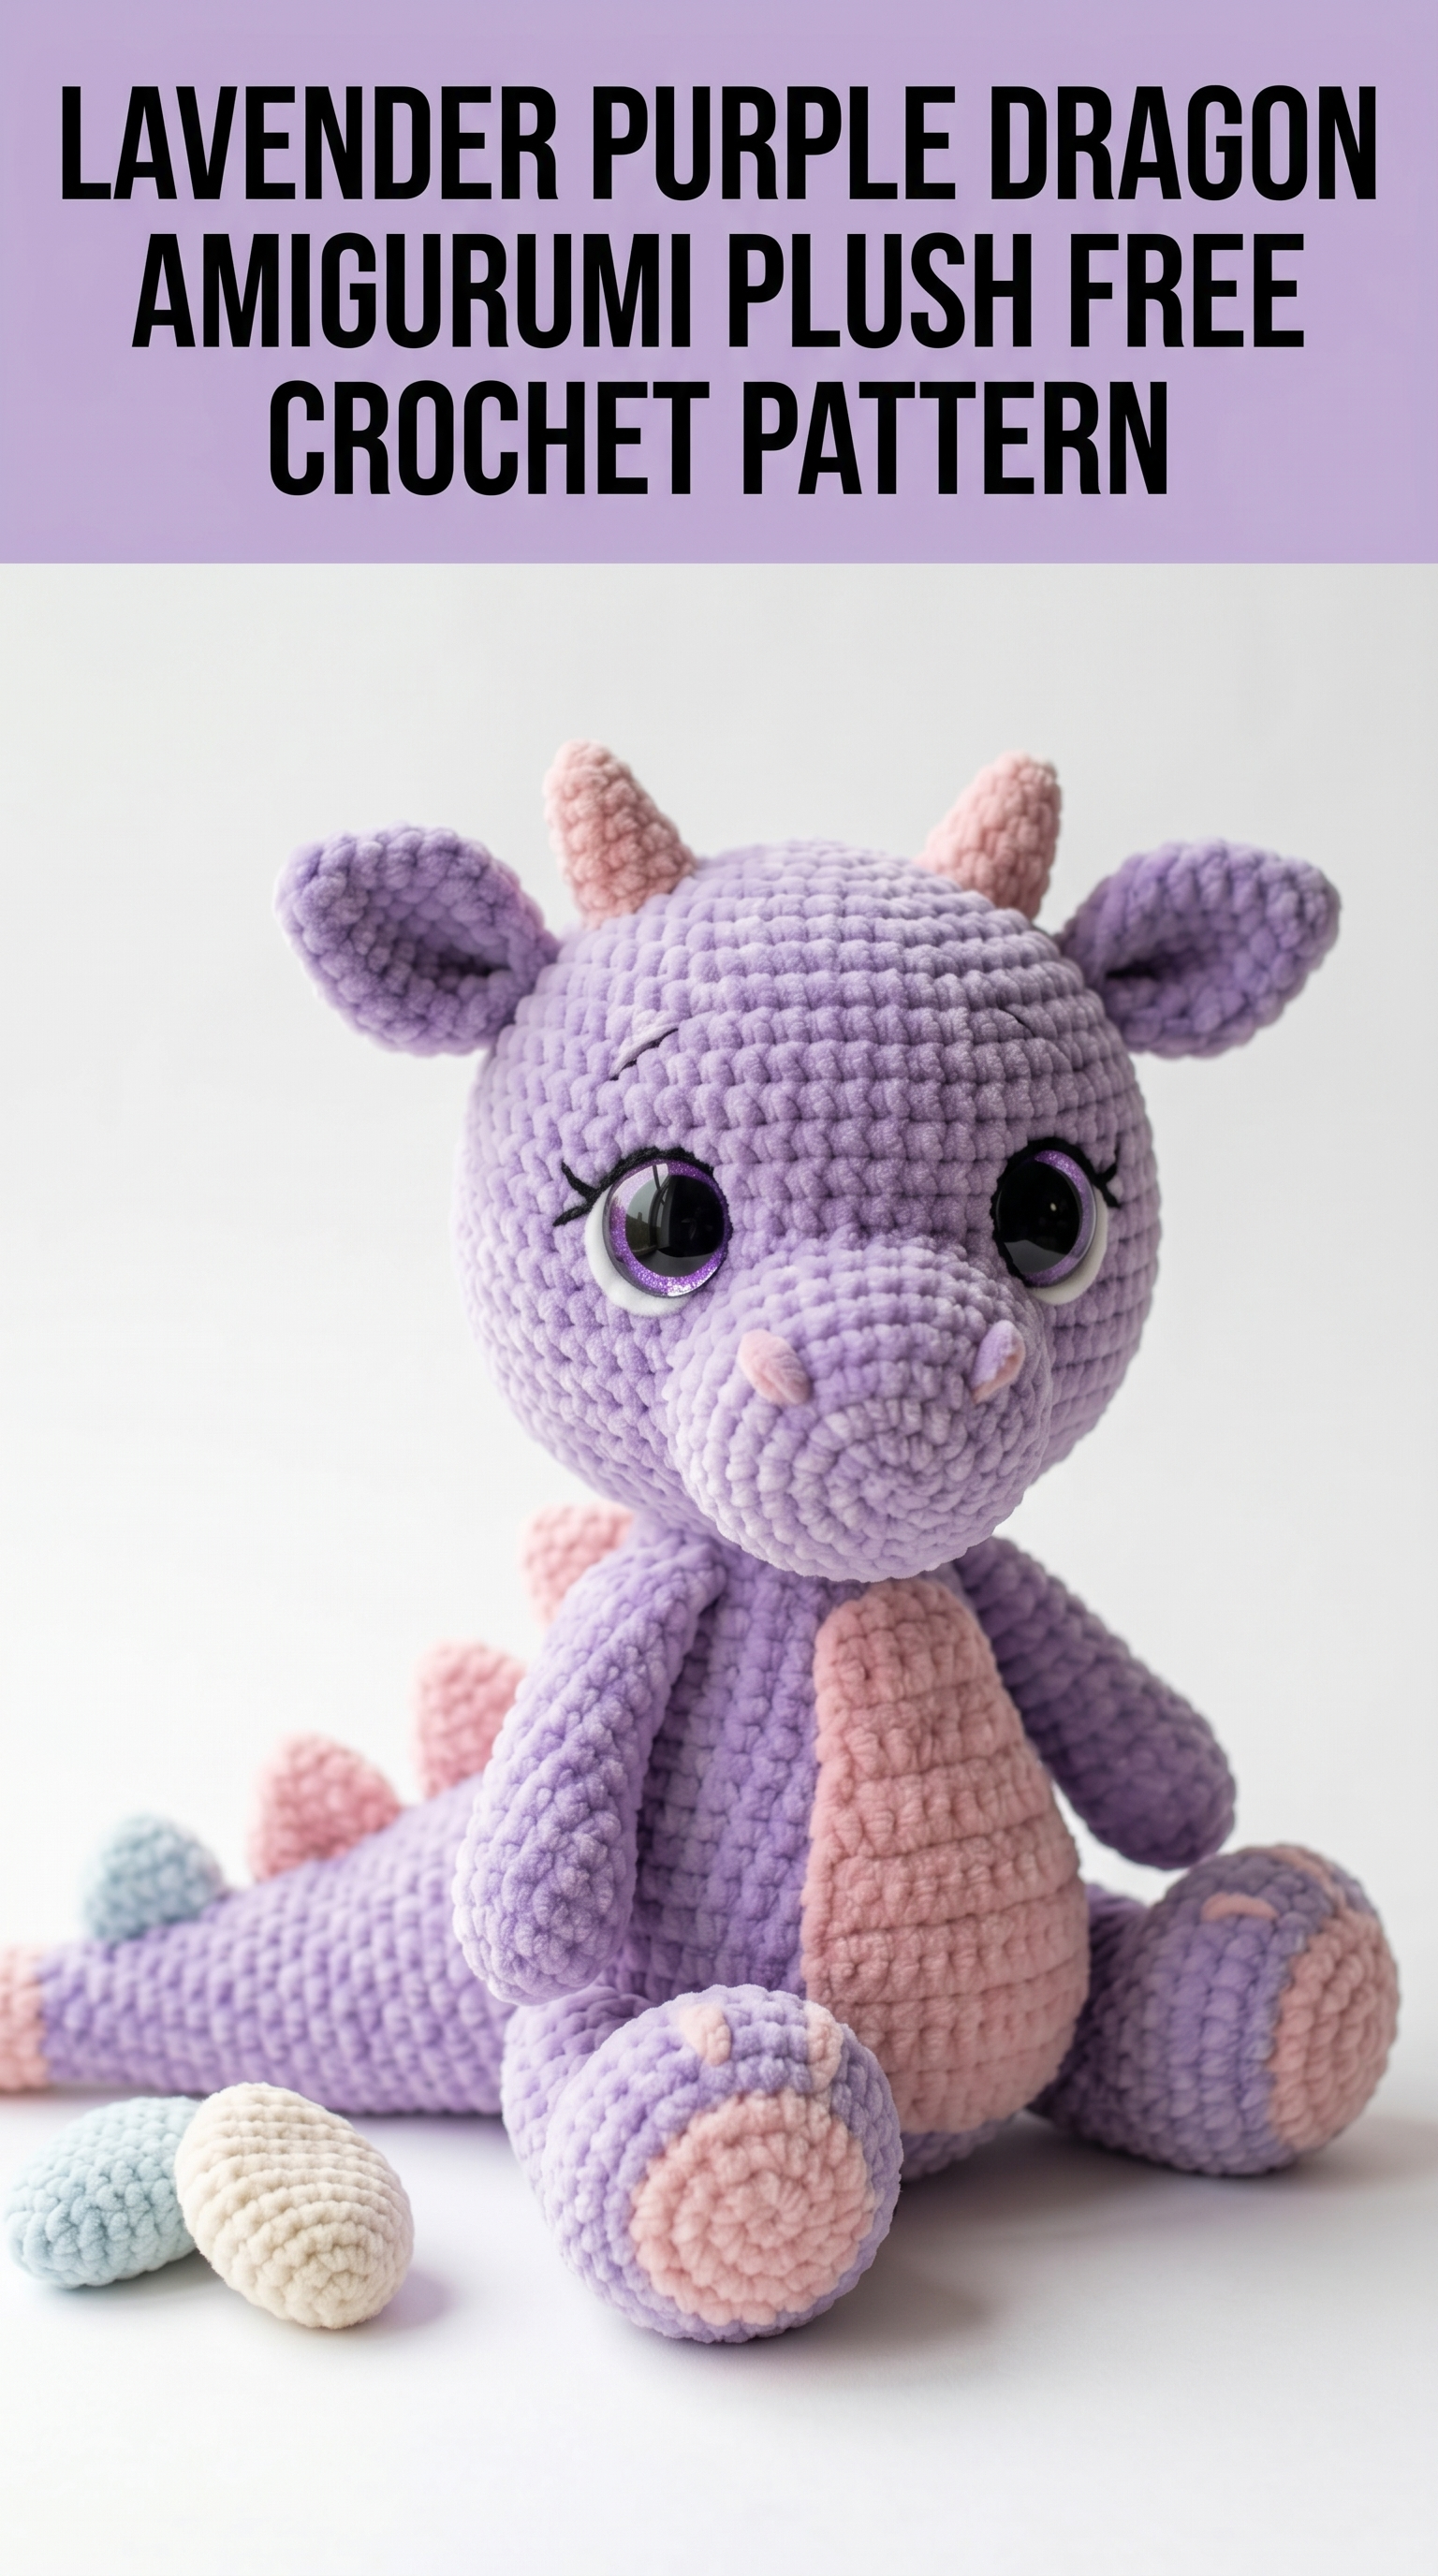
Oh, this sweet little dragon is about to become your new favorite project. I designed this lavender purple dragon amigurumi plush after falling in love with the idea of a cuddly, not-scary mythical creature that would make anyone smile. Standing approximately 10 inches tall when complete, this dragon features soft pastel colors, adorable floppy ears, tiny horns, spine ridges, and the sweetest face with sparkly safety eyes.
If you have made a few amigurumi before, you can absolutely handle this crochet pattern. And if this is your first amigurumi adventure? Stick with me. I will walk you through every single step.
Why You Will Love This Dragon Amigurumi Crochet Pattern
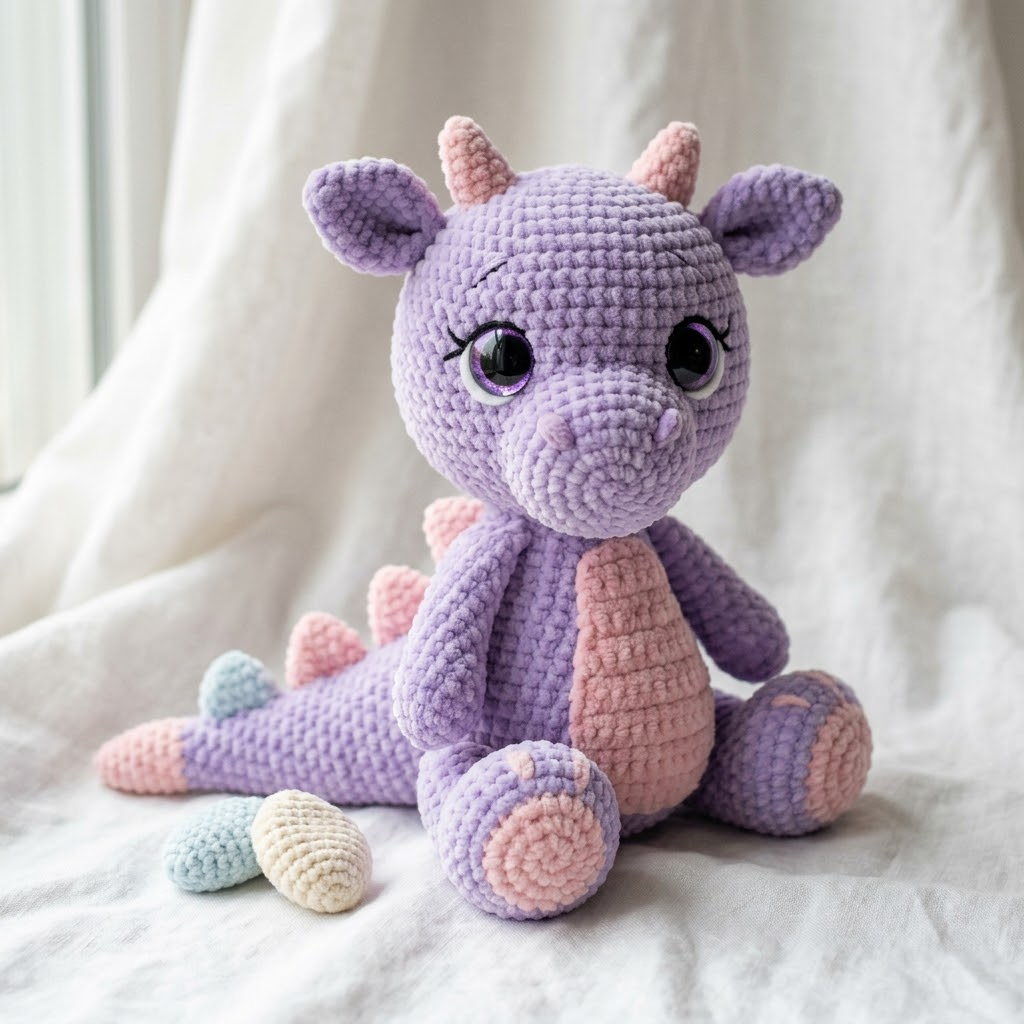
This dragon plush has everything. The chunky chenille yarn creates that beautifully textured, squishy look you see in the photo. The construction uses basic amigurumi techniques worked in continuous rounds, so once you understand the rhythm, you will find it almost meditative.
The pastel color palette makes this dragon feel modern and nursery-ready. Lavender purple dominates the body, while dusty pink appears on the belly patch, horns, ear tips, spine ridges, and foot pads. You will also use small amounts of pastel blue and cream for the little eggs sitting beside the dragon.
Let me be honest with you. This is an intermediate-level project. Not because any single technique is hard, but because there are multiple pieces to assemble. Take your time. Work one piece per sitting if that feels better. The result is absolutely worth it.
Materials You Will Need
Yarn:
Hook:
Notions:
Stitch Abbreviations and Definitions
Let me define every stitch before we begin. Bookmark this section.
Gauge Note
With chenille yarn and a 4.0mm hook, you should get approximately 4 sc = 1 inch. The exact gauge matters less than achieving tight stitches. You do not want stuffing peeking through. If your stitches look loose, go down a hook size.
Step by Step Crochet Pattern Instructions
Head
Work in continuous rounds. Use a stitch marker to track your first stitch of each round.
Rnd 1: With MC, make a magic ring, 6 sc into ring. (6 sts)
Rnd 2: Inc in each st around. (12 sts)
Rnd 3: *Sc 1, inc* repeat around. (18 sts)
Rnd 4: *Sc 2, inc* repeat around. (24 sts)
Rnd 5: *Sc 3, inc* repeat around. (30 sts)
Rnd 6: *Sc 4, inc* repeat around. (36 sts)
Rnd 7: *Sc 5, inc* repeat around. (42 sts)
Rnd 8: *Sc 6, inc* repeat around. (48 sts)
Rnds 9 to 16: Sc in each st around. (48 sts) — 8 rounds even
Rnd 17: *Sc 6, invdec* repeat around. (42 sts)
Rnd 18: *Sc 5, invdec* repeat around. (36 sts)
Insert safety eyes between rounds 12 and 13, approximately 8 stitches apart. The placement shown creates that sweet, slightly wide-eyed look.
Rnd 19: *Sc 4, invdec* repeat around. (30 sts)
Rnd 20: *Sc 3, invdec* repeat around. (24 sts)
Begin stuffing firmly.
Rnd 21: *Sc 2, invdec* repeat around. (18 sts)
Rnd 22: *Sc 1, invdec* repeat around. (12 sts)
Finish stuffing.
Rnd 23: Invdec around. (6 sts)
Fasten off and close the hole with your yarn needle.
Muzzle
Rnd 1: With MC, make a magic ring, 6 sc into ring. (6 sts)
Rnd 2: Inc in each st around. (12 sts)
Rnd 3: *Sc 1, inc* repeat around. (18 sts)
Rnd 4: *Sc 2, inc* repeat around. (24 sts)
Rnds 5 to 7: Sc in each st around. (24 sts) — 3 rounds even
Sl st to finish. Leave a long tail for sewing. Stuff lightly before attaching to the front of the head, centered below the eyes.
Body
Rnd 1: With MC, make a magic ring, 6 sc into ring. (6 sts)
Rnd 2: Inc in each st around. (12 sts)
Rnd 3: *Sc 1, inc* repeat around. (18 sts)
Rnd 4: *Sc 2, inc* repeat around. (24 sts)
Rnd 5: *Sc 3, inc* repeat around. (30 sts)
Rnd 6: *Sc 4, inc* repeat around. (36 sts)
Rnds 7 to 14: Sc in each st around. (36 sts) — 8 rounds even
Rnd 15: *Sc 4, invdec* repeat around. (30 sts)
Rnds 16 to 18: Sc in each st around. (30 sts)
Rnd 19: *Sc 3, invdec* repeat around. (24 sts)
Rnds 20 to 22: Sc in each st around. (24 sts)
Sl st to finish. Leave a long tail. Stuff firmly.
Belly Patch
Rnd 1: With CC1, make a magic ring, 6 sc into ring. (6 sts)
Rnd 2: Inc in each st around. (12 sts)
Rnd 3: *Sc 1, inc* repeat around. (18 sts)
Rnd 4: *Sc 2, inc* repeat around. (24 sts)
Rnd 5: *Sc 3, inc* repeat around. (30 sts)
Sl st to finish. Leave a long tail. This flat oval gets sewn onto the front of the body before attaching the head.
Arms (Make 2)
Rnd 1: With MC, make a magic ring, 6 sc into ring. (6 sts)
Rnd 2: Inc in each st around. (12 sts)
Rnds 3 to 5: Sc in each st around. (12 sts)
Rnd 6: *Sc 1, invdec* repeat around. (8 sts)
Rnds 7 to 12: Sc in each st around. (8 sts)
Sl st to finish. Stuff the hand portion lightly. Leave the arm portion mostly unstuffed for a floppy look. Leave a long tail for sewing.
Legs (Make 2)
Rnd 1: With CC1, make a magic ring, 6 sc into ring. (6 sts)
Rnd 2: Inc in each st around. (12 sts)
Rnd 3: *Sc 1, inc* repeat around. (18 sts)
Rnds 4 to 6: Sc in each st around. (18 sts)
Rnd 7: Change to MC. Sc in BLO around. (18 sts)
Rnds 8 to 10: Sc in each st around. (18 sts)
Rnd 11: *Sc 1, invdec* repeat around. (12 sts)
Rnds 12 to 16: Sc in each st around. (12 sts)
Sl st to finish. Stuff the foot firmly, upper leg lightly. Leave a long tail.
Ears (Make 2)
Rnd 1: With MC, make a magic ring, 4 sc into ring. (4 sts)
Rnd 2: *Sc 1, inc* repeat around. (6 sts)
Rnd 3: *Sc 2, inc* repeat around. (8 sts)
Rnd 4: *Sc 3, inc* repeat around. (10 sts)
Rnds 5 to 6: Sc in each st around. (10 sts)
Sl st to finish. Do not stuff. Pinch flat at the base and leave a tail for sewing.
Horns (Make 2)
Rnd 1: With CC1, make a magic ring, 4 sc into ring. (4 sts)
Rnd 2: *Sc 1, inc* repeat around. (6 sts)
Rnd 3: *Sc 2, inc* repeat around. (8 sts)
Rnds 4 to 5: Sc in each st around. (8 sts)
Sl st to finish. Stuff lightly. Leave a tail.
Spine Ridges (Make 5)
Rnd 1: With CC1, make a magic ring, 4 sc into ring. (4 sts)
Rnd 2: Inc in each st around. (8 sts)
Rnds 3 to 4: Sc in each st around. (8 sts)
Sl st to finish. Flatten slightly. Leave tails for sewing in a row down the back of the head and body.
Tail
Rnd 1: With MC, make a magic ring, 4 sc into ring. (4 sts)
Rnd 2: Inc in each st around. (8 sts)
Rnd 3: *Sc 1, inc* repeat around. (12 sts)
Rnds 4 to 10: Sc in each st around. (12 sts)
Sl st to finish. Stuff lightly. Attach two remaining spine ridges along the top of the tail before sewing to the body.
Small Eggs (Optional, Make 2 to 3)
Rnd 1: With CC2 or CC3, make a magic ring, 6 sc into ring. (6 sts)
Rnd 2: Inc in each st around. (12 sts)
Rnds 3 to 5: Sc in each st around. (12 sts)
Rnd 6: *Sc 1, invdec* repeat around. (8 sts)
Stuff.
Rnd 7: Invdec around. (4 sts)
Close and fasten off.
Assembly Instructions
1. Attach the muzzle to the lower front of the head, centered below the eyes.
2. Sew the belly patch onto the front center of the body.
3. Attach the head to the top of the body, angling it slightly forward.
4. Sew the arms to either side of the body, just below the head seam.
5. Attach the legs to the bottom sides of the body so the dragon sits upright.
6. Sew the ears to the top sides of the head, pinched at the base for dimension.
7. Attach the horns between and slightly behind the ears.
8. Sew spine ridges in a row down the center back of the head and continuing down the body.
9. Attach the tail to the back bottom of the body.
Use pink embroidery floss to add small eyelashes above the safety eyes and a tiny nose detail on the muzzle. These finishing touches bring so much personality.
Tips for Success with This Crochet Tutorial
Tension matters. Chenille yarn loves to split. Work slowly and aim for consistent, tight stitches.
Count every round. Losing track with amigurumi leads to wonky shapes. Your stitch marker is your best friend.
Shape as you stuff. Manipulate the stuffing to create a smooth, firm finish without lumps.
Take breaks. Chenille can be tiring on the hands. Step away and stretch.
Thank You for Being Here
I really hope you enjoy making this lavender purple dragon amigurumi as much as I loved designing it. There is something magical about watching a pile of yarn transform into a huggable creature with personality.
When you finish yours, I would absolutely love to see it. Tag me on Instagram or share your photo in my Facebook group. Seeing your creations genuinely makes my whole week.
Happy crocheting, friend. You have got this.
