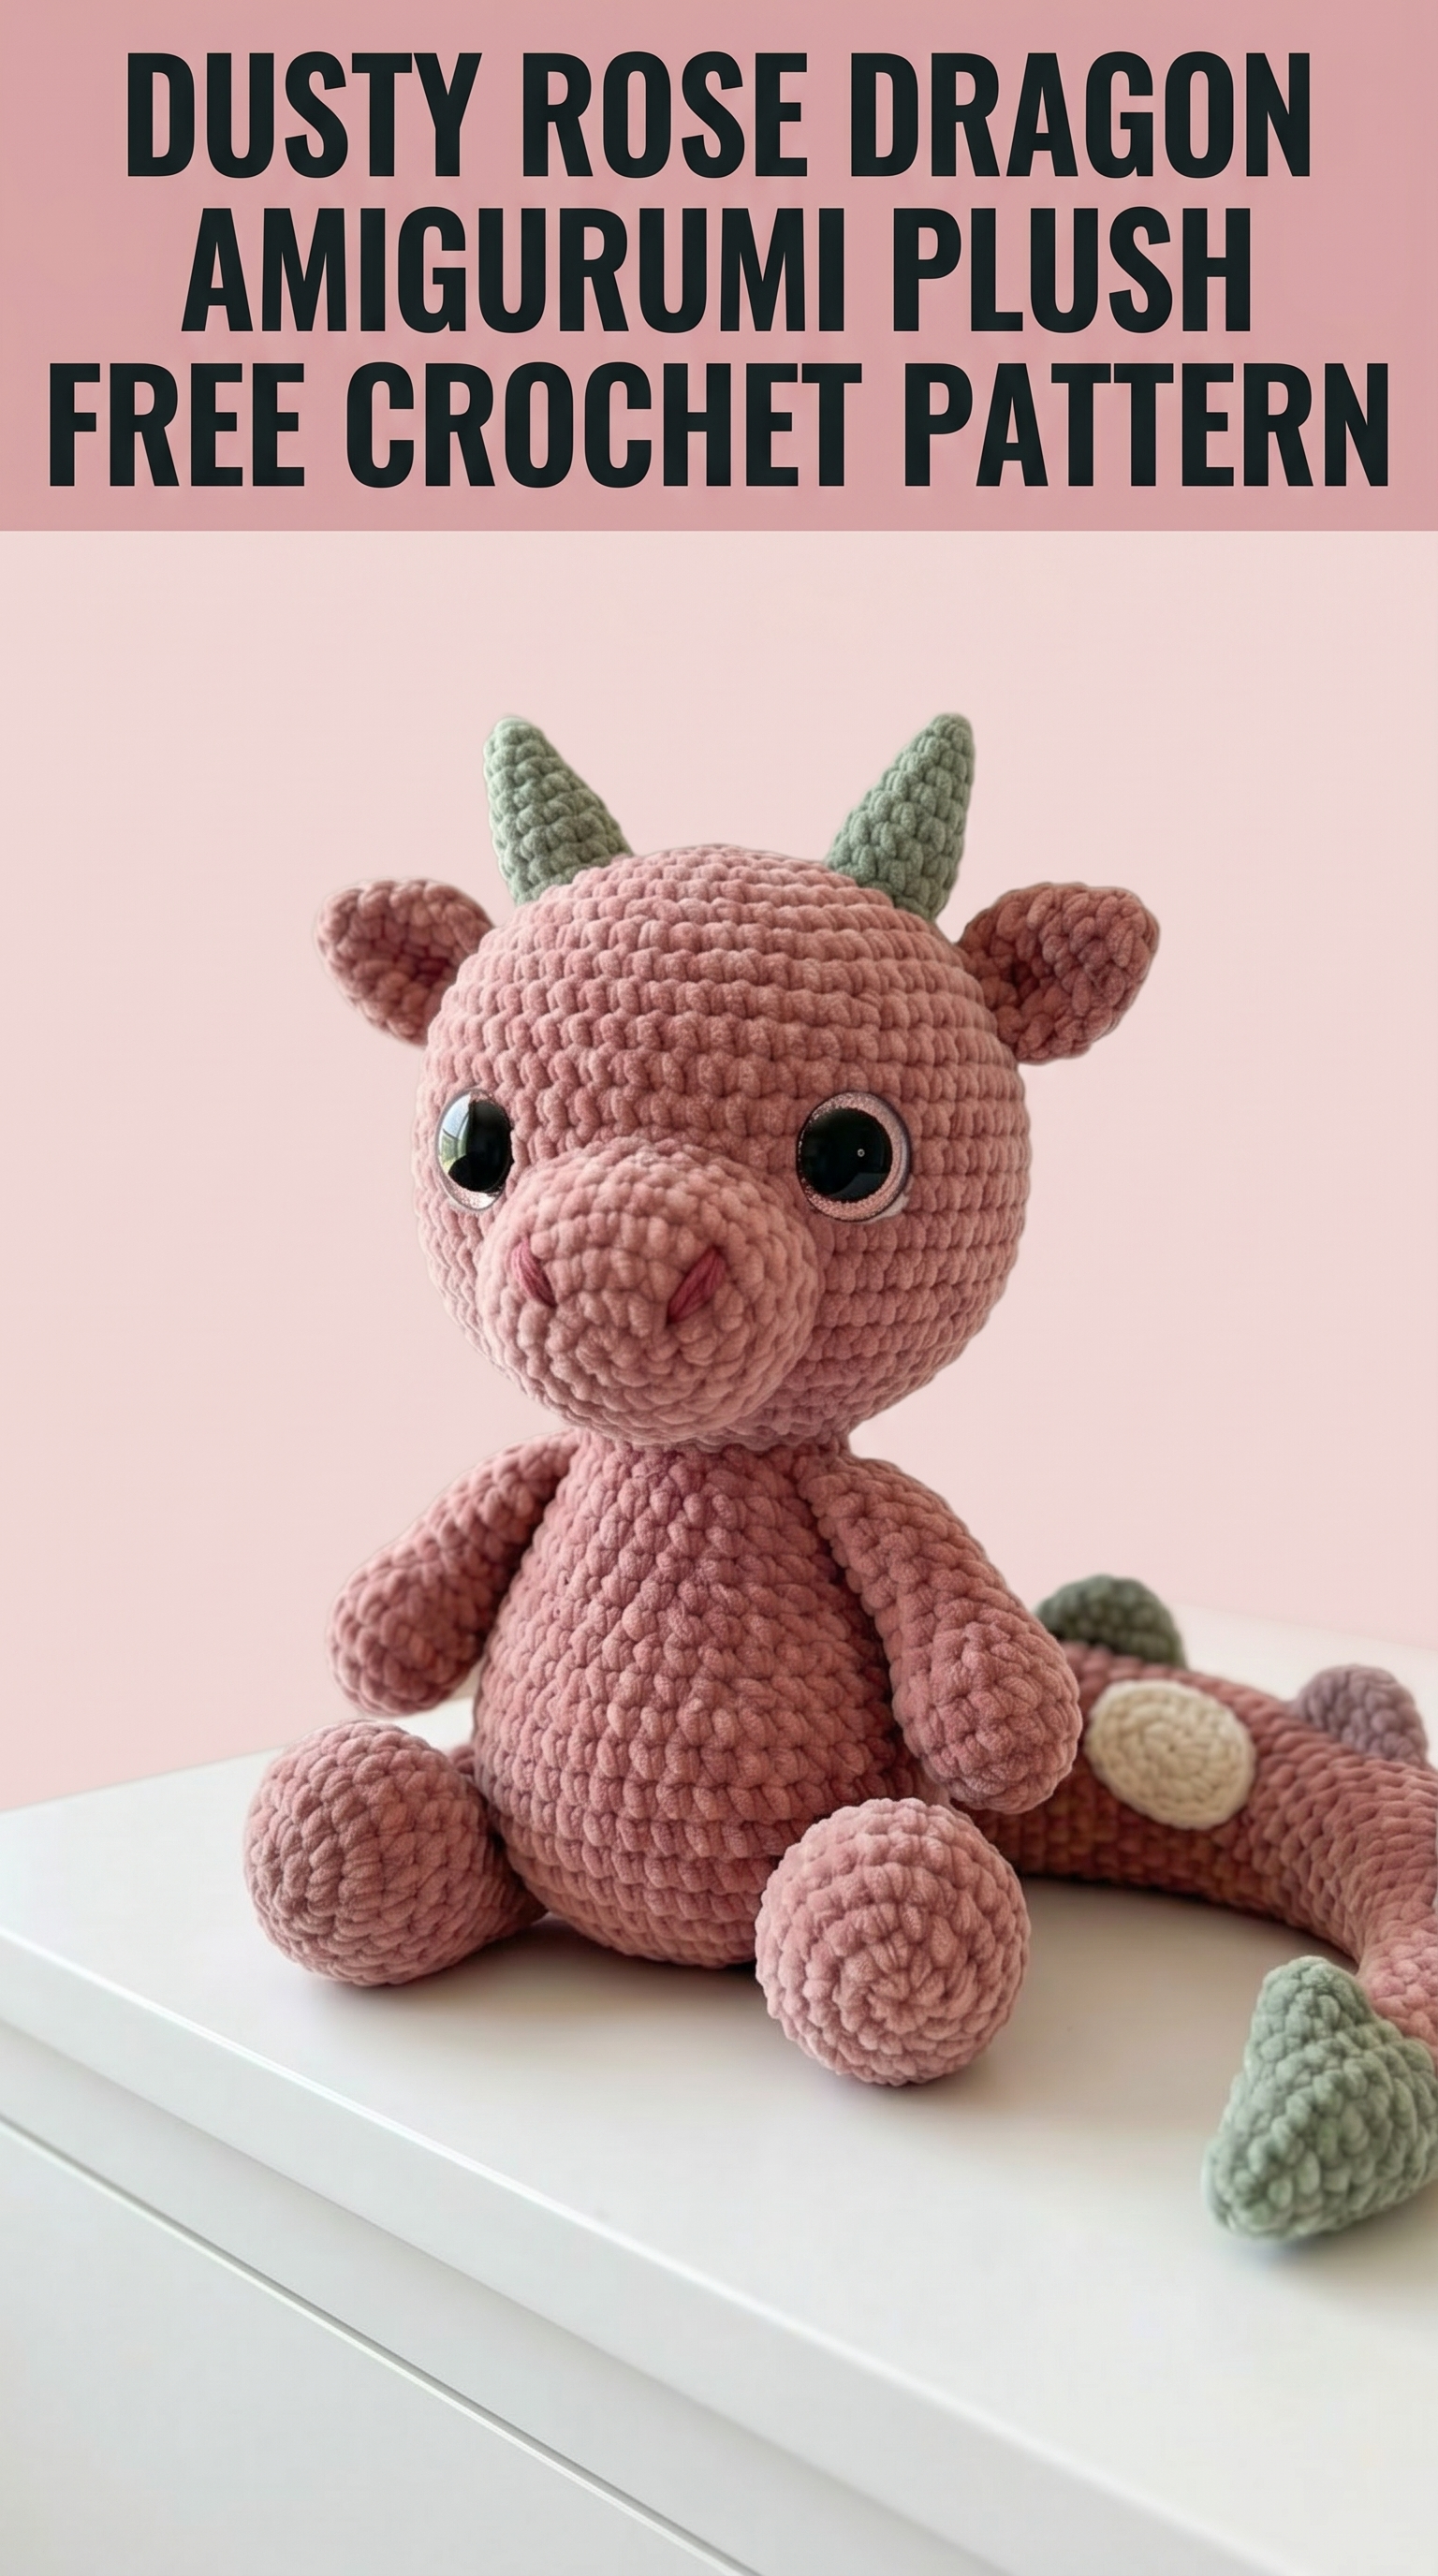
Oh, this little dragon is about to become your new favorite project. This dusty rose dragon amigurumi plush crochet pattern creates the most huggable, squishy creature with the sweetest face and the cutest curled tail you have ever seen. Standing about 10 inches tall when seated, this plush dragon works up surprisingly quickly using chunky chenille yarn and basic amigurumi techniques.
If you have made a few amigurumi projects before, you can absolutely tackle this one. And if you are newer to stuffed crochet toys, I will walk you through every single step. The construction is straightforward. You will make each piece separately, stuff them, then sew everything together at the end. No complicated colorwork. No confusing shaping. Just simple increases, decreases, and lots of single crochet stitches worked in continuous rounds.
Let me show you exactly how to bring this sweet dragon to life.
Why This Dragon Amigurumi Pattern Works So Well
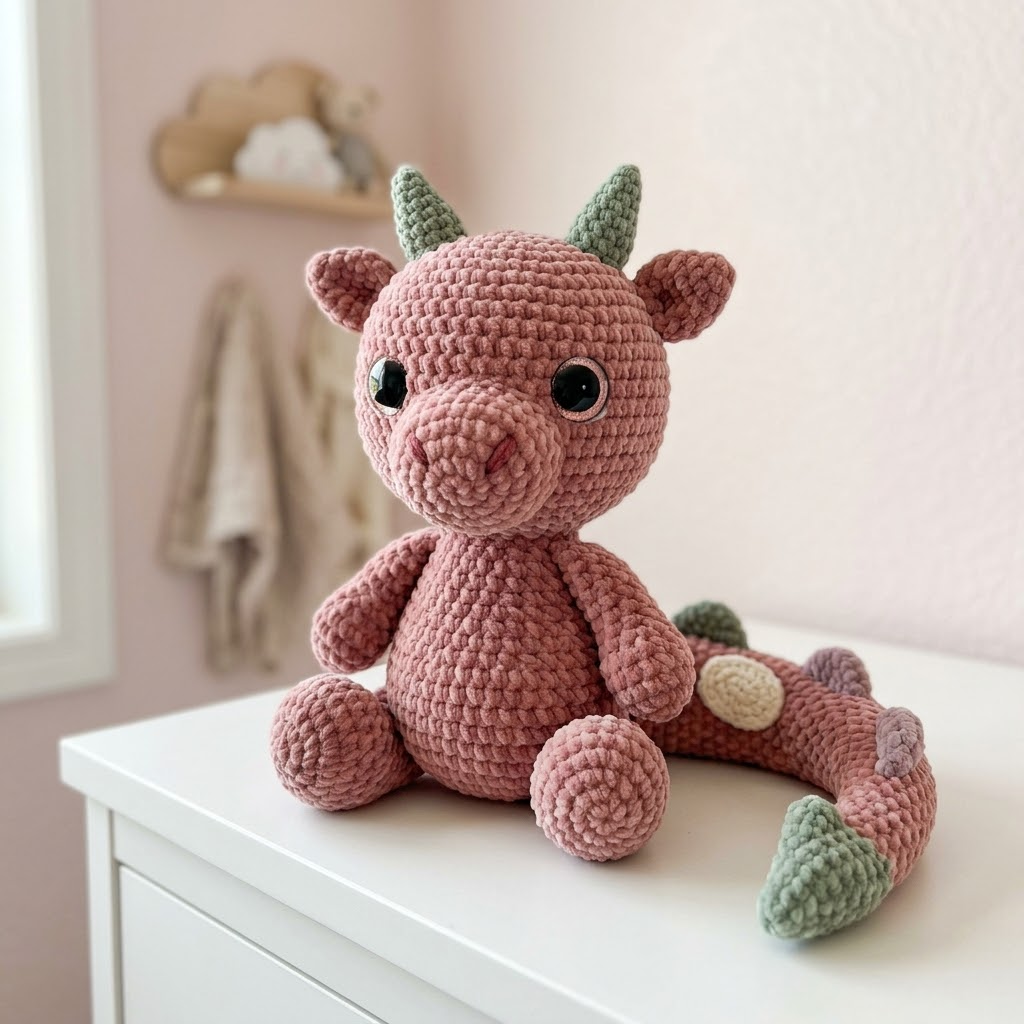
This design uses velvet or chenille yarn, which gives the finished plush that irresistibly soft, squishy texture. The dusty rose color feels modern and nursery-ready without being too babyish. Those sage green horns and tail spikes add just enough contrast to make the dragon pop.
The proportions are perfect for cuddling. A nice round head, a chunky body, stubby little arms and legs, and that signature curled dragon tail with decorative spikes running down its length. The ears fold slightly forward, giving personality. And those big safety eyes with the subtle sparkle bring the whole face to life.
This crochet tutorial will give you everything you need to recreate this exact dragon from scratch.
Materials You Will Need
Before you start, gather these supplies:
Yarn:
I recommend Himalaya Dolphin Baby or YarnArt Dolce for that perfect velvety texture. Both are size 5 bulky weight chenille yarns that create beautifully defined stitches in amigurumi.
Hook:
Notions:
Skill Level and Techniques
This pattern is intermediate beginner friendly. You should be comfortable with:
If you have made a simple amigurumi ball or basic stuffed animal before, you have all the skills you need.
Abbreviations
Let me define every abbreviation before we begin:
Gauge Note
With chenille yarn and a 4.0mm hook, your stitches should be tight enough that stuffing does not show through. Work a small swatch if needed. This is more important than hitting an exact measurement. If you see white fiberfill peeking through, go down a hook size.
Step by Step Crochet Pattern Instructions
Head (Make 1 in Dusty Rose)
Work in continuous rounds. Use a stitch marker to track the beginning of each round.
Rnd 1: Make a MR, 6 sc into ring. (6 sts)
Rnd 2: Inc in each st around. (12 sts)
Rnd 3: *Sc 1, inc* repeat around. (18 sts)
Rnd 4: *Sc 2, inc* repeat around. (24 sts)
Rnd 5: *Sc 3, inc* repeat around. (30 sts)
Rnd 6: *Sc 4, inc* repeat around. (36 sts)
Rnd 7: *Sc 5, inc* repeat around. (42 sts)
Rnd 8: *Sc 6, inc* repeat around. (48 sts)
Rnds 9-16: Sc in each st around. (48 sts) — 8 rounds even
Rnd 17: *Sc 6, invdec* repeat around. (42 sts)
Rnd 18: *Sc 5, invdec* repeat around. (36 sts)
Insert safety eyes between rounds 12 and 13, approximately 8-9 stitches apart. Take your time with placement. Pin them first and look at the face from multiple angles before securing the backs.
Rnd 19: *Sc 4, invdec* repeat around. (30 sts)
Rnd 20: *Sc 3, invdec* repeat around. (24 sts)
Begin stuffing firmly. Add more as you continue decreasing.
Rnd 21: *Sc 2, invdec* repeat around. (18 sts)
Rnd 22: *Sc 1, invdec* repeat around. (12 sts)
Rnd 23: Invdec around. (6 sts)
FO, leaving a long tail. Weave through remaining stitches and pull tight to close.
Snout (Make 1 in Dusty Rose)
Rnd 1: MR, 6 sc. (6 sts)
Rnd 2: Inc in each st. (12 sts)
Rnd 3: *Sc 1, inc* repeat around. (18 sts)
Rnds 4-6: Sc around. (18 sts) — 3 rounds even
FO, leaving a long tail for sewing. Stuff lightly before attaching to face.
Ears (Make 2 in Dusty Rose)
Rnd 1: MR, 6 sc. (6 sts)
Rnd 2: *Sc 1, inc* repeat around. (9 sts)
Rnd 3: *Sc 2, inc* repeat around. (12 sts)
Rnds 4-5: Sc around. (12 sts)
FO, leaving tail for sewing. Do not stuff. Flatten slightly and pinch base when attaching.
Horns (Make 2 in Sage Green)
Rnd 1: MR, 4 sc. (4 sts)
Rnd 2: *Sc 1, inc* repeat around. (6 sts)
Rnd 3: Sc around. (6 sts)
Rnd 4: *Sc 2, inc* repeat around. (8 sts)
Rnd 5: Sc around. (8 sts)
Rnd 6: *Sc 3, inc* repeat around. (10 sts)
Rnds 7-8: Sc around. (10 sts)
FO. Stuff lightly with small bits of fiberfill, focusing on the tip.
Body (Make 1 in Dusty Rose)
Rnd 1: MR, 6 sc. (6 sts)
Rnd 2: Inc around. (12 sts)
Rnd 3: *Sc 1, inc* repeat. (18 sts)
Rnd 4: *Sc 2, inc* repeat. (24 sts)
Rnd 5: *Sc 3, inc* repeat. (30 sts)
Rnd 6: *Sc 4, inc* repeat. (36 sts)
Rnds 7-14: Sc around. (36 sts) — 8 rounds even
Rnd 15: *Sc 4, invdec* repeat. (30 sts)
Rnds 16-18: Sc around. (30 sts)
Rnd 19: *Sc 3, invdec* repeat. (24 sts)
Rnds 20-21: Sc around. (24 sts)
FO, leaving a very long tail. Stuff body firmly but leave the top slightly less full for easier head attachment.
Arms (Make 2 in Dusty Rose)
Rnd 1: MR, 6 sc. (6 sts)
Rnd 2: Inc around. (12 sts)
Rnds 3-5: Sc around. (12 sts)
Rnd 6: *Sc 1, invdec* repeat. (8 sts)
Rnds 7-12: Sc around. (8 sts)
FO. Stuff the hand area lightly. Leave the arm portion mostly unstuffed for a floppy look.
Legs (Make 2 in Dusty Rose)
Rnd 1: MR, 6 sc. (6 sts)
Rnd 2: Inc around. (12 sts)
Rnd 3: *Sc 1, inc* repeat. (18 sts)
Rnds 4-6: Sc around. (18 sts)
Rnd 7: *Sc 1, invdec* repeat. (12 sts)
Rnds 8-12: Sc around. (12 sts)
FO. Stuff foot firmly. Stuff leg lightly.
Tail (Make 1 — Starts in Sage Green, Changes to Dusty Rose)
Rnd 1: In sage green, MR, 4 sc. (4 sts)
Rnd 2: Inc around. (8 sts)
Rnds 3-4: Sc around. (8 sts)
Change to dusty rose.
Rnd 5: *Sc 3, inc* repeat. (10 sts)
Rnds 6-8: Sc around. (10 sts)
Rnd 9: *Sc 4, inc* repeat. (12 sts)
Rnds 10-14: Sc around. (12 sts)
Rnd 15: *Sc 5, inc* repeat. (14 sts)
Rnds 16-20: Sc around. (14 sts)
FO. Stuff lightly throughout, keeping tail flexible enough to curl.
Tail Spikes (Make 3-4 in Assorted Colors)
Use sage green, cream, and mauve for variety.
Rnd 1: MR, 4 sc. (4 sts)
Rnd 2: *Sc 1, inc* repeat. (6 sts)
Rnd 3: Sc around. (6 sts)
FO. Leave tail for sewing. Do not stuff.
Assembly Instructions
Take your time with assembly. This is where your dragon gets its personality.
1. Attach snout to head. Position centered on the face, just below the eyes. Pin first. The snout should sit forward, giving dimension. Use a whip stitch all around.
2. Embroider mouth. Using pink embroidery floss, create a small curved line beneath the snout for the mouth. A simple V shape or gentle curve works beautifully.
3. Sew ears to head. Position on either side of the head, angled slightly outward and forward. Flatten the base before stitching.
4. Attach horns. Place between and slightly behind the ears. The horns should point upward and slightly backward.
5. Sew head to body. Add extra stuffing to the neck area if needed. Use pins to find the perfect angle before committing. Whip stitch securely all around.
6. Attach arms. Position on either side of the body, about one round below the head seam. Leave arms slightly loose so they dangle.
7. Attach legs. Position at the bottom front of the body so the dragon can sit upright. The feet should point forward.
8. Sew tail to back. Attach at the lower back, centered. Curve the tail around to one side naturally.
9. Add tail spikes. Space evenly along the outer curve of the tail. Alternate colors for visual interest.
Finishing Tips for This Amigurumi Pattern
How to Customize Your Dragon
This pattern is incredibly versatile. Try different color combinations. A mint green body with pink accents would be adorable. Or go classic with a deep purple dragon and gold horns. You could also add small wings by creating two flat oval shapes and sewing them to the back.
For a smaller dragon, use worsted weight cotton yarn and a 3.5mm hook. Your finished piece will be roughly 6 inches instead of 10.
You Did It
I really hope you enjoy making this dusty rose dragon amigurumi plush crochet pattern as much as I enjoyed designing it. There is something so satisfying about watching all those separate pieces come together into a cuddly little creature.
Thank you for trusting me with your crafting time. That means a lot.
When you finish your dragon, I would absolutely love to see it. Tag me on Instagram or share your photo in our Facebook group. Seeing your creations honestly makes my whole day.
Happy crocheting, friend. You have got this.
