Hey, yarn lovers! Time to dig into that stash and pull out that chunky cotton rope yarn you’ve been saving for something special. This adorable kitty face tote bag is exactly the project it’s been waiting for. The construction is surprisingly straightforward, working in continuous rounds from the bottom up with single crochet stitches throughout. I’d call this an intermediate project since you’ll need to shape the ears and attach hardware, but don’t let that scare you off. If you can single crochet in a spiral and aren’t afraid of a little sewing, you’ve absolutely got this.
Why You’ll Love This Crochet Cat Tote Bag Pattern
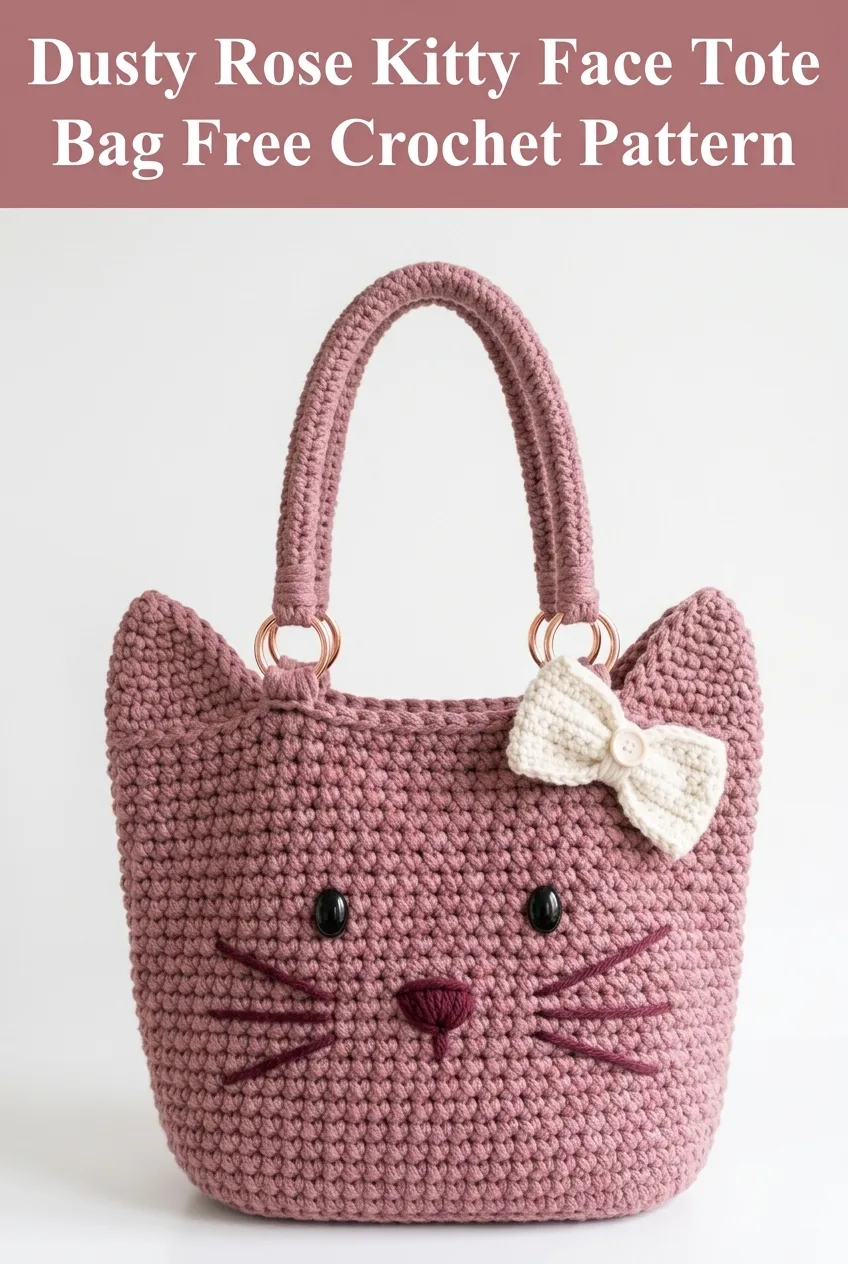
This dusty rose kitty tote is equal parts functional and whimsical. It’s roomy enough to hold your current project, a water bottle, your phone, and whatever else life throws at you. But honestly? The cat face is what makes people stop and ask where you got it.
The sturdy single crochet fabric creates a bag that holds its shape beautifully. No floppy sides here. The rose gold ring hardware adds a polished touch that elevates the whole design. And that little cream bow by the ear? Chef’s kiss.
Whether you’re making this for yourself, your cat-obsessed best friend, or the kiddo who needs a special library bag, this crochet tutorial will walk you through every stitch.
Skill Level
Intermediate
You should be comfortable with:
If you’re a confident beginner ready to level up, this is a great stretch project. I’ll explain everything step by step.
Finished Dimensions
Materials Needed
Yarn
Cotton rope yarn or recycled t-shirt yarn works best for this project. The density creates that structured look you see in the photos. I recommend Hoooked Zpagetti, Lily Sugar’n Cream Cotton, or similar thick cotton yarn.
Tools
Optional
Abbreviations and Stitch Definitions
Let me break down every stitch term you’ll see in this pattern:
ch = chain: Wrap yarn over hook, pull through loop on hook. This creates your foundation.
sl st = slip stitch: Insert hook, yarn over, pull through stitch AND loop on hook in one motion. Used for joining.
sc = single crochet: Insert hook into stitch, yarn over and pull up a loop (two loops on hook), yarn over and pull through both loops.
inc = increase: Work 2 single crochet stitches into the same stitch. This adds one stitch to your count.
dec = decrease (invisible decrease): Insert hook through front loops only of next 2 stitches, yarn over and pull through both front loops, yarn over and pull through both loops on hook. This removes one stitch.
BLO = back loop only: Instead of inserting your hook under both loops of the stitch, go under only the back loop (the one farthest from you).
st(s) = stitch(es)
Gauge
10 sc x 10 rows = 4 inches (10 cm) in single crochet with 8mm hook and bulky cotton yarn.
Gauge matters for this project! Your bag needs to be sturdy enough to hold its shape. If your stitches are too loose, go down a hook size. Too tight? Go up.
Pattern Notes Before You Begin
This bag is worked in continuous rounds. That means you won’t join at the end of each round. You’ll just keep spiraling upward. Use a stitch marker to track where each round begins, moving it up as you go.
The ears are shaped using short rows at the top of the bag. Don’t worry, I’ll walk you through it.
Work tightly. A dense fabric is key to this bag’s structure. If you tend to crochet loosely, consider going down half a hook size.
Crochet Pattern Instructions
Base of the Bag
The base is an oval shape worked in continuous rounds.
Foundation: With dusty rose yarn and 8mm hook, ch 15.
Round 1: Starting in 2nd ch from hook, sc in each of next 13 ch, 3 sc in last ch (this is your turn). Working along the opposite side of the foundation chain, sc in each of next 12 ch, 2 sc in last ch. Place marker. (30 sts)
Round 2: Inc in first st, sc in next 12 sts, inc in next 3 sts, sc in next 12 sts, inc in next 2 sts. (36 sts)
Round 3: Sc in first st, inc in next st, sc in next 12 sts, (sc 1, inc) 3 times, sc in next 12 sts, (sc 1, inc) 2 times. (42 sts)
Round 4: Sc in next 2 sts, inc in next st, sc in next 12 sts, (sc 2, inc) 3 times, sc in next 12 sts, (sc 2, inc) 2 times. (48 sts)
Round 5: Sc in next 3 sts, inc in next st, sc in next 12 sts, (sc 3, inc) 3 times, sc in next 12 sts, (sc 3, inc) 2 times. (54 sts)
Your base should measure approximately 4 inches by 7 inches. If it’s significantly different, check your gauge.
Body of the Bag
Now we’ll build the walls by working in the back loop only for one round, then continuing normally.
Round 6: Working in BLO only, sc in each st around. (54 sts)
This creates a nice defined edge where the base meets the walls.
Rounds 7-30: Sc in each st around. (54 sts)
That’s 24 rounds of straight single crochet. The body should measure approximately 9 inches tall at this point. Perfect for mindless crocheting while watching your favorite show!
Shaping the Ears
Here’s where it gets fun. We’ll create the cat ears using short rows on each side of the bag.
Setting Up: Sc 7 sts, place marker A. Sc 13 sts, place marker B. Sc 14 sts (you’re now at the back of the bag). Sc 13 sts, place marker C. Sc 7 sts to return to start.
The markers divide your bag into: front left ear section, front center, back section, back center, front right ear section.
First Ear (Right Side)
Row 1: Sc in next 7 sts, turn. (7 sts)
Row 2: Ch 1, skip first st, sc in next 5 sts, skip last st, turn. (5 sts)
Row 3: Ch 1, skip first st, sc in next 3 sts, skip last st, turn. (3 sts)
Row 4: Ch 1, skip first st, sc in next st, skip last st. (1 st)
Fasten off, leaving a tail to weave in.
Second Ear (Left Side)
Rejoin yarn at marker C on the opposite side.
Row 1: Sc in next 7 sts, turn. (7 sts)
Rows 2-4: Repeat as for first ear.
Fasten off.
Finishing the Top Edge
Rejoin yarn at the back center of the bag. Single crochet evenly around the entire top opening, including up and down the sides of each ear, creating a smooth finished edge. Work approximately 3 sc along each ear edge. Sl st to first sc, fasten off.
Handle (Make 2)
Foundation: Ch 6, sl st to first ch to form a ring.
Round 1: Sc 6 into ring. (6 sts)
Rounds 2-45: Sc in each st around. (6 sts)
The handle should measure approximately 18 inches long. Adjust length to your preference by adding or removing rounds.
Sl st to next st, fasten off, leaving a long tail for attaching.
Bow (Optional)
Using cream yarn and 5mm hook:
Center piece:
Ch 6.
Row 1: Sc in 2nd ch from hook and each ch across, turn. (5 sts)
Rows 2-6: Ch 1, sc in each st across, turn. (5 sts)
Fasten off, leaving a long tail.
Bow loops:
Ch 20.
Row 1: Sc in 2nd ch from hook and each ch across, turn. (19 sts)
Rows 2-4: Ch 1, sc in each st across, turn. (19 sts)
Fasten off, leaving a long tail.
Assembly: Fold the longer piece into a bow shape with loops on each side. Wrap the center piece around the middle and secure with a few stitches at the back.
Assembly and Finishing
Attaching the Eyes
Position the safety eyes approximately 3 inches down from the top edge and about 3.5 inches apart. The exact placement is up to you, so I recommend pinning buttons in place first to find the look you like best.
If using safety eyes, push them through the fabric and secure the backs firmly. If using buttons, sew them on with matching thread or yarn.
Embroidering the Face
Nose: Using dark rose yarn and tapestry needle, embroider a small triangle nose centered between and below the eyes. Use satin stitch, working 5-6 horizontal stitches that decrease in length from top to bottom.
Whiskers: Using the same dark rose yarn, embroider 3 whiskers on each side of the nose. Each whisker is a single long stitch, approximately 2 inches long, angling outward. Space them about half an inch apart vertically.
Mouth (optional): Add a small vertical line from the bottom of the nose down about half an inch, then two small diagonal lines forming a "W" shape.
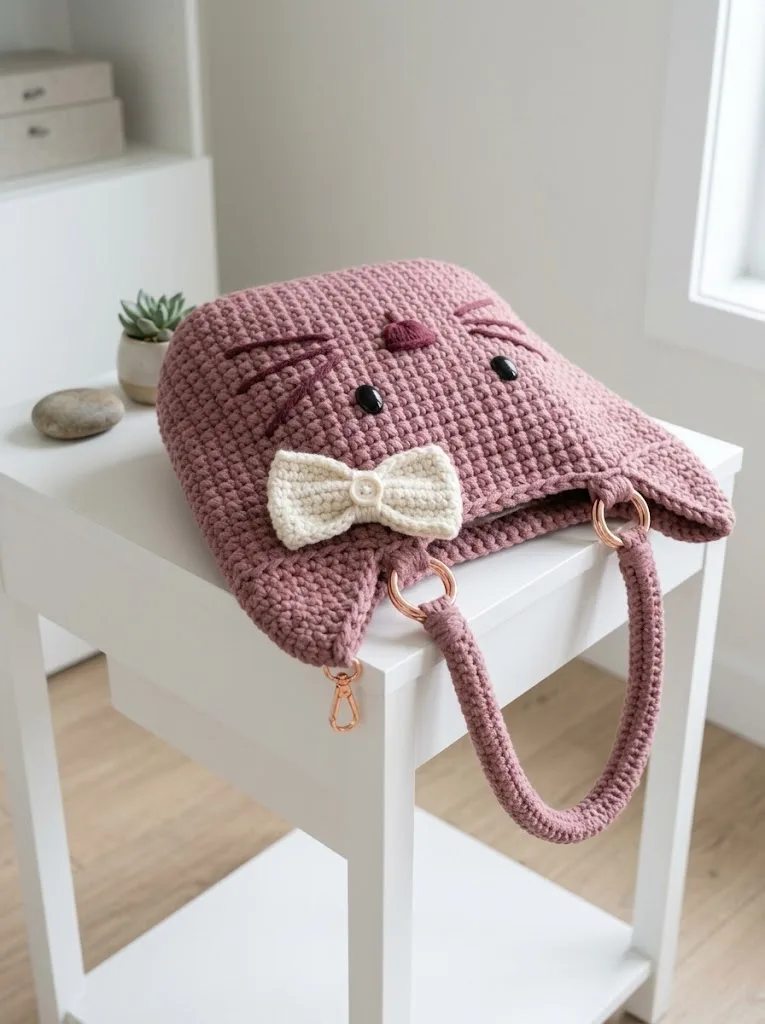
Attaching the O-Rings and Handles
Step 1: Position one O-ring at the base of each ear, where the ear meets the body of the bag.
Step 2: Using a length of dusty rose yarn, whip stitch around the O-ring to secure it to the bag. Make sure it’s attached firmly since it’ll bear the weight of whatever you carry.
Step 3: Thread one handle through each O-ring. Fold the end of the handle back on itself by about 1 inch and whip stitch it closed, securing it around the ring.
Step 4: Repeat on the other side, making sure both handles are even.
Attaching the Bow
Position the bow near one ear, slightly below and to the side. Use cream yarn to stitch it securely in place, hiding your stitches at the back of the bow.
Weaving in Ends
Take your time here. Weave each tail through at least 2 inches of stitches, then double back. This bag will see some use, and you don’t want ends popping out later.
Customization Ideas
Change the colors: Black yarn with gold hardware gives you a sophisticated Halloween vibe. Gray with silver rings looks modern and chic. Orange with black details? Hello, October!
Add a lining: Cut two pieces of cotton fabric to match your bag shape plus seam allowance. Sew them together, press the top edge under, and hand stitch the lining inside the bag. This adds durability and hides your carried items.
Magnetic snap: Install a magnetic snap at the top center before lining for easy closure.
Skip the face: Want something more subtle? Leave off the eyes, nose, and whiskers for a sleek cat ear silhouette bag.
Troubleshooting Common Issues
Ears are floppy: Your tension might be too loose. Try blocking the ears with fabric stiffener, or insert a small piece of plastic canvas inside each ear for structure.
Bag won’t stand up: This usually means looser gauge. For future projects, go down a hook size. For this project, adding a fabric lining with interfacing will help.
Handles stretching: Cotton rope can relax over time. If you’re concerned, crochet the handles around a cotton cord core for extra stability.
Care Instructions
Hand wash in cool water with mild detergent. Reshape while damp and lay flat to dry. Avoid machine washing, which can stretch the handles and distort the shape.
I really hope you love making this dusty rose kitty face tote bag as much as I loved designing it. The combination of practical and adorable is pretty hard to beat, and every cat lover deserves a bag that makes them smile.
If this pattern made your day a little brighter, I’d love for you to save it to your Pinterest boards so you can find it whenever you’re ready to start. And please, if you make one, drop a comment below or tag me on social media. Seeing your finished projects is genuinely the best part of sharing patterns. Happy crocheting, friend!
