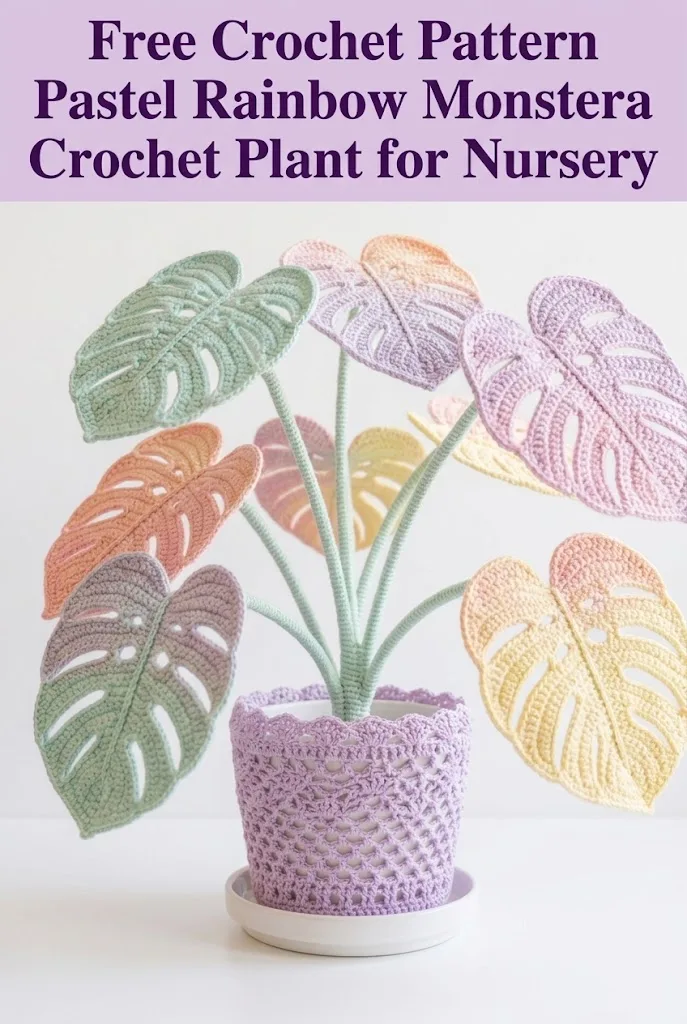
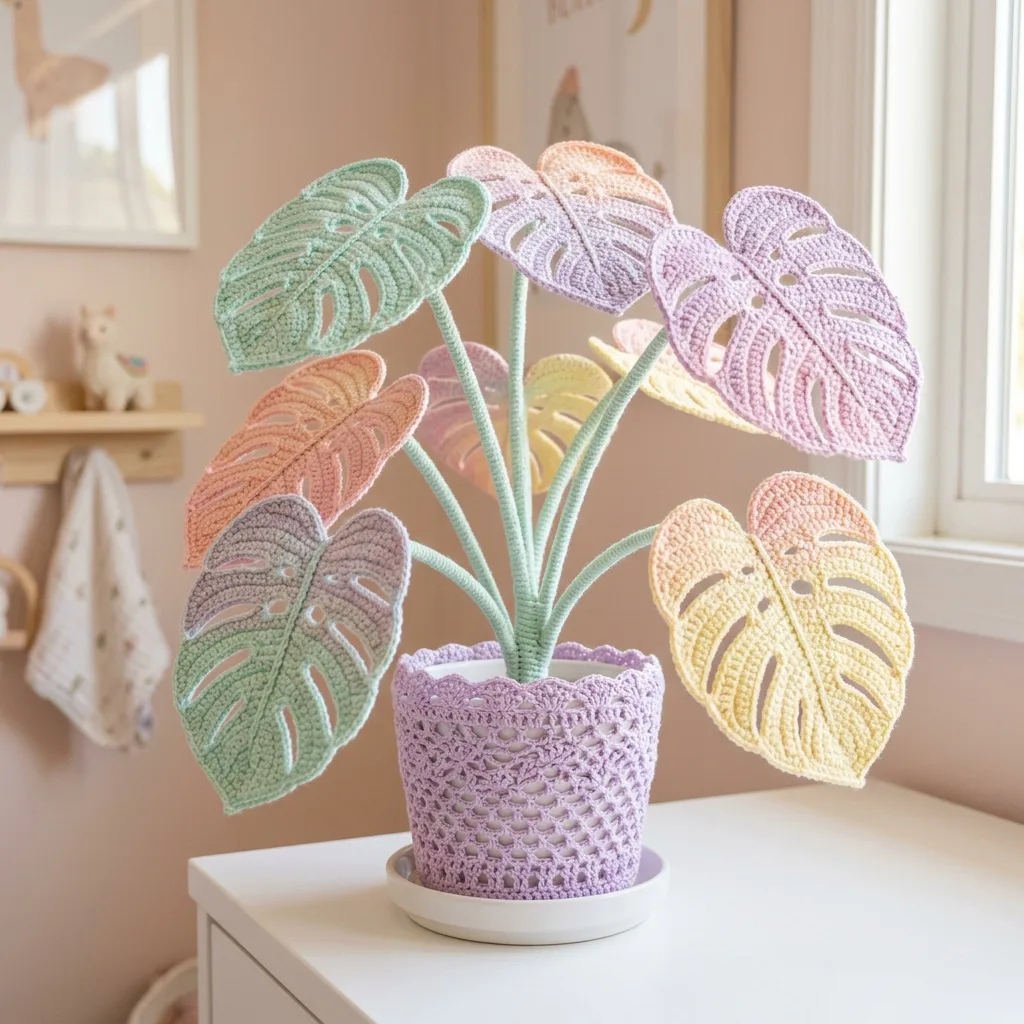
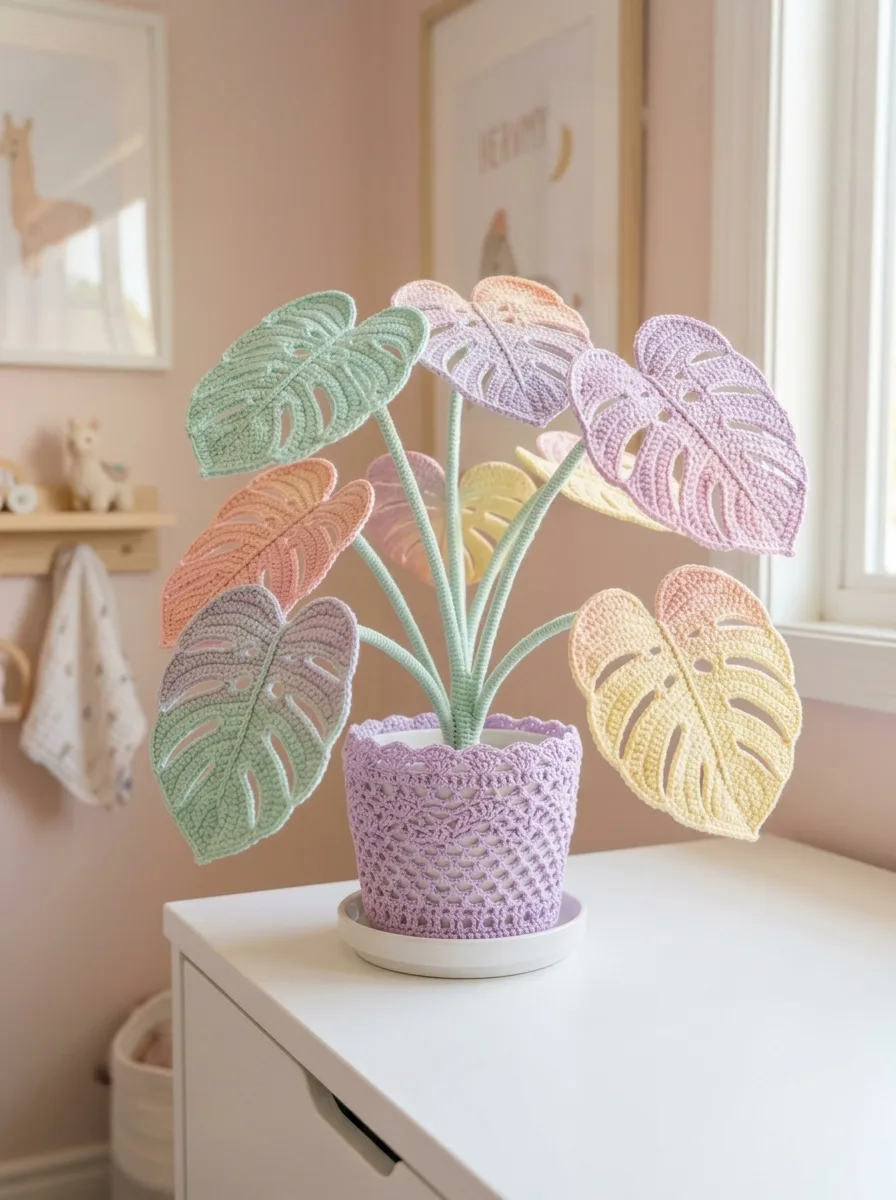
If you have ever scrolled past a crocheted houseplant and thought "that looks way too complicated for me," I need you to stop right there. This pastel rainbow monstera crochet plant looks like an advanced project, but I promise it breaks down into manageable pieces that even a confident beginner can handle. Each leaf is worked flat using basic stitches you probably already know. The fenestrations (those iconic split holes in monstera leaves) are created with simple chain spaces, not fancy cutwork. And that gorgeous pot cover? It is just a tube with a scalloped edge. So take a breath, trust yourself, and let me walk you through every single step.
Why This Crochet Monstera Plant Pattern Is Perfect for Nursery Decor
This pastel rainbow monstera makes an ideal nursery decoration for so many reasons. It brings the calming beauty of plants into a baby’s room without any of the safety concerns that come with real foliage. No soil for curious toddlers to dig into. No leaves that could be harmful if chewed. No watering schedule to forget during those sleep-deprived newborn weeks.
The soft pastel color palette of mint green, peachy coral, butter yellow, and lavender feels modern and gender-neutral. You can customize the colors to match any nursery theme, or stick with this rainbow combination for a playful pop of color.
Best of all, this crochet plant will never die. It looks just as fresh and perky on day one thousand as it does on day one.
Materials You Will Need
Before you start this crochet tutorial, gather these supplies:
Yarn:
Hook:
Notions:
Stitch Abbreviations and Definitions
Let me define every stitch before we begin. Even if you know these already, a quick refresher never hurts.
Ch = Chain: Yarn over, pull through the loop on your hook. This creates a foundation row or adds height.
Sl st = Slip stitch: Insert hook, yarn over, pull through both the stitch and the loop on your hook in one motion. Used for joining or moving across stitches invisibly.
Sc = Single crochet: Insert hook into stitch, yarn over and pull up a loop (2 loops on hook), yarn over and pull through both loops. Your shortest basic stitch.
Hdc = Half double crochet: Yarn over, insert hook into stitch, yarn over and pull up a loop (3 loops on hook), yarn over and pull through all 3 loops. Slightly taller than single crochet.
Dc = Double crochet: Yarn over, insert hook into stitch, yarn over and pull up a loop (3 loops on hook), yarn over and pull through 2 loops, yarn over and pull through remaining 2 loops. A tall stitch that works up quickly.
Inc = Increase: Work 2 stitches into the same stitch to add width.
Sk = Skip: Pass over the indicated stitch without working into it.
Skill Level
Intermediate beginner. If you can comfortably work single crochet, double crochet, and basic increases, you have all the skills you need. The shaping might look complex, but each step is clearly explained.
Gauge
Gauge is flexible for this decorative project. In single crochet with worsted weight cotton and a 4.0mm hook, you should get approximately 16 stitches and 18 rows per 4 inches. Your leaves may be slightly larger or smaller than mine, and that is perfectly fine.
Finished Measurements
How to Crochet the Monstera Leaves (Make 6 to 8)
Each monstera leaf is worked flat in rows, starting from the bottom center and working outward. The iconic split pattern is created with chain spaces. Make a mix of large and small leaves in different pastel colors.
Large Leaf Pattern
Row 1: Ch 4, sc in 2nd ch from hook, sc in next 2 ch. (3 sts)
Row 2: Ch 1, turn. Inc in first st, sc in next st, inc in last st. (5 sts)
Row 3: Ch 1, turn. Inc in first st, sc across to last st, inc in last st. (7 sts)
Rows 4 through 8: Repeat Row 3, increasing at each end. (17 sts after Row 8)
Row 9: Ch 1, turn. Sc in first 4 sts, ch 3, sk 2 sts (this creates your first fenestration), sc in next 5 sts, ch 3, sk 2 sts, sc in last 4 sts. (13 sc, 2 ch-3 spaces)
Row 10: Ch 1, turn. Sc in first 4 sts, 3 sc in ch-3 space, sc in next 5 sts, 3 sc in ch-3 space, sc in last 4 sts. (19 sts)
Rows 11 through 13: Ch 1, turn. Sc across all stitches, increasing 1 st at each end. (25 sts after Row 13)
Row 14: Ch 1, turn. Sc in first 5 sts, ch 4, sk 3 sts, sc in next 9 sts, ch 4, sk 3 sts, sc in last 5 sts. (19 sc, 2 ch-4 spaces)
Row 15: Ch 1, turn. Sc in first 5 sts, 4 sc in ch-4 space, sc in next 9 sts, 4 sc in ch-4 space, sc in last 5 sts. (27 sts)
Rows 16 through 18: Ch 1, turn. Sc across. (27 sts)
Begin Top Shaping:
Row 19: Ch 1, turn. Sc2tog (single crochet 2 together by inserting hook in first st, pull up loop, insert in next st, pull up loop, yarn over and pull through all 3 loops), sc to last 2 sts, sc2tog. (25 sts)
Rows 20 through 24: Continue decreasing at each end every row until you have 15 sts.
Row 25: Ch 1, turn. Sc2tog, sc in next 4 sts, ch 2, sk 1 st, sc in next 4 sts, sc2tog. (11 sc, 1 ch-2 space)
Rows 26 through 28: Continue decreasing at each end. (5 sts after Row 28)
Row 29: Ch 1, turn. Sc2tog, sc 1, sc2tog. (3 sts)
Row 30: Ch 1, turn. Sc3tog (decrease 3 into 1). Fasten off.
Leaf Edging
Join yarn at the bottom center of the leaf. Work 1 round of sc evenly around the entire leaf edge, placing 3 sc in each corner point to keep the shape smooth. Sl st to join. Fasten off and weave in ends.
Small Leaf Pattern
Work Rows 1 through 8 of the large leaf pattern. Skip the first set of fenestrations.
Row 9: Ch 1, turn. Sc across, increasing at each end. (19 sts)
Row 10: Ch 1, turn. Sc in first 4 sts, ch 3, sk 2 sts, sc in next 7 sts, ch 3, sk 2 sts, sc in last 4 sts.
Rows 11 through 14: Continue working even or with slight increases as desired.
Rows 15 through 20: Decrease at each end every row until 5 sts remain. Finish as for large leaf.
Add edging around small leaves as well.
How to Crochet the Stems (Make One Per Leaf)
The stems are simple tubes worked in continuous rounds. They slide over floral wire for structure.
With mint green yarn:
Round 1: Create a magic ring, work 6 sc into the ring. Pull tight. (6 sts)
Round 2 and ongoing: Sc in each st around without joining. Continue in a spiral for 30 to 50 rounds depending on desired stem length (6 to 10 inches).
Do not stuff the stems until you insert the wire. Sl st to close and fasten off, leaving a long tail for attaching to the leaf.
Creating the Central Vein
Each leaf needs a raised center vein. Using the same color as the leaf (or the mint green for contrast), surface slip stitch a line from the stem attachment point to the leaf tip. Simply hold yarn behind the leaf, insert hook from front to back, pull up a loop, and repeat in a straight line.
How to Crochet the Pot Cover
This lacy pot cover fits a standard 4 inch nursery pot. Adjust the starting chain for different sizes.
With lavender yarn:
Round 1: Ch 40, sl st to first ch to form a ring, being careful not to twist. (40 ch)
Round 2: Ch 3 (counts as dc), dc in each ch around, sl st to top of ch-3 to join. (40 dc)
Rounds 3 through 5: Ch 3, dc in each st around, sl st to join. (40 dc)
Round 6 (Lace Round): Ch 4 (counts as dc plus ch 1), sk 1 st, *dc in next st, ch 1, sk 1 st* around, sl st to 3rd ch of ch-4 to join. (20 dc, 20 ch-1 spaces)
Round 7: Ch 3, dc in ch-1 space, dc in dc, *dc in ch-1 space, dc in dc* around, sl st to join. (40 dc)
Rounds 8 through 12: Repeat Rounds 6 and 7, alternating lace rounds with solid rounds to create the textured pattern visible in the design.
Round 13 (Scallop Edging): *Sc in next st, sk 1 st, 5 dc in next st (shell made), sk 1 st* around, sl st to first sc. Fasten off.
Weave in all ends. Slip the cover over your pot, adjusting to fit snugly.
Assembly Instructions
Step 1: Prepare the Wire
Cut floral wire 2 inches longer than each crochet stem tube. Bend a small loop at one end to prevent poking through. Wrap the entire wire with green floral tape for a finished look and extra grip.
Step 2: Insert Wire into Stems
Slide each wire through its corresponding stem tube. The wire should extend about 1 inch beyond the bottom of the stem.
Step 3: Attach Leaves to Stems
Using the long yarn tail from your stem, whip stitch the top of the stem to the back bottom of each leaf. Stitch securely several times. The wire should sit along the back of the leaf’s center vein for support.
Step 4: Optional Light Stuffing
If your stems feel too floppy, add tiny wisps of fiberfill around the wire before closing.
Step 5: Prepare the Pot
Place floral foam or styrofoam inside your pot. The pot cover will hide this completely.
Step 6: Arrange the Plant
Push the wire ends of each stem into the foam, arranging leaves at varying heights and angles. Bend the wires gently to create natural, graceful curves. Place larger leaves toward the outside and smaller leaves in the center.
Step 7: Final Touches
Fluff the leaves, adjust the angles, and admire your work. This pastel rainbow monstera crochet plant is ready to brighten any nursery.
Helpful Tips for Success
Blocking: Lightly steam block each leaf before assembly to help them lay flat and show off the fenestrations.
Color Planning: Lay out your pastel yarns before starting and decide which colors you want for each leaf. Some crafters prefer an ombre gradient, while others love a random rainbow mix.
Wire Alternatives: If you cannot find floral wire, pipe cleaners work for smaller leaves, though they offer less support.
Pot Options: Any small container works. Try a painted terra cotta pot, a cute ceramic planter, or even a decorative mug.
More Ways to Use This Crochet Pattern
This step by step crochet tutorial creates a stunning standalone piece, but consider these variations:
Thank you so much for choosing this pattern and trusting me to guide you through the process. I truly hope your pastel rainbow monstera crochet plant brings joy to its new home. If you make one, I would absolutely love to see it. Tag me on Instagram or share a photo in my Facebook group.
If this pattern inspired you, go ahead and save it to your Pinterest boards so you can find it whenever you are ready to start. And please drop a comment below if you give it a try. I read every single one and your photos make my whole day.
