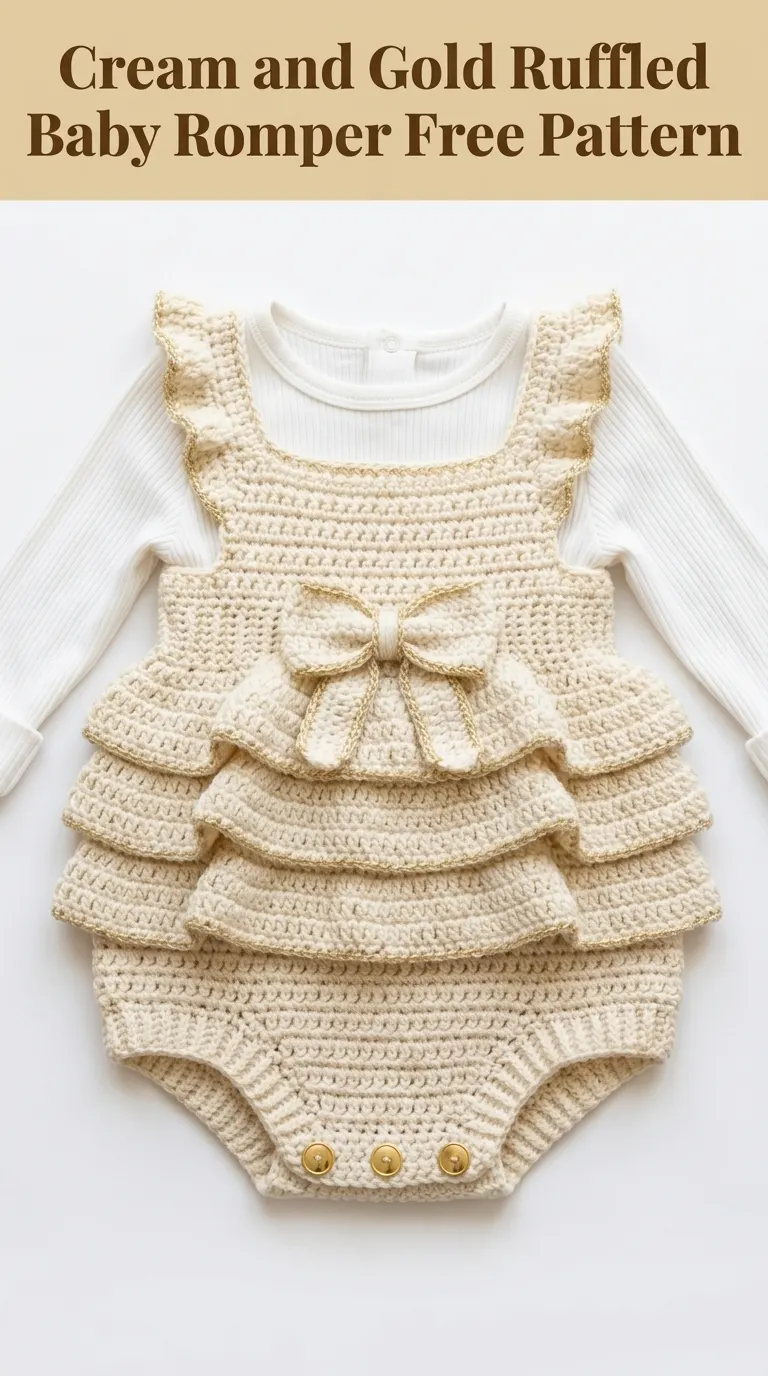
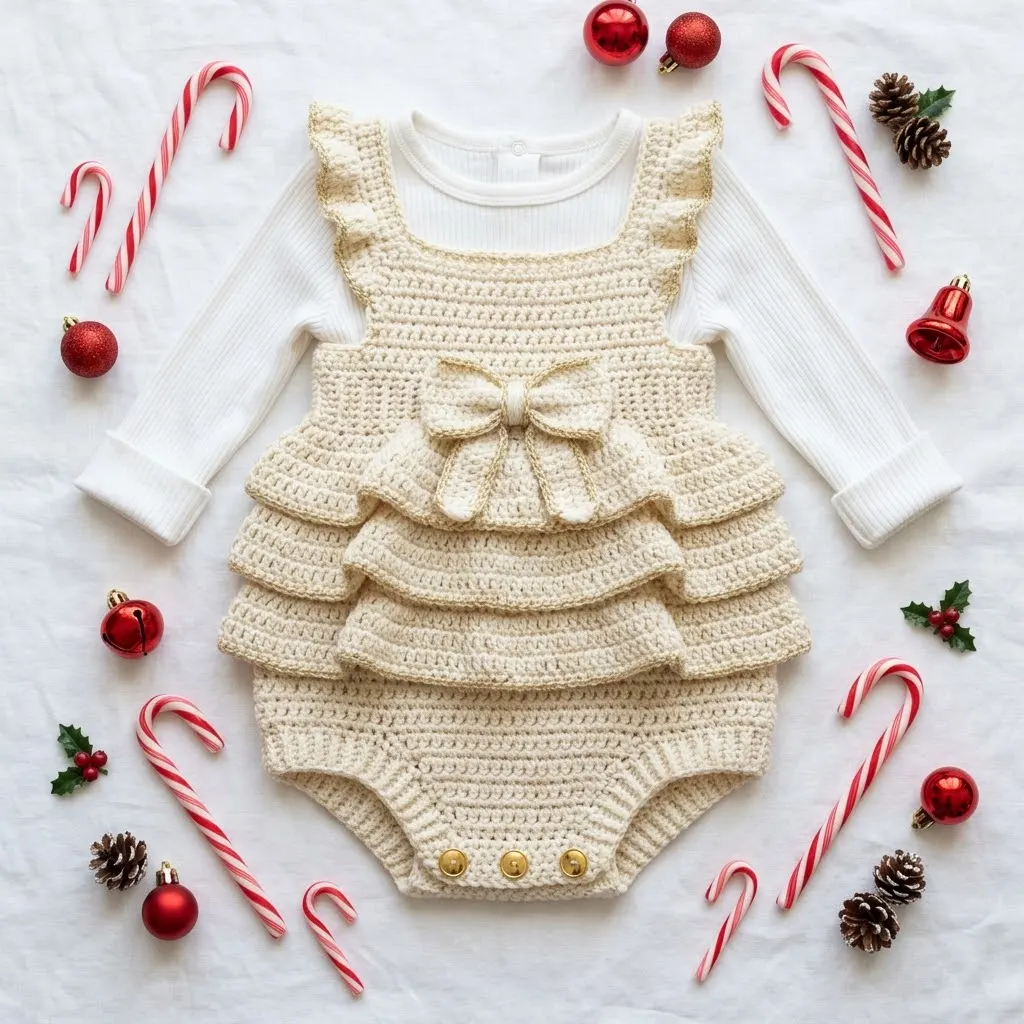
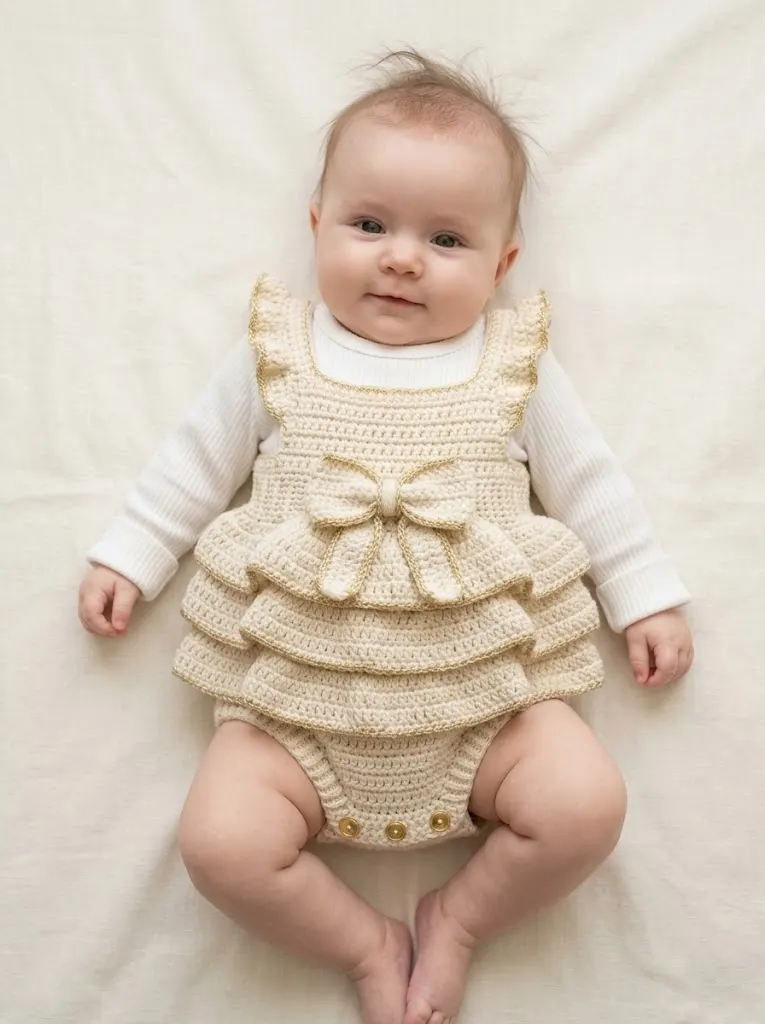
There is something absolutely magical about a handmade baby outfit that stops everyone in their tracks. This cream and gold ruffled baby romper is that project. With its tiered ruffles, sweet bow detail, and delicate shoulder straps, this crochet pattern creates a showstopper piece perfect for holiday photos, special occasions, or gifting to expecting parents. And I promise you, if you can work basic stitches in rows and rounds, you can absolutely make this.
I designed this crochet tutorial with intermediate beginners in mind. You will need to know how to work in joined rounds and increase evenly, but I will walk you through every single step. The construction is simpler than it looks. We build the body first, add the ruffles, create the straps and bow separately, then bring everything together. Take a breath. You have got this.
Why This Baby Romper Crochet Pattern Works So Beautifully
The magic of this design comes from the layered ruffles that cascade down the front. Each ruffle tier is worked directly onto the body, so there is no fussy sewing of multiple pieces. The subtle gold fleck in the cream yarn catches light without being overwhelming. Three small gold buttons at the crotch closure make diaper changes easy for parents.
This step by step crochet pattern fits approximately 0 to 6 months, with guidance for adjusting length for older babies.
Materials You Will Need
Yarn:
Hook:
Notions:
Gauge:
18 stitches and 20 rows = 4 inches in half double crochet
*Always check your gauge. A romper that is too tight will not fit over baby’s diaper.*
Stitch Abbreviations and Definitions
Let me define every stitch before we begin. Reference back here anytime you need a refresher.
Ch = Chain: Wrap yarn over hook, pull through loop on hook. This creates the foundation.
Sl st = Slip stitch: Insert hook into stitch, yarn over, pull through both the stitch and loop on hook in one motion. Used for joining rounds.
Sc = Single crochet: Insert hook into stitch, yarn over and pull up a loop (2 loops on hook), yarn over and pull through both loops.
Hdc = Half double crochet: Yarn over, insert hook into stitch, yarn over and pull up a loop (3 loops on hook), yarn over and pull through all 3 loops at once.
Dc = Double crochet: Yarn over, insert hook into stitch, yarn over and pull up a loop (3 loops on hook), yarn over and pull through 2 loops (2 loops remain), yarn over and pull through remaining 2 loops.
Inc = Increase: Work 2 stitches into the same stitch. For example, "hdc inc" means work 2 half double crochets in one stitch.
Dec = Decrease: Work 2 stitches together as one. I will specify the method when needed.
BLO = Back loop only: Instead of inserting your hook under both top loops of the stitch, insert under only the back loop (the one farthest from you).
FLO = Front loop only: Insert hook under only the front loop (closest to you).
The Pattern: Step by Step Instructions
Part 1: The Body (Bottom Section)
We start at the crotch and work upward. This creates the diaper cover portion.
Foundation: Ch 51.
Row 1: Hdc in 2nd ch from hook and in each ch across. Turn. (50 sts)
Rows 2 through 4: Ch 1, hdc in each st across. Turn. (50 sts)
*These first rows create the crotch panel where your buttons will go.*
Row 5: Ch 1, hdc in first 12 sts, hdc inc in next st, hdc in next 24 sts, hdc inc in next st, hdc in last 12 sts. Turn. (52 sts)
Rows 6 through 8: Ch 1, hdc in each st across. Turn. (52 sts)
Row 9: Ch 1, hdc in first 13 sts, hdc inc in next st, hdc in next 24 sts, hdc inc in next st, hdc in last 13 sts. Turn. (54 sts)
Rows 10 through 14: Ch 1, hdc in each st across. Turn. (54 sts)
Now we join to work in the round for the body tube.
Joining Round: Ch 1, hdc in each st across. Without turning, sl st to the first hdc of this row to join into a round. Place marker. (54 sts)
*This is where it becomes a tube. Make sure your work is not twisted before joining.*
Rounds 1 through 6: Ch 1, hdc in each st around, sl st to first hdc to join. (54 sts)
Part 2: Adding the Ruffle Tiers
Here is where the magic happens. We will create three tiered ruffles by working into the front loops only, leaving the back loops to continue our body fabric.
Ruffle Attachment Round: Ch 1, working in FLO only, dc in same st, dc in same st again (2 dc in first st), *2 dc in next st*, repeat around, sl st to first dc. (108 sts)
Ruffle Row 2: Ch 3 (counts as dc), dc in each st around, sl st to top of ch-3. (108 sts)
Ruffle Edging: Ch 1, sc in each st around, sl st to first sc. Fasten off this ruffle.
*Do not panic when it flares out dramatically. That is exactly what we want.*
Now return to the body. Locate the unworked back loops from the round before you made the ruffle.
Rejoin yarn to any BLO with a sl st.
Body Rounds 7 through 10: Ch 1, hdc in each BLO around (first round after rejoining), then hdc in both loops for remaining rounds, sl st to join. (54 sts)
Second Ruffle: Repeat the ruffle attachment round, ruffle row 2, and ruffle edging exactly as before. Fasten off ruffle.
Body Rounds 11 through 14: Rejoin to BLO, work 4 more rounds of hdc. (54 sts)
Third Ruffle: Repeat ruffle section one more time. Fasten off.
Body Rounds 15 through 18: Rejoin and work 4 more rounds of hdc for the bodice above the ruffles. (54 sts)
Part 3: Shaping the Bodice Front and Back
We now divide for the front and back panels.
Row 1 (Front): Ch 1, hdc in next 27 sts. Turn, leaving remaining sts unworked. (27 sts)
Rows 2 through 6: Ch 1, hdc in each st across. Turn. (27 sts)
Armhole Shaping Row 7: Ch 1, skip first st, hdc in next 25 sts, leave last st unworked. Turn. (25 sts)
Row 8: Ch 1, skip first st, hdc in next 23 sts, leave last st unworked. Turn. (23 sts)
Rows 9 through 12: Ch 1, hdc in each st across. Turn. (23 sts)
Fasten off front panel.
Back Panel: Join yarn to the 28th stitch (where you stopped for front). Repeat Rows 1 through 12 exactly as for the front panel. Fasten off.
Part 4: Shoulder Straps with Ruffle Detail
Make 2.
Ch 46.
Row 1: Sc in 2nd ch from hook and in each ch across. Turn. (45 sts)
Row 2: Ch 1, sc in each st across. Turn. (45 sts)
Ruffle Edge: Ch 1, working along one long edge of the strap, *sc, 2 dc in next row-end st*, repeat across length. Fasten off.
Repeat ruffle edge along the opposite long side if desired for extra fullness.
Part 5: The Bow
This sweet bow sits at the waistline where the ruffles begin.
Bow Center:
Ch 7.
Rows 1 through 12: Sc in 2nd ch from hook and in each ch across. Turn. (6 sts)
Fasten off, leaving a long tail.
Bow Loop (make 2):
Ch 21.
Row 1: Hdc in 2nd ch from hook and in each ch across. Turn. (20 sts)
Rows 2 and 3: Ch 1, hdc in each st across. Turn. (20 sts)
Fasten off.
Assembly: Fold each bow loop piece so short ends meet. Whip stitch ends together to create two loops. Stack loops in an X formation. Wrap the bow center piece tightly around the middle, securing with yarn tail on the back.
Finishing and Assembly
Attaching Straps: Position straps at the corner edges of both front and back bodice panels. The ruffled edge should face outward. Whip stitch securely, ensuring straps are even on both sides.
Seaming Sides: If your armhole shaping created any gaps, use mattress stitch to close them neatly.
Button Loops: At one short edge of the crotch panel (Row 1 area), create 3 evenly spaced button loops by chaining 3 and slip stitching back into the same spot. Space them about 1 inch apart.
Sew Buttons: Attach 3 gold buttons to the opposite crotch edge, aligned with your loops.
Attach Bow: Position the completed bow at center front waistline, just above where the first ruffle begins. Sew securely with matching yarn.
Weave in all ends thoroughly. Baby items get washed frequently, so secure those tails.
Helpful Tips for Success
Gauge matters here. A romper needs to fit over a diaper comfortably. If your gauge is tight, go up a hook size.
Block your ruffles. A gentle steam or wet block helps the ruffles lie beautifully and evenly.
Customize the length by adding or subtracting body rounds before each ruffle tier. Each round adds approximately half an inch.
For a simpler version, skip the bow entirely. The romper is gorgeous without it.
Care Instructions
Hand wash in cool water with gentle detergent. Lay flat to dry, reshaping ruffles while damp. If machine washing, use a mesh laundry bag on delicate cycle.
Make It Your Own
This beginner friendly crochet pattern adapts beautifully to different color schemes. Try soft pink for spring, sage green for a gender neutral option, or classic red for the holidays. Swap the gold buttons for pearl or wooden ones to match your yarn choice.
I hope you love making this cream and gold ruffled baby romper crochet pattern as much as I loved designing it. There is nothing quite like seeing a little one wear something you created stitch by stitch.
Thank you so much for choosing this pattern and trusting me to guide you through it. I genuinely appreciate you being here. If you make this romper, I would absolutely love to see it. Tag me on Instagram or share in my Facebook group. Seeing your creations truly makes my day.
If this pattern caught your eye, go ahead and pin it to your Pinterest boards so you can find it when you are ready to start. And please drop a comment below if you make one. I love hearing which colors you chose and seeing how these little rompers turn out in your hands.
