This gorgeous amigurumi mermaid doll is exactly the kind of project that makes you fall in love with crochet all over again. She features flowing lavender hair, a beautifully textured mermaid tail, delicate seashell details, and the sweetest embroidered face. If you have been searching for a stunning crochet mermaid pattern that creates a truly huggable finished piece, you have found it.
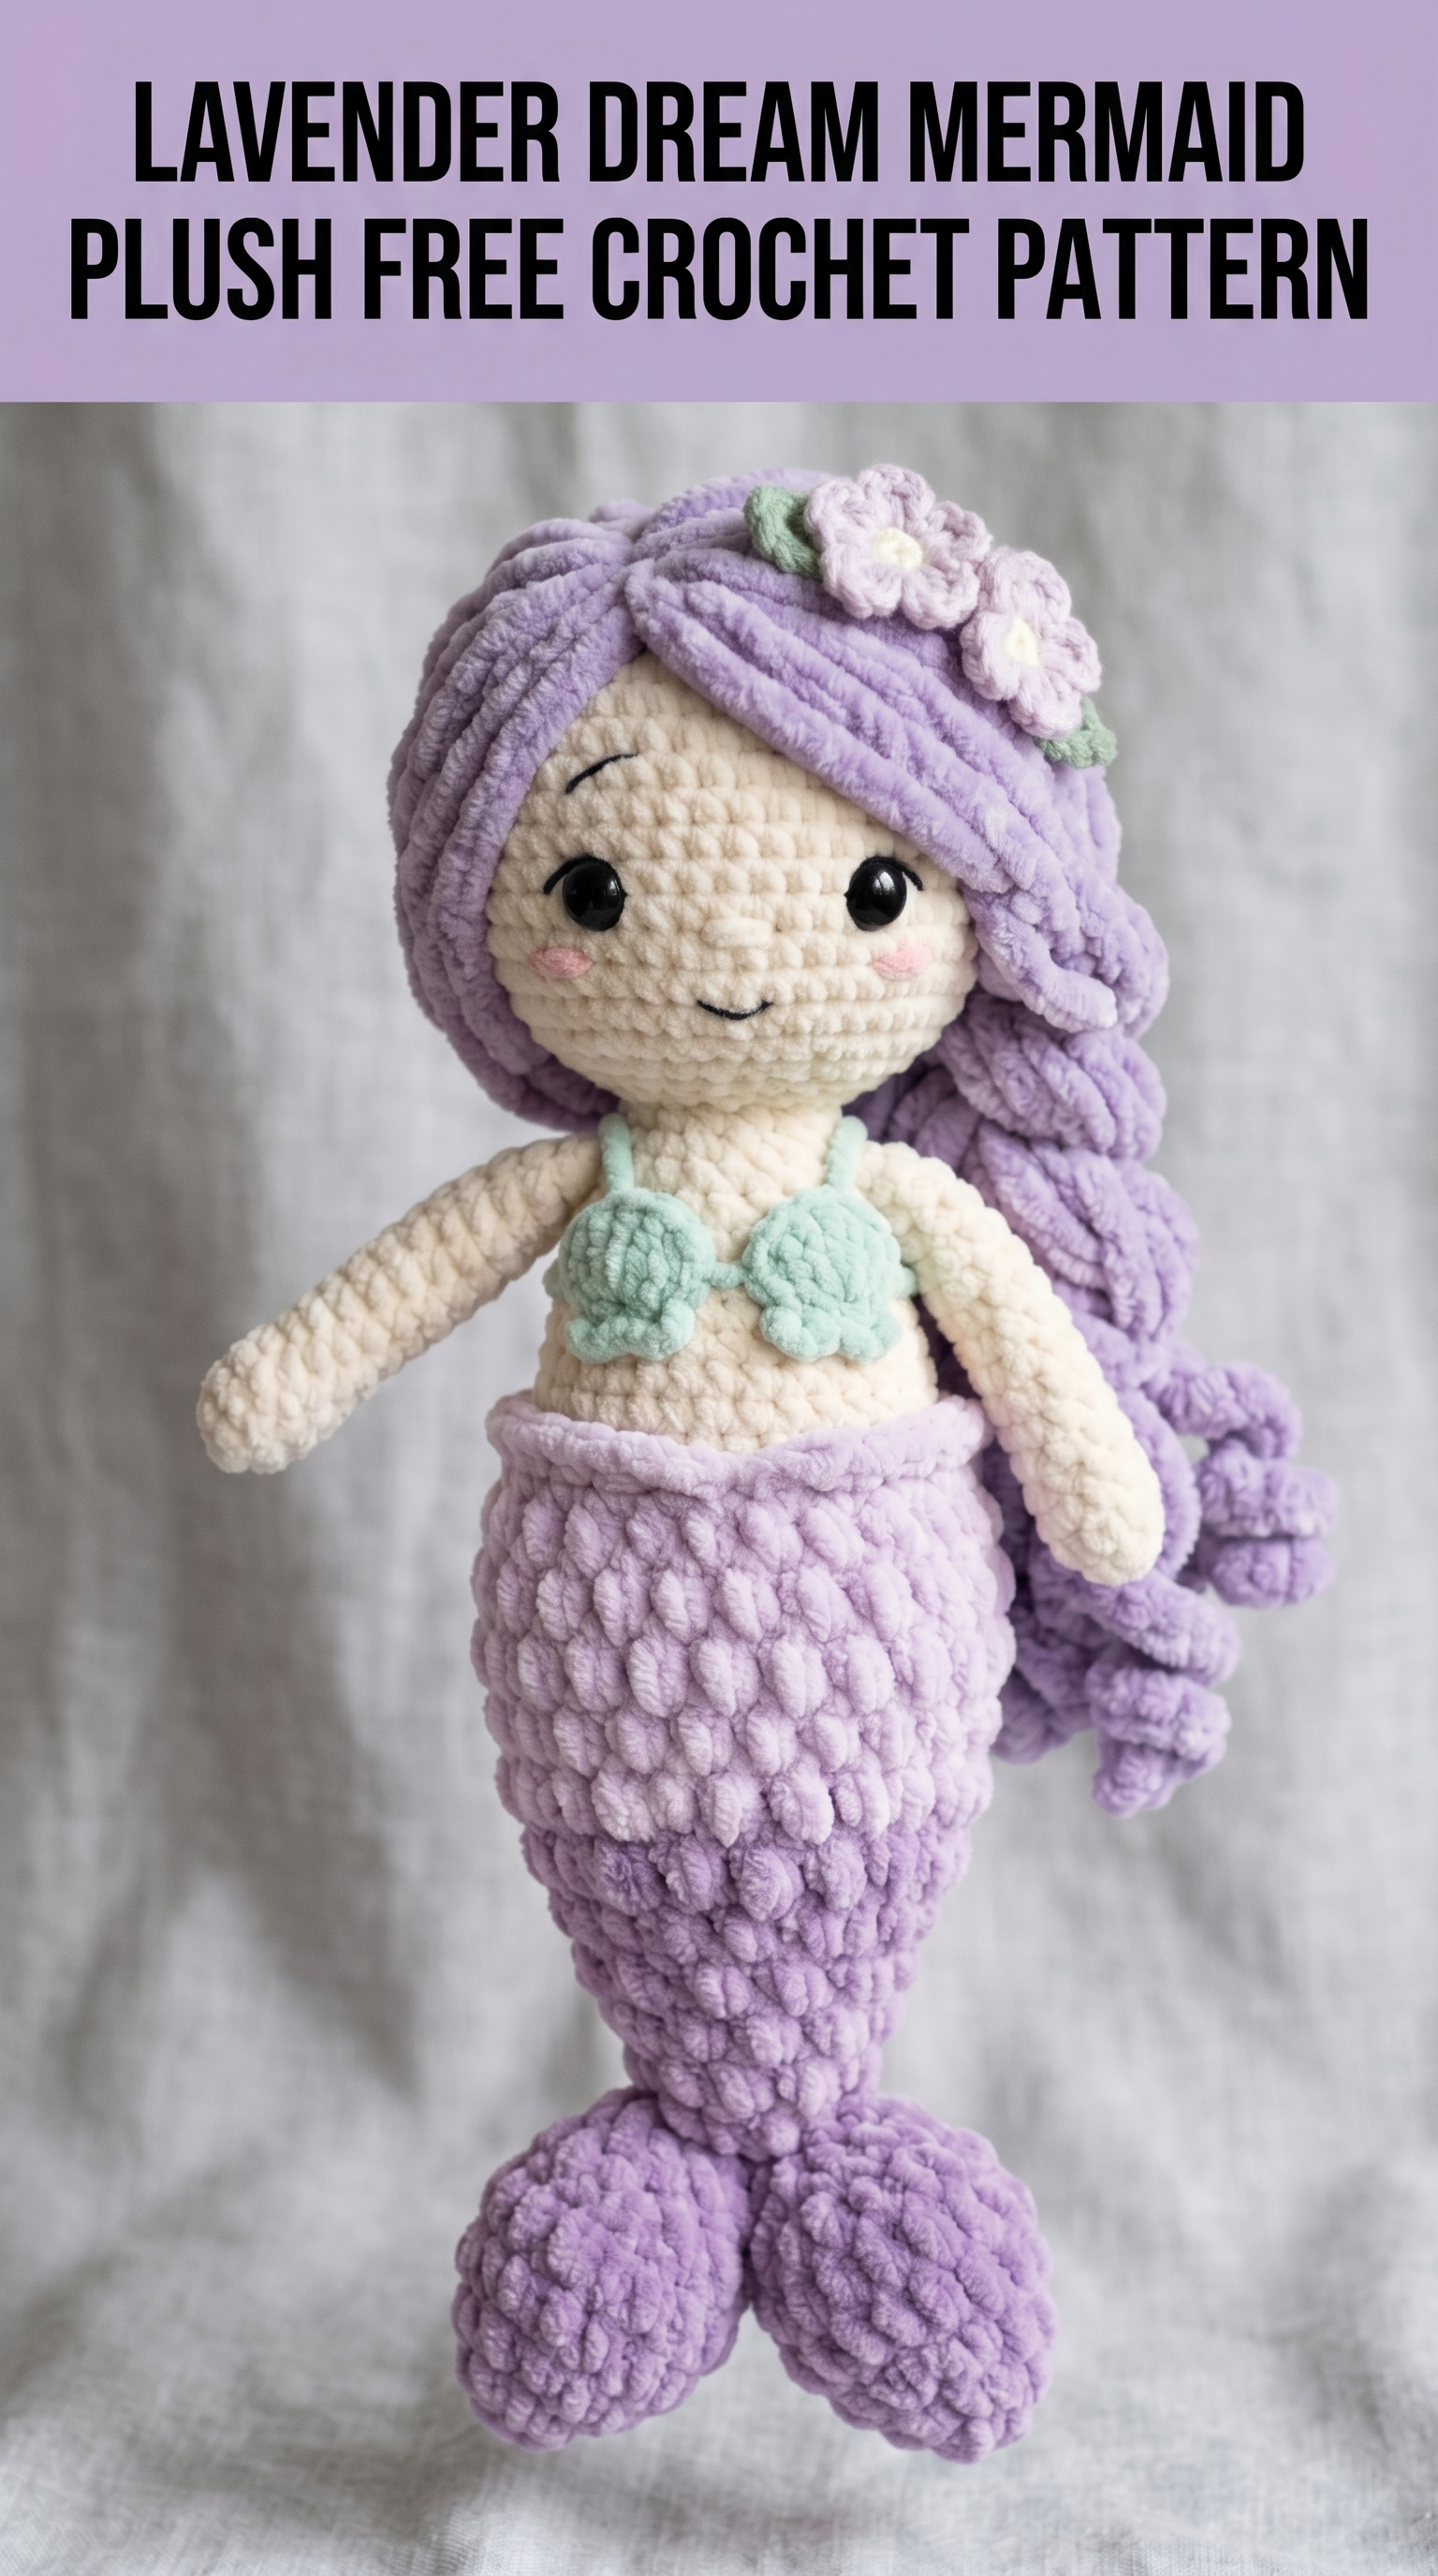
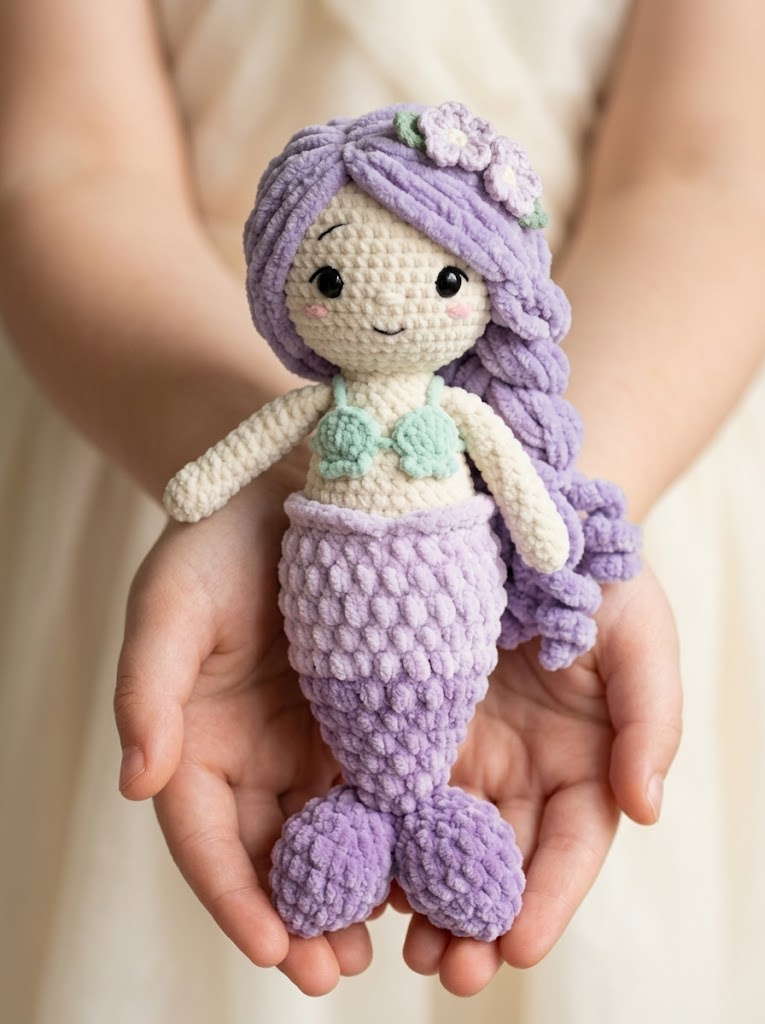
I designed this mermaid plush using chunky chenille yarn for that irresistibly soft, squishy texture everyone loves. The finished doll measures approximately 14 inches tall. Perfect for gifting, nursery decor, or keeping for yourself. I absolutely will not judge.
This crochet tutorial walks you through every single step. You will need intermediate amigurumi skills to complete this project comfortably. If you have made a few basic stuffed animals before, you are ready. I promise to explain the tricky parts thoroughly.
Why This Crochet Mermaid Pattern Works So Well
Let me tell you what makes this design special. The combination of two yarn weights creates visual interest and textural contrast. The body and head use smooth worsted weight cotton yarn. The tail and hair use plush chenille yarn. This contrast makes the mermaid feel luxurious and gives her that professional handmade quality.
The tail features a gorgeous bobble texture that mimics fish scales beautifully. Those bobbles look impressive but they are simply clusters of double crochet stitches worked into the same stitch. If you can double crochet, you can make bobbles.
The hair cascades down in chunky loops that frame her face perfectly. Those lavender flowers tucked into her hair add the finishing touch every mermaid deserves.
Materials You Will Need
Gathering your supplies before starting keeps you in the flow once you begin crocheting. Here is everything required for this step by step crochet pattern.
Yarn:
Hooks:
Notions:
Gauge: Gauge is less critical for amigurumi than for garments. Your stitches should be tight enough that stuffing does not show through. If you see gaps, size down your hook.
Abbreviations and Stitch Definitions
Understanding these terms before you start will make following the pattern much easier. I define each one in plain English so nothing feels confusing.
ch – Chain: Yarn over, pull through loop on hook. The foundation for most crochet.
sc – Single Crochet: Insert hook, yarn over, pull up a loop, yarn over, pull through both loops. Your basic building block stitch.
inc – Increase: Work 2 single crochet stitches into the same stitch. This makes your piece wider.
dec – Invisible Decrease: Insert hook through front loops only of next 2 stitches, yarn over, pull through both front loops, yarn over, pull through both loops on hook. Creates a neater decrease than standard method.
sl st – Slip Stitch: Insert hook, yarn over, pull through stitch and loop on hook in one motion. Used for joining and invisible finishing.
dc – Double Crochet: Yarn over, insert hook, yarn over, pull up loop, yarn over, pull through 2 loops, yarn over, pull through remaining 2 loops.
bobble – Bobble Stitch: Work 5 double crochet stitches into the same stitch but stop each dc before the final yarn over. You will have 6 loops on your hook. Yarn over and pull through all 6 loops at once. This creates a raised bump.
FLO – Front Loop Only: Work into only the front loop of the stitch instead of both loops.
BLO – Back Loop Only: Work into only the back loop of the stitch.
MR – Magic Ring: An adjustable starting ring that closes completely with no hole. Essential for amigurumi.
How to Crochet the Mermaid Head
Use cream worsted weight yarn and 3.5mm hook. Work in continuous rounds. Do not join. Use a stitch marker to track the beginning of each round.
Round 1: MR, 6 sc into ring (6 sts)
Round 2: Inc in each st around (12 sts)
Round 3: *Sc 1, inc* repeat around (18 sts)
Round 4: *Sc 2, inc* repeat around (24 sts)
Round 5: *Sc 3, inc* repeat around (30 sts)
Round 6: *Sc 4, inc* repeat around (36 sts)
Round 7: *Sc 5, inc* repeat around (42 sts)
Rounds 8-15: Sc in each st around (42 sts) – 8 rounds total
Insert safety eyes between rounds 10 and 11, approximately 8 stitches apart. This placement gives her that sweet, slightly wide-eyed look. Make sure they are secure before continuing.
Round 16: *Sc 5, dec* repeat around (36 sts)
Round 17: *Sc 4, dec* repeat around (30 sts)
Round 18: *Sc 3, dec* repeat around (24 sts)
Begin stuffing the head firmly. You want it nice and round with no lumps.
Round 19: *Sc 2, dec* repeat around (18 sts)
Round 20: *Sc 1, dec* repeat around (12 sts)
Finish stuffing. Leave a long tail for sewing. Fasten off.
How to Crochet the Mermaid Body
Continue with cream worsted weight yarn and 3.5mm hook.
Round 1: MR, 6 sc into ring (6 sts)
Round 2: Inc in each st around (12 sts)
Round 3: *Sc 1, inc* repeat around (18 sts)
Round 4: *Sc 2, inc* repeat around (24 sts)
Round 5: *Sc 3, inc* repeat around (30 sts)
Rounds 6-12: Sc in each st around (30 sts) – 7 rounds total
Round 13: *Sc 3, dec* repeat around (24 sts)
Rounds 14-16: Sc in each st around (24 sts) – 3 rounds total
Stuff body firmly. Do not fasten off. We will attach the tail directly.
How to Crochet the Mermaid Tail
This is where the magic happens. Switch to lavender chenille yarn and 5.0mm hook. The bobble texture creates those gorgeous scale-like bumps.
Important: When working with chenille yarn, keep your tension slightly looser than usual. This yarn splits easily if you fight it.
Continue from body, switching yarn and hook.
Round 17: Sc in each st around with chenille yarn (24 sts)
Round 18: *Sc 3, bobble in next st* repeat around (24 sts, 6 bobbles)
Round 19: Sc in each st around (24 sts)
Round 20: Sc 2, *bobble, sc 3* repeat around, ending with sc 1 (24 sts, 6 bobbles)
This offsets your bobbles so they create a staggered scale pattern. Beautiful, right?
Round 21: Sc in each st around (24 sts)
Round 22: *Sc 3, bobble* repeat around (24 sts, 6 bobbles)
Round 23: Sc in each st around (24 sts)
Round 24: *Sc 2, dec* repeat around (18 sts)
Round 25: Sc 1, *bobble, sc 2* repeat around (18 sts)
Round 26: Sc in each st around (18 sts)
Round 27: *Sc 1, dec* repeat around (12 sts)
Round 28: *Bobble, sc 1* repeat around (12 sts)
Rounds 29-32: Sc in each st around (12 sts) – 4 rounds total
Stuff tail as you go. Keep it firm but not rock hard.
Sl st, fasten off, weave in ends.
How to Crochet the Tail Fins
Make 2 identical pieces. Use lavender chenille yarn and 5.0mm hook.
Round 1: MR, 6 sc into ring (6 sts)
Round 2: Inc in each st around (12 sts)
Round 3: *Sc 1, inc* repeat around (18 sts)
Rounds 4-6: Sc in each st around (18 sts) – 3 rounds total
Round 7: *Sc 1, dec* repeat around (12 sts)
Stuff lightly. Flatten the opening and sew closed. Sew both fins to the bottom of the tail, angled outward like a fish tail.
How to Crochet the Arms
Make 2. Use cream worsted weight yarn and 3.5mm hook.
Round 1: MR, 6 sc into ring (6 sts)
Round 2: *Sc 1, inc* repeat around (9 sts)
Rounds 3-18: Sc in each st around (9 sts) – 16 rounds total
Do not stuff the arms. This keeps them floppy and huggable. Flatten opening and leave long tail for sewing.
How to Crochet the Seashell Top
Make 2 shell cups. Use mint green worsted weight yarn and 3.5mm hook.
Row 1: Ch 4, sc in 2nd ch from hook, sc in next 2 ch, turn (3 sts)
Row 2: Ch 1, inc, sc 1, inc, turn (5 sts)
Row 3: Ch 1, inc, sc 3, inc, turn (7 sts)
Row 4: Ch 1, sc in each st across (7 sts)
Create shell ridges by surface crocheting 3 vertical lines from bottom to top of each cup. This creates that classic scallop shell look.
Sew both shell pieces to the front of the body at chest level.
How to Create the Mermaid Hair
This technique creates those gorgeous flowing locks. Use lavender chenille yarn.
Cut approximately 40 strands of yarn, each about 16 inches long. Fold each strand in half. Using your hook, pull the folded loop through a stitch on the head. Pull the cut ends through the loop and tighten. This is called a larks head knot.
Start at the back of the head around round 5. Work your way up and around the sides, creating a full head of hair. Leave the face area clear.
For the wavy texture you see in the photo, gently separate the chenille yarn fibers with your fingers. This creates that gorgeous voluminous look.
How to Make the Hair Flowers
Make 2 or 3 small flowers. Use light pink or white worsted weight yarn and 3.5mm hook.
MR, work the following into ring: *Ch 2, 2 dc, ch 2, sl st* repeat 5 times.
Pull ring closed. Fasten off, leaving tail for sewing. Tuck flowers into the hair near the top of the head and secure with a few stitches.
Assembly Instructions
Now comes the satisfying part. Bringing her together.
1. Attach head to body: Use the long tail from the head. Sew securely around the entire neck opening. Go around twice for extra security.
2. Attach arms: Position arms at shoulder level, slightly toward the front of the body. Sew securely with multiple passes.
3. Embroider face: Using black embroidery floss, create small curved eyebrows above the safety eyes. Stitch a small curved smile below the eyes. Using pink embroidery floss or yarn, add rosy cheeks with small circular stitches or a touch of fabric blush.
4. Final touches: Adjust hair placement. Make sure all yarn ends are woven in securely.
Helpful Tips for Success
Working with chenille yarn: This yarn can be frustrating at first. It splits and catches easily. Use a larger hook than you think you need. Work slowly. The texture is worth the extra patience.
Invisible decreases: These make a huge difference in amigurumi. Standard decreases leave visible holes. Invisible decreases create smooth shaping. Always use them for faces especially.
Stuffing evenly: Add small amounts of stuffing at a time. Poke it into corners with the back of your hook. Overstuffing distorts the shape. Understuffing creates sad, floppy dolls.
Safety eyes: Always insert and secure safety eyes before closing the head. Once the back is on, they cannot come out. Test them by tugging firmly.
You Did It
There she is. Your very own Lavender Dream Mermaid Plush, complete and gorgeous. This crochet pattern creates something truly special. A keepsake quality doll that looks like it belongs in a boutique.
I hope this step by step tutorial gave you everything you needed to bring this mermaid to life. The combination of textures, the sweet details, the bobble tail scales. She is a project to be proud of.
Thank you so much for choosing this pattern. Your support means everything to me and keeps this little creative corner going.
I would absolutely love to see your finished mermaid. Tag me on Instagram or share your photos in my Facebook group. Seeing your creations genuinely makes my day. Every single one.
Happy crocheting, friend. You have got this.
