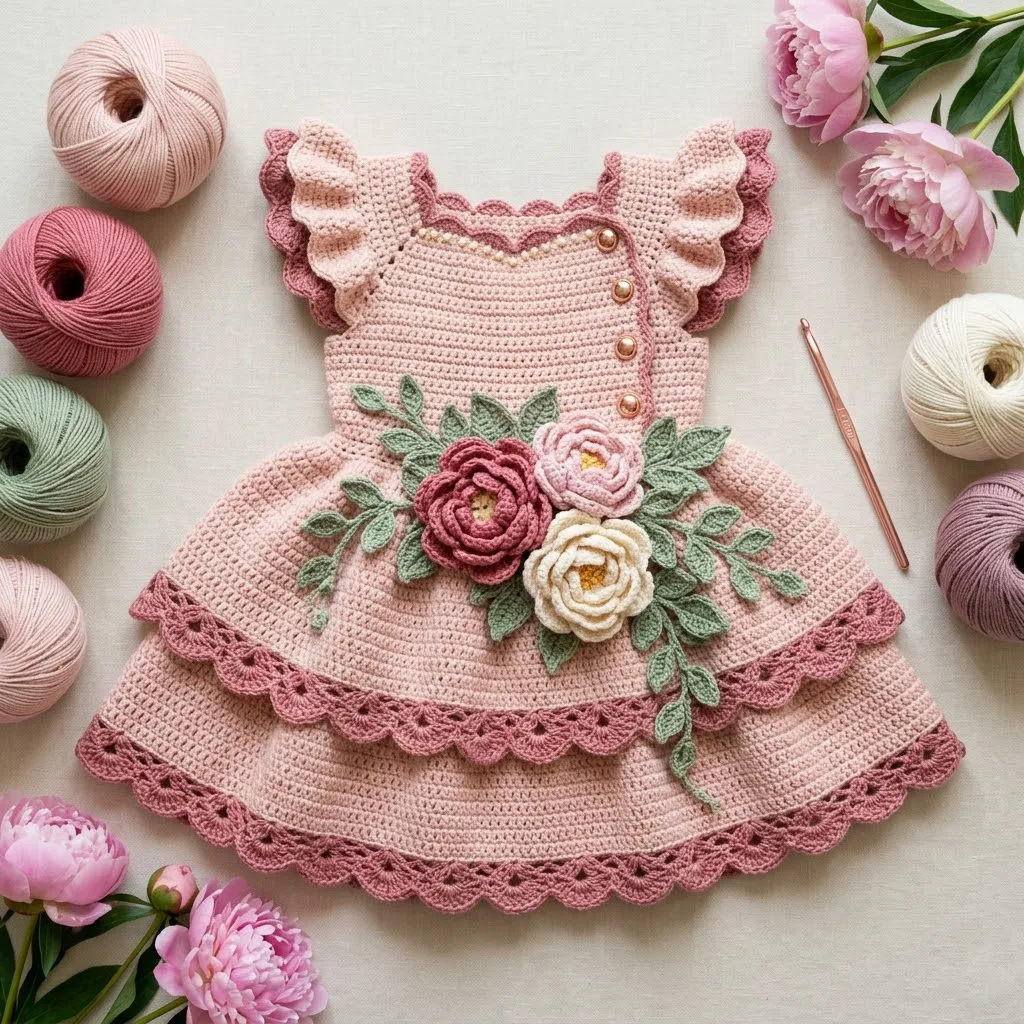
There is something truly magical about crocheting a little dress for a baby girl. This Blush Peony Baby Dress crochet pattern combines soft romantic colors with delicate ruffled sleeves and the most stunning three-dimensional peony appliqués at the waist. I designed this dress to look like it belongs in a garden party or christening celebration, but it works just as beautifully for everyday wear.
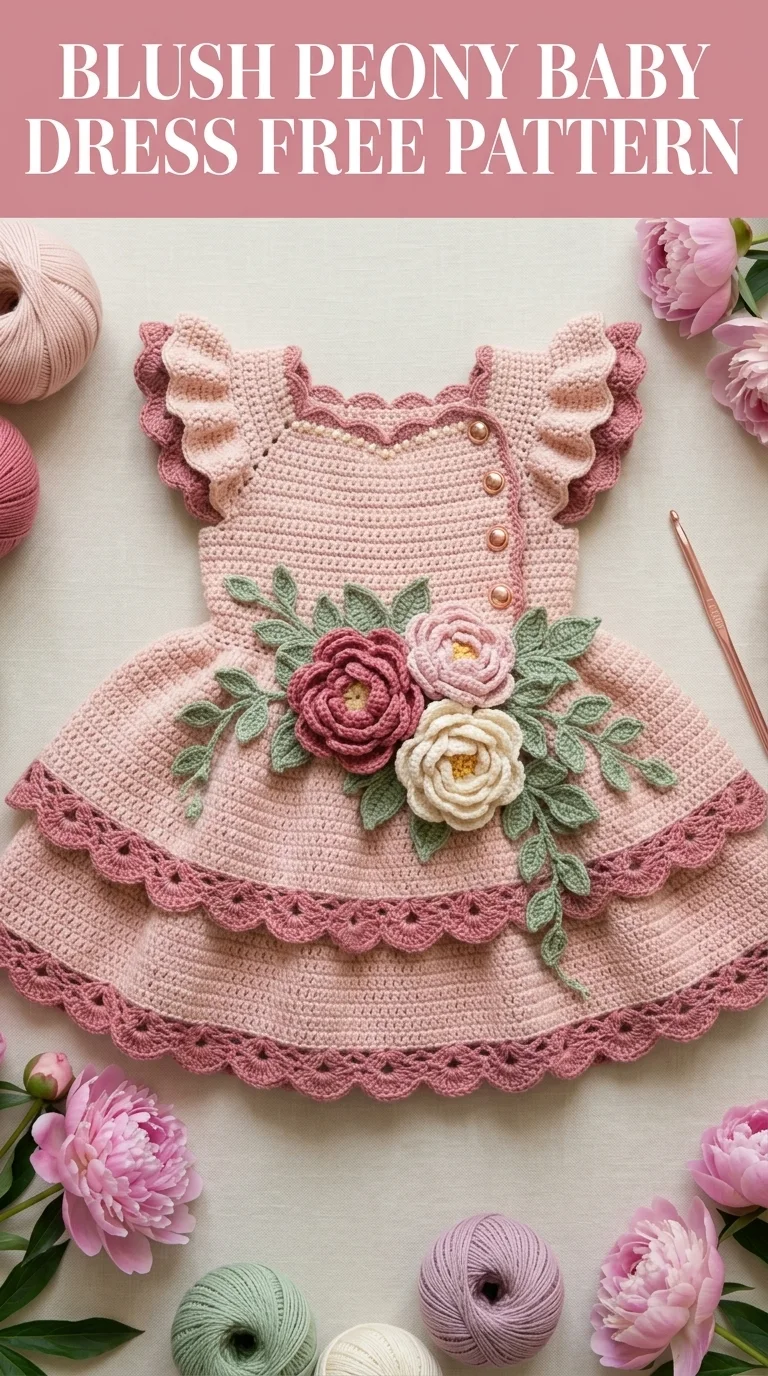
If you can crochet basic stitches and follow a straightforward construction, you can absolutely make this dress. The techniques look impressive, but I will walk you through every single step. Promise.
Why This Baby Dress Pattern Works So Well
The construction of this dress is smart and beginner-friendly even though the finished piece looks elaborate. You will work the bodice flat in rows, then join to work the skirt in the round. The ruffled sleeves get added afterward, and the peony flowers with leaves are made separately and sewn on at the end.
This step by step crochet tutorial breaks down each component so you never feel overwhelmed. Take it one section at a time and you will have a showstopper dress in your hands.
Skill Level
Intermediate beginner to intermediate. You should feel comfortable with basic stitches, increasing, decreasing, and working in the round. The flower appliqués use a spiral technique that might be new to you, but I explain it thoroughly.
Finished Measurements
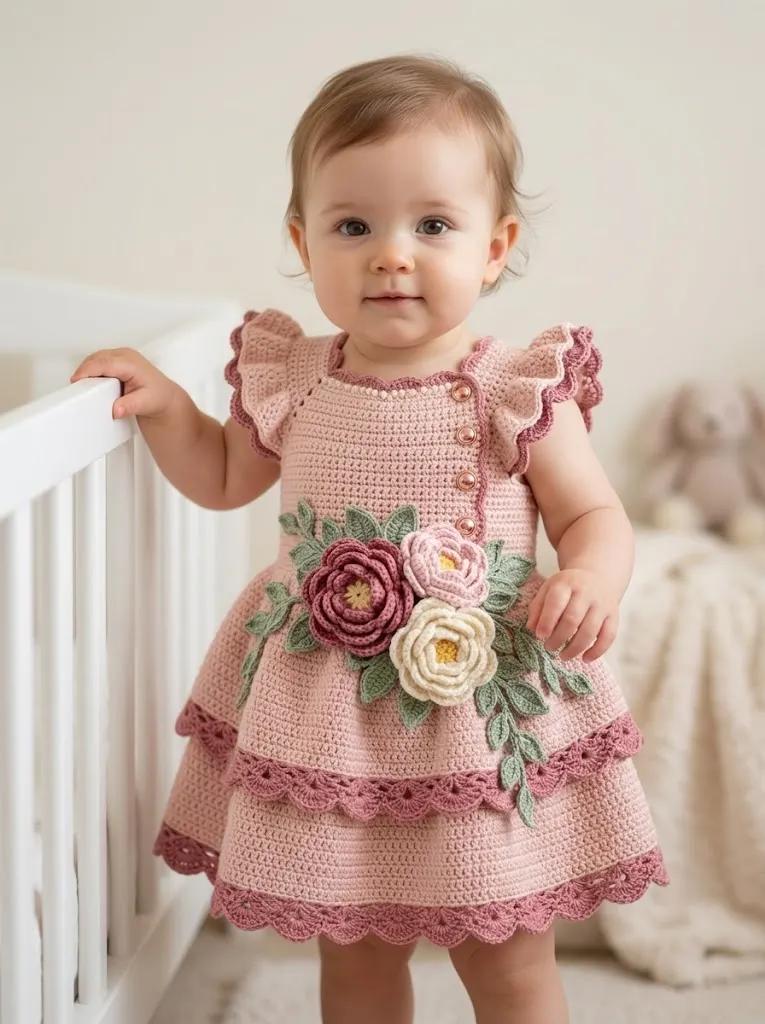
This pattern is written for size 6 to 12 months.
You can adjust sizing by using a different hook size or adding/subtracting rows to the bodice and skirt.
Materials Needed
Yarn:
I recommend a soft cotton blend or bamboo blend yarn for baby garments. The dress in the photo appears to use a mercerized cotton which gives that lovely subtle sheen.
Hook:
Notions:
Gauge
18 stitches and 20 rows = 4 inches in single crochet using 4.0 mm hook.
Please check your gauge. A too-loose gauge will make the dress larger and more open. A too-tight gauge will make the fabric stiff and smaller.
Abbreviations and Stitch Definitions
Let me define every stitch before we begin. Read through these even if you are experienced because my wording might differ from other patterns.
ch = chain: Yarn over, pull through loop on hook. Creates foundation or adds height.
sl st = slip stitch: Insert hook, yarn over, pull through both loops at once. Used for joining or invisible movement.
sc = single crochet: Insert hook, yarn over, pull up a loop (2 loops on hook), yarn over, pull through both loops. Creates a short, dense stitch.
hdc = half double crochet: Yarn over, insert hook, yarn over, pull up a loop (3 loops on hook), yarn over, pull through all 3 loops. Slightly taller than sc.
dc = double crochet: Yarn over, insert hook, yarn over, pull up a loop (3 loops on hook), yarn over, pull through 2 loops, yarn over, pull through remaining 2 loops. Creates taller, more open fabric.
inc = increase: Work 2 stitches into the same stitch.
dec = decrease: Single crochet 2 together (sc2tog). Insert hook in first st, pull up loop, insert hook in next st, pull up loop (3 loops on hook), yarn over, pull through all 3.
sk = skip: Miss the indicated stitch.
st(s) = stitch(es)
RS = right side (the pretty side facing out)
WS = wrong side
The Pattern Instructions
Bodice Back Panel
Using main color (blush pink) and 4.0 mm hook:
Row 1: Ch 35. Sc in 2nd ch from hook and in each ch across. Turn. (34 sts)
Rows 2 to 20: Ch 1, sc in each st across. Turn. (34 sts)
This creates a rectangle that forms the back of the bodice. It should measure approximately 7.5 inches wide and 4 inches tall.
Bodice Front Panel (Left Side)
Row 1: Ch 18. Sc in 2nd ch from hook and in each ch across. Turn. (17 sts)
Rows 2 to 20: Ch 1, sc in each st across. Turn. (17 sts)
Bodice Front Panel (Right Side)
Repeat the left side panel instructions exactly. You now have two front pieces that will overlap slightly at center front where the buttons go.
Joining the Bodice
Lay the back panel flat with RS facing up. Place the two front panels on top with RS facing down, aligning the side edges. The front panels should overlap by about 1 inch at center front.
Using sl st, join the shoulder seams on each side, leaving the center open for the neckline.
Shoulder seam: Join yarn at armhole edge. Sl st through both layers for 8 stitches. Fasten off. Repeat on other shoulder.
Leave approximately 6 inches open at each side for armholes.
Join the side seams below the armholes using sl st through both layers for about 2 inches, leaving the bottom open for the skirt.
Neckline Edging
With RS facing, join dusty rose (contrast A) at center back neck.
Round 1: Ch 1, sc evenly around entire neckline, working approximately 3 sc for every 4 rows. Join with sl st to first sc.
Round 2: Ch 3 (counts as dc), dc in same st, sk 1 st, *2 dc in next st, sk 1 st* around. Join with sl st to top of ch-3.
Round 3: Ch 1, working in back loops only, *sc, sk 1, 5 dc in next st (shell made), sk 1* around. Join. Fasten off.
This creates the pretty scalloped edge you see around the neckline.
Skirt
Turn the bodice so the bottom edge faces you. With RS facing, join main color at center back.
Round 1: Ch 1, sc evenly around bottom edge of bodice. You should have approximately 90 sts. Adjust to ensure stitch count is divisible by 6. Join with sl st. Do not turn.
Round 2: Ch 3 (counts as dc), dc in each st around. Join. (90 sts)
Rounds 3 to 6: Ch 3, dc in each st around. Join. (90 sts)
Round 7 (increase round): Ch 3, *dc in next 5 sts, 2 dc in next st* around. Join. (105 sts)
Rounds 8 to 12: Ch 3, dc in each st around. Join. (105 sts)
Round 13 (increase round): Ch 3, *dc in next 6 sts, 2 dc in next st* around. Join. (120 sts)
Rounds 14 to 20: Ch 3, dc in each st around. Join. (120 sts)
The skirt should now measure approximately 6.5 inches from the waist.
Skirt Lace Border
This decorative border creates that gorgeous layered scallop effect at the hem.
Join dusty rose at any stitch.
Round 1: Ch 1, sc in each st around. Join. (120 sts)
Round 2: Ch 4 (counts as dc plus ch-1), sk 1 st, *dc in next st, ch 1, sk 1 st* around. Join to 3rd ch of ch-4. (60 dc, 60 ch-1 spaces)
Round 3: Sl st into ch-1 space, ch 1, *sc in ch-1 space, ch 3* around. Join.
Round 4: Sl st into ch-3 space, ch 1, *5 dc in ch-3 space (shell), sc in next ch-3 space* around. Join. Fasten off.
This creates the first layer of scallops.
Join main color to any sc between shells.
Round 5: Ch 5 (counts as dc plus ch-2), *dc in next sc between shells, ch 2* around. Join.
Round 6: Sl st into ch-2 space, *6 dc in ch-2 space, sl st in next ch-2 space* around. Join. Fasten off.
Add the final dusty rose edge:
Round 7: Join dusty rose, ch 1, sc in each st around entire hem. Join. Fasten off.
Ruffled Sleeves (Make 2)
These sweet flutter sleeves give the dress its romantic charm.
With RS facing, join main color at underarm.
Round 1: Ch 1, sc evenly around armhole opening. Aim for approximately 42 sts. Join.
Rounds 2 to 3: Ch 1, sc in each st around. Join. (42 sts)
Round 4 (ruffle increase): Ch 3, 2 dc in each st around. Join. (84 sts)
Round 5: Ch 3, dc in each st around. Join. (84 sts)
Round 6: Join dusty rose. Ch 1, working in back loops only, *sc, sk 1, 5 dc in next st, sk 1* around. Join. Fasten off.
The ruffle will naturally curl and wave. This is correct and creates that beautiful fluttery effect.
Peony Flowers (Make 3: 1 dusty rose, 1 light pink, 1 cream)
These three-dimensional flowers are the showpiece of the dress. They look complex but are worked in simple spiraling rounds.
Center:
Using golden yellow and 3.5 mm hook:
Ch 4, sl st to form ring.
Round 1: Ch 1, 8 sc into ring. Do not join. Work in continuous spiral. (8 sts)
Round 2: 2 sc in each st around. (16 sts)
Sl st to next st. Fasten off yellow.
Inner Petals:
Join flower color (dusty rose, light pink, or cream).
Round 3: *Ch 3, sl st in next st* 8 times. (8 small petals)
Round 4: Working behind petals just made, *ch 4, sl st in next st* 8 times. (8 medium petals)
Middle Petals:
Round 5: Working behind previous petals, *ch 5, 3 dc in 3rd ch from hook, ch 2, sl st in next st* 8 times.
Outer Petals:
Round 6: Working behind previous petals, *ch 6, 5 dc in 4th ch from hook, ch 2, sl st in next st* 8 times.
Fasten off, leaving a long tail for sewing.
The petals will naturally cup and layer. Gently shape them with your fingers.
Leaves (Make 10 to 14)
Using sage green and 3.5 mm hook:
Ch 10.
Row 1: Sl st in 2nd ch from hook, sc in next ch, hdc in next ch, dc in next 3 chs, hdc in next ch, sc in next ch, 3 sc in last ch.
Working along opposite side of foundation chain: sc in next ch, hdc in next ch, dc in next 3 chs, hdc in next ch, sc in next ch, sl st in last ch.
Fasten off, leaving a tail for sewing.
Each leaf should be approximately 2 inches long with a pointed tip.
Assembly and Finishing
Button placket:
On the right front panel, mark placement for 5 buttons evenly spaced. Sew buttons securely using sewing thread.
On the left front panel, the natural spacing between stitches will serve as buttonholes. If needed, create small chain loops at corresponding positions.
Flower arrangement:
Position the three peony flowers at the waist, slightly off-center. The largest or darkest flower typically looks best in the center. Pin in place before sewing.
Arrange leaves around and behind the flowers, fanning outward. You want some leaves peeking out from behind the flowers and some extending along the waistline.
Sew each flower and leaf securely using yarn tails and a yarn needle. Weave in all ends on the wrong side.
Final pressing:
Gently steam block the dress if desired, being careful not to flatten the dimensional flowers.
Tips for Success with This Crochet Pattern
Yarn choice matters. Cotton or cotton blend yarns hold the shape of the flowers beautifully and wash well for baby items. Avoid fuzzy or splitty yarn for the appliqués.
Make a gauge swatch. I know it feels tedious, but sizing matters for wearables. Five minutes now saves hours of frustration later.
Block your flowers. A light steam helps the petals hold their shape. Pin them into position while slightly damp.
The buttons are optional. If you prefer, you can sew the front closed permanently or use snaps instead.
How to Customize This Baby Dress Pattern
Final Thoughts on the Blush Peony Baby Dress Crochet Pattern
This Blush Peony Baby Dress is the kind of project that makes people gasp when they see it. The combination of the soft blush tones, the romantic ruffled sleeves, and those incredible peony flowers creates something truly heirloom-worthy.
I hope this crochet tutorial gives you everything you need to create this dress with confidence. Take your time with each section, trust yourself, and enjoy the process of making something so beautiful with your own hands.
If this pattern inspires you, I would love for you to pin it to your Pinterest boards so you can find it again when you are ready to start. And please, leave me a comment below if you make one. Seeing your finished dresses absolutely makes my day, and I would love to cheer you on.
