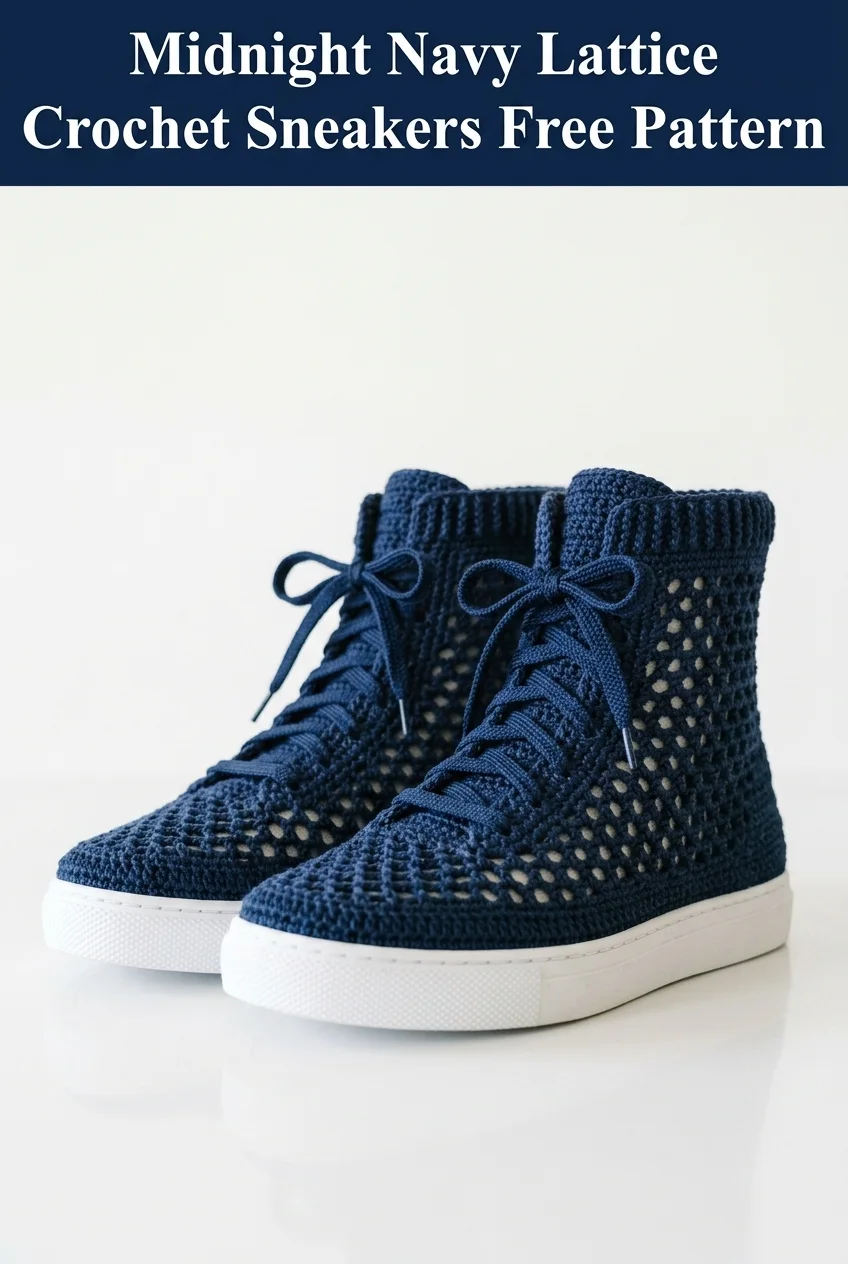
These are crochet sneakers built on a rubber sole with an open lattice mesh body and ribbed ankle cuff. The pattern uses single crochet for structure, chain spaces for the mesh, and back loop only ribbing at the top. You will need a rubber sneaker sole, cotton yarn, and basic crochet skills to complete this project.
Why You Will Love Making These Crochet Sneakers
I have been obsessed with the idea of wearable crochet footwear for years now. When I finally sat down to design a high-top sneaker pattern, I knew I wanted something breathable, modern, and actually functional for everyday wear. The lattice mesh construction keeps your feet cool while the sturdy sole means you can actually walk in these. They look complicated, but the mesh is really just chains and single crochets worked in a simple repeat.
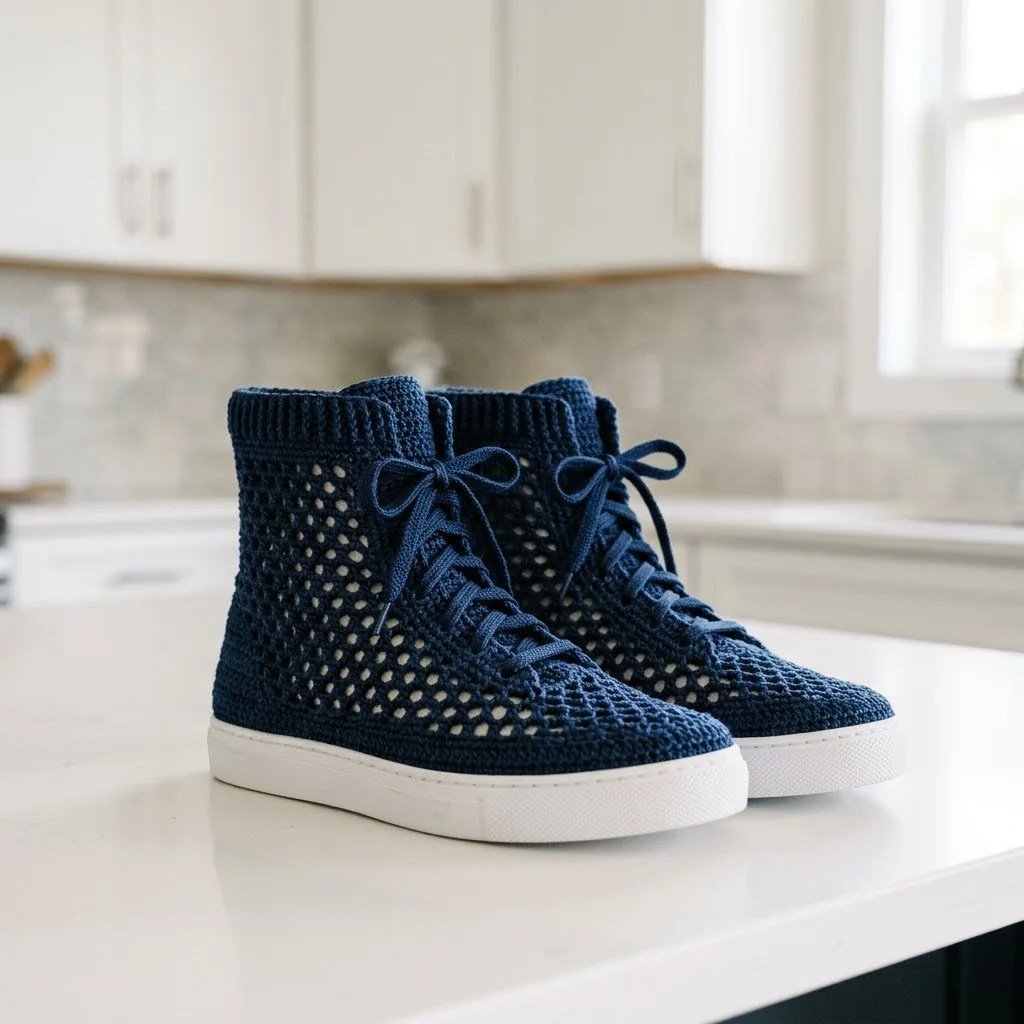
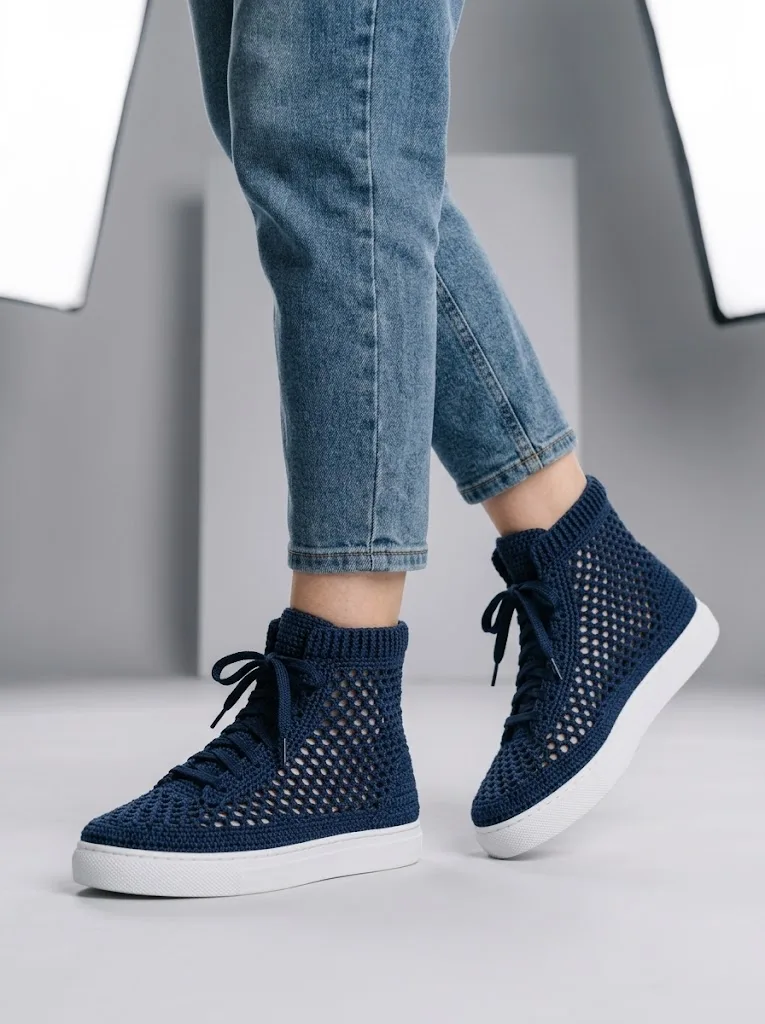
These sneakers make an incredible statement piece. Picture yourself wearing handmade shoes that you crocheted yourself. People will absolutely stop you on the street to ask about them. The navy colorway is versatile enough to pair with jeans, dresses, or athleisure looks.
Pattern Details and Skill Level
Skill Level: Intermediate
This crochet sneaker pattern requires comfort with working in the round, increasing and decreasing, and attaching crochet to a non-fabric base. If you have made crochet slippers before, you can absolutely handle this project.
Finished Measurements:
Shown in Women’s US Size 8. The pattern can be adjusted by using different sole sizes and modifying the stitch counts accordingly.
Gauge:
16 single crochet stitches and 18 rows equals 4 inches in single crochet using recommended yarn and hook.
Materials Needed for Your Crochet Sneakers
Yarn:
Hook:
Additional Supplies:
For the Laces:
Abbreviations and Stitch Definitions
Before we dive into the step by step instructions, let me explain every stitch abbreviation you will see in this crochet tutorial.
Ch = Chain. Wrap yarn over hook and pull through the loop on your hook. This creates one chain stitch.
Sl st = Slip stitch. Insert hook into stitch, yarn over, pull through both the stitch and the loop on your hook in one motion.
Sc = Single crochet. Insert hook into stitch, yarn over and pull up a loop (2 loops on hook), yarn over and pull through both loops.
Sc2tog = Single crochet two together. A decrease stitch. Insert hook into first stitch and pull up a loop, insert hook into next stitch and pull up a loop (3 loops on hook), yarn over and pull through all 3 loops. This turns 2 stitches into 1.
BLO = Back loop only. Instead of inserting your hook under both loops of a stitch, insert it only under the back loop. This creates a ribbed texture.
Ch-sp = Chain space. The gap created by chain stitches in the previous row or round.
How to Prepare Your Sneaker Sole
Before you begin crocheting, you need to prepare your rubber sole for attachment. This step is crucial for a professional looking finished sneaker.
Step 1: Using an awl or leather punch, create evenly spaced holes around the entire perimeter of the sole. Space holes approximately 1/4 inch apart and 1/4 inch from the edge.
Step 2: For a Women’s Size 8, you should have approximately 80 to 90 holes total around the sole.
Step 3: Count your holes and note the number. Your foundation round stitch count will match this number.
Crochet Sneaker Pattern Instructions
Foundation Round (Attaching to Sole)
Hold the sole with the bottom facing you. You will work through the punched holes to create your foundation round.
Round 1: Insert hook through first hole at center back heel, pull up a loop, ch 1. Work 1 sc through each hole around the entire sole perimeter. Join with sl st to first sc. (80 to 90 sc, matching your hole count)
Place a stitch marker at the center front toe and center back heel for reference.
Building the Sole Border
Round 2: Ch 1, sc in each st around. Join with sl st. (80 to 90 sc)
Round 3: Ch 1, sc in each st around. Join with sl st. (80 to 90 sc)
These rounds create a small border that covers the edge of the rubber sole and provides a stable base for the upper construction.
Toe Cap Section
The toe cap is worked in solid single crochet for durability and structure. You will work back and forth in rows across the front portion of the sneaker.
Locate your center front toe marker. Count 15 stitches to each side of center front.
Row 1: Starting 15 sts before center front, sc in next 30 sts, turn. (30 sc)
Row 2: Ch 1, sc2tog, sc in each st across to last 2 sts, sc2tog, turn. (28 sc)
Row 3: Ch 1, sc in each st across, turn. (28 sc)
Row 4: Ch 1, sc2tog, sc in each st across to last 2 sts, sc2tog, turn. (26 sc)
Row 5: Ch 1, sc in each st across, turn. (26 sc)
Row 6: Ch 1, sc2tog, sc in each st across to last 2 sts, sc2tog, turn. (24 sc)
Rows 7 to 10: Repeat the decrease pattern, alternating decrease rows with straight rows until you have 20 sts remaining.
Fasten off and weave in the end. The toe cap is complete.
Lattice Mesh Body
This is where your crochet sneakers really come to life. The open lattice mesh creates that beautiful breathable texture you see in the photos. Do not worry if it looks intimidating. The mesh is simply chains and single crochets worked in an easy repeat.
Rejoin yarn at the side of the toe cap where it meets the sole border.
Round 1 (Setup Round): Ch 1, work sc evenly around the entire upper edge of the sneaker, including across the top of the toe cap and around the heel. Join with sl st. Count your stitches. You should have a number divisible by 3 plus 1. Adjust with an increase or decrease if needed. (Approximately 60 to 66 sc)
Round 2 (Begin Mesh): Ch 4 (counts as sc plus ch 3), skip 2 sts, *sc in next st, ch 3, skip 2 sts*. Repeat from * around. Join with sl st to first sc.
Round 3: Sl st into ch-sp, ch 4, *sc in next ch-sp, ch 3*. Repeat from * around. Join with sl st to first sc.
Rounds 4 to 12: Repeat Round 3. The mesh will grow taller with each round. (9 rounds of mesh total)
Your lattice mesh body should now reach approximately 3 to 4 inches tall from the sole.
Lace Panel Construction
The front lace panel is worked separately and attached, creating that classic sneaker look with functional lace holes.
Row 1: Ch 22, sc in 2nd ch from hook and in each ch across, turn. (21 sc)
Row 2: Ch 1, sc in first 2 sts, ch 2, skip 2 sts (lace hole created), sc in next 13 sts, ch 2, skip 2 sts, sc in last 2 sts, turn. (17 sc, 2 ch-sps)
Row 3: Ch 1, sc in each st and 2 sc in each ch-sp across, turn. (21 sc)
Rows 4 to 18: Repeat Rows 2 and 3, creating lace holes every other row. You will have 8 pairs of lace holes when complete.
Finishing the Panel: Sc evenly around all edges of the panel to create a neat border. Fasten off.
Sew the lace panel to the front of the sneaker using whip stitch, centering it over the toe cap and extending up through the mesh section.
Ribbed Ankle Cuff
The ribbed cuff at the top gives structure and that polished high-top sneaker look. Working in back loop only creates the stretchy ribbed texture.
Switch to your smaller hook if desired for a tighter cuff.
Round 1: Join yarn at center back, ch 1, sc in each st and ch-sp around the top edge of the mesh. Join with sl st. (Approximately 54 to 60 sc)
Round 2: Ch 1, working in BLO only, sc in each st around. Join with sl st.
Rounds 3 to 8: Repeat Round 2. (6 rounds of BLO ribbing)
Round 9: Sl st in BLO of each st around. Fasten off.
Weave in all ends securely.
Creating the Crochet Laces
For matching crocheted laces, work a simple i-cord or crochet chain.
I-Cord Method: Ch 4, sc in 2nd ch from hook, sc in next 2 ch. *Without turning, slide stitches to other end of hook, insert hook in back loop of first sc, pull up a loop, sc in BLO of each st across.* Repeat from * until cord measures approximately 45 inches. Fasten off.
Make 2 laces total.
Alternatively, use purchased flat cotton laces in a matching navy color for a quicker finish.
Tips for Crochet Sneaker Success
Blocking: Stuff your finished sneakers with tissue paper and allow them to dry completely after a light steam. This helps set the shape.
Durability: Apply fabric glue along the inside edge where the crochet meets the sole for extra security during wear.
Sizing Adjustments: For smaller sizes, reduce the stitch counts proportionally. For larger sizes, add stitches and additional rows to the toe cap and mesh sections.
Yarn Choice Matters: Cotton or cotton blend yarns work best for this project. Acrylic will stretch too much and lose shape over time. Look for yarn labeled as durable or suitable for accessories.
Caring for Your Handmade Crochet Sneakers
Spot clean your sneakers with a damp cloth and mild soap. For deeper cleaning, hand wash gently in cool water and reshape while damp. Never machine wash or dry, as this can damage the sole attachment and distort the mesh pattern.
Store your sneakers stuffed with tissue paper to maintain their shape between wears.
I really hope you love making these Midnight Navy Lattice Crochet Sneakers as much as I loved designing them. They are such a fun conversation starter and a truly unique addition to any handmade wardrobe.
If you found this crochet sneaker pattern helpful, I would love for you to save it to your Pinterest boards so you can find it easily when you are ready to start your project. And please, leave a comment below if you make a pair. I genuinely love seeing your finished creations and hearing how the pattern worked up for you.
