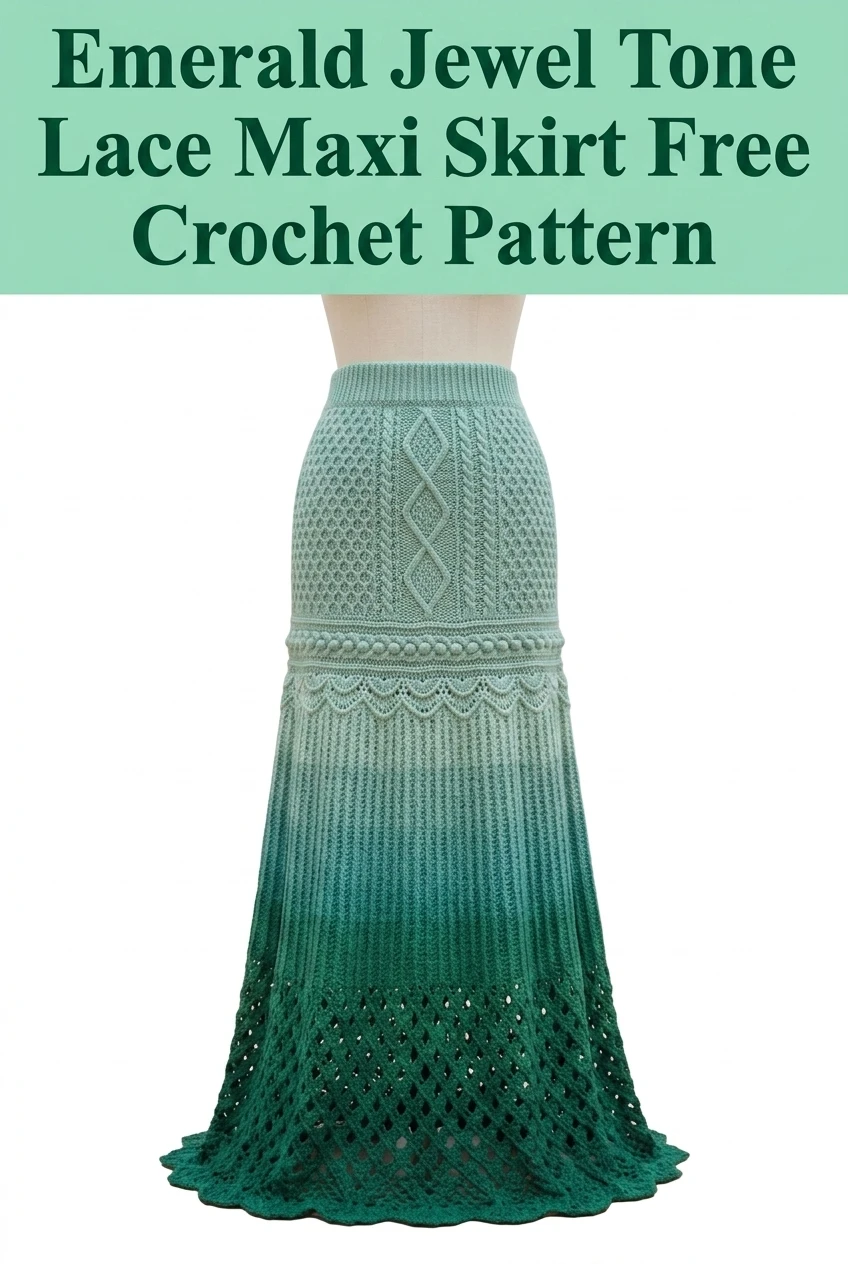
I’ve been looking for the perfect statement piece to add to my handmade wardrobe for months, and this stunning ombre lace maxi skirt is absolutely my favourite design I’ve created this year. After testing countless stitch combinations and playing with gradient colorways, I rounded up all my best techniques into one showstopping garment that looks far more complicated than it actually is. This Emerald Jewel Tone Lace Maxi Skirt crochet pattern combines textured cables, delicate lacework, and that dreamy color transition from soft sage to deep forest green.
About This Crochet Maxi Skirt Pattern
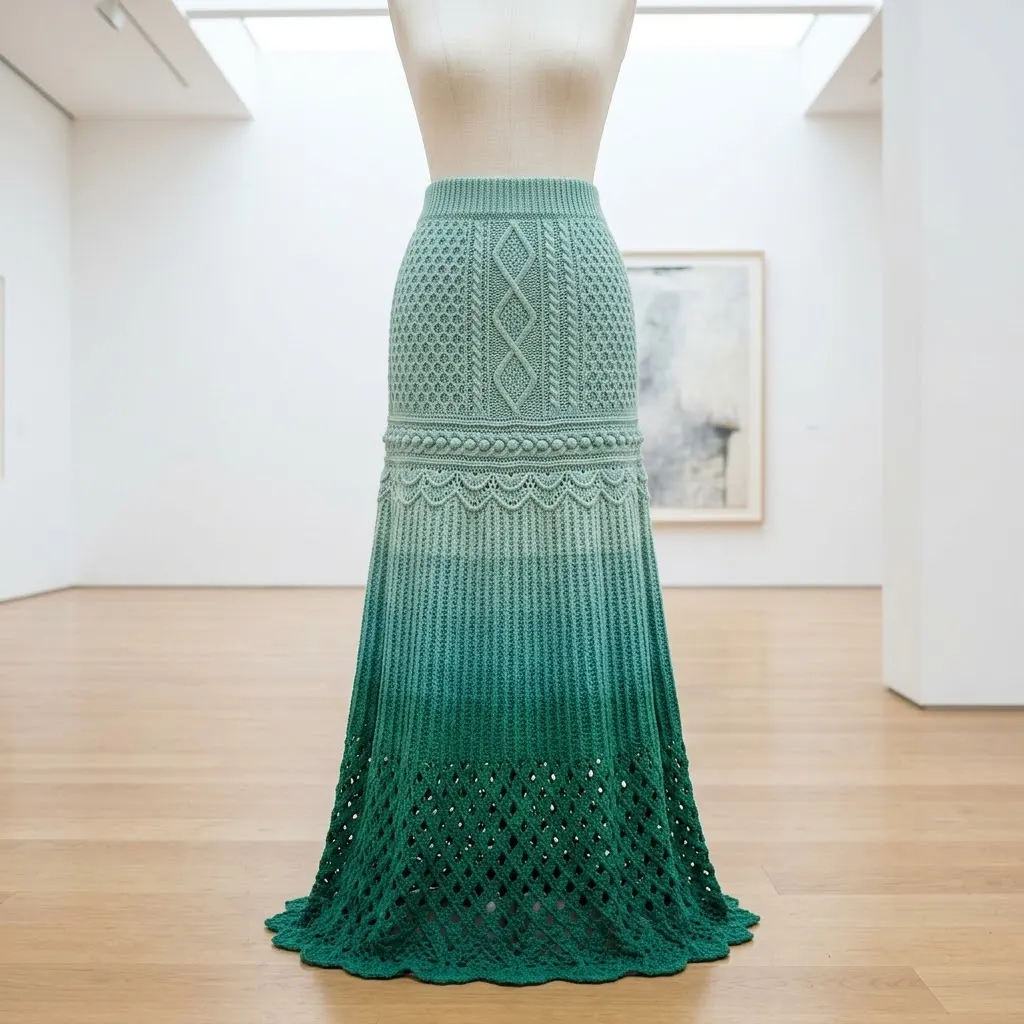
This floor length skirt features multiple distinct sections that create visual interest and showcase different crochet techniques. The fitted hip section uses textured stitches including cables, bobbles, and honeycomb patterns. A scalloped border creates a natural waistline accent. The flowing lower section transitions through an ombre gradient while incorporating vertical ribbing and an open diamond mesh hem.
The construction might look intimidating at first glance, but I promise you can do this. Each section uses repeating stitch patterns that become second nature after a few rounds. You’ll work this skirt from the waistband down, which means you can try it on as you go and adjust the length to your preference.
Skill Level: Intermediate to Advanced
This pattern assumes you’re comfortable with basic stitches and ready to learn some new textured techniques. If you’ve made a few garments before and feel confident reading patterns, you’re ready for this project.
Materials Needed
Yarn:
Hook:
Notions:
Gauge
Hip Section: 24 stitches and 28 rows = 4 inches in single crochet using smaller hook
Lower Section: 22 stitches and 26 rows = 4 inches in half double crochet using larger hook
Taking time to check your gauge matters tremendously for garment fit. Swatch both sections before beginning.
Finished Measurements
This pattern is written for size Medium with a 28 to 30 inch waist and 38 to 40 inch hip. The skirt length shown is approximately 42 inches from waist to hem.
To adjust sizing, add or subtract stitch repeats in multiples of 12 for the textured patterns and multiples of 6 for the lace section.
Abbreviations and Stitch Definitions
Before we dive into the pattern, let me walk you through every stitch you’ll encounter. Understanding these upfront will make the actual instructions much smoother.
Ch = Chain. Wrap yarn over hook and pull through the loop on your hook. This creates the foundation for your work.
Sl st = Slip stitch. Insert hook into stitch, yarn over, pull through both the stitch and the loop on your hook in one motion. Used for joining rounds.
Sc = Single crochet. Insert hook into stitch, yarn over and pull up a loop (2 loops on hook), yarn over and pull through both loops. The shortest basic stitch.
Hdc = Half double crochet. Yarn over, insert hook into stitch, yarn over and pull up a loop (3 loops on hook), yarn over and pull through all 3 loops. Slightly taller than single crochet with nice drape.
Dc = Double crochet. Yarn over, insert hook into stitch, yarn over and pull up a loop (3 loops), yarn over and pull through 2 loops (2 loops remain), yarn over and pull through remaining 2 loops. A tall versatile stitch.
Tr = Treble crochet. Yarn over twice, insert hook, yarn over and pull up a loop (4 loops), yarn over and pull through 2 loops three times. Even taller for lacy open effects.
FPdc = Front post double crochet. Yarn over, insert hook from front to back to front around the post (vertical part) of the stitch below, complete as a regular double crochet. Creates raised texture on the front of your work.
BPdc = Back post double crochet. Same as FPdc but insert hook from back to front to back around the post. Creates raised texture on the back.
Bobble = Work 5 dc in same stitch but stop each dc before the final yarn over (leaving 2 loops on hook each time). You’ll have 6 loops on hook. Yarn over and pull through all 6 loops at once. This creates a dimensional bump.
Sc2tog = Single crochet 2 together (decrease). Insert hook in first stitch, pull up a loop, insert hook in next stitch, pull up a loop (3 loops on hook), yarn over and pull through all 3 loops. Reduces stitch count by 1.
Ch-sp = Chain space. The gap created by chains in a previous row. You’ll work into this space rather than into individual chains.
Special Techniques
Cable Pattern
The diamond cable design uses front post stitches that cross over each other. Don’t let this scare you. You’re simply skipping a stitch, working into the next one, then going back to work the skipped stitch. The posts naturally cross.
Right Cross Cable: Skip next st, FPdc in following st, FPdc in skipped st (working in front of the stitch you just made)
Left Cross Cable: Skip next st, FPdc in following st (working behind), FPdc in skipped st
Honeycomb Texture
The honeycomb effect comes from alternating rows of front and back post stitches. When you work FPdc above a BPdc from the previous row, you get that distinctive honeycomb look.
Pattern Instructions
Waistband
Foundation: Ch 180 (or adjust to fit your hip measurement plus 2 inches of ease). Join with sl st to first ch, being careful not to twist.
Rounds 1 to 6: Ch 1, sc in each st around, sl st to join. (180 sts)
This creates a neat folded waistband. After completing the skirt, you’ll fold this in half and sew it down to create a casing for your elastic.
Textured Hip Section
This section creates all that gorgeous visual interest you see in the upper portion of the skirt. We’ll work diamond cables flanked by honeycomb texture.
Setup Round: Ch 2 (does not count as st throughout), hdc in each st around, sl st to join. (180 sts)
Round 1 (Establish Pattern): Ch 2, *sc in next 15 sts, FPdc in next 2 sts, sc in next 6 sts, FPdc in next 2 sts, sc in next 15 sts, place marker* repeat from * around 4 times total, sl st to join. (180 sts)
Round 2: Ch 2, *work honeycomb pattern over 15 sts (alternating FPdc and BPdc), work right cross cable, sc in 6 sts, work left cross cable, honeycomb over 15 sts* repeat around, sl st to join. (180 sts)
Continue working the diamond cable pattern, expanding the center of each diamond by 2 stitches every other round until the diamond reaches 12 stitches wide, then decrease back down. This creates those beautiful diamond shapes.
Rounds 3 to 24: Continue established cable and honeycomb pattern, referring to the diamond shaping as described. Each round maintains 180 sts.
Bobble Accent Round
Round 25: Ch 1, sc in first 4 sts, *bobble in next st, sc in next 5 sts* repeat around, adjusting final repeat as needed, sl st to join. (180 sts with 30 bobbles)
Rounds 26 to 28: Ch 1, sc in each st around, sl st to join. (180 sts)
Scalloped Border Section
This decorative border creates that pretty waistline accent and visual separation between the fitted top and flowing bottom.
Round 29: Ch 4 (counts as dc plus ch 1), skip 1 st, *dc in next st, ch 1, skip 1 st* repeat around, sl st to 3rd ch of beginning ch 4. (90 dc, 90 ch-1 spaces)
Round 30: Sl st into ch-1 sp, ch 1, *sc in ch-sp, ch 3, sc in same ch-sp, sc in next ch-sp* repeat around to create scallop points, sl st to join.
Rounds 31 to 33: Work 3 more rounds of scallop edging, with each scallop created by working (sc, ch 3, sc) into the ch-3 space of the previous round.
Transition to Skirt Body
Round 34: Ch 2, working along the base of the scallops, hdc evenly around, increasing 20 sts evenly spaced. (200 sts)
This is where you’ll begin transitioning your yarn colors if using separate skeins rather than gradient yarn. I recommend changing colors every 8 to 12 rounds for a smooth ombre effect.
Vertical Ribbed Section
Round 35: Ch 2, *FPdc in next st, BPdc in next st* repeat around, sl st to join. (200 sts)
Rounds 36 to 65: Continue in established ribbing pattern, working FPdc over previous FPdc and BPdc over previous BPdc. This creates those lovely vertical lines. (200 sts each round)
Continue color transitions throughout this section. The ribbing creates beautiful vertical lines that elongate the silhouette.
Diamond Lace Hem Section
Here comes the airy lace portion at the bottom. This is where the skirt really gets that romantic flowing quality.
Round 66 (Setup): Ch 4 (counts as dc plus ch 1), skip 1 st, *dc in next st, ch 1, skip 1 st* repeat around, sl st to join. (100 dc, 100 ch-1 spaces)
Round 67: Ch 5 (counts as dc plus ch 2), skip next ch-sp, *dc in next dc, ch 2, skip ch-sp* repeat around, sl st to join.
Round 68: Ch 6 (counts as dc plus ch 3), *dc in next dc, ch 3* repeat around, sl st to join.
Rounds 69 to 85: Continue expanding the chain spaces gradually while maintaining the diamond mesh structure. The mesh opens up more as you work down, creating that gorgeous lacy effect.
Round 86 (Increase Round): Work into each ch-sp with (dc, ch 2, dc) to begin forming the scalloped hem edge. (200 dc)
Rounds 87 to 95: Continue mesh pattern, allowing the skirt to flare naturally at the hem.
Scalloped Hem Edging
Final Round: Working around the entire hem edge, *sc in dc, (hdc, dc, hdc) in ch-sp* repeat around to create gentle scallops, sl st to join. Fasten off.
Finishing Your Crochet Maxi Skirt
Weave in all ends. With this many color changes and sections, you’ll have quite a few. Take your time and weave each end through at least 2 inches of stitches in the same color area.
Block your skirt. Soak in lukewarm water with a bit of wool wash or gentle soap. Gently squeeze out excess water (don’t wring). Lay flat on blocking mats and pin to measurements, paying special attention to the lace hem section. Let dry completely.
Install the waistband elastic. Fold the waistband rounds in half toward the inside of the skirt. Cut your elastic to your waist measurement minus 1 inch. Thread it through the folded casing, overlap the ends by 1 inch, and sew securely. Whipstitch the waistband closed.
Tips for Success
Tension consistency matters. The textured section and lace section have very different visual effects. Keep your tension even within each section, but don’t stress if the lace section feels looser. That’s intentional.
Try it on frequently. One of the beautiful things about working top down is the ability to check fit as you go. Pin the working edge temporarily and slip it on to check length and fit.
Color transitions look best when gradual. If using separate yarn skeins, consider working 2 rounds holding both the old and new color together before switching completely. This softens the transition.
The lace section grows quickly. After all that textured work, you’ll fly through the mesh portion. It’s a nice reward for your patience.
Styling Your Finished Skirt
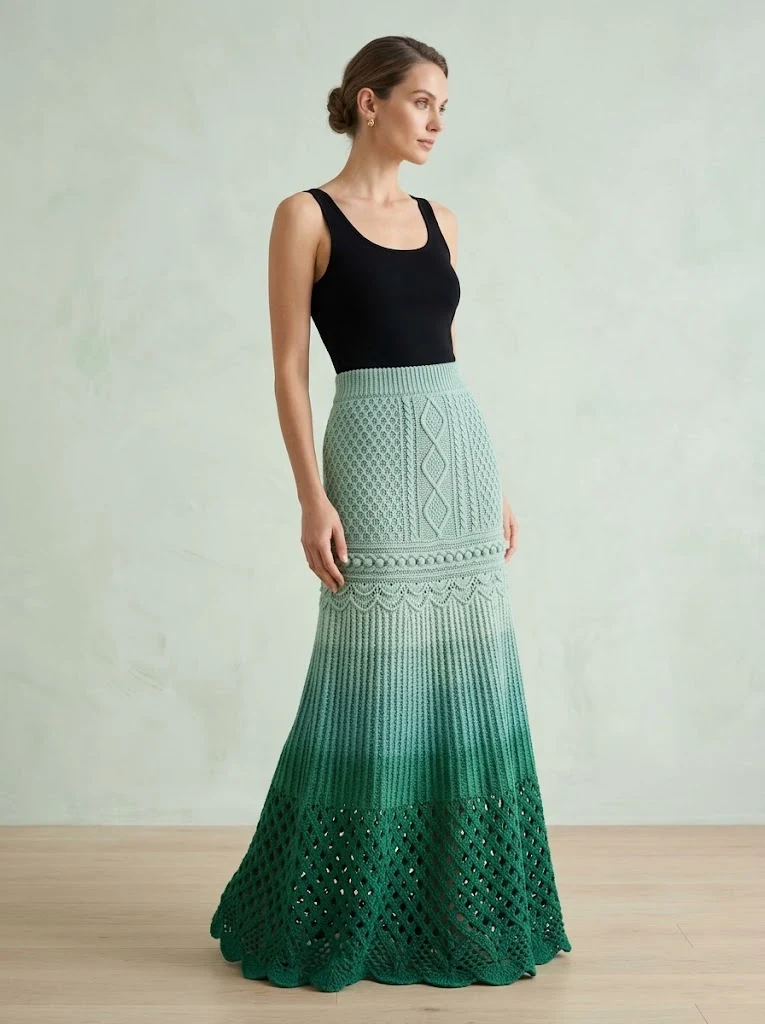
This stunning piece works beautifully with a simple fitted top in cream, white, or coordinating green tones. The ombre effect makes it a true statement piece, so keep everything else simple. A cropped sweater in winter or a linen tank in summer lets the skirt shine.
I absolutely love how the different sections create visual interest from every angle. The textured hip section provides structure and flattering shaping, while the flowing lace hem adds movement and romance.
Thank you so much for choosing this pattern for your next crochet adventure. I genuinely cannot wait to see your finished skirts in all the gorgeous colorways you’ll dream up. If you make this Emerald Jewel Tone Lace Maxi Skirt, please tag me on Instagram or share in our Facebook group. Seeing your creations truly makes my whole week.
I hope you’ll save this crochet maxi skirt pattern to your Pinterest boards so you can find it whenever inspiration strikes. And please drop a comment below if you make one. I’d love to hear which colors you chose and how the project went for you. Happy crocheting, friends.
