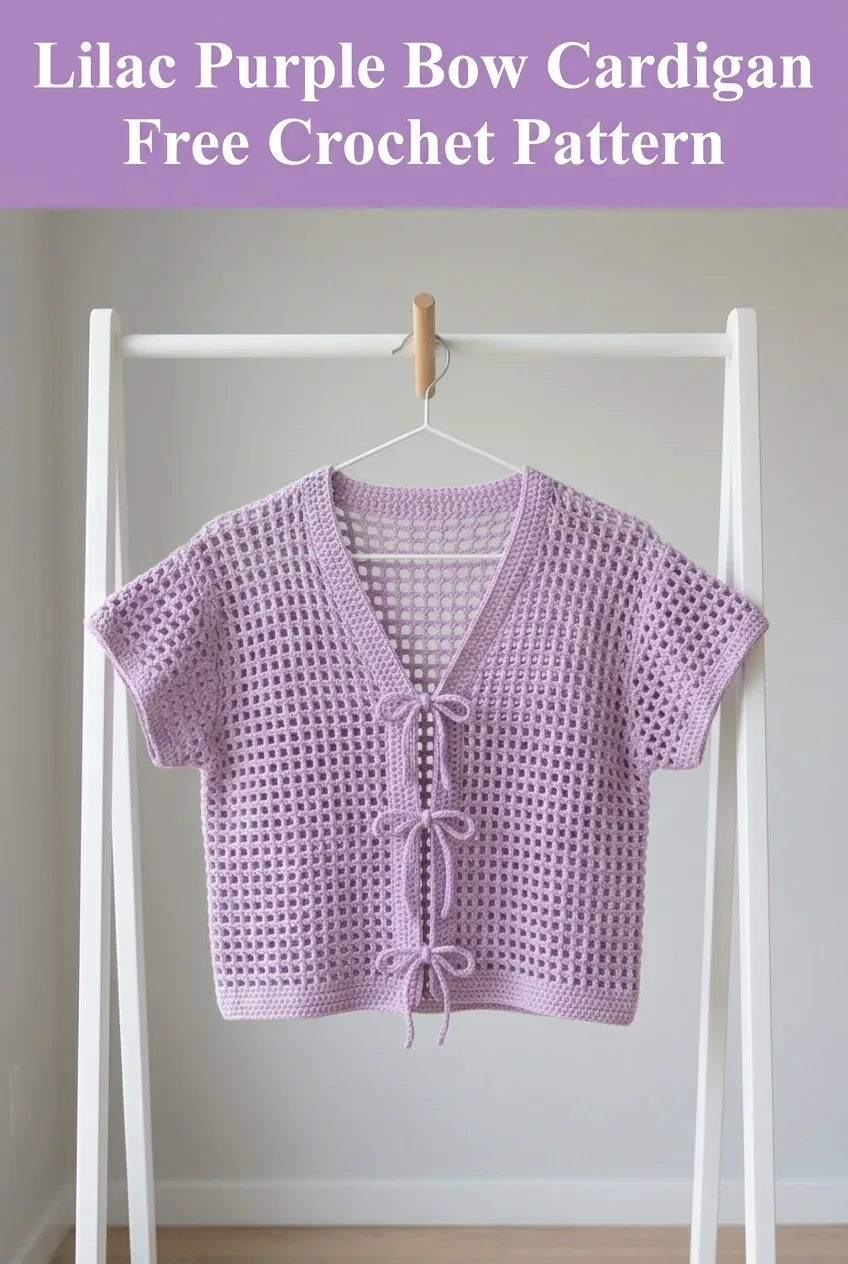
This is a lightweight, open-front cardigan worked in a classic filet mesh stitch. It uses basic double crochet and chain stitches. Three decorative bow ties close the front. Perfect for spring layering or summer evenings.
About This Crochet Pattern
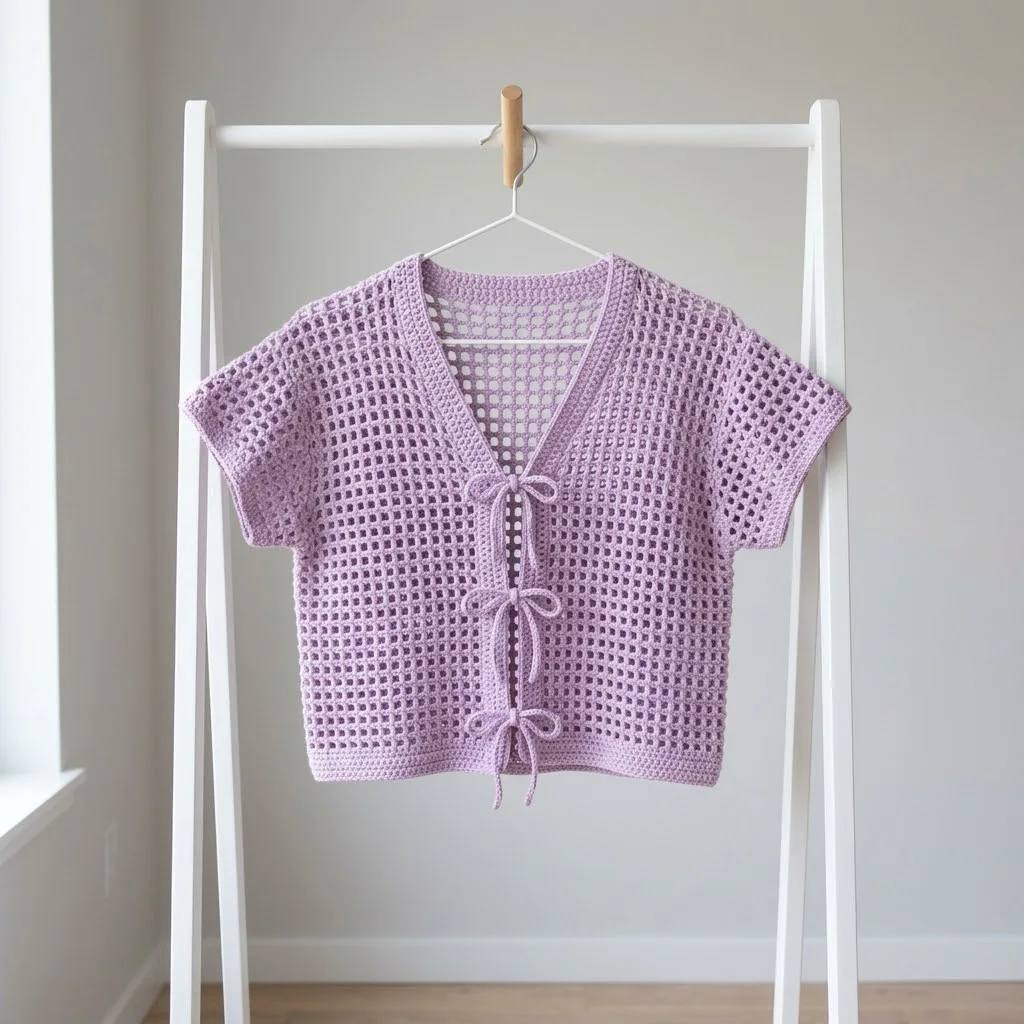
The Lilac Purple Bow Cardigan combines vintage charm with modern simplicity. The filet mesh creates an airy, breathable fabric that drapes beautifully. Those three bow closures add a feminine touch without any complicated hardware or buttons to sew on.
I love how the grid-like pattern creates visual interest while remaining incredibly easy to work. Once you establish the rhythm of the mesh, this cardigan practically works itself. The construction is straightforward too. You will work the back panel, two front panels, and short sleeves as separate pieces, then seam them together.
The V-neckline features a simple ribbed edging that frames the face nicely. This same edging continues down both front openings, giving the whole piece a polished, finished look.
Skill Level
Confident Beginner to Intermediate
If you can work a double crochet and count your stitches, you can make this cardigan. The mesh pattern is repetitive and meditative. Seaming the pieces together requires some patience, but nothing complicated.
Materials Needed
Yarn:
Hook:
Notions:
Gauge
18 stitches and 10 rows = 4 inches in filet mesh pattern
Check your gauge before starting. This cardigan relies on proper measurements for a good fit. If your gauge is too loose, go down a hook size. If too tight, go up a hook size.
Finished Measurements
This pattern is written for size Small with notes for adjusting.
Abbreviations and Stitch Definitions
Let me walk you through every stitch you will need.
Ch = Chain. Wrap yarn over hook, pull through loop on hook. This creates the foundation and the spaces in your mesh.
Sl st = Slip stitch. Insert hook, yarn over, pull through stitch and loop on hook in one motion. Used for joining and edging.
Sc = Single crochet. Insert hook, yarn over, pull up a loop (2 loops on hook), yarn over, pull through both loops. Creates a short, tight stitch.
Dc = Double crochet. Yarn over, insert hook, yarn over, pull up a loop (3 loops on hook), yarn over, pull through 2 loops, yarn over, pull through remaining 2 loops. The main stitch in this pattern.
Sk = Skip. Pass over the indicated stitch without working into it.
St(s) = Stitch(es)
Rep = Repeat
Special Technique: Filet Mesh Stitch
The filet mesh creates that beautiful grid pattern you see in the photos. Here is how it works:
Mesh Unit: 1 dc, ch 1, skip 1 stitch, 1 dc
Think of each "square" in the grid as one double crochet, one chain space, and then another double crochet into the next available stitch. The chain and skipped stitch create the open holes.
To work filet mesh in rows:
Row setup: Ch a multiple of 2, plus 4 for turning chain.
Pattern row: Dc in 5th ch from hook, *ch 1, sk 1, dc in next ch*, repeat to end.
Subsequent rows: Ch 4 (counts as dc plus ch 1), sk first dc and ch-1 space, dc in next dc, *ch 1, sk ch-1 space, dc in next dc*, repeat across.
Once you get the hang of it, you will fly through this pattern. The rhythm becomes automatic.
Pattern Instructions
Back Panel
Foundation: Ch 82 (or a multiple of 2 plus 2 for your desired width)
Row 1: Dc in 5th ch from hook (skipped chains count as dc plus ch 1), *ch 1, sk 1 ch, dc in next ch*, repeat across. (40 mesh squares, 81 sts including ch spaces)
Row 2: Ch 4 (counts as dc plus ch 1), turn, sk first dc and ch-1 space, dc in next dc, *ch 1, sk ch-1 space, dc in next dc*, repeat across, ending with dc in top of turning chain. (40 mesh squares)
Rows 3 through 44: Repeat Row 2.
Your back panel should measure approximately 18 inches long. Adjust row count as needed for your desired length.
Fasten off and weave in ends.
Left Front Panel
Foundation: Ch 42
Row 1: Dc in 5th ch from hook, *ch 1, sk 1 ch, dc in next ch*, repeat across. (20 mesh squares)
Row 2: Ch 4, turn, sk first dc and ch-1 space, dc in next dc, *ch 1, sk ch-1 space, dc in next dc*, repeat across. (20 mesh squares)
Rows 3 through 10: Repeat Row 2.
Begin V-Neck Shaping (Row 11):
Ch 4, turn, work in pattern across to last mesh square. Stop here. Do not work the final dc. (19 mesh squares)
Row 12: Ch 4, turn, sk first mesh unit, dc in next dc, continue in pattern across. (18 mesh squares)
Rows 13 through 44: Continue decreasing 1 mesh square at neck edge every other row until 12 mesh squares remain. Then work even until panel matches back length.
Fasten off.
Right Front Panel
Work same as Left Front Panel, but reverse the neck shaping. Decrease at the opposite edge so your two fronts mirror each other.
Tip: Place a stitch marker on the right side of each panel. This helps when seaming so you do not accidentally flip one piece.
Sleeves (Make 2)
Foundation: Ch 62
Row 1: Dc in 5th ch from hook, *ch 1, sk 1 ch, dc in next ch*, repeat across. (30 mesh squares)
Rows 2 through 15: Work even in filet mesh pattern.
Your sleeve should measure approximately 6 inches. This creates a relaxed short sleeve that hits mid-upper arm.
Fasten off.
Assembly
Take your time with this section. Good seaming makes all the difference in how professional your cardigan looks.
1. Shoulder Seams
Place back panel and one front panel right sides together. Using yarn needle and matching yarn, whipstitch or mattress stitch along shoulder edge, joining approximately 4 to 5 inches on each side. Leave the center open for your neck.
Repeat with second front panel.
2. Attach Sleeves
Find the center of one sleeve’s top edge. Match this to the shoulder seam. Pin in place.
Seam the sleeve to the body, working from shoulder seam toward front and back, distributing the sleeve evenly along the armhole opening.
Repeat for second sleeve.
3. Side and Underarm Seams
Starting at the bottom hem, seam up the side of the body. Continue along the underarm of the sleeve to the cuff.
Repeat on other side.
Edging
The edging creates that clean, polished border around the neckline and front openings.
Round 1: Join yarn at bottom right front corner with a sl st. Sc evenly up the right front edge, around the back neck, and down the left front edge. Work approximately 3 sc for every 2 rows to keep the edge flat without puckering.
Round 2: Ch 1, turn, sc in each sc across. This creates a firmer edge.
Round 3: Repeat Round 2.
Fasten off and weave in ends.
If desired, add a matching edging around each sleeve cuff using the same technique.
Bow Ties (Make 6)
Each bow consists of two separate tie pieces that you will attach to the cardigan edges.
Chain 60.
Row 1: Sc in 2nd ch from hook and each ch across. (59 sc)
Fasten off, leaving a 6-inch tail for attaching.
These simple chains create ties that you will sew to the front edges. Position three on the left front and three on the right front, directly across from each other.
Placement:
Use yarn needle to secure each tie firmly to the wrong side of the front edge. Tie in bows to close the cardigan.
Finishing Touches
Blocking: Wet block your finished cardigan by soaking it in lukewarm water for 15 minutes. Gently squeeze out excess water (do not wring). Lay flat on blocking mats and pin to measurements. Let dry completely.
Blocking opens up the mesh pattern beautifully and evens out your stitches. Do not skip this step.
Weave in all ends securely, weaving through several stitches and doubling back to prevent unraveling.
Customization Ideas
This cardigan pattern is wonderfully adaptable. Here are some ways to make it your own.
Longer Length: Add more rows to the body panels before beginning neck shaping for a hip-length or tunic cardigan.
Three-Quarter Sleeves: Work 25 to 30 rows instead of 15 for longer sleeves.
Button Closure: Skip the bow ties and add vintage buttons with crocheted loops instead.
Color Blocking: Use different colors for the body and sleeves, or work stripes within the mesh pattern.
Add Pockets: Crochet two small mesh squares and sew them to the front panels at hip level.
Care Instructions

Troubleshooting Tips
My mesh holes are closing up: Your tension may be too tight. Try going up a hook size, or consciously loosen your grip as you work.
The edges are wavy: This usually means you are adding or losing stitches somewhere. Count your mesh squares at the end of each row until the pattern feels automatic.
My front panels do not match: Double-check that you decreased on opposite edges for each panel. Lay them side by side before seaming to verify they mirror each other.
The shoulders are too wide: You can easily adjust by seaming more inches at the shoulder, leaving a smaller neck opening.
Thank you so much for choosing this pattern. I truly hope you enjoy making your own Lilac Purple Bow Cardigan. It is such a satisfying project, and that finished piece will get so many compliments.
If you make this cardigan, I would absolutely love to see it. Tag me on Instagram or share a photo in our Facebook group. Seeing your creations honestly makes my whole day.
Save this crochet pattern to your Pinterest boards so you can find it whenever you are ready to start. And please drop a comment below if you give it a try. I love hearing how your projects turn out and answering any questions along the way. Happy crocheting!
