I call this one "Sweet Whiskers," and she has quite the story. About two years ago, I sketched this little cat face in the margins of my planner during a particularly boring meeting. The drawing sat there for months, just a doodle with heart eyes and crooked whiskers. Then Valentine’s Day rolled around, and my niece mentioned she wanted a "pink kitty bag for carrying her treasures." I dug out that old planner, found my scribbled sketch, and Sweet Whiskers finally came to life. She turned out even cuter than I imagined, and now I get to share her with you.
This adorable Valentine Kitty Tote crochet pattern combines simple stitches with charming details to create a bag that works for kids and adults alike. Whether you are making it for a little one who loves cats or treating yourself to a whimsical accessory, this project delivers maximum cuteness with approachable construction.
Why You Will Love This Crochet Pattern
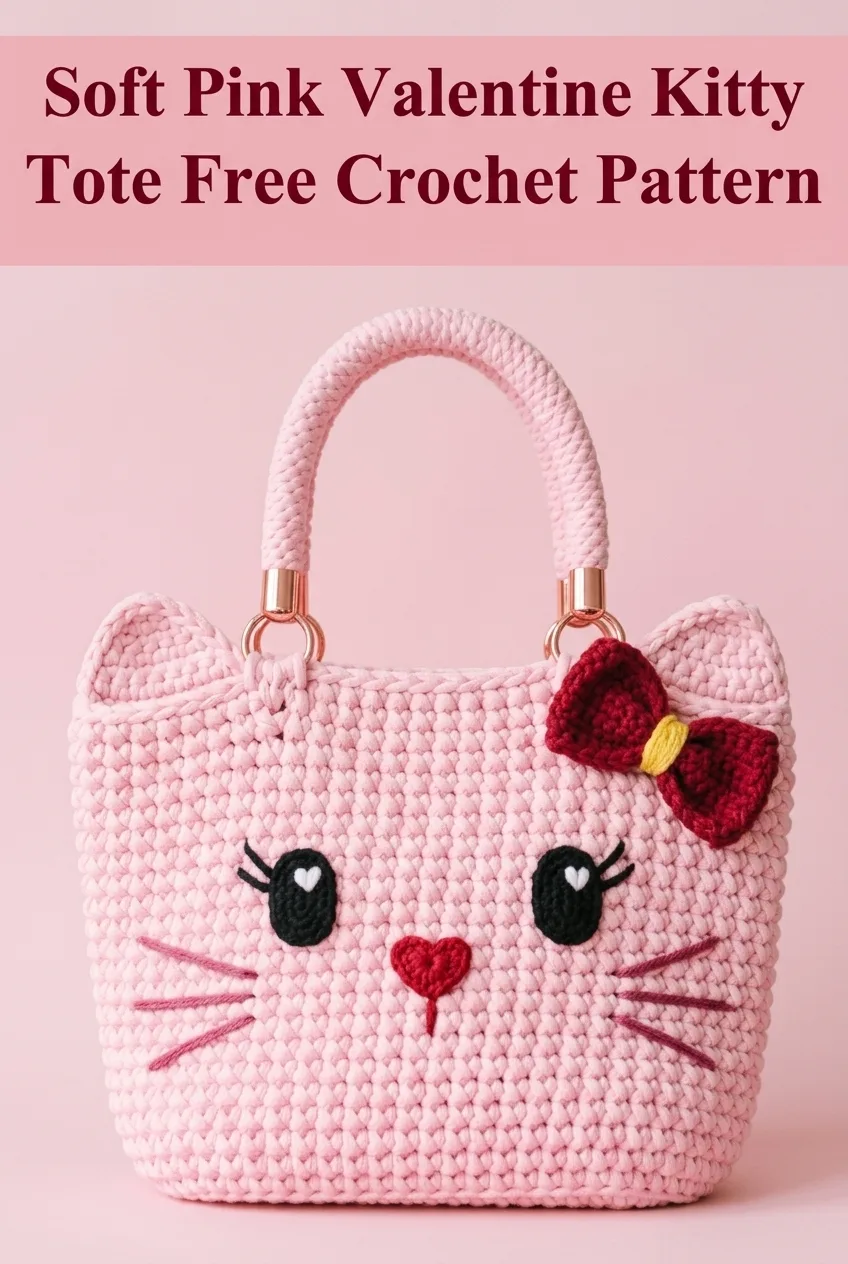
This kitty tote looks impressive, but the techniques are surprisingly straightforward. The body uses basic stitches worked in the round, creating that lovely textured fabric you see in the photos. The cat ears are shaped separately and sewn on, so you do not need to worry about complicated shaping while working the main bag.
The face details bring everything together. Those sweet oval eyes with heart reflections, the tiny heart nose, and the embroidered whiskers transform a simple pink bag into a character with personality. The bow adds a finishing touch that screams Valentine’s Day without being over the top.
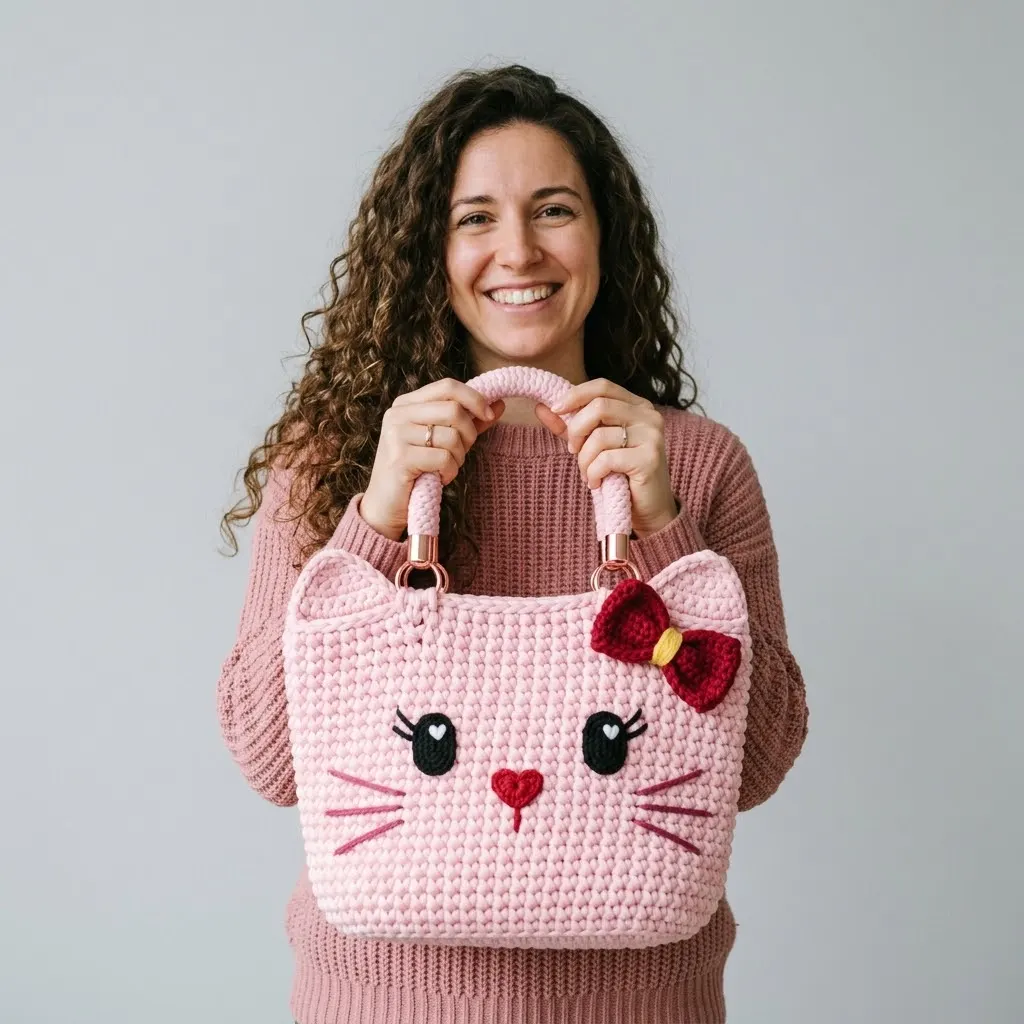
Perfect for gift giving. This tote works up relatively quickly considering its size, making it ideal for last minute Valentine’s gifts. Kids adore it for carrying small toys, books, or craft supplies. Adults can use it as a fun project bag or a quirky purse for casual outings.
Materials Needed for Your Kitty Tote
Gathering the right supplies before you start makes the whole process smoother. Here is everything you need to crochet this Valentine kitty bag from scratch.
Yarn
The bag pictured uses a chunky cotton cord yarn or t-shirt yarn, which gives it that substantial, sturdy feel. Regular worsted weight yarn will work too, but your finished bag will be smaller and softer. Adjust your hook size accordingly if substituting.
Tools and Notions
Skill Level and Techniques
This pattern suits confident beginners and beyond. If you can chain, single crochet, and work in the round, you have the skills needed. The face details involve some sewing and embroidery, which might feel new if you have not done it before. I walk you through each step.
Stitches Used
Chain (ch): Create a foundation loop, yarn over, pull through the loop on your hook. This forms your starting row.
Slip stitch (sl st): Insert hook into stitch, yarn over, pull through both the stitch and the loop on your hook in one motion. Used to join rounds and close off work.
Single crochet (sc): Insert hook into stitch, yarn over and pull up a loop (two loops on hook), yarn over and pull through both loops. This is your main stitch for the entire bag.
Increase (inc): Work two single crochet stitches into the same stitch. This makes your work grow wider.
Invisible decrease (dec): Insert hook through the front loops only of the next two stitches, yarn over, pull through both front loops, yarn over and pull through both loops on hook. Creates a cleaner decrease than the standard method.
Gauge
With bulky/t-shirt yarn and 8mm hook: 10 sc and 10 rows = approximately 10cm (4 inches) square.
Gauge matters here because it affects your finished bag size. Too loose and your bag will be floppy. Too tight and it will be stiff and small. Make a quick swatch and adjust your hook size if needed.
Finished Dimensions
The completed tote measures approximately:
Step by Step Crochet Pattern
Bag Base
The base is worked in rows to create a sturdy rectangular bottom.
Row 1: Ch 21. Sc in second ch from hook and in each ch across. (20 sts)
Rows 2 through 10: Ch 1, turn. Sc in each st across. (20 sts)
You should have a rectangle measuring approximately 20cm by 10cm. Do not fasten off. We will now work up the sides.
Bag Body
The body is worked in continuous rounds around the base. Place a stitch marker at the start of each round and move it up as you go.
Round 1: Without turning, work sc evenly around the entire edge of the base rectangle. Work 20 sc across the long edge, 3 sc in the corner stitch, 10 sc along the short edge, 3 sc in the corner, 20 sc across the second long edge, 3 sc in the corner, 10 sc along the final short edge, 3 sc in the corner. Place marker. (72 sts)
Rounds 2 through 25: Sc in each st around, moving your marker each round. (72 sts)
Your bag body should measure approximately 25cm tall. If you want a taller bag, continue for additional rounds.
Final Round: Sl st in next st. Fasten off and weave in ends.
Cat Ears (Make 2)
The ears are worked in rows, then folded and sewn to the top of the bag.
Row 1: Ch 10. Sc in second ch from hook and in each ch across. (9 sts)
Row 2: Ch 1, turn. Dec, sc in next 5 sts, dec. (7 sts)
Row 3: Ch 1, turn. Dec, sc in next 3 sts, dec. (5 sts)
Row 4: Ch 1, turn. Dec, sc in next st, dec. (3 sts)
Row 5: Ch 1, turn. Sc3tog (insert hook in next st, pull up loop) three times, yarn over and pull through all 4 loops. (1 st)
Fasten off, leaving a long tail for sewing.
Shaping the Ear: Fold the ear piece in half lengthwise, wrong sides together. The folded edge becomes the front of the ear, and the natural curve creates that cute pointed cat ear shape. Whip stitch the bottom edges together partway, leaving an opening if you want to add a tiny bit of stuffing.
Eyes (Make 2)
The eyes are large black ovals with white heart highlights.
Black Oval:
Round 1: With black yarn, ch 6. Sc in second ch from hook, sc in next 3 ch, 3 sc in last ch. Working along the opposite side of the chain, sc in next 3 sts, 2 sc in last st. Place marker. (12 sts)
Round 2: Inc, sc in next 3 sts, inc 3 times, sc in next 3 sts, inc twice. (18 sts)
Round 3: Sc in next st, inc, sc in next 3 sts, (sc, inc) 3 times, sc in next 3 sts, (sc, inc) twice. (24 sts)
Sl st to close. Fasten off, leaving a tail for sewing.
White Heart Highlight: Using white yarn, embroider a small heart shape in the upper portion of each eye using satin stitch. Alternatively, you can crochet a tiny heart (ch 2, work 2 dc, ch 2, sl st, ch 2, 2 dc all in the same starting chain) and sew it on.
Heart Nose
Round 1: With red yarn, create a magic ring. Ch 2, work 2 dc in ring, ch 2, sl st in ring, ch 2, work 2 dc in ring. Pull ring closed.
This creates a tiny heart shape. Fasten off, leaving a tail for sewing.
Bow
The bow adds that signature Valentine’s Day charm.
Center Piece:
Row 1: With red yarn, ch 6. Sc in second ch from hook and in each ch across. (5 sts)
Rows 2 through 8: Ch 1, turn. Sc in each st across. (5 sts)
Fasten off, leaving a long tail.
Bow Loops (Make 2):
Row 1: With red yarn, ch 16. Sc in second ch from hook and in each ch across. (15 sts)
Rows 2 and 3: Ch 1, turn. Sc in each st across. (15 sts)
Fasten off, leaving a tail.
Yellow Center:
Row 1: With yellow yarn, ch 4. Sc in second ch from hook and in each ch across. (3 sts)
Rows 2 through 4: Ch 1, turn. Sc in each st across. (3 sts)
Fasten off.
Assembly: Fold each bow loop piece so the short ends meet. Stack them crossed over each other. Wrap the center piece around the middle and sew the back closed. Wrap the yellow piece around the very center and sew in place on the back.
Assembly Instructions
Now comes the fun part. Bringing Sweet Whiskers to life.
Attaching the Ears
Position each ear at the top corners of the bag, angled slightly outward. The base of each ear should sit about 3cm down from the top edge and about 5cm in from each side corner. Pin in place first to check positioning. Using your tapestry needle and matching yarn, whip stitch firmly around the base of each ear.
Placing the Face
The face sits centered on one side of the bag. Lay your bag flat and arrange the pieces before sewing anything.
Eyes: Position about 8cm down from the top edge and about 8cm apart. They should be slightly tilted, with the inner corners angled down toward where the nose will go.
Nose: Center the heart nose between and below the eyes, about 3cm down from the bottom of the eyes.
Once you are happy with placement, sew each piece securely using matching thread or yarn. Make small stitches around the edges, going through both the applique and the bag fabric.
Embroidering the Whiskers
Using pink embroidery floss or thin yarn, create three whiskers on each side of the face. Each whisker is a simple straight stitch about 4cm long, angling slightly upward and outward from the cheeks. Space them evenly.
Adding the Eyelashes
With black yarn, embroider 2 or 3 short eyelash lines extending from the outer corner of each eye. Keep them subtle.
Attaching the Bow
Position the bow on one ear, angled slightly. Sew securely through the back of the bow into the ear.
Handle Attachment
Thread the bag handles through the top edge of the bag, positioning them evenly on each side. If your handles have hardware loops, you can create a yarn loop connection instead. Using matching pink yarn, ch 10, sl st to form a ring, and sc around the chain until covered. Attach to the bag edge and loop through the handle hardware. Repeat for all four connection points.
Pattern Notes and Tips
Blocking: Steam blocking helps even out your stitches and gives the bag a more polished look.
Lining: For durability, consider adding a fabric lining. This prevents items from poking through the stitches and adds structure.
Customization: Switch up the colors for different holidays. Orange and black for Halloween, pastels for Easter, or classic neutrals for everyday use.
Sizing up or down: Add or subtract rows from the base and rounds from the body to adjust the overall size.

Caring for Your Finished Tote
Hand wash in cool water with mild soap if needed. Lay flat to dry, reshaping while damp. T-shirt yarn and cotton blends hold up well to regular use, but avoid machine washing to preserve the shape.
I hope you love making Sweet Whiskers as much as I loved designing her. This crochet tutorial walks you through every step, so even if this is your first bag project, you can absolutely do this.
If you make this pattern, I would genuinely love to see your version. Tag me on Instagram or share in our Facebook group. Seeing your creations brings me so much joy.
This Valentine Kitty Tote pattern makes a statement gift that shows real thought and effort. That little heart nose gets me every time.
Thank you so much for choosing this pattern. Happy crocheting, friend.
If this Soft Pink Valentine Kitty Tote caught your eye, go ahead and pin it to your crochet project board so you can find it when you are ready to start. And if you do make one, please drop a comment below. I love hearing which color combinations you choose and seeing how your Sweet Whiskers turns out.
