
I don’t know about you, but I have a serious soft spot for doll clothes. There’s something about miniature garments that lets you experiment with fancy techniques without committing to a full-sized project.
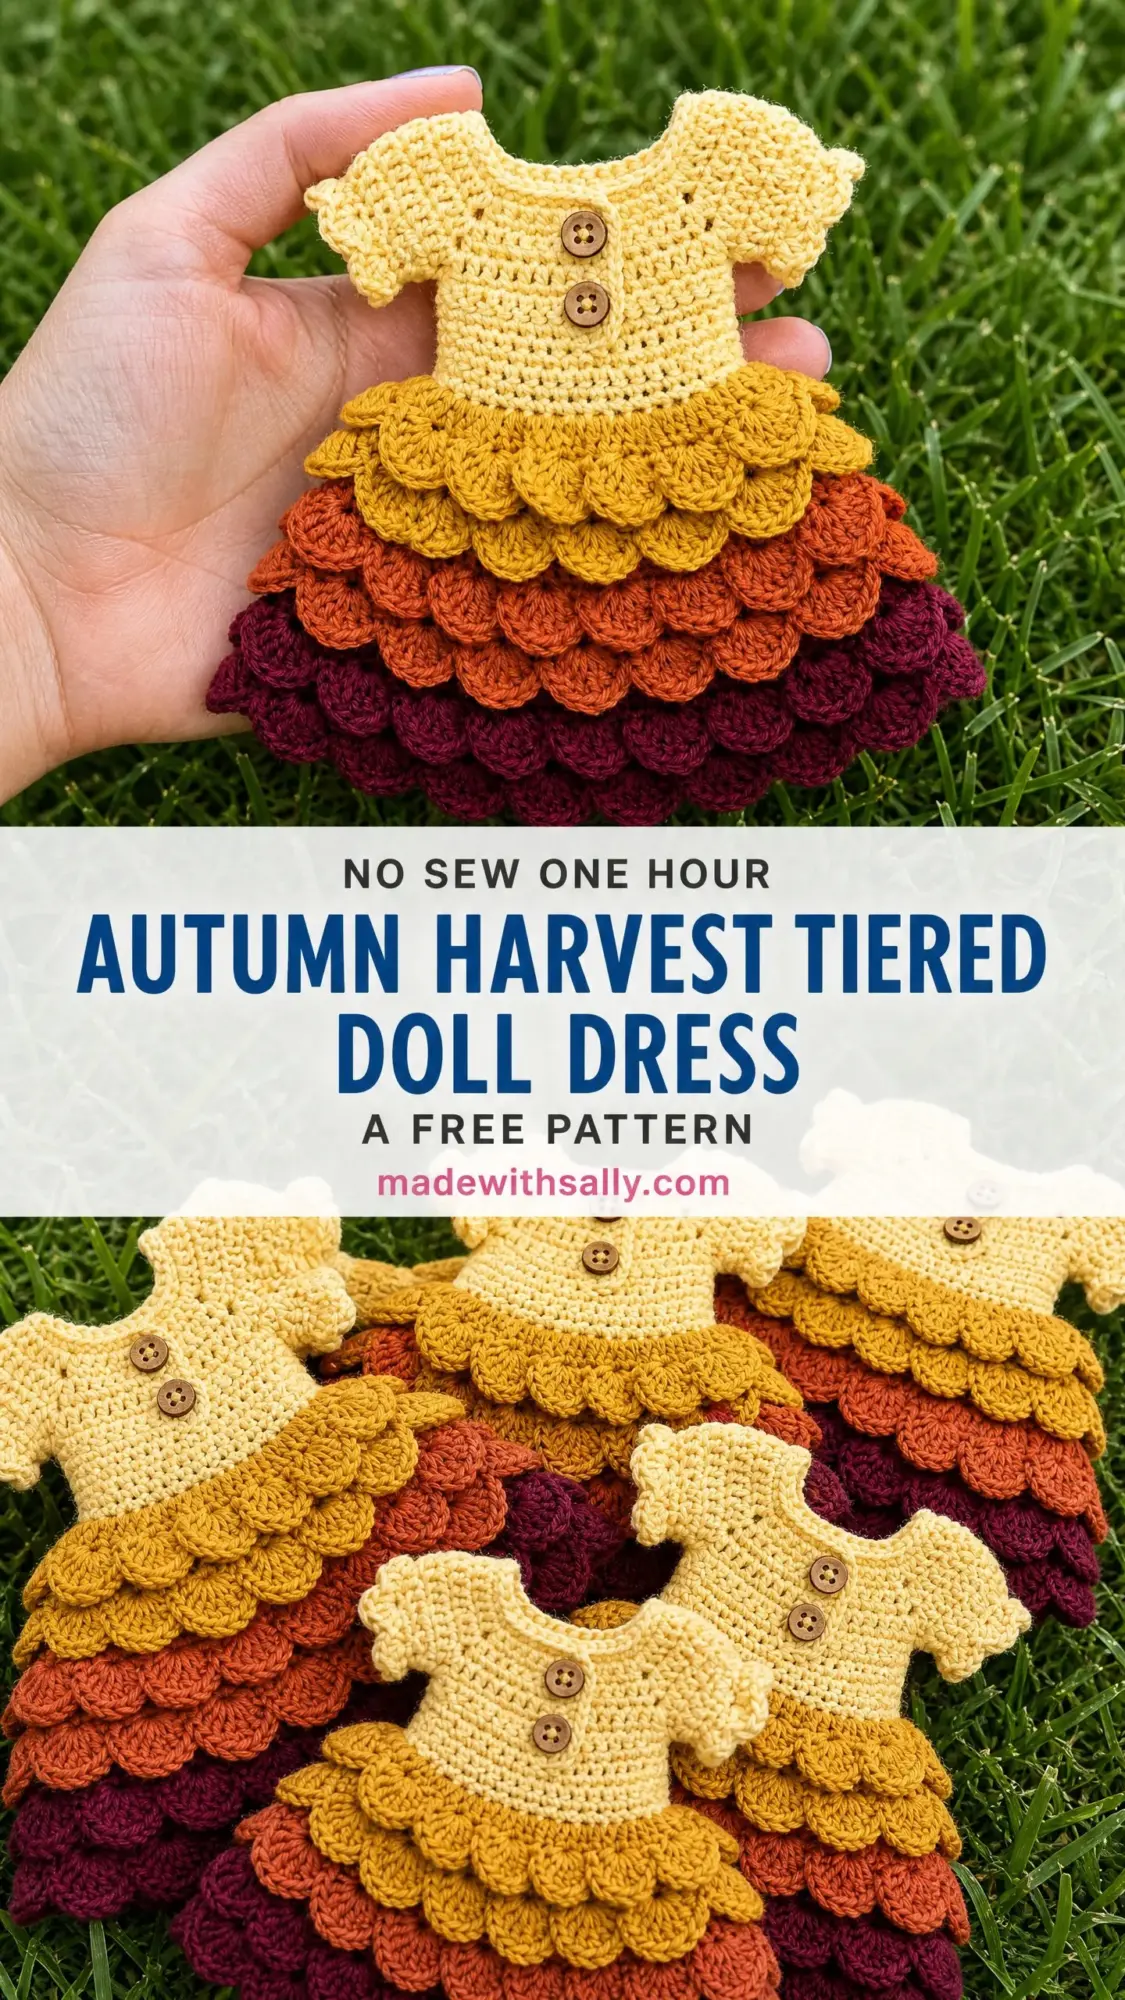
This tiered doll dress hits that sweet spot perfectly. You get to practice the stunning crocodile stitch in a small, manageable format while creating something genuinely beautiful. The warm autumn color palette makes it feel like a cozy little harvest celebration for your favorite 18-inch doll.
And honestly? The finished dress looks way more complicated than it actually is. If you can work basic stitches and follow a rhythm, you can absolutely make this happen.
About This Crochet Pattern
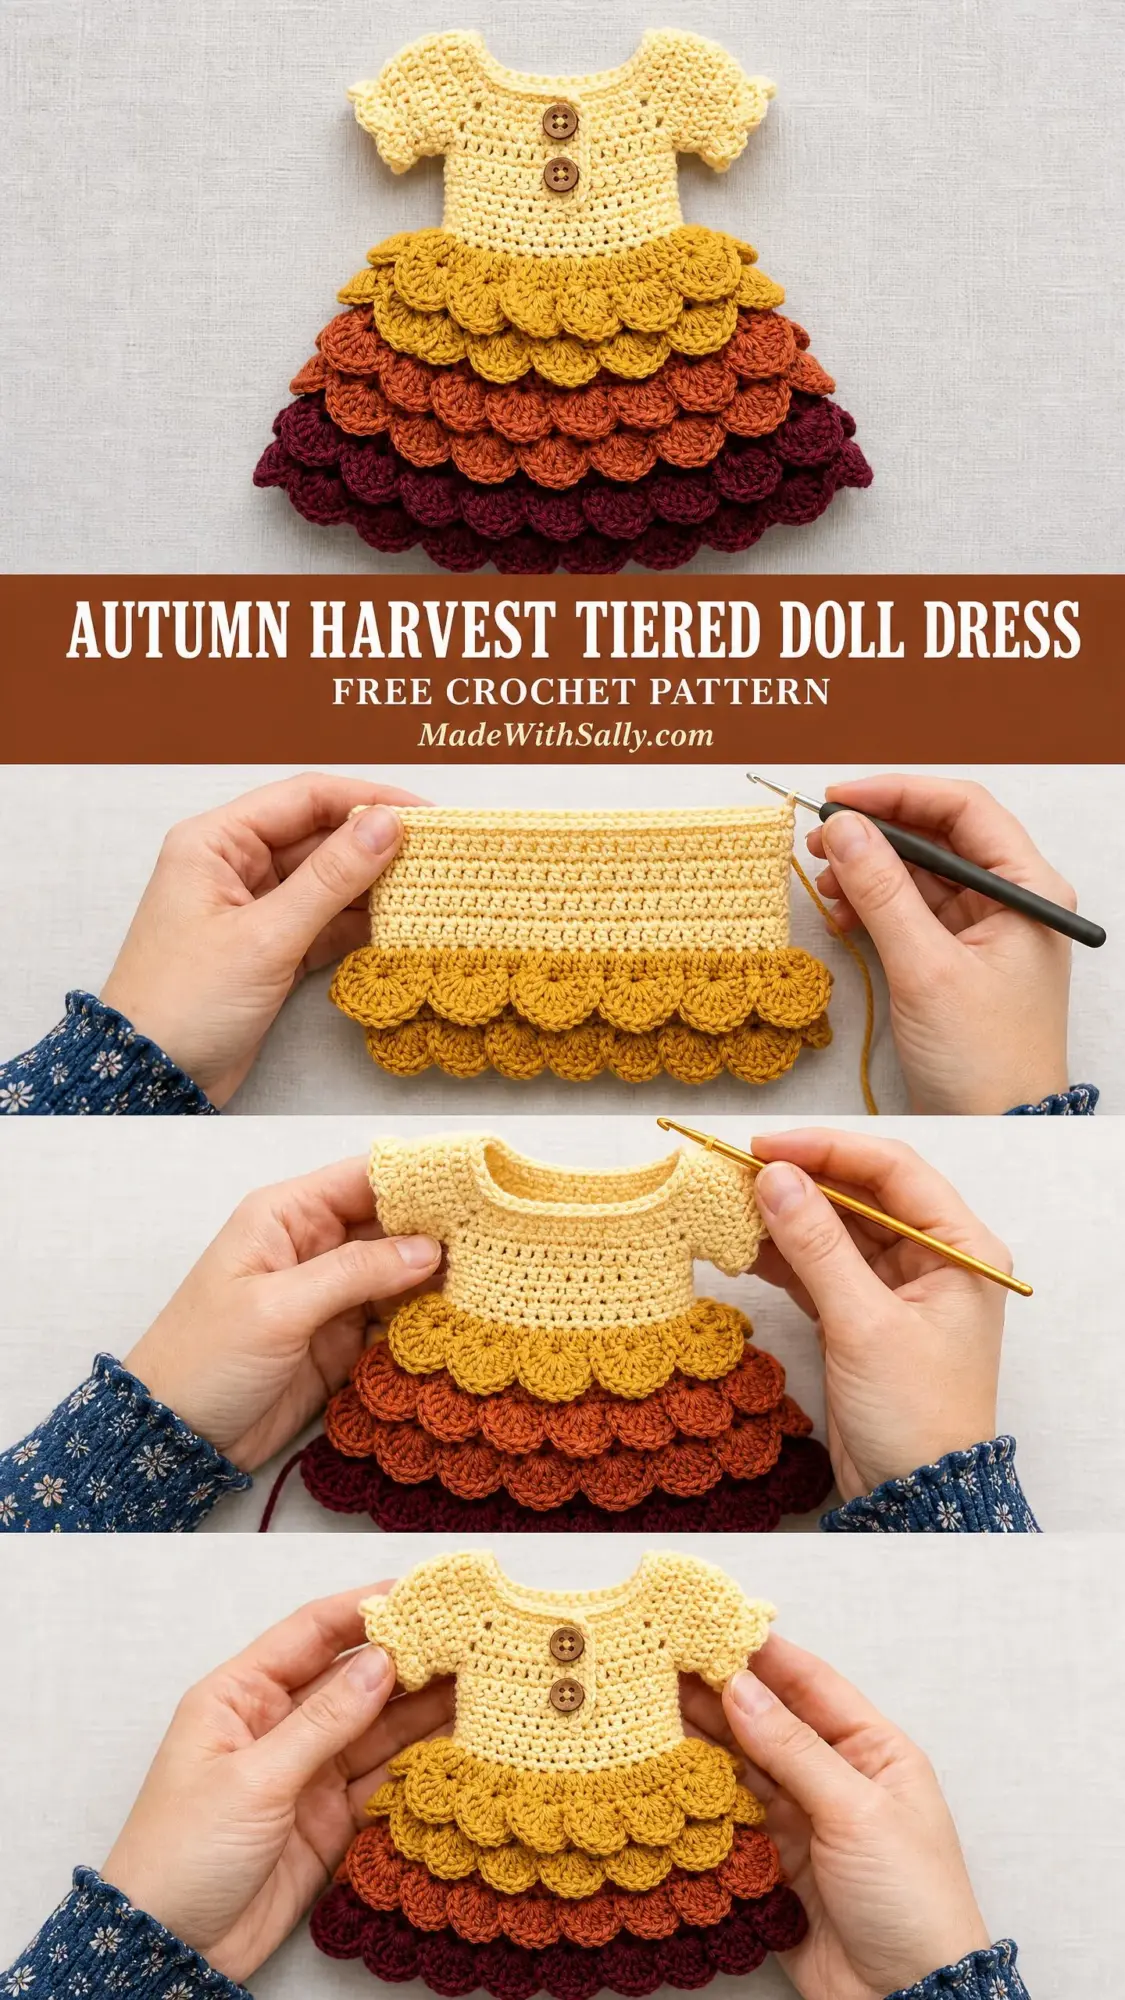
This Autumn Harvest Tiered Doll Dress features a classic empire-waist silhouette that you’ll work flat from the top down. The bodice uses simple single crochet with adorable cap sleeves and a decorative front button band. But the real showstopper is that skirt. Four tiers of crocodile stitch scales cascade down in a gorgeous color progression, moving from golden mustard through burnt orange to deep burgundy.
The dress is designed to fit 18-inch dolls like American Girl and similar fashion dolls. When finished, it measures approximately 5.5 inches wide across the bodice and 9.5 inches from shoulder to hem.
Skill Level: Intermediate. You’ll need to be comfortable working flat and in the round, shaping with increases and decreases, joining new colors cleanly, and executing the crocodile stitch. Don’t worry if the crocodile stitch is new to you. I’ll walk you through every step in detail.
Time Estimate: Plan for approximately 6 to 10 hours depending on your experience with the crocodile stitch.
Materials You’ll Need
Yarn: Light worsted weight (size 3 or DK weight) cotton or cotton-blend yarn in four colors
Hook: US size E-4 / 3.5 mm crochet hook
Notions:
Yarn Suggestions
Lion Brand 24/7 Cotton works beautifully here. This 100% mercerized cotton holds crisp stitch definition that’s ideal for showing off the crocodile scale texture, and it washes like a dream.
Paintbox Yarns Simply DK is another excellent choice. It’s widely available in a full autumn palette, produces excellent stitch definition, and is machine washable. Super practical for a doll garment that might see some play.
Scheepjes Catona is my premium pick. This mercerized cotton has an outstanding color range for achieving those precise autumn tones, and it’s available in small quantities so you won’t be stuck with tons of leftover yarn.
Substitution note: Any DK or light worsted yarn that produces the correct gauge will work. Cotton and cotton blends are recommended because they block well and hold the structured crocodile scales in shape. Avoid overly fuzzy or hairy fibers since these will obscure the beautiful scale texture.
Gauge
18 stitches and 20 rows = 4 inches / 10 cm in single crochet worked flat with your E-4 / 3.5 mm hook.
Gauge for crocodile stitch: One complete crocodile scale measures approximately 0.9 inches / 2.3 cm wide.
Please, please make a gauge swatch. Even small gauge differences will alter the fit of the bodice, and you don’t want to get halfway through only to discover the dress won’t fit your doll.
Abbreviations
Let me break down all the abbreviations you’ll encounter in this crochet tutorial:
Special Stitches: The Crocodile Scale
This is the signature technique that makes the skirt so stunning. The crocodile stitch creates overlapping scales that resemble fish scales or flower petals. Each scale is worked around two adjacent double crochet posts that form a V shape.
Step by Step for One Crocodile Scale
Step 1: Locate the V-stitch pair. You’ll have two double crochet stitches leaning toward each other with a chain-1 space between them.
Step 2: Join yarn to the top of the left-hand dc of the pair. Work 5 dc down the post of that left-hand dc by inserting your hook around the post (front to back to front), yarning over and pulling through, yarning over and pulling through 2 loops. Repeat until you have 5 dc worked around that post from top to bottom.
Step 3: Chain 1. This chain-1 forms the bottom point of the scale.
Step 4: Now work 5 dc UP the post of the right-hand dc of the same V pair. Insert your hook from bottom to top (front to back to front) around that post, working each dc from the base toward the top.
Step 5: The 10 dc total (5 down and 5 up) form one complete overlapping scale. The scale will naturally cup forward.
Step 6: To move to the next scale, slip stitch across the top of the next V pair to position for the following scale.
Pattern Notes Before You Begin
1. The bodice is worked flat in rows from the back neck opening down to the waist. A button and loop will close the back seam at the end.
2. The skirt tiers are worked in joined rounds built on top of each other. Each tier adds height and volume.
3. Color changes occur at the beginning of new tiers: Color B for tier 1, Color C for tiers 2 and 3, Color D for tier 4.
4. For rows of sc, chain 1 and turn. This chain 1 does not count as a stitch throughout this pattern.
5. The decorative front buttons are just for show. The back closure uses a separate loop and button sewn after finishing.
6. Mark your RS with a stitch marker. The first row worked is the WS (inside) of the dress.
Crochet Pattern Instructions
Bodice
The bodice is worked flat in rows. Begin at the back neck edge.
Using Color A, chain 37.
Row 1 (WS): Sc in the 2nd chain from hook and in each ch across. Turn. (36 sc)
Row 2 (RS): Ch 1, sc in each st across. Turn. (36 sc)
Row 3: Ch 1, sc in each st across. Turn. (36 sc)
This establishes the upper back panel. Now you’ll divide for the armholes.
Row 4, Back left panel: Ch 1, sc in first 8 sts. Turn, leaving remaining sts unworked. (8 sc)
Row 5: Ch 1, sc in each st across. Turn. (8 sc)
Row 6: Ch 1, sc in each st across. Turn. (8 sc)
Row 7: Ch 1, sc in each st across. Turn. (8 sc)
Fasten off Color A. This is the left back bodice.
Return to Row 3. Skip 2 sts from the left back panel, join Color A to the next st.
Row 4, Bodice front: Ch 1, sc in same st as join and in next 15 sts. Turn. (16 sc)
Row 5: Ch 1, sc in each st across. Turn. (16 sc)
Row 6: Ch 1, sc in each st across. Turn. (16 sc)
Row 7: Ch 1, sc in each st across. Turn. (16 sc)
Fasten off Color A. This is the front bodice panel.
Return to Row 3. Skip 2 sts from the front panel, join Color A to the next st.
Row 4, Back right panel: Ch 1, sc in same st as join and in next 7 sts. Turn. (8 sc)
Row 5: Ch 1, sc in each st across. Turn. (8 sc)
Row 6: Ch 1, sc in each st across. Turn. (8 sc)
Row 7: Ch 1, sc in each st across. Turn. (8 sc)
Fasten off Color A. This is the right back bodice.
Now you’ll join all three panels at the underarm and work the bodice body in rows.
Row 8, Join panels: With RS facing, join Color A to the first st of the left back panel. Ch 1, sc in each of 8 sts across left back panel. Ch 2 (underarm bridge). Sc in each of 16 sts across front panel. Ch 2 (underarm bridge). Sc in each of 8 sts across right back panel. Turn. (32 sc plus 4 ch = 36 sts in working row)
Row 9: Ch 1, sc in first 8 sc, sc in each of the 2 ch at underarm, sc in next 16 sc, sc in each of the 2 ch at underarm, sc in last 8 sc. Turn. (36 sc)
Row 10: Ch 1, sc in each st across. Turn. (36 sc)
Row 11: Ch 1, sc in each st across. Turn. (36 sc)
Row 12: Ch 1, [sc in next 8 sts, inc in next st] 4 times. Turn. (40 sc)
Row 13: Ch 1, sc in each st across. Turn. (40 sc)
Row 14: Ch 1, sc in each st across. Turn. (40 sc)
Row 15: Ch 1, [sc in next 9 sts, inc in next st] 4 times. Turn. (44 sc)
Row 16: Ch 1, sc in each st across. Turn. (44 sc)
Fasten off Color A.
Checkpoint: Your bodice should measure approximately 4 inches tall from the chain edge to the bottom of Row 16. The width at Row 16 should measure approximately 9.75 inches flat.
Sleeve Edging
With RS facing and working along the armhole opening on one side, join Color A at the underarm bridge.
Round 1: Ch 1, sc evenly around the armhole opening, working approximately 12 sc around each armhole. Join with sl st to first sc. (12 sc)
Round 2: Ch 1, sc in each st around. Join with sl st. (12 sc)
Round 3: Ch 1, [sc in next 2 sts, inc in next st] 4 times. Join with sl st. (16 sc)
Fasten off and weave in ends. Repeat for second armhole.
The slight flare in Round 3 creates that sweet little cap sleeve puff.
Preparing for the Skirt
Before beginning the skirt, use a yarn needle and Color A to seam the back bodice from the neck edge down through Row 10. Leave the bottom 6 rows open so the dress can go on and off the doll easily.
Skirt Tier 1 (Color B, Golden Mustard)
Join Color B to any stitch in Row 16 of the bodice with RS facing.
Tier 1 Round 1 (V-stitch foundation): Ch 4 (counts as dc plus ch-1). Skip 3 sts. [(Dc, ch 1, dc) in next st, skip 3 sts] 10 times. Dc in same st as ch-4. Sl st to 3rd ch of ch-4. (11 V-pairs across 44 base sts)
Tier 1 Round 2 (Crocodile Scales): Work 1 crocodile scale over each V-pair following the Special Stitches instructions. Travel between pairs with sl st as needed. Work 11 scales total.
Tier 1 Round 3 (Connector): Join Color B to the top edge of any completed scale. Working across the top edges of all 11 scales, work 4 sc across each scale evenly. Sl st to join. (44 sc)
Work this connector row loosely so the scales hang freely.
Checkpoint: Your dress should measure approximately 6.5 inches from shoulder.
Skirt Tier 2 (Color C, Burnt Orange)
Round 4 (Increase round): Join Color C. Ch 1. [Sc in next 3 sts, inc] 11 times. Sl st to join. (55 sc)
Round 5 (V-stitch foundation): Ch 4. Skip 4 sts. [(Dc, ch 1, dc) in next st, skip 4 sts] 10 times. Dc in same st as ch-4. Sl st to 3rd ch of ch-4. (11 V-pairs across 55 base sts)
Round 6 (Crocodile Scales): Work 11 scales as before. (11 scales)
Round 7 (Connector): Join Color C. Work 5 sc per scale across all 11 scales. Sl st to join. (55 sc)
Skirt Tier 3 (Color C, Burnt Orange)
Round 8 (Increase round): Ch 1. [Sc in next 4 sts, inc] 11 times. Sl st to join. (66 sc)
Round 9 (V-stitch foundation): Ch 4. Skip 5 sts. [(Dc, ch 1, dc) in next st, skip 5 sts] 10 times. Dc in same st as ch-4. Sl st to 3rd ch of ch-4. (11 V-pairs across 66 base sts)
Round 10 (Crocodile Scales): Work 11 scales. (11 scales)
Round 11 (Connector): Work 6 sc per scale across all 11 scales. Sl st to join. (66 sc)
Skirt Tier 4 (Color D, Deep Burgundy)
Round 12 (Increase round): Join Color D. Ch 1. [Sc in next 5 sts, inc] 11 times. Sl st to join. (77 sc)
Round 13 (V-stitch foundation): Ch 4. Skip 6 sts. [(Dc, ch 1, dc) in next st, skip 6 sts] 10 times. Dc in same st as ch-4. Sl st to 3rd ch of ch-4. (11 V-pairs across 77 base sts)
Round 14 (Crocodile Scales): Work 11 scales. (11 scales)
Fasten off and weave in all ends.
Finishing
Attaching Decorative Buttons: Using sewing needle and thread, attach both wooden buttons to the front bodice, spacing them evenly as shown in the reference images. These are decorative only.
Back Closure: Sew a small button loop at the top of one back panel edge. Attach a small button or hook-and-eye closure to secure the dress at the waist area for easy dressing.
Blocking: For the crispest crocodile scales, lightly steam block the finished dress. Pin the scales open while blocking to help them hold their shape.
Tips for Success
If your scales look floppy: Your tension might be too loose. Try going down a hook size for just the scale rows.
If your bodice is too tight: Go up a hook size, or add an extra stitch to your starting chain and adjust subsequent rows accordingly.
Color substitution idea: This dress looks stunning in any gradient. Try blues for a mermaid look, greens for a forest fairy, or pinks and purples for a spring garden party dress.
For beginners to crocodile stitch: Practice on a small swatch first. Make a few V-stitch pairs and work scales over them until the technique clicks. It usually takes about 3 or 4 scales before it becomes intuitive.
I really hope you enjoy making this autumn harvest tiered doll dress as much as I enjoyed designing it. The crocodile stitch creates such a satisfying texture, and watching those warm colors stack up tier by tier is genuinely delightful. If you want to find this pattern easily later, go ahead and pin it to your favorite Pinterest board. And please drop a comment below if you make one. I would absolutely love to see your color combinations and hear how the project went for you!
