
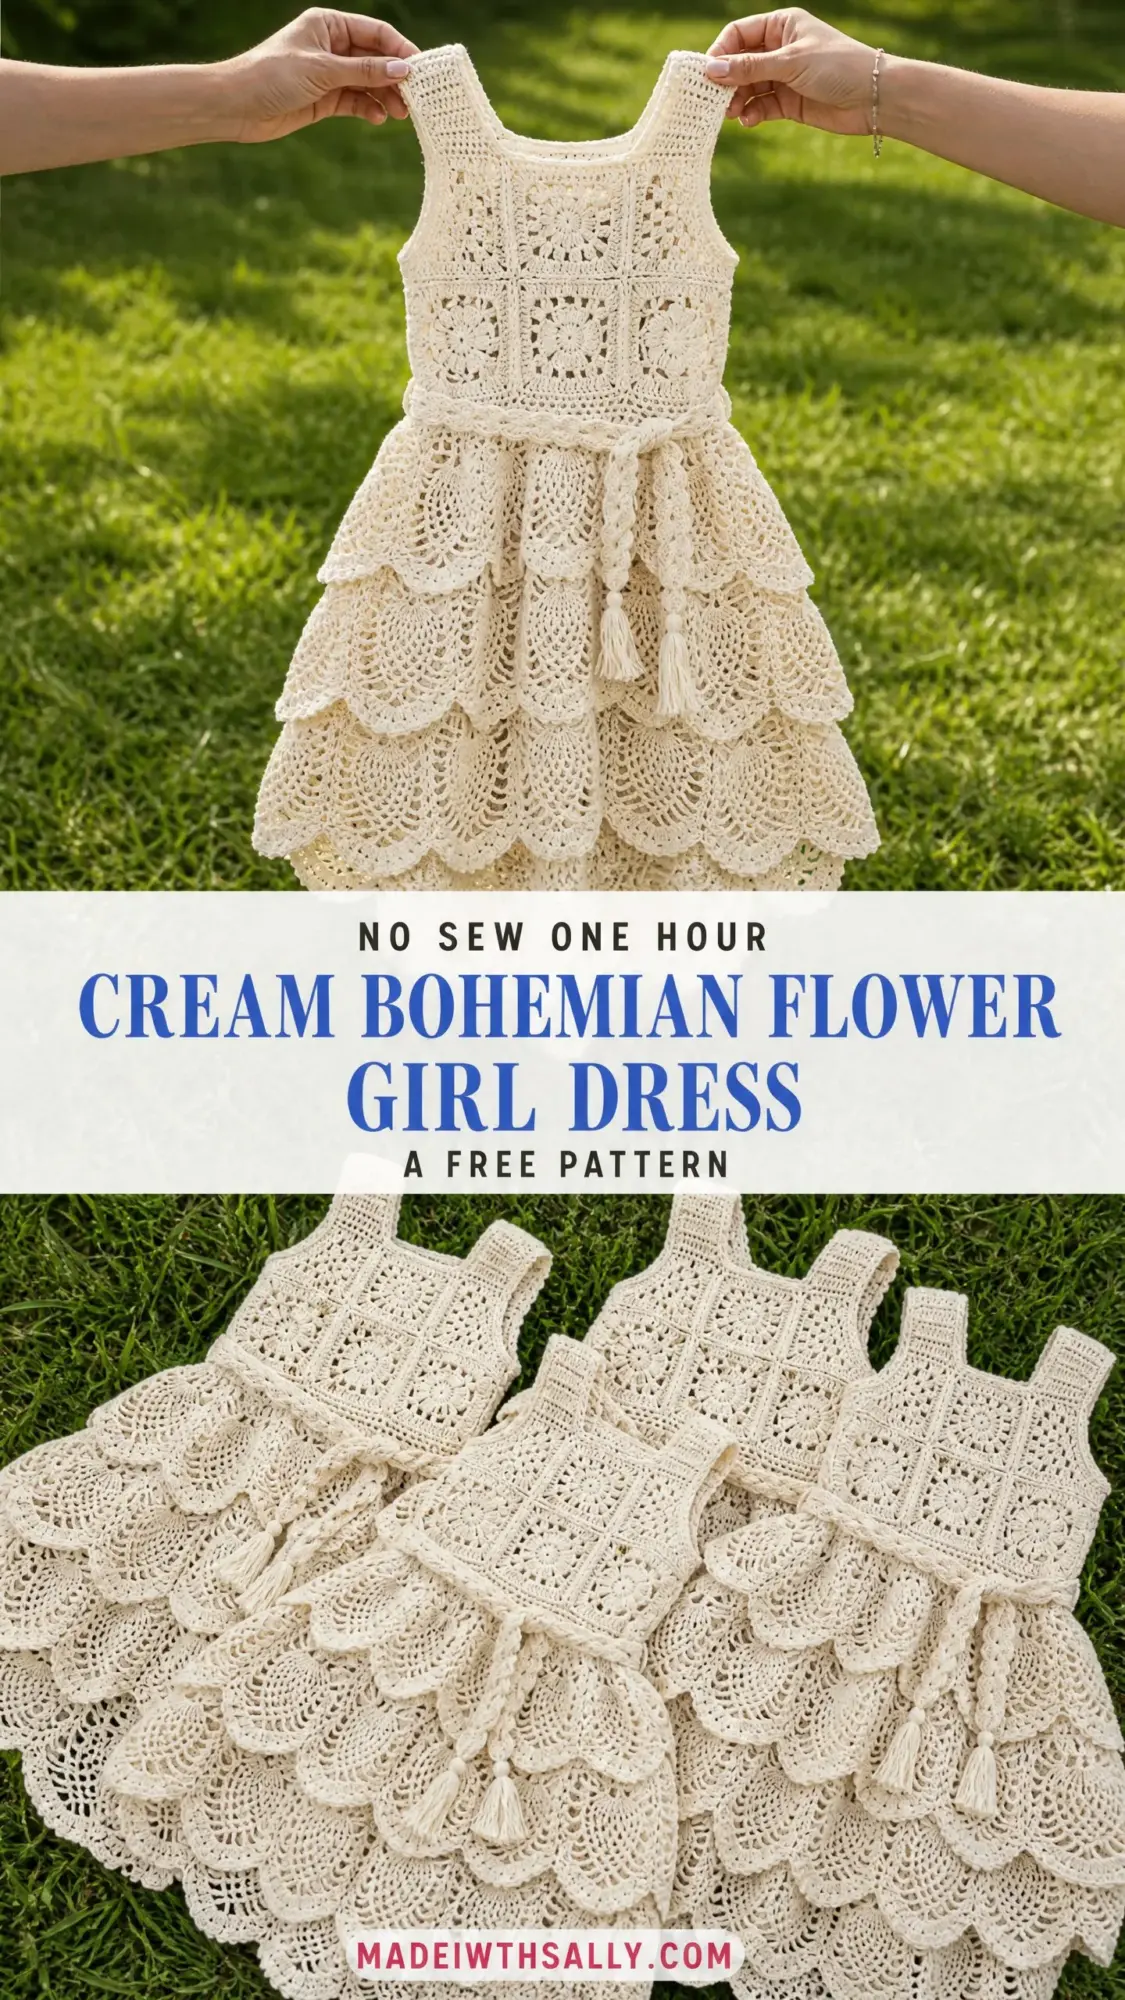
Go dig into that stash right now. You know that beautiful DK cotton you’ve been saving for something truly special? This is the project. This bohemian flower girl dress combines classic granny squares with layered doily motifs to create a cascading, romantic silhouette that looks far more complex than it actually is.
I’ll be honest with you. This pattern sits at the advanced beginner to intermediate level. You’ll need to know your way around a granny square and feel comfortable working circular motifs. But if you’ve completed at least one project using each of those techniques, you absolutely have the skills to make this dress.
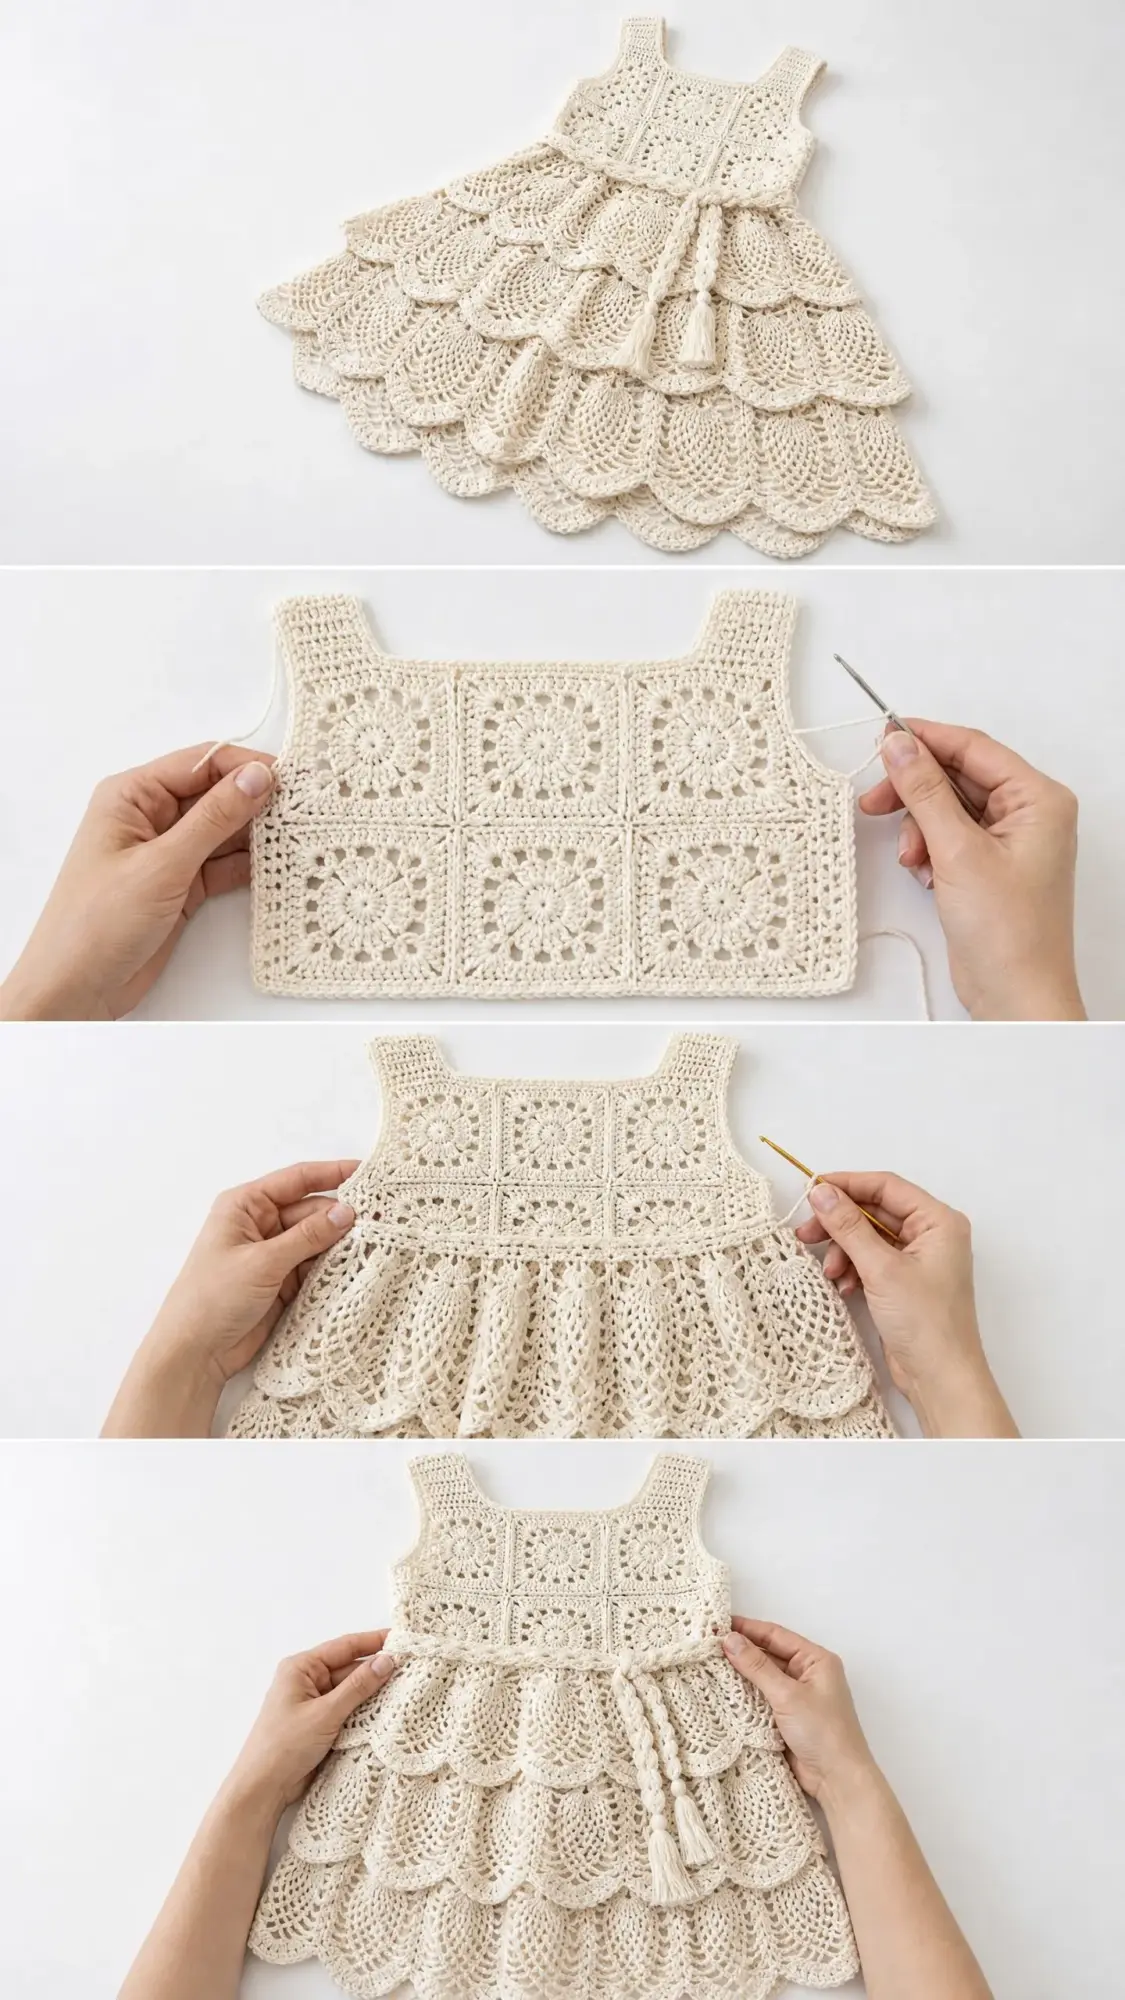
The construction is genuinely interesting. The structured bodice uses a simple 3×3 grid of joined granny squares, while the dreamy tiered skirt features overlapping circular doilies that create those gorgeous petal-like layers. Add a braided belt with tassel ends, and you’ve got an heirloom piece worthy of the most special occasions.
Why This Crochet Pattern Works So Well
The genius of this design lies in how the different elements complement each other. The geometric granny square bodice provides structure and a secure fit, while the circular doily motifs on the skirt create movement and flow. The high-low hemline adds modern drama to a classic silhouette.
Each component is worked separately and then assembled. This means you can crochet individual motifs during short sessions, making it a perfect project for busy crafters who work in stolen moments throughout the week.
The total time estimate runs approximately 20 to 30 hours, depending on your speed and experience. Motif joining and finishing add considerable time beyond the crocheting itself, so plan accordingly if you’re working toward a specific event date.
Finished Size and Fit
This crochet pattern is written for a child aged approximately 4 to 6 years.
Key measurements:
Size customization tips are provided at the end of the pattern for those who need adjustments.
Materials You’ll Need
Yarn: Approximately 900 to 1100 yards / 823 to 1006 meters of DK weight (US size 3) 100 percent cotton yarn in cream or natural ecru.
Cotton is strongly recommended over acrylic for drape, stitch definition, and breathability. This matters especially for a special occasion dress that a child will wear for hours.
Recommended Yarn Options
Paintbox Yarns Simply DK Cotton in Champagne White: 100 percent combed cotton, 137 yards / 125 meters per 50 gram ball. You will need approximately 7 to 8 balls. This yarn is affordable, widely available, and has excellent stitch definition for motif work.
Cascade Yarns Ultra Pima in Natural: 100 percent pima cotton, 220 yards / 201 meters per 100 gram skein. You will need approximately 4 to 5 skeins. Pima cotton has a slight sheen and superior softness against a child’s skin, making it ideal for a special occasion dress.
Rico Design Essentials Cotton DK in Cream: 100 percent combed cotton, 142 yards / 130 meters per 50 gram ball. You will need approximately 7 balls. A European option with consistent dye lots.
Substitution Note: Any smooth DK weight (weight 3) 100 percent cotton yarn will substitute well. Avoid blends with linen or linen-look fibers, as they reduce drape in the skirt. Check that your substitution achieves the listed gauge before beginning. Cotton yarns vary significantly in thickness even within the DK category.
Hooks and Notions
Gauge Information
Getting gauge right is critical for this crochet tutorial. The bodice must fit properly, and the skirt tiers need to lay flat.
With US E-4 / 3.5 mm hook and DK cotton yarn:
Gauge check: Before beginning the dress, crochet one Bodice Square and one full Skirt Motif, block them, and measure. If your motifs are larger than stated, go down a hook size. If they are smaller, go up a hook size.
Abbreviations and Stitch Definitions
Let me walk you through every abbreviation you’ll encounter:
Brackets [ ] mean work instructions within brackets the number of times stated. Parentheses ( ) indicate stitch count at end of row or round.
Special Stitches for This Pattern
Picot: Chain 3, slip stitch into the first chain made. This creates a small decorative loop used on scallop edging of skirt motifs.
Scallop Shell: Work 5 double crochets into the same stitch or space. Used along the outer edges of skirt motifs.
Joining Slip Stitch (for flat join): Insert hook through the corresponding chain space or stitch of the adjacent motif, draw up a loop, draw through loop on hook. This creates a virtually invisible join when attaching motifs side by side.
Standing Double Crochet: Begin with a slip knot on hook. Yarn over, insert hook into designated stitch or space, yarn over and pull up a loop (3 loops on hook), yarn over and pull through 2 loops, yarn over and pull through remaining 2 loops. This begins a new section without a starting chain, keeping joins neat.
Braided Cord (for belt): Cut 12 strands of yarn each 60 inches / 152 cm long. Divide into 3 groups of 4 strands. Knot all strands together at one end. Braid the three groups to approximately 26 inches / 66 cm. Knot at the other end. Trim each end to approximately 2.5 inches / 6 cm below the knot to form tassels. Separate the tassel strands gently with a yarn needle for fullness.
Important Pattern Notes Before You Begin
Read through these notes carefully. They’ll save you confusion later.
1. The bodice is constructed as a 3 by 3 grid of Bodice Squares (9 squares total), worked individually and then joined using the flat slip stitch join. This creates a fabric approximately 10.5 inches / 26.5 cm wide and 10.5 inches / 26.5 cm tall before the neckline shaping.
2. The neckline is formed by leaving the center top square open (not sewn to the adjacent squares across the top edge), creating a natural square opening of approximately 3.5 inches / 9 cm.
3. The shoulder straps are formed by the top-left and top-right squares of the 3 by 3 grid. Each strap is approximately 3.5 inches / 9 cm wide.
4. The skirt is constructed in three tiers. Tier 1 (closest to the waist) uses the smallest motif diameter (5-round motif). Tier 2 (middle) uses the medium motif (7-round motif). Tier 3 (lowest tier) uses the full motif (8-round motif). This creates the cascading layered appearance.
5. Motifs within each tier are joined side by side using the slip stitch join as the last round of each motif is worked, except for the first motif in each tier which is completed fully before joining begins.
6. The high-low silhouette is achieved by the front skirt having Tiers 1 and 2 only (no Tier 3 at the front center), while the back skirt features all three tiers.
7. All rounds are worked on the right side unless otherwise noted. Join each round with a slip stitch to the first stitch unless otherwise noted. Chain 3 at the beginning of a round counts as the first double crochet throughout. Chain 1 at the beginning of a round does NOT count as a stitch.
8. Weave in all ends securely before joining motifs, as the openwork fabric makes ends visible from both sides.
9. Block all motifs before final assembly. This is not optional. Blocking is what produces the flat, even appearance of the motifs and makes joining accurate.
Step by Step Crochet Pattern Instructions
Section 1: Bodice Granny Square Motif
Make 9 total.
Each motif begins with a magic ring (adjustable ring).
Round 1: Make a magic ring. Ch 3 (counts as first dc), work 2 dc into ring, ch 2, [3 dc into ring, ch 2] 3 times. Join with sl st to top of beg ch-3. Pull magic ring closed. (12 dc, 4 ch-2 corner spaces)
Round 2: Sl st into next 2 dc and into the ch-2 corner sp. Ch 3, 2 dc into same corner sp, ch 2, 3 dc into same corner sp (first corner made), ch 1, [3 dc into next corner sp, ch 2, 3 dc into same corner sp, ch 1] 3 times. Join with sl st to top of beg ch-3. (24 dc, 4 ch-2 corner spaces, 4 ch-1 side spaces)
Round 3: Sl st into next 2 dc and into the ch-2 corner sp. Ch 3, 2 dc into same corner sp, ch 2, 3 dc into same corner sp (corner made), ch 1, 3 dc into next ch-1 side sp, ch 1, [3 dc into next ch-2 corner sp, ch 2, 3 dc into same corner sp, ch 1, 3 dc into next ch-1 side sp, ch 1] 3 times. Join with sl st to top of beg ch-3. (36 dc, 4 ch-2 corner spaces, 8 ch-1 side spaces)
Round 4: Sl st into next 2 dc and into the ch-2 corner sp. Ch 3, 2 dc into same corner sp, ch 2, 3 dc into same corner sp (corner made), [ch 1, 3 dc into next ch-1 sp] twice, ch 1, [3 dc into next ch-2 corner sp, ch 2, 3 dc into same corner sp, (ch 1, 3 dc into next ch-1 sp) twice, ch 1] 3 times. Join with sl st to top of beg ch-3. (48 dc, 4 ch-2 corner spaces, 12 ch-1 side spaces)
Fasten off. Weave in ends. Block square to 3.5 inches / 9 cm. Make 9 total.
Checkpoint 1: Each finished blocked Bodice Square should measure exactly 3.5 inches / 9 cm square. The square should lie completely flat. If it cups, block more aggressively or increase hook size. If it ruffles, decrease hook size.
Section 2: Assembling the Bodice
Layout: Arrange the 9 Bodice Squares in a 3-column by 3-row grid on a flat surface, right sides facing up.
Column positions: Left column, Center column, Right column.
Row positions: Top row (will be neckline/shoulder), Middle row, Bottom row (will attach to skirt).
Joining method: Hold two squares with right sides together. Using a yarn needle and a length of yarn approximately 24 inches / 61 cm, whipstitch through the back loops only along one shared edge, working through each corresponding stitch and chain space across. Alternatively, use the slip stitch join with hook for a flatter seam: hold squares with right sides together, insert hook through both corresponding edge stitches, draw up a loop, ch 1, then sc through each pair of stitches across. Either method is acceptable.
Step 1: Join the 3 squares in the bottom row together along their vertical edges to form a horizontal strip of 3 squares. This is the Bottom Row Strip.
Step 2: Join the 3 squares in the middle row together along their vertical edges to form the Middle Row Strip.
Step 3: Join the 3 squares in the top row along their vertical edges to form the Top Row Strip. Note: do NOT join the top edge of the center top square to anything yet. Leave the center top square’s top edge free.
Step 4: Join the Bottom Row Strip to the Middle Row Strip along their shared horizontal edges.
Step 5: Join the Middle Row Strip to the Top Row Strip along their shared horizontal edges.
The assembled bodice panel is now 3 squares wide and 3 squares tall, approximately 10.5 inches / 26.5 cm wide and 10.5 inches / 26.5 cm tall.
Neckline: The opening at the top center is formed by the free top edge of the center top square and the adjacent unsewn inner edges of the left and right top squares. The neckline opening is approximately 3.5 inches / 9 cm wide and 3.5 inches / 9 cm deep.
Side seams: With right sides together, fold the bodice panel so that the left side edge meets the right side edge. The bodice is now a tube. Join the side edges together from the bottom edge upward, stopping after joining only the bottom row and middle row side edges. Leave the top row (shoulder area) side edges unjoined. This creates armhole openings approximately 3.5 inches / 9 cm tall.
Checkpoint 2: The assembled bodice tube should measure approximately 10.5 inches / 26.5 cm in circumference (about 21 inches / 53 cm around, slightly stretched).
Section 3: Bodice Edging
Neckline Edging Round: Join yarn at any corner of the neckline opening with a sl st. Ch 1. Work 1 sc into each dc and 2 sc into each ch-2 corner sp around the entire neckline opening. Join with sl st to first sc. Fasten off. (Approximately 48 sc total around neckline, adjust as needed to keep edge flat)
Armhole Edging Round (work both armholes the same): Join yarn at the bottom corner of one armhole with a sl st. Ch 1. Work 1 sc into each dc and 2 sc into each ch-2 corner sp around the armhole opening. Join with sl st to first sc. Fasten off. (Approximately 48 sc total per armhole, adjust to keep flat)
Bottom Edge of Bodice: Join yarn at any point along the bottom edge of the Bottom Row Strip with a sl st. Ch 1. Work 1 sc into each dc and 2 sc into each ch-2 corner sp across the entire bottom edge of the bodice tube. Join with sl st to first sc. Do not fasten off if you are attaching the skirt immediately. (Approximately 96 sc total around the bottom edge of the bodice tube)
Section 4: Skirt Motifs
The skirt uses three sizes of circular doily motif. The scalloped outer edge creates the petal-like silhouette of each tier.
Skirt Motif A (Tier 1, 5-Round Motif)
Finished diameter approximately 4 inches / 10 cm. Make 10 total for Tier 1.
Round 1: Magic ring. Ch 4 (counts as dc + ch 1), [dc in ring, ch 1] 7 times. Join with sl st to 3rd ch of beg ch-4. Pull ring closed. (8 dc, 8 ch-1 spaces)
Round 2: Sl st into first ch-1 sp. Ch 1. Work 2 sc into each ch-1 sp around. Join with sl st to first sc. (16 sc)
Round 3: Ch 4 (counts as tr). Skip next sc. [Tr in next sc, ch 2, skip 1 sc] 7 times. Ch 2. Join with sl st to top of beg ch-4. (8 tr, 8 ch-2 spaces)
Round 4: Sl st into first ch-2 sp. Ch 3 (counts as dc). Work 2 more dc into same ch-2 sp (3 dc total in first sp), ch 1. [3 dc into next ch-2 sp, ch 1] 7 times. Join with sl st to top of beg ch-3. (24 dc, 8 ch-1 spaces)
Round 5 (Scallop Edge): Sl st into next 2 dc and into ch-1 sp. Ch 1. Into each ch-1 sp work: [sc, hdc, 3 dc, hdc, sc] (7-stitch scallop). Work this scallop into each of the 8 ch-1 spaces around. Join with sl st to first sc. Fasten off. (8 scallops, 56 stitches total around outer edge)
Checkpoint 3: Completed and blocked Skirt Motif A should measure 4 inches / 10 cm in diameter with 8 even scallop petals.
Skirt Motif B (Tier 2, 7-Round Motif)
Finished diameter approximately 5.5 inches / 14 cm. Make 14 total for Tier 2.
Round 1: Magic ring. Ch 4 (counts as dc + ch 1), [dc in ring, ch 1] 11 times. Join with sl st to 3rd ch of beg ch-4. Pull ring closed. (12 dc, 12 ch-1 spaces)
Round 2: Sl st into first ch-1 sp. Ch 1. Work 2 sc into each ch-1 sp around. Join with sl st to first sc. (24 sc)
Round 3: Ch 1. Sc in first sc. [Ch 3, skip 1 sc, sc in next sc] 11 times. Ch 3. Join with sl st to first sc. (12 sc, 12 ch-3 spaces)
Round 4: Sl st into first ch-3 sp. Ch 3 (counts as dc). Work 3 more dc into same sp (4 dc total). Ch 1. [4 dc into next ch-3 sp, ch 1] 11 times. Join with sl st to top of beg ch-3. (48 dc, 12 ch-1 spaces)
Round 5: Sl st into next 3 dc and into ch-1 sp. Ch 4 (counts as tr). Work 2 more tr into same ch-1 sp. Ch 2. [3 tr into next ch-1 sp, ch 2] 11 times. Join with sl st to top of beg ch-4. (36 tr, 12 ch-2 spaces)
Round 6: Sl st into next 2 tr and into ch-2 sp. Ch 3 (counts as dc). Work 4 more dc into same sp (5 dc). Ch 1. [5 dc into next ch-2 sp, ch 1] 11 times. Join with sl st to top of beg ch-3. (60 dc, 12 ch-1 spaces)
Round 7 (Scallop Edge): Sl st into next 4 dc and into ch-1 sp. Ch 1. Into each ch-1 sp work: [sc, hdc, dc, tr, dc, hdc, sc] (7-stitch scallop). Work this scallop into each of the 12 ch-1 spaces around. Join with sl st to first sc. Fasten off. (12 scallops, 84 stitches total around outer edge)
Checkpoint 4: Completed and blocked Skirt Motif B should measure 5.5 inches / 14 cm in diameter with 12 even scallop petals.
Skirt Motif C (Tier 3, 8-Round Motif)
Finished diameter approximately 6.5 inches / 16.5 cm. Make 8 total for Tier 3.
Round 1: Magic ring. Ch 4 (counts as dc + ch 1), [dc in ring, ch 1] 11 times. Join with sl st to 3rd ch of beg ch-4. Pull ring closed. (12 dc, 12 ch-1 spaces)
Round 2: Sl st into first ch-1 sp. Ch 1. Work 2 sc into each ch-1 sp around. Join with sl st to first sc. (24 sc)
Round 3: Ch 1. Sc in first sc. [Ch 3, skip 1 sc, sc in next sc] 11 times. Ch 3. Join with sl st to first sc. (12 sc, 12 ch-3 spaces)
Round 4: Sl st into first ch-3 sp. Ch 3 (counts as dc). Work 3 more dc into same sp (4 dc). Ch 1. [4 dc into next ch-3 sp, ch 1] 11 times. Join with sl st to top of beg ch-3. (48 dc, 12 ch-1 spaces)
Round 5: Sl st into next 3 dc and into ch-1 sp. Ch 4 (counts as tr). Work 2 more tr into same sp. Ch 2. [3 tr into next ch-1 sp, ch 2] 11 times. Join with sl st to top of beg ch-4. (36 tr, 12 ch-2 spaces)
Round 6: Sl st into next 2 tr and into ch-2 sp. Ch 3 (counts as dc). Work 4 more dc into same sp. Ch 1. [5 dc into next ch-2 sp, ch 1] 11 times. Join with sl st to top of beg ch-3. (60 dc, 12 ch-1 spaces)
Round 7: Sl st into next 4 dc and into ch-1 sp. Ch 4 (counts as tr). Work 2 tr into same sp. Ch 2. [3 tr into next ch-1 sp, ch 2] 11 times. Join with sl st to top of beg ch-4. (36 tr, 12 ch-2 spaces)
Round 8 (Scallop Edge): Sl st into next 2 tr and into ch-2 sp. Ch 1. Into each ch-2 sp work: [sc, hdc, dc, 3 tr, dc, hdc, sc] (9-stitch scallop). Work this scallop into each of the 12 ch-2 spaces around. Join with sl st to first sc. Fasten off. (12 scallops, 108 stitches total around outer edge)
Checkpoint 5: Completed and blocked Skirt Motif C should measure 6.5 inches / 16.5 cm in diameter with 12 even scallop petals.
Section 5: Blocking All Motifs
Before assembly, wet block every single motif. Immerse each motif in cool water for 10 minutes. Gently press out excess water in a towel. Do not wring. Pin each motif to a blocking mat using the stated dimensions: Motif A to 4 inches, Motif B to 5.5 inches, Motif C to 6.5 inches. Pin each scallop point outward to define the petal shape. Allow to dry completely (12 to 24 hours depending on humidity).
Section 6: Assembling the Skirt Tiers
Tier 1 Assembly
Tier 1 consists of 10 Skirt Motif A pieces arranged in a horizontal row. These motifs are joined side by side at two adjacent scallop points each, creating a connected strip.
Hold two Motif A pieces with right sides up side by side. Identify one scallop on the right side of the left motif and one scallop on the left side of the right motif. These two scallops will be joined at their center dc stitch.
With yarn and hook, join yarn at the center top dc of one scallop on the left motif. Ch 1. Work a sl st into the corresponding center dc of the adjacent scallop on the right motif, then sl st back into the center dc of the left motif scallop. For a more stable join, work one additional sl st connection at the sc at the base of each of those same two scallops.
Repeat to join all 10 Motif A pieces into a curved strip.
Tier 2 Assembly
Tier 2 consists of 14 Skirt Motif B pieces arranged in a horizontal row, joined identically to Tier 1. Because Motif B is larger than Motif A, Tier 2 extends both wider and lower than Tier 1.
Tier 3 Assembly
Tier 3 consists of 8 Skirt Motif C pieces distributed across the back and sides of the dress only. The front center of the skirt does not receive Tier 3 motifs. This creates the high-low hemline.
Section 7: Attaching the Skirt to the Bodice
Tier 1 Attachment: The top edge of the Tier 1 strip is attached to the bottom edge of the assembled bodice tube using slip stitches. The bodice bottom edge has approximately 96 sc. With 10 Motif A pieces, each motif attachment point spans approximately 9 to 10 sc of the bodice bottom edge.
Lay the Tier 1 strip along the bottom edge of the bodice with right sides both facing up. Working with yarn and hook, join yarn at the beginning of the bodice bottom edge. Insert hook through the top edge of the first Motif A at a point in Round 4 and through the corresponding sc on the bodice bottom edge. Sl st to join. Continue working sl sts every stitch across.
Tier 2 Attachment: Tier 2 motifs hang below Tier 1, attached only to the bottom portion of the Tier 1 motifs. Attach the top of each Tier 2 Motif B to the lower region of a Tier 1 Motif A by working 3 to 4 sl sts through the outer dc ring. Center Tier 2 so that the additional width is distributed to the sides and back.
Tier 3 Attachment: Attach the 8 Tier 3 Motif C pieces across the back half of the dress, attaching the top arc of each Tier 3 motif to the lower portion of the corresponding Tier 2 motifs. There are no Tier 3 motifs on the front center panels.
Checkpoint 6: The front hem should end at approximately 22 inches from the shoulder. The back should be approximately 6 inches longer.
Section 8: Creating the Braided Belt
Cut 12 strands of yarn each 60 inches / 152 cm long. Divide into 3 groups of 4 strands. Knot all strands together at one end. Braid the three groups to approximately 26 inches / 66 cm. Knot at the other end. Trim each end to approximately 2.5 inches / 6 cm below the knot to form tassels. Separate the tassel strands gently with a yarn needle for fullness.
Thread the belt through the waist area of the dress, weaving through the ch-1 spaces at the junction between the bodice and Tier 1. Tie at the front or side as desired.
Finishing Touches
Weave in any remaining ends. Give the assembled dress a final light steam blocking if needed to smooth the tier attachments. If desired, add a small snap or button at the back neckline for easier dressing.
Try the dress on your little one and adjust the belt placement for the most flattering fit.
Tips for Success with This Bohemian Crochet Dress
Block as you go. Seriously. Blocking each motif before assembly makes joining so much easier and produces a professional result.
Count your stitches. Those scallop rounds have specific stitch counts that matter for the layered effect.
Take your time with assembly. The joining process takes nearly as long as the crocheting itself. This is normal.
Use stitch markers liberally. Mark the center front and back of each tier as you join to ensure even distribution.
This cream bohemian flower girl dress is the kind of project that becomes a treasured keepsake. The combination of classic granny squares and delicate doily motifs creates something truly special, and the high-low silhouette photographs beautifully.
I hope you love making this crochet pattern as much as I loved designing it. If you’d like to save this for later, go ahead and pin it to your favorite Pinterest board. And please, if you make this dress, drop a comment below or tag me on Instagram. I would absolutely love to see your finished creation!
