
If you need a sweet handmade gift that works up in a weekend and looks like it came from a boutique, this is the project for you. This pastel garden anklet combines a braided band with six tiny amigurumi charms, perfect for summer birthdays, bridal party favors, or treating yourself to something whimsical. The stitches are straightforward single crochet and slip stitch, the charms are miniature but not fussy, and the whole thing fits in a small bag for on-the-go crafting.
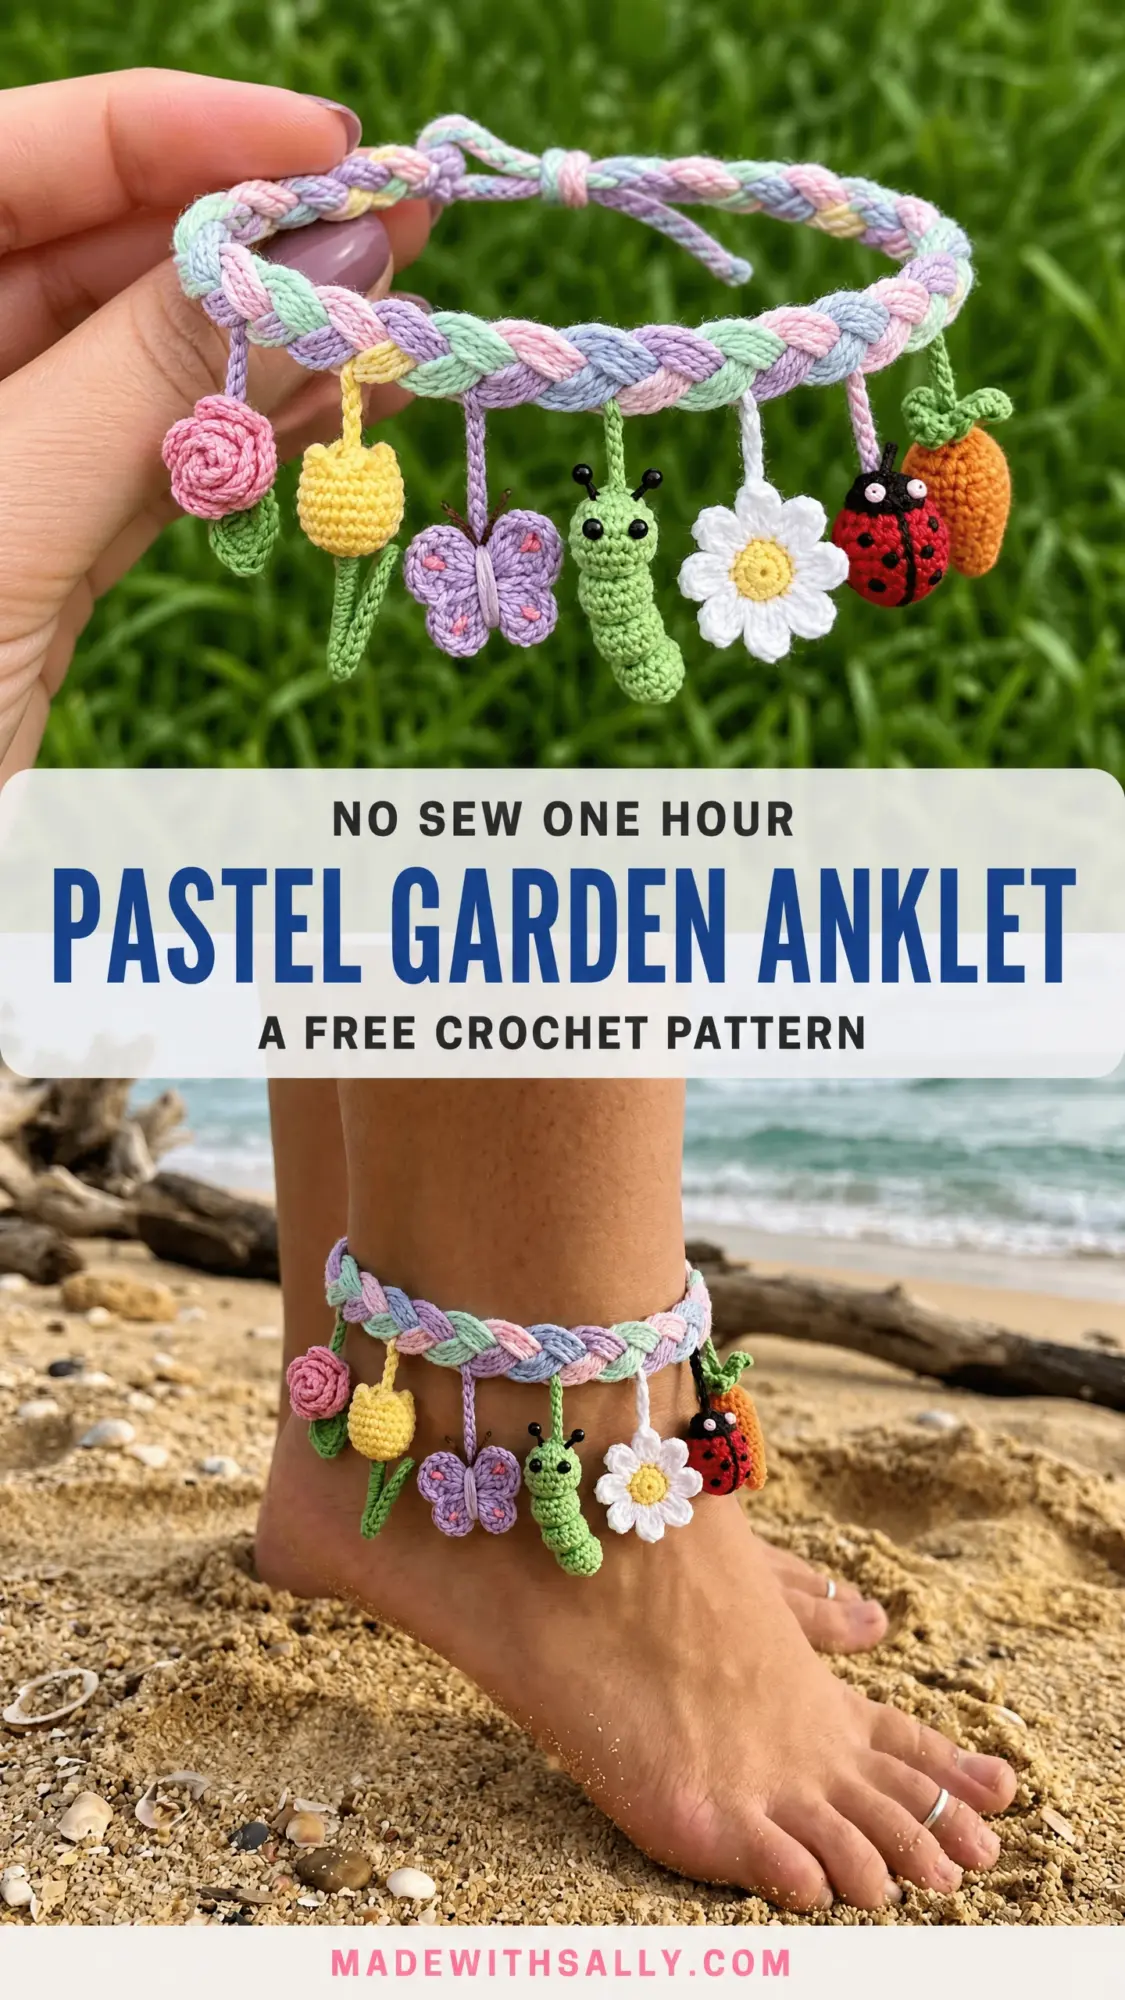
I designed this crochet anklet pattern with intermediate crocheters in mind, though confident beginners who have tried amigurumi will do just fine. The braided construction gives the band a comfortable stretch, and the dangling charms add personality without being bulky. Each piece takes between 30 and 90 minutes, so you can work through them one at a time over a few evenings.
This makes an excellent gift for the nature lover, gardener, or anyone who appreciates cute accessories. It also works beautifully as a charity craft fair item since the materials are inexpensive and the finished anklet looks impressive.
Why You’ll Love This Crochet Anklet Pattern
This project hits a sweet spot between simple and impressive. The braided band uses basic slip stitch cords that even newer crocheters can master. The charms are small enough to finish quickly but detailed enough to feel like proper amigurumi. And because each charm is made separately, you can customize the anklet however you like. Swap the ladybug for a bee. Skip the carrot. Add a tiny mushroom. Make it yours.
The finished anklet fits most adult ankles comfortably, measuring about 9 inches around with natural stretch from the braid. It sits snugly without being tight, and the charms dangle freely along the front. Cotton yarn keeps it breathable for warm weather wear.
Materials You’ll Need
Gather these supplies before you start. Having everything ready makes the process much smoother.
Yarn (4-ply cotton, DK weight):
Hooks:
Notions:
Suggested Yarns: Paintbox Yarns Simply DK Cotton, Lion Brand 24/7 Cotton, or Scheepjes Catona all work beautifully. Stick with 100% cotton for breathability against skin.
Gauge
Getting gauge right matters here, especially for the charms.
Band cords: 20 slip stitches equals 4 inches using the US C-2 / 2.75 mm hook.
Charms: 5 single crochet stitches equals 1 inch, and 5 rows equals 1 inch using the US B-1 / 2.25 mm hook.
Your fabric should be firm and dense with no visible gaps. Stuffing should not show through.
Abbreviations and Stitch Definitions
Let me walk you through every stitch and abbreviation used in this pattern. I define each one so you never have to guess.
ch (chain): Yarn over, pull through the loop on your hook. This creates a foundation or adds height.
sl st (slip stitch): Insert hook, yarn over, pull through both the stitch and the loop on your hook in one motion. Used for joining or creating cords.
sc (single crochet): Insert hook into stitch, yarn over and pull up a loop (2 loops on hook), yarn over and pull through both loops. The most common stitch in this pattern.
sc2tog (single crochet two together): Insert hook into next stitch, pull up a loop, insert hook into following stitch, pull up a loop (3 loops on hook), yarn over and pull through all 3. This decreases your stitch count by one.
inc (increase): Work 2 single crochet stitches into the same stitch. This adds one stitch to your count.
MR (magic ring): Create an adjustable loop, work stitches into it, then pull the tail to close the center hole. Essential for amigurumi.
BLO (back loop only): Work into only the back loop of the stitch, leaving the front loop untouched.
FLO (front loop only): Work into only the front loop of the stitch.
Petal Stitch: Into the same stitch, work chain 3, 3 double crochet, chain 3, slip stitch. This creates one rounded petal.
Special Techniques
Twisted Cord: Work a foundation chain. Turn and slip stitch into the back bump of every chain across. Do not turn. Rotate 180 degrees and slip stitch into the front loops of the original chain. This creates a dense, slightly twisted cord.
Rose Spiral: Work increases in a continuous spiral, then roll and stitch the resulting strip into a cone shape to form the rose.
Magic Ring Tip: If magic rings intimidate you, chain 2 and work your stitches into the first chain instead. It leaves a tiny hole but works fine for these small charms.
Step-by-Step Crochet Pattern Instructions
Section 1: The Band Cords
Make 4 cords total, one in each color: light pink, light lavender, light green, light blue.
Foundation chain: With US C-2 / 2.75 mm hook, ch 91.
Row 1 (first side of cord): Starting in 2nd ch from hook, sl st in back bump of each ch across. (90 sl sts)
Do not fasten off. Do not turn.
Row 2 (second side of cord): Rotate work 180 degrees. Working into the front loops of the original foundation chain, sl st in each loop across. (90 sl sts)
Fasten off, leaving a 6-inch tail for joining.
Make 4 cords total. Each finished cord should measure approximately 9 to 9.5 inches when relaxed.
Section 2: Braiding the Band
Hold all four cords together at one end. Tie temporarily with scrap yarn to secure while braiding.
Arrange cords left to right: light pink, light lavender, light green, light blue.
4-Strand Flat Braid:
Position the four cords as positions 1, 2, 3, 4 from left to right.
Move cord in position 4 over cord in position 3. Move cord in position 1 over cord in position 2. Move the cord now in position 3 over the cord in position 2. Move the cord now in position 2 over the cord in position 1.
Continue braiding in this over-under pattern with consistent tension until the braid reaches approximately 9 inches.
Hold both ends together. Using a tapestry needle and green or neutral yarn, whipstitch the two ends securely. Weave in all ends.
The finished braided band should form a comfortable loop approximately 9 inches in circumference and 0.75 inches wide.
Section 3: The Charms
All charms use the US B-1 / 2.25 mm hook.
Charm 1: Pink Rose
Rose bud base:
With pink yarn, make MR.
Rnd 1: 6 sc into MR. (6 sc)
Rnd 2: Inc in each st around. (12 sc)
Rnd 3: (Sc in next st, inc in next st) rep around. (18 sc)
Rnd 4: Working in BLO, sc in each st around. (18 sc)
Rnd 5: Sc in each st around. (18 sc)
Rnd 6: (Sc2tog, sc in next st) rep around. (12 sc)
Stuff lightly with fiberfill.
Rnd 7: Sc2tog around. (6 sc)
Fasten off, leaving a long tail. Thread tail through remaining 6 sts, pull tight to close.
Rose petals strip:
With pink yarn, ch 25.
Row 1: Sc in 2nd ch from hook, sc in each ch across. (24 sc)
Row 2: Ch 1, turn. (Inc, inc) rep across. (48 sc)
Row 3: Ch 1, turn. Sc in each st across. (48 sc)
Row 4: Ch 1, turn. Sc2tog across. (24 sc)
Fasten off, leaving a long tail. Roll the strip into a spiral, with wider rows forming outer petals. Stitch through the bottom as you roll. Attach to the top of the rose base.
Stem: With green yarn, ch 10, sl st in each ch back to base. (10 sl sts) Attach to bottom of rose. Leave a 6-inch tail.
Charm 2: Yellow Tulip
With yellow yarn, make MR.
Rnd 1: 6 sc into MR. (6 sc)
Rnd 2: Inc in each st around. (12 sc)
Rnd 3: Sc in each st around. (12 sc)
Rnd 4: (Sc in next 3 sts, inc in next st) rep around. (15 sc)
Rnd 5: Sc in each st around. (15 sc)
Rnd 6: Working in FLO, (sc2tog, sc in next st) rep around. (10 sc)
Rnd 7: Sc2tog around, ending with sc2tog on last 2 sts. (5 sc)
Do not stuff. Fasten off, thread tail through 5 sts, pull tight.
Stem and leaf: With green yarn, ch 12. Sl st in each ch toward base. At midpoint, ch 5, sc in 2nd ch from hook, sc in next 3 ch, sl st back to main stem. Continue sl st to end. Attach stem to tulip base. Leave a 6-inch tail.
Charm 3: Purple Butterfly
Upper wings (make 2):
With purple yarn, make MR.
Rnd 1: 6 sc into MR. (6 sc)
Rnd 2: Inc in each st around. (12 sc)
Rnd 3: (Sc in next st, inc in next st) rep around. (18 sc)
Rnd 4: Sc in each st around. (18 sc)
Sl st to close. Fasten off. Do not stuff. Flatten.
Lower wings (make 2):
With purple yarn, make MR.
Rnd 1: 6 sc into MR. (6 sc)
Rnd 2: Inc in each st around. (12 sc)
Rnd 3: Sc in each st around. (12 sc)
Sl st to close. Fasten off. Flatten.
Body:
With purple yarn, make MR.
Rnd 1: 4 sc into MR. (4 sc)
Rnd 2: Inc in each st around. (8 sc)
Rnds 3-4: Sc in each st around. (8 sc)
Rnd 5: Sc2tog around. (4 sc)
Stuff lightly. Fasten off, thread through 4 sts, pull tight.
Assembly: Stitch one large and one small wing to each side of body. Embroider pink dots on upper wings. Add two antennae by working ch 5 from top of body. Create a hanging loop with ch 8 attached at both ends. Leave a 6-inch tail.
Charm 4: Green Caterpillar
Head sphere:
With green yarn, make MR.
Rnd 1: 6 sc into MR. (6 sc)
Rnd 2: Inc in each st around. (12 sc)
Rnd 3: Sc in each st around. (12 sc)
Rnd 4: Sc2tog around. (6 sc)
Stuff lightly. Fasten off, thread through 6 sts, pull tight.
Body sphere (make 3):
With green yarn, make MR.
Rnd 1: 6 sc into MR. (6 sc)
Rnd 2: Inc in each st around. (12 sc)
Rnd 3: Sc2tog around. (6 sc)
Stuff lightly. Fasten off, thread through 6 sts, pull tight.
Assembly: Stitch three body segments in a line. Attach head to one end. Embroider black eyes on head. Add antennae with ch 4 in black. Create hanging cord with ch 6 from top of head. Leave a 6-inch tail.
Charm 5: White Daisy
Daisy center:
With yellow yarn, make MR.
Rnd 1: 6 sc into MR. (6 sc)
Rnd 2: Inc in each st around. (12 sc)
Rnd 3: Sc in each st around. (12 sc)
Sl st to join. Fasten off. Flatten into a disk.
Petals: With white yarn, join to any stitch on outer edge of yellow center.
Into each of the 12 sts around: ch 3, 3 dc into same st, ch 3, sl st into same st. (12 petals)
Fasten off. Weave in ends on back.
Stem: With green yarn, ch 8, sl st back to base of daisy. Leave a 6-inch tail.
Charm 6: Ladybug and Carrot
Ladybug body:
With red yarn, make MR.
Rnd 1: 6 sc into MR. (6 sc)
Rnd 2: Inc in each st around. (12 sc)
Rnd 3: (Sc in next st, inc in next st) rep around. (18 sc)
Rnd 4: Sc in each st around. (18 sc)
Rnd 5: (Sc in next st, sc2tog) rep around. (12 sc)
Rnd 6: Sc2tog around. (6 sc)
Stuff lightly. Fasten off, thread through 6 sts, pull tight.
Ladybug head:
With black yarn, make MR.
Rnd 1: 4 sc into MR. (4 sc)
Rnd 2: Inc in each st around. (8 sc)
Rnd 3: Sc in each st around. (8 sc)
Rnd 4: Sc2tog around. (4 sc)
Stuff lightly. Fasten off, thread through 4 sts, pull tight.
Attach head to body. Embroider 4 to 6 black spots and a center line on the red body. Add white dot eyes on head.
Carrot:
With orange yarn, make MR.
Rnd 1: 4 sc into MR. (4 sc)
Rnd 2: Inc in each st around. (8 sc)
Rnd 3: (Sc in next st, inc in next st) rep around. (12 sc)
Rnds 4-5: Sc in each st around. (12 sc)
Rnd 6: (Sc in next 2 sts, sc2tog) rep around. (9 sc)
Rnd 7: (Sc in next st, sc2tog) rep around. (6 sc)
Stuff lightly. Fasten off, thread through 6 sts, pull tight.
With green yarn, work 3 chains of lengths 5, 4, and 4 from the top for leafy greens.
Attach ladybug and carrot to a shared hanging cord with ch 8, or attach separately about 0.25 inches apart. Leave 6-inch tails.
Section 4: Assembly
Lay the braided band flat. Mark 6 evenly spaced attachment points across the front half, spanning approximately 4.5 inches.
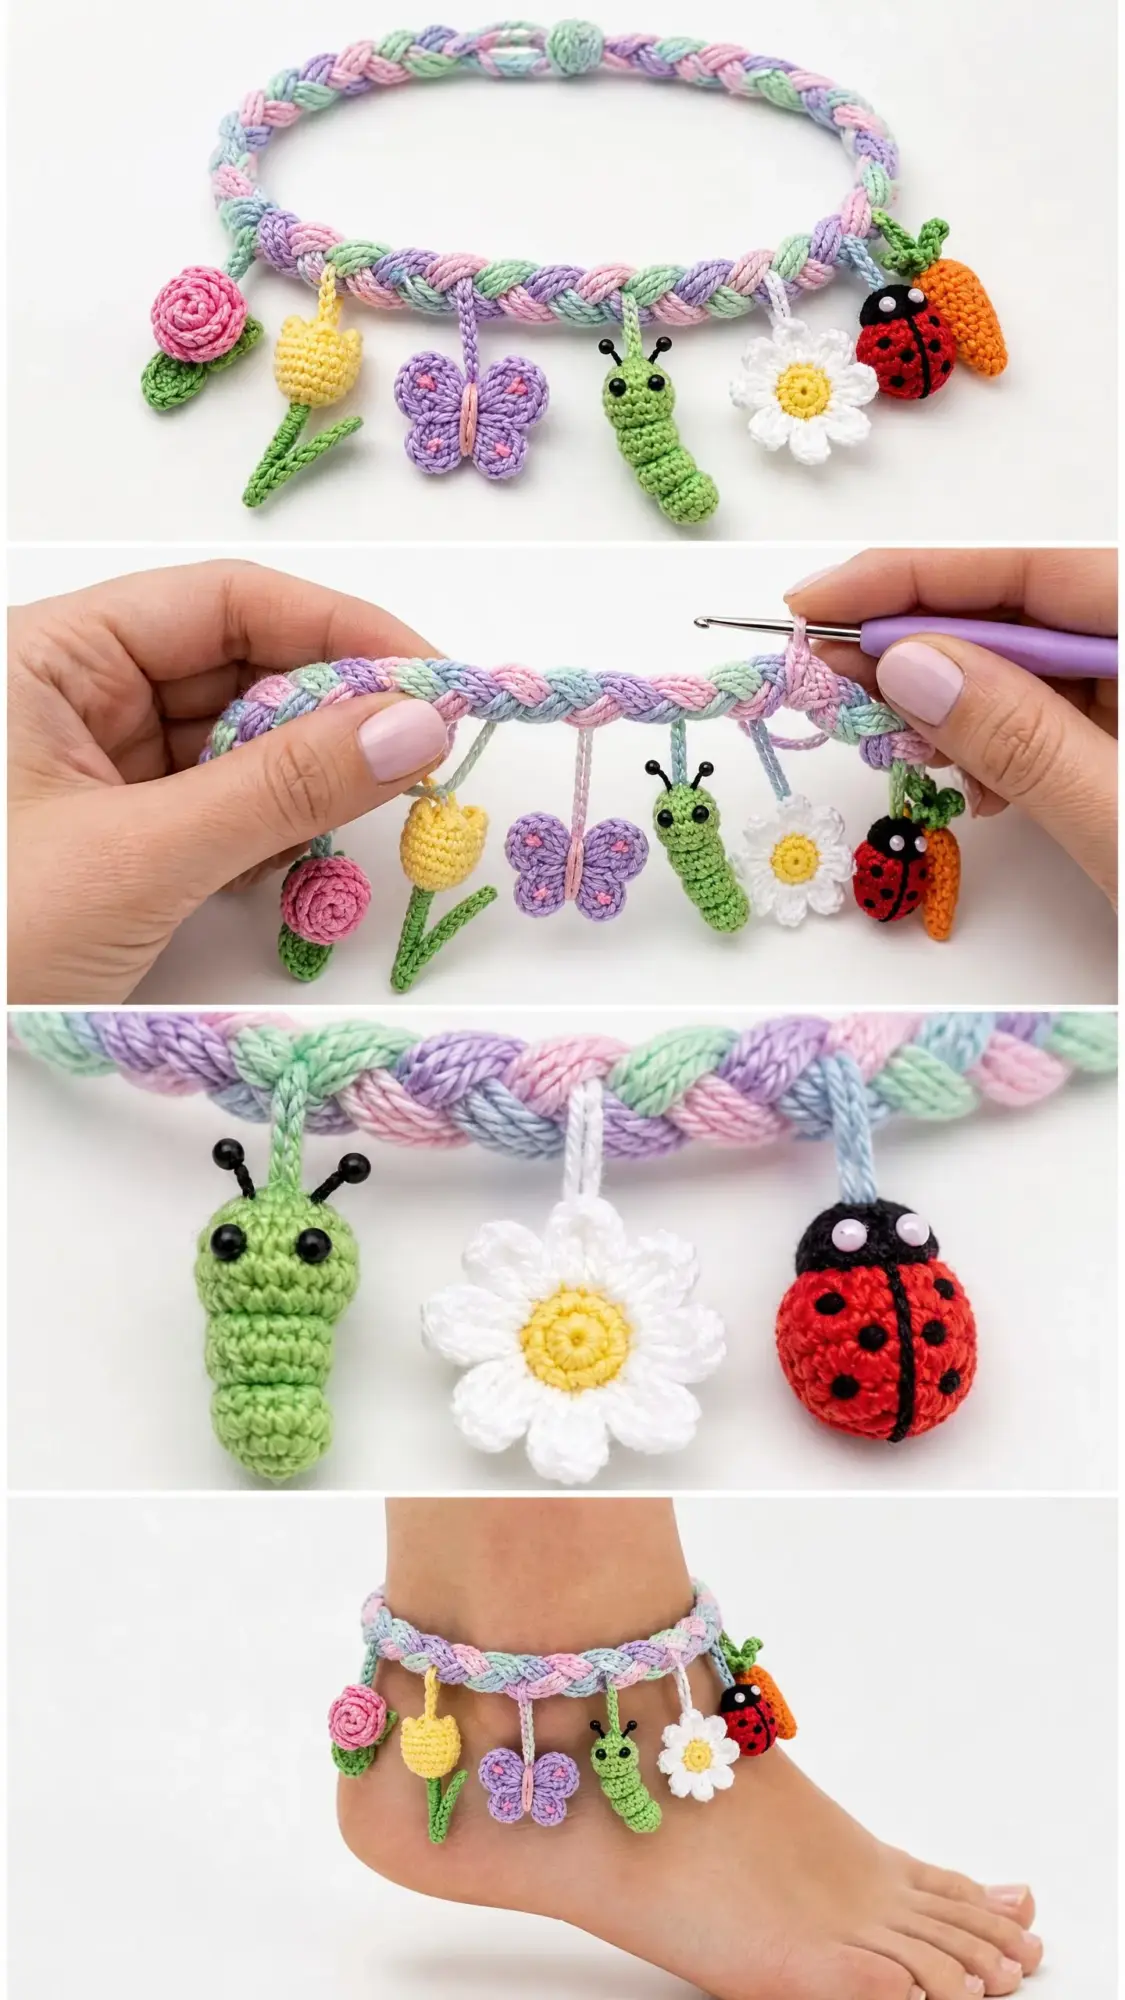
Attachment order from left to right: rose, tulip, butterfly, caterpillar, daisy, ladybug and carrot.
Thread each charm’s tail onto a tapestry needle. Insert through the braid, loop around a strand, and bring back through. Repeat 2 to 3 times. Knot and bury the tail within the braid.
Charms should hang 0.75 to 1.25 inches below the band.
Size Customization Tips
For a smaller anklet (child or slim ankle): Reduce each cord to 72 chains, working 71 sl sts per side. This creates approximately 7 inches circumference.
For a larger anklet: Increase each cord to 108 chains, working 107 sl sts per side. This creates approximately 10.5 to 11 inches circumference.
Always adjust all four cords by the same amount in multiples of 4.
Finishing and Care
Weave in all remaining ends securely. Wet-block the anklet by submerging in cool water, gently squeezing in a towel, and laying flat to dry.
Care instructions: Hand wash only in cool water with mild soap. Lay flat to dry. Do not machine wash. Store flat or coiled loosely to prevent distortion. Rinse after swimming to remove salt or chlorine.
Final Thoughts on This Crochet Tutorial
This pastel garden anklet crochet pattern brings together simple techniques with charming results. The braided band construction gives you stretch and comfort, while the miniature charms let you practice amigurumi on a small scale. Whether you make this for yourself, as a gift, or as a craft fair item, the finished piece feels special and handmade in the best way.
I hope you have as much fun making this as I did designing it. Thank you for choosing this pattern, and I would absolutely love to see your finished anklets. Tag me on Instagram or share in our Facebook group so I can cheer you on.
If this pattern caught your eye, go ahead and save it to your Pinterest boards so you can find it when you are ready to start. And please drop a comment below if you make one. I love hearing which charm was your favorite to create.
