
Three-dimensional crochet roses look intimidating. I get it. All those petals, the coiling, the tiny thread work. Most crocheters scroll right past these beauties thinking they need years of experience to pull them off.
Here is the truth: if you can single crochet, half double crochet, and double crochet, you already have every skill you need. The roses are not worked in complicated rounds or mysterious shaping. They are simple flat strips that you roll up like a cinnamon bun. Seriously. That is the entire magic trick.
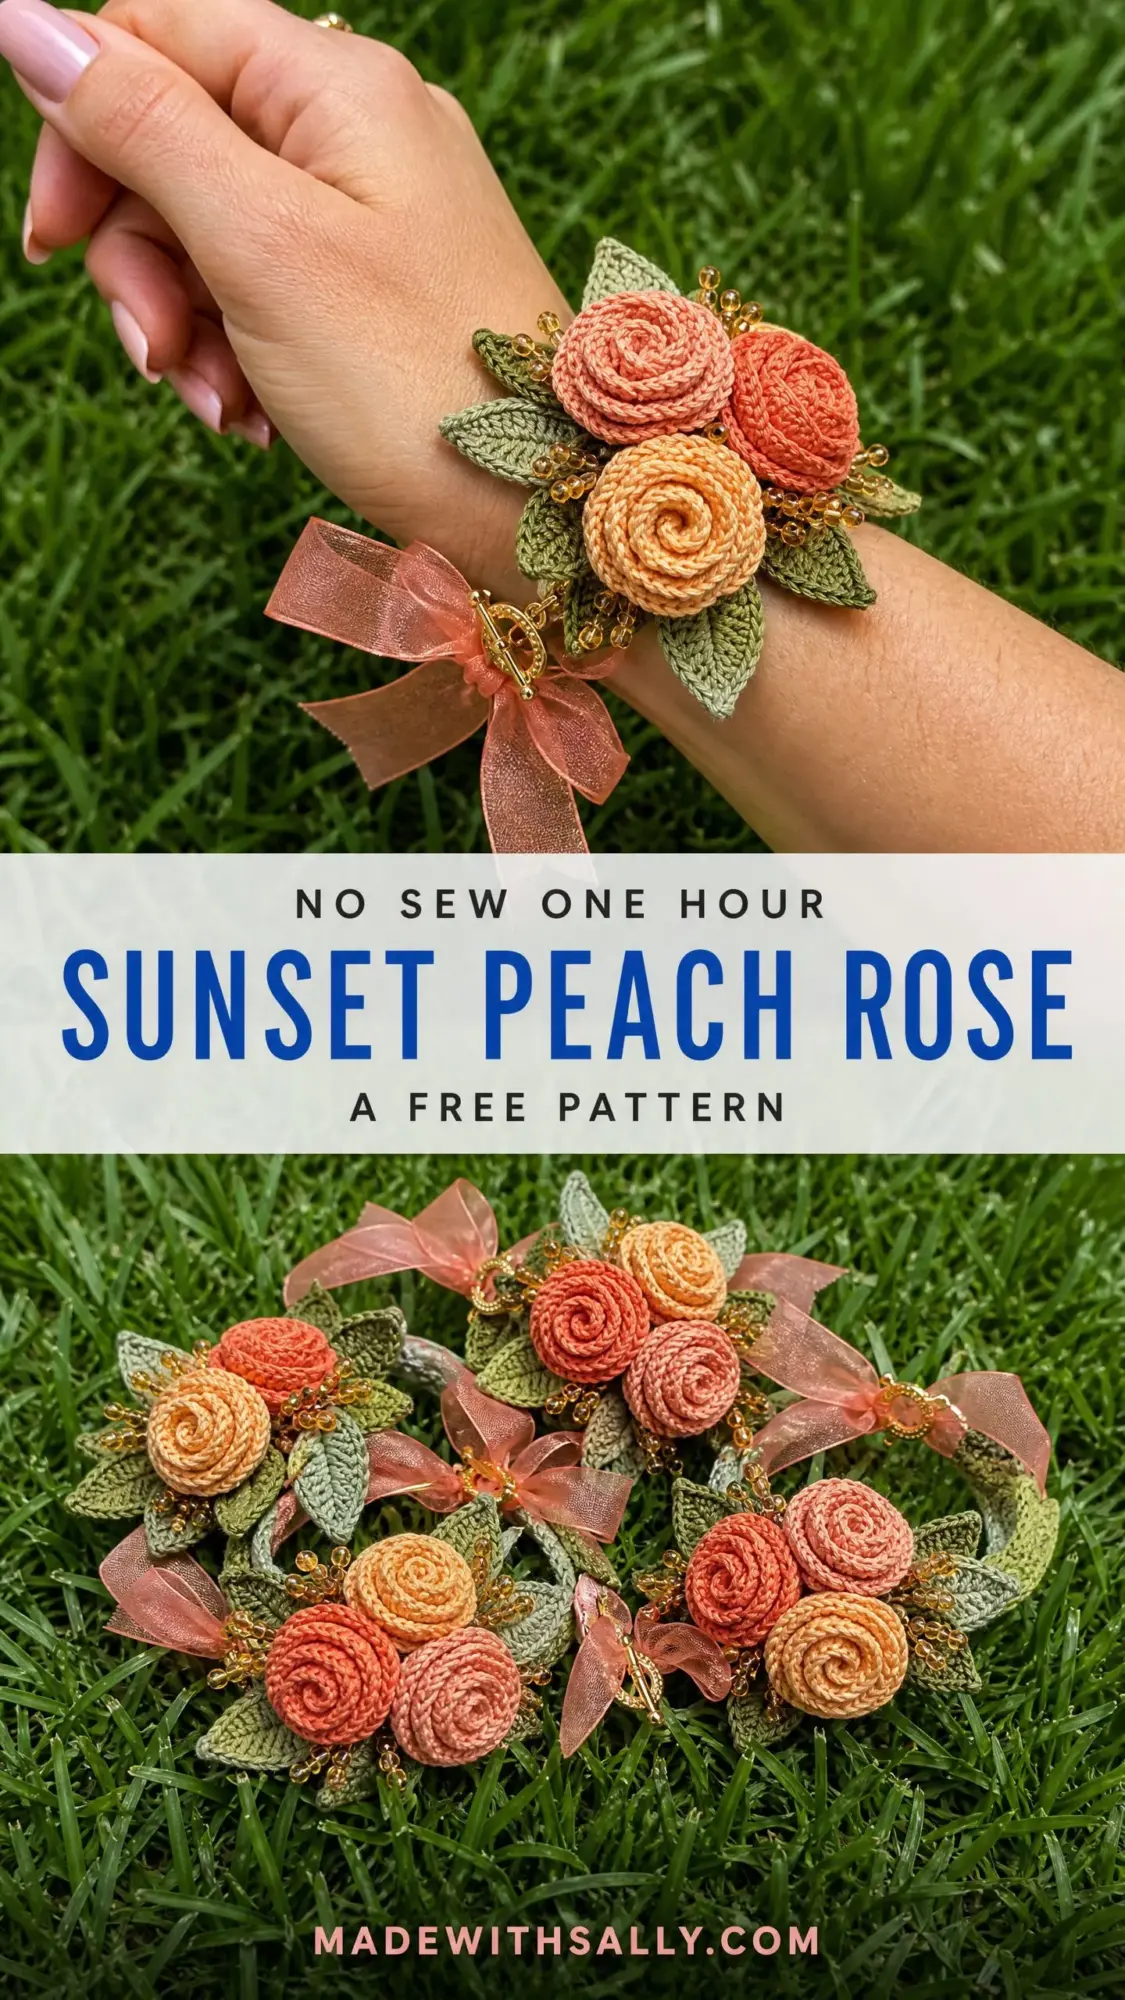
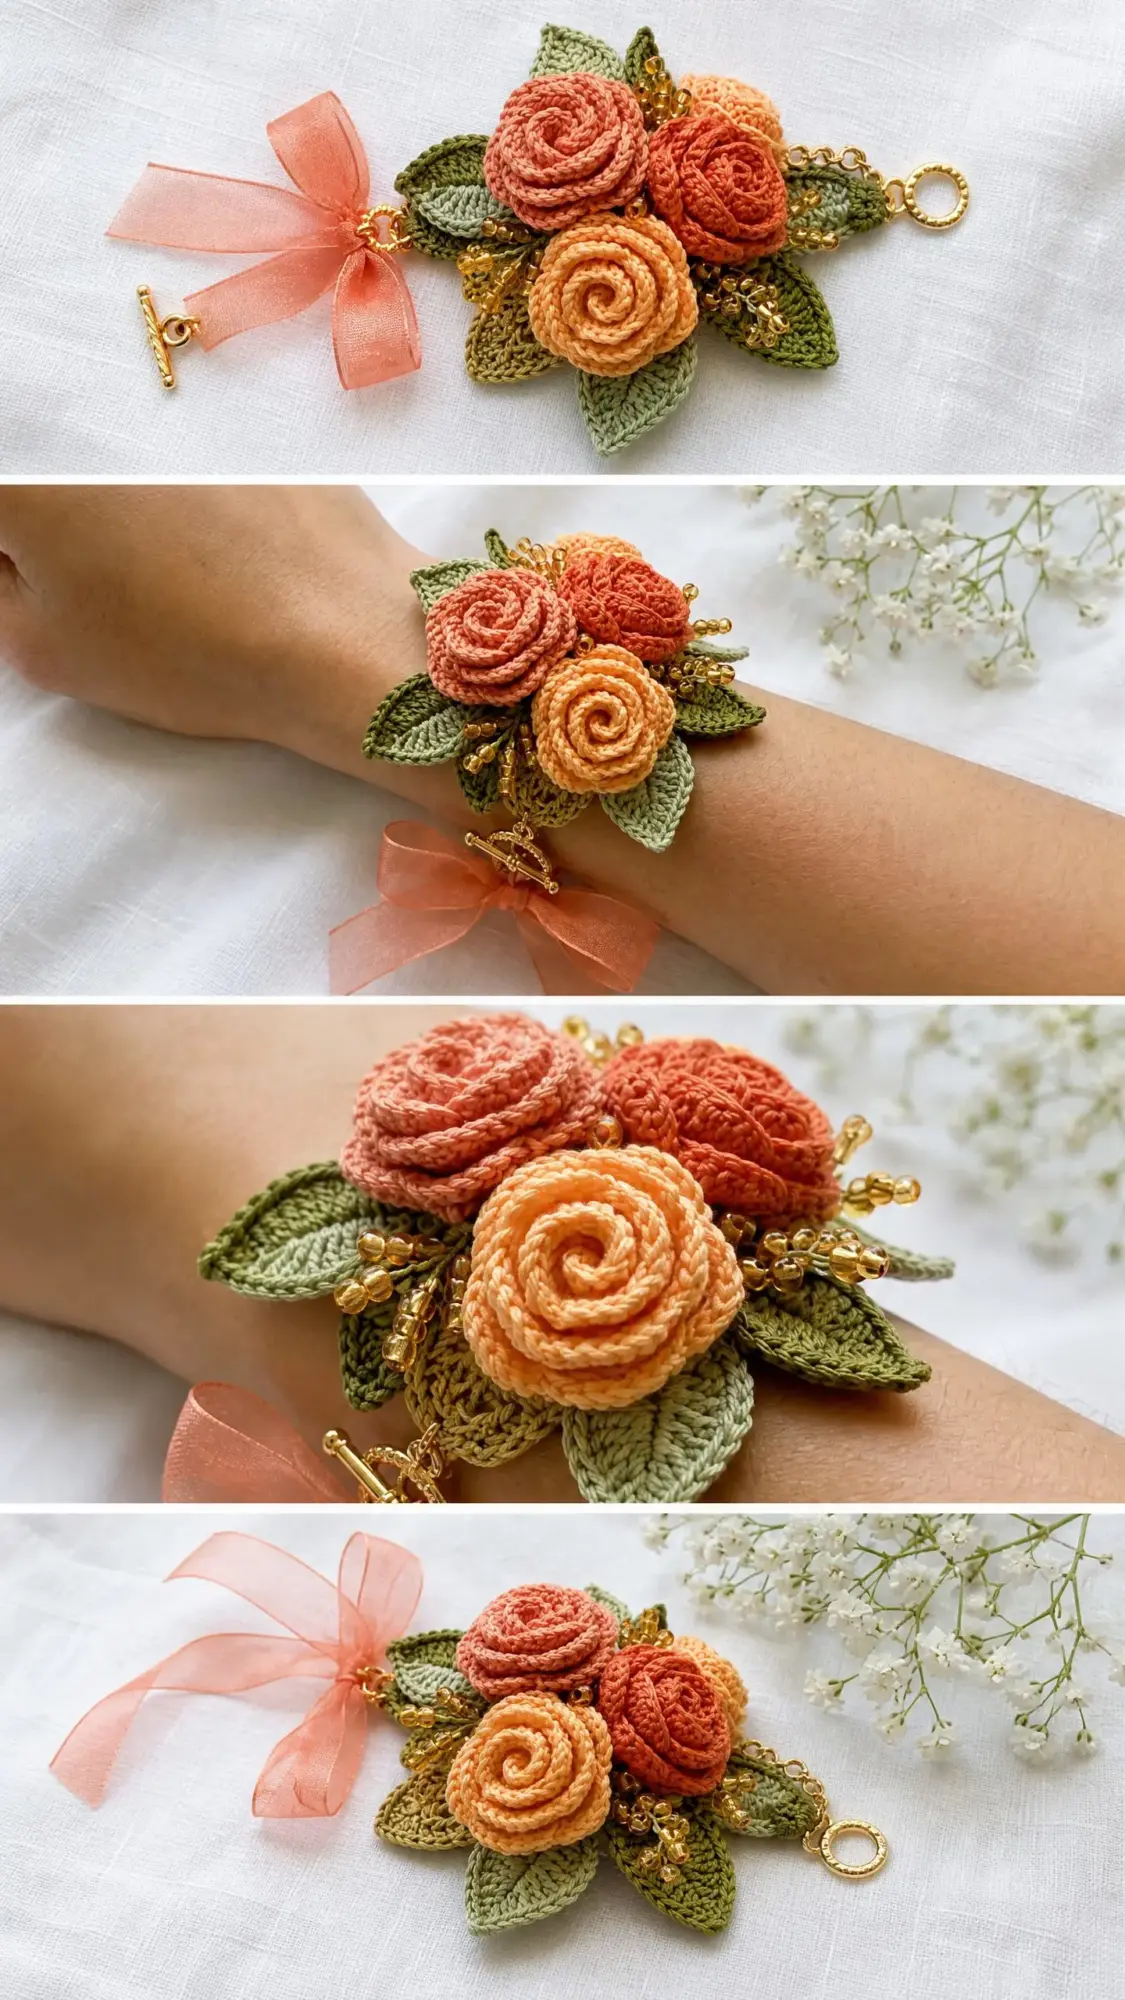
This wearable corsage bracelet combines three spiral roses in sunset peach tones, layered crochet leaves, sparkling seed bead accents, and a pretty ribbon bow closure. It looks like something from a bridal boutique, but you can make it on your couch this weekend.
About This Crochet Rose Bracelet Pattern
This project brings together several techniques, but each one is approachable on its own. You will crochet a simple single crochet band for the wristband base. Then you will make three roses using the spiral petal strip method, which creates graduated shells that naturally coil into dimensional blooms. The leaves are worked flat in one quick round. Finally, you will add some sparkle with seed bead sprigs on thin wire.
The finished bracelet fits a 6.5 to 7 inch wrist and features a gold toggle clasp with an organza ribbon bow. The floral cluster sits beautifully on top of the wrist and measures about 3 inches across.
Skill level: Intermediate to advanced. The band itself is beginner level, but assembling all the components requires comfort with shaping, tight tension in fine thread, and hand sewing. If you have made amigurumi or floral motifs before, you will feel right at home.
Time estimate: Four to six hours total. The band takes about 20 minutes, each rose takes 30 to 40 minutes, the leaves take about 15 minutes per set, bead assembly runs about 20 minutes, and finishing takes 30 to 45 minutes.
Materials You Will Need
Yarn and Thread
You will work this entire bracelet in size 10 crochet cotton thread. Here are the colors and amounts:
Recommended thread brands: Aunt Lydia’s Classic Crochet Thread Size 10, DMC Natura Just Cotton Fine Thread, or Lizbeth Cotton Thread Size 10 by Handy Hands. Any size 10 mercerized cotton will work beautifully.
Important note: Avoid substituting acrylic or wool in fine weight. Cotton thread has the body and structure needed for the roses to hold their three-dimensional coiled shape.
Hook
Notions
Gauge
10 single crochet stitches x 12 rows = 1 inch worked with size 10 thread and US size 7 steel hook (1.65 mm).
Gauge matters here. It affects whether the bracelet fits a standard wrist. Please check your gauge before starting the band.
Finished Measurements
Abbreviations
Here are all the abbreviations used in this pattern with plain English definitions:
Special Techniques
The Spiral Rose Petal Strip Method
This is the core technique that makes these roses look so impressive while being totally manageable. You crochet a long flat strip with graduated shell clusters. Small shells at one end, medium shells in the middle, large shells at the other end. When you roll this strip starting from the small end, it naturally spirals into a dimensional rose.
The basic shell sequence:
After completing the strip, roll it starting from the small petal end. Keep the first 2 to 3 rotations tight for the bud center, then let it loosen for the outer petals. Stitch through the base coil to secure.
The Basic Leaf Stitch
Leaves are worked around both sides of a foundation chain, creating a pointed oval shape. You work up one side, make 3 single crochets at the tip to turn the corner, then work back down the other side. Quick and satisfying.
Pattern Instructions
Section 1: The Wristband Band
Make 1 in Color E (Natural Beige).
Foundation Chain: Ch 67.
Row 1: Sc in the second ch from hook and in each ch across. Turn. (66 sc)
Row 2: Ch 1, sc in each st across. Turn. (66 sc)
Row 3: Ch 1, sc in each st across. Turn. (66 sc)
Row 4: Ch 1, sc in each st across. Do not turn. Fasten off, leaving a 6 inch tail.
Checkpoint: Your band should measure approximately 6.5 inches long and 0.5 inches wide. If it is too short, add one more ch to the foundation and rework. If too long, reduce by one ch.
Attach one half of the toggle clasp to each short end using your tapestry needle and Color E thread. Pass through the clasp ring several times and knot securely on the wrong side.
Section 2: Small Rose (Bud Center Size)
Make 2 in Color A (Dusty Coral).
Foundation Chain: Ch 31.
Row 1 (Setup Row): Sc in the second ch from hook and in each ch across. Turn. (30 sc)
Row 2 (Small Petals): Ch 1, [(sc, hdc, dc) in next st, (dc, hdc, sc) in next st] rep 5 times. (30 sts across, 5 small petal pairs)
Do not turn. Continue directly to Row 3.
Row 3 (Medium Petals): Working into the back loops only of Row 1 stitches, starting at the 11th st from the beginning: [(sc, hdc, dc, dc) in next st, (dc, dc, hdc, sc) in next st] rep 5 times. (40 sts in this section)
Row 4 (Large Petals): Working into the back loops only of Row 1 stitches, starting at the 21st st: [(sc, hdc, dc, tr) in next st, (tr, dc, hdc, sc) in next st] rep 5 times. (50 sts in this section)
Fasten off, leaving a 14 inch tail.
Rolling the rose: Start from the small petal end and roll tightly. Keep the base flat while rolling. Stitch through the base coil every half turn to lock it in place. After 3 full rotations, ease the roll slightly looser for the outer petals. Secure with several passes of thread through the bottom. Knot firmly.
Section 3: Large Rose (Open Bloom Size)
Make 1 in Color B (Peach Apricot).
Foundation Chain: Ch 41.
Row 1 (Setup Row): Sc in the second ch from hook and in each ch across. Turn. (40 sc)
Row 2 (Small Petals): Ch 1, [(sc, hdc, dc) in next st, (dc, hdc, sc) in next st] rep 5 times across the first 10 sts. (30 sts)
Row 3 (Medium Petals): Working into BLO of Row 1, starting at the 11th st: [(sc, hdc, dc, dc) in next st, (dc, dc, hdc, sc) in next st] rep 5 times. (40 sts)
Row 4 (Large Petals): Working into BLO of Row 1, starting at the 21st st: [(sc, hdc, dc, tr) in next st, (tr, dc, hdc, sc) in next st] rep 5 times. (50 sts)
Row 5 (Extra Large Petals): Working into BLO of Row 1, starting at the 31st st: [(sc, hdc, dc, tr, tr) in next st, (tr, tr, dc, hdc, sc) in next st] rep 5 times. (60 sts)
Fasten off, leaving a 16 inch tail.
Rolling: Same method as the small roses. The extra large petal row forms the outermost ring. Roll tight for the first 3 to 4 rotations, then loose and slightly splayed for the final 2 rotations. The finished large rose should measure approximately 1.1 inches in diameter.
Section 4: Leaves
Small Leaves (Color C, Sage Green)
Make 6 total.
Ch 8.
Row 1: Starting in the second ch from hook: sc in 1st ch, hdc in 2nd ch, dc in 3rd ch, dc in 4th ch, hdc in 5th ch, sc in 6th ch, 3 sc in the 7th ch (leaf tip turn). Working back along the opposite side: sc, hdc, dc, dc, hdc, sc, sl st to the first sc to close. (15 sts total)
Fasten off, leaving a 10 inch tail.
Large Leaves (Color D, Medium Olive Green)
Make 4 total.
Ch 11.
Row 1: Starting in the second ch from hook: sc, hdc, dc, dc, tr, dc, dc, hdc, sc, 3 sc in the 10th ch (tip turn). Working back: sc, hdc, dc, dc, tr, dc, dc, hdc, sc, sl st to close. (21 sts total)
Fasten off, leaving a 10 inch tail.
Leaf checkpoint: Small leaves should measure about 1 inch long. Large leaves should measure about 1.4 inches long. Block leaves lightly with a damp cloth before assembly.
Section 5: Seed Bead Sprigs
Cut 10 lengths of gold craft wire, each 3 inches long.
For each sprig: Thread 5 seed beads onto the wire. Fold the wire in half so beads cluster at the top. Twist the two tail ends together 4 to 5 times to form a stem.
Group into 3 bundles: one bundle of 4 sprigs, two bundles of 3 sprigs each. Twist stems of each bundle together. Curl the bottom into a small flat coil using pliers so no sharp wire ends are exposed.
Assembly
Step 1: Lay the band flat with RS facing up. Mark the center with a stitch marker.
Step 2: Arrange the 4 large olive leaves in a fan around the center point, with tips pointing outward at roughly 10 o’clock, 12 o’clock, 4 o’clock, and 6 o’clock positions. Stitch each leaf firmly to the band at its base.
Step 3: Tuck the 6 small sage leaves in the gaps between the large leaves, layering slightly on top at the base. Stitch securely.
Step 4: Place the large peach rose at center front bottom, angled slightly to the lower left. Stitch through the base coil and through the band multiple times.
Step 5: Position the two smaller coral roses above and to the right of the large rose, staggered in height. Stitch each through its base.
Step 6: Insert bead sprig bundles between the roses and at the upper right. Press wire coils flat and stitch over them to anchor.
Step 7: Tie the organza ribbon into a small bow. Tack the bow knot securely to the band near the toggle clasp end.
Step 8: Give everything a final inspection. Tack any components that have shifted.
Size Customization Tips
For a larger wrist: Add chains in even numbers. Ch 71 for a 7 inch wrist.
For a smaller wrist: Ch 61 for a 6 inch wrist.
For smaller roses: Skip Row 4 (and Row 5 for the large rose) to create tight buds.
For heavier thread: If using size 3 cotton with a 2.0 to 2.5 mm hook, reduce the band foundation to approximately 45 stitches.
Care Instructions
Hand wash in cool water with mild soap. Do not wring. Lay flat to dry. Spot clean the bead sprigs rather than submerging them. Store flat in a small box to protect the dimensional roses from crushing.
You Did It!
This crochet rose bracelet pattern might look like it belongs in a gallery, but now you know the secret. It is just strips and coils and a bit of patient assembly. The results are absolutely stunning, whether you are making this for yourself, a bride, a prom date, or someone who just deserves something beautiful.
Thank you so much for choosing this pattern. I would absolutely love to see your finished bracelet! Tag me on Instagram or share it in our Facebook group. Seeing your creations genuinely makes my day.
If this pattern caught your eye, go ahead and save it to your Pinterest boards so you can find it when you are ready to start. And please drop a comment below if you make one. I always love hearing how projects turn out and seeing which color combinations you choose!
