
Looking for a showstopping formal gown that will turn heads at every event? This mermaid silhouette crochet dress delivers elegance with its raised diamond texture, dramatic train, and figure-flattering fit. The diamond lattice cable pattern creates depth and visual interest while the construction uses front post and back post stitches that intermediate to advanced crocheters will find satisfying to master.
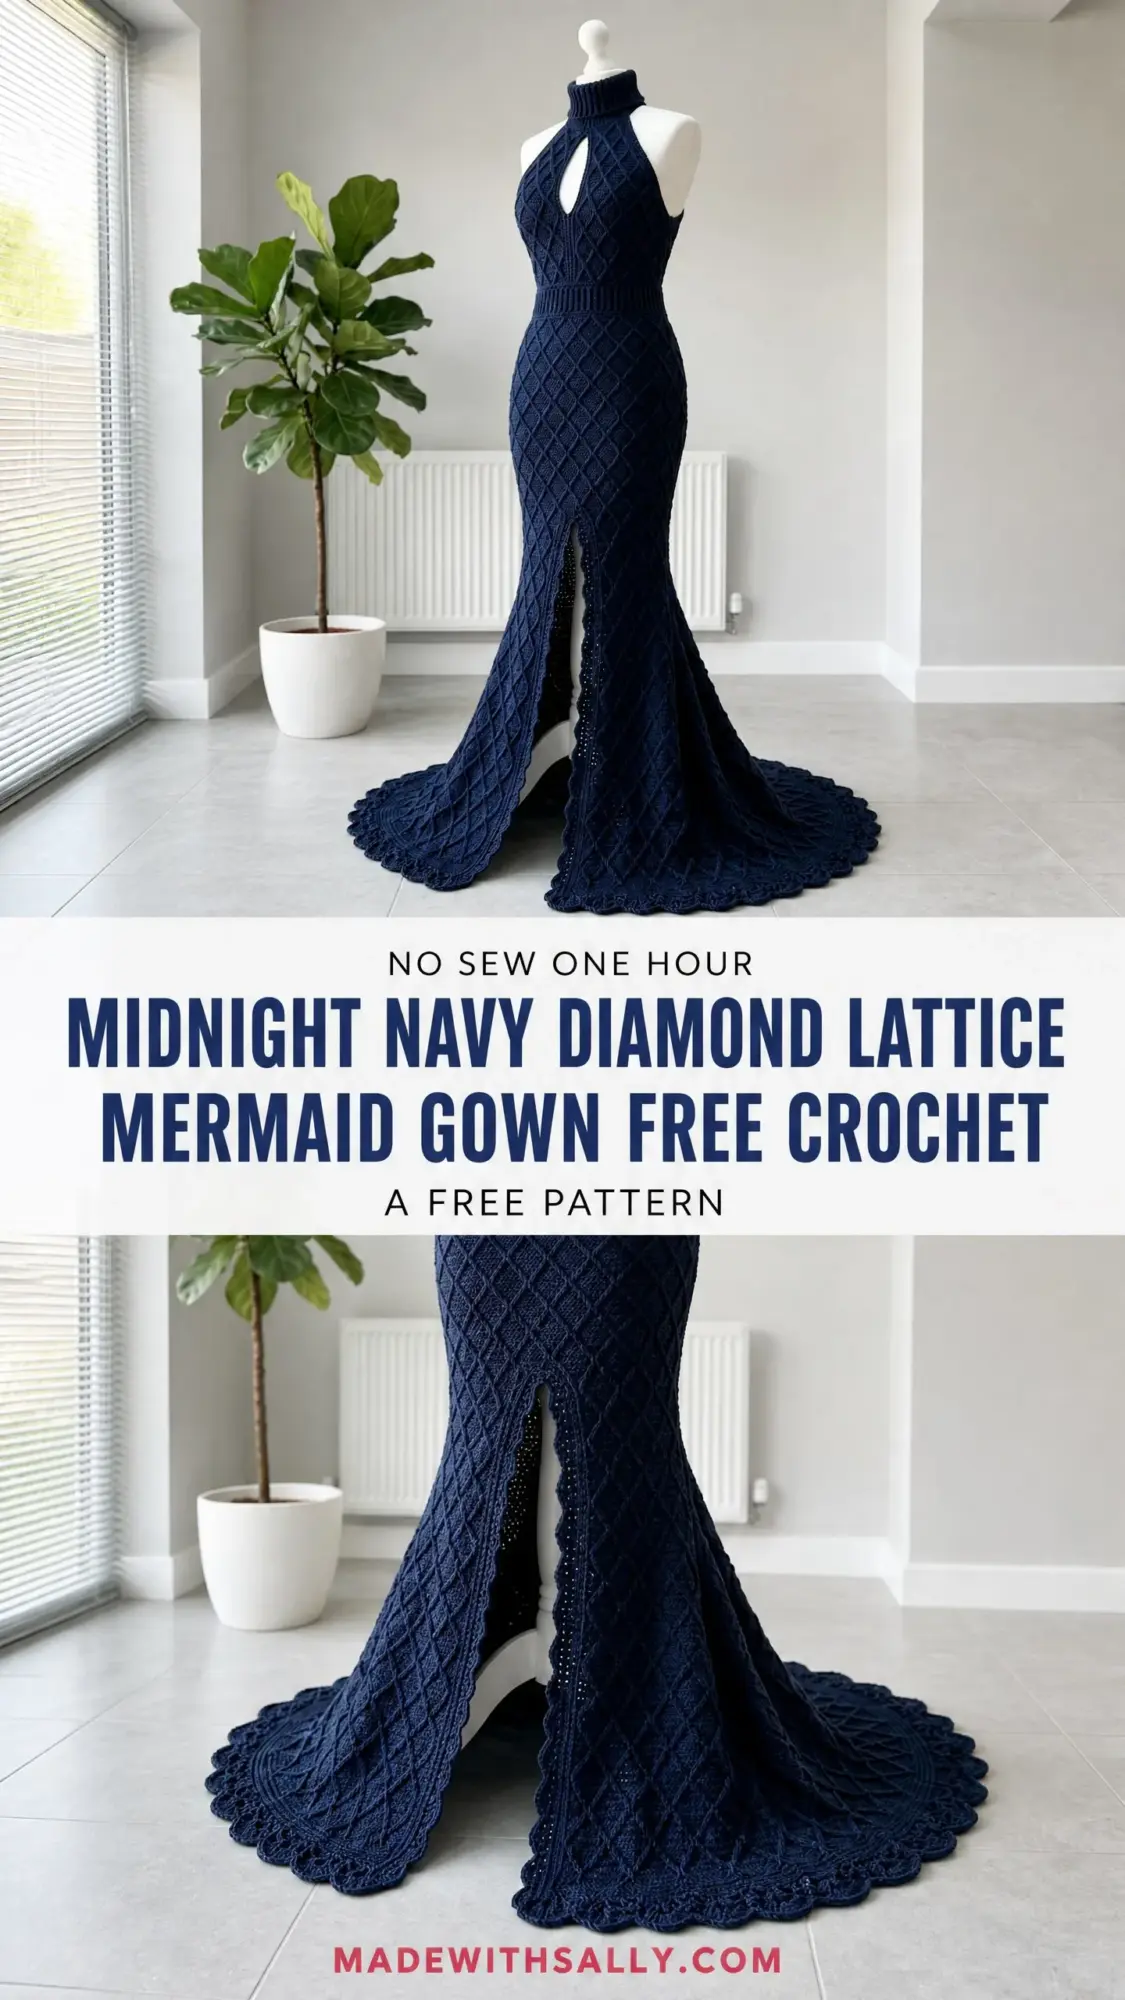
This gown works beautifully for proms, galas, weddings, or any occasion where you want to wear something truly one of a kind. The deep navy yarn photographs gorgeously and the beaded slit trim adds just the right amount of sparkle. If you have been wanting to challenge yourself with a couture-level project, this pattern will push your skills in the best way.
The fitted bodice, open back halter design, and sweeping train combine classic elegance with modern construction techniques. Plan for 180 to 240 hours of work depending on your speed. This is absolutely a labor of love, but the finished piece is worth every stitch.
Why This Crochet Gown Pattern Stands Out
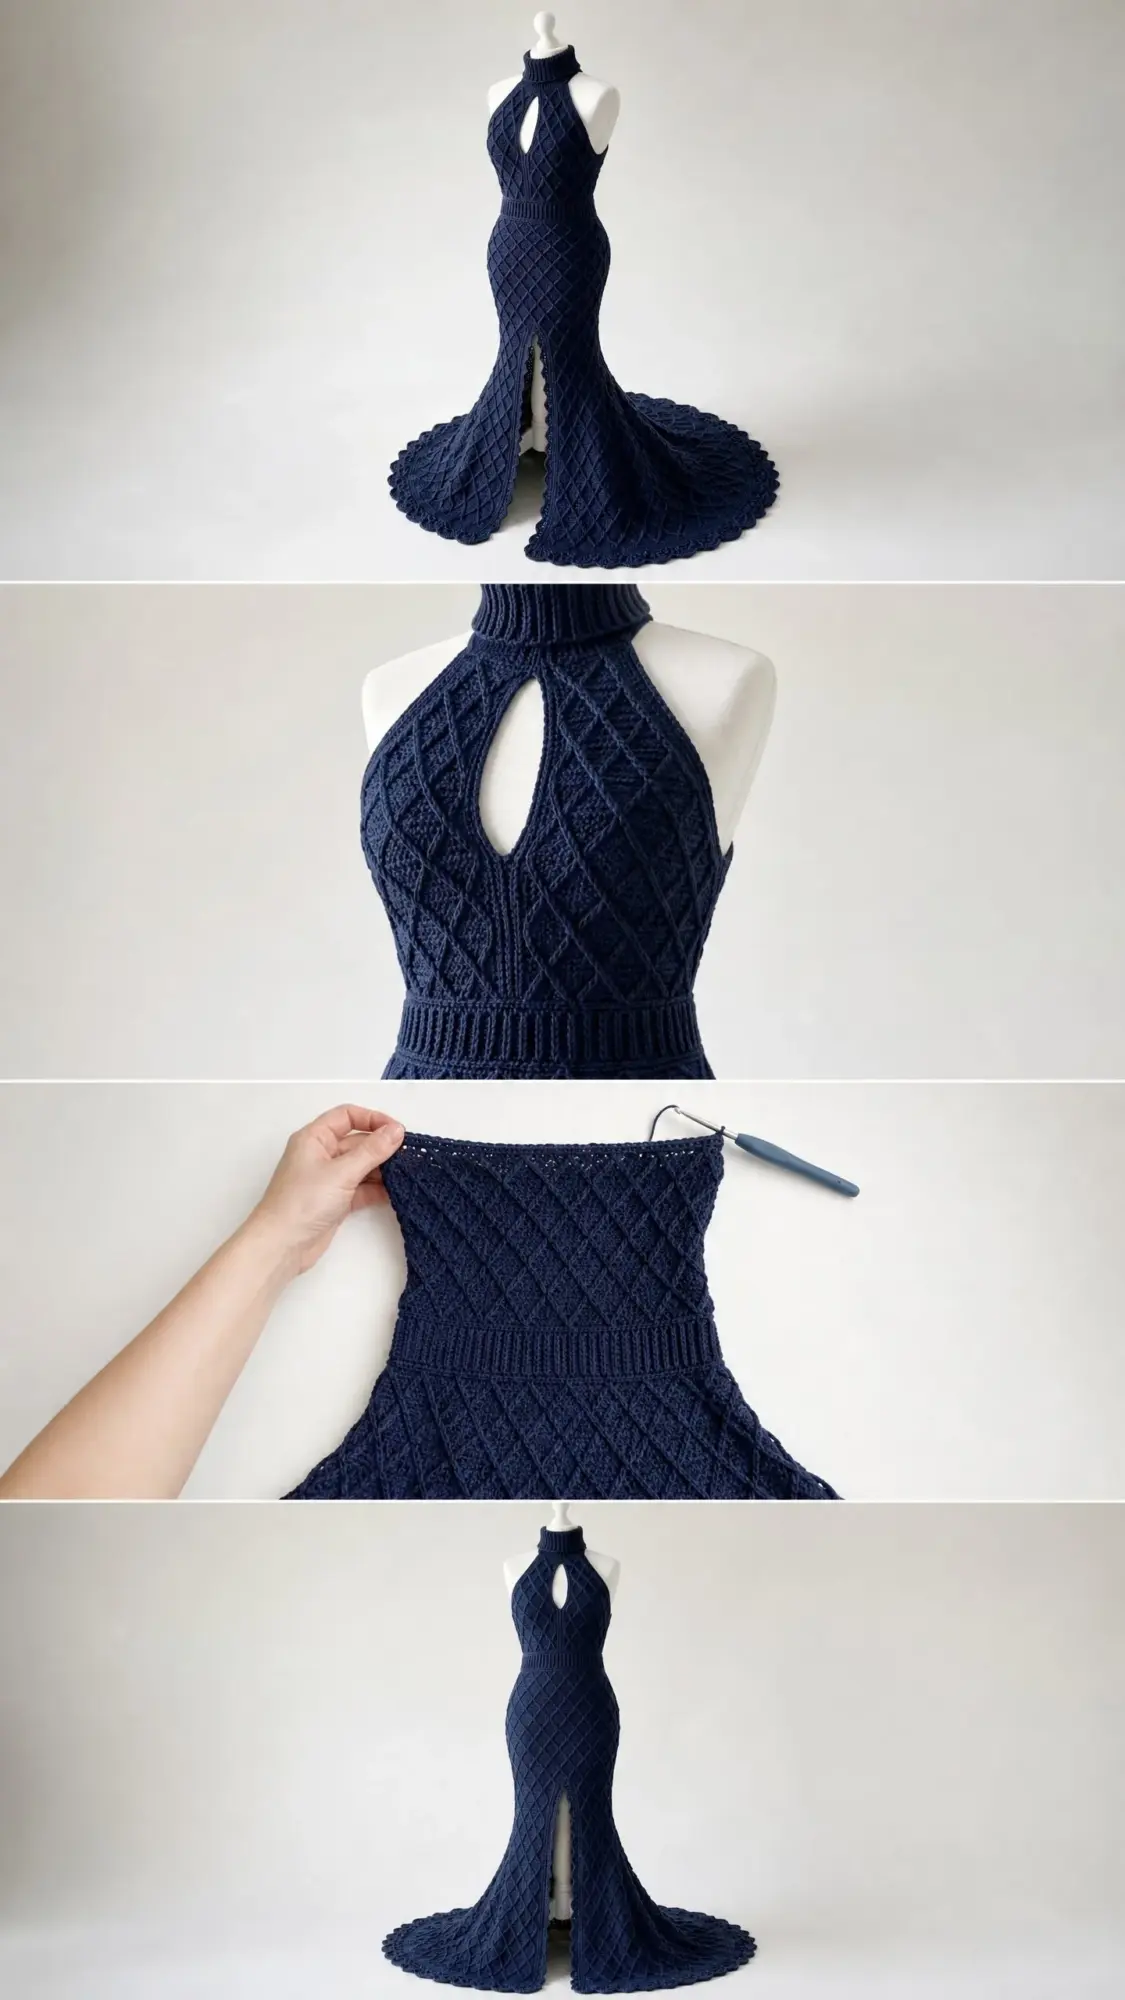
The entire garment features a continuous diamond lattice cable texture created through strategic placement of post stitches. Unlike simple surface textures, this raised pattern has genuine architectural depth. The diamonds travel diagonally across the fabric, creating movement and visual flow from neckline to train.
The silhouette starts fitted at the bust and waist, then flares dramatically from the hips down into that classic mermaid shape. A center front slit keeps the design practical while adding drama. The 12-inch train sweeps behind you as you walk.
Construction moves from the turtleneck collar downward through the bodice, then continues from the waistband down through the skirt. The back remains open with only narrow structural strips maintaining the halter shape. This means less fabric to crochet while still achieving that elegant formal look.
Materials You Will Need
Yarn: Approximately 4,200 yards for size Small, 4,600 yards for size Medium, or 5,000 yards for size Large of DK weight yarn (light weight, CYCA 3) in deep navy. A tightly spun cotton blend or cotton-acrylic blend works best for stitch definition and drape without excessive stretch.
Recommended yarn options:
Hooks:
Notions:
Finished Measurements
This pattern includes sizes Small, Medium, and Large written in the format S (M, L) throughout.
Bust: 34 in / 86 cm (36 in / 91 cm, 38 in / 97 cm)
Waist: 26 in / 66 cm (28 in / 71 cm, 30 in / 76 cm)
Hip at widest mermaid flare: 52 in / 132 cm (55 in / 140 cm, 58 in / 147 cm)
Total length from back neck to train hem: 62 in / 157 cm (63 in / 160 cm, 64 in / 163 cm)
Train length beyond hem floor line: 12 in / 30 cm
Slit height from hem: 24 in / 61 cm
Gauge
Using E-4 / 3.5 mm hook: 20 stitches x 12 rows = 4 in / 10 cm in Diamond Lattice Pattern (blocked)
This gauge is critical. Work a swatch of at least 6 in x 6 in in the Diamond Lattice Pattern, wet block it, allow it to dry completely, then measure. Cotton can grow 10 to 15 percent after blocking. Adjust hook size as needed. If your swatch has more stitches per 4 inches, go up a hook size. If fewer, go down.
Stitch Abbreviations and Definitions
ch: chain
sl st: slip stitch
sc: single crochet. Insert hook, yarn over (yo), pull up loop, yo, draw through both loops.
dc: double crochet. Yo, insert hook, yo, pull up loop, (yo, draw through 2 loops) twice.
hdc: half double crochet
dc2tog: double crochet two together. A decrease that joins two stitches into one.
FPdc: front post double crochet. Yo, insert hook from front to back to front around the vertical post of the indicated stitch below, yo, pull up loop, (yo, draw through 2 loops) twice. This pushes the stitch toward you on the right side.
BPdc: back post double crochet. Yo, insert hook from back to front to back around the vertical post of the indicated stitch, yo, pull up loop, (yo, draw through 2 loops) twice.
FPsc: front post single crochet
BPsc: back post single crochet
FPtr: front post treble crochet. Yo twice, insert hook from front to back to front around post of indicated stitch, yo, pull up loop, (yo, draw through 2 loops) three times.
RS: right side
WS: wrong side
st(s): stitch(es)
rep: repeat
inc: increase, meaning two stitches worked in same stitch
pm: place marker
Understanding the Diamond Lattice Cable Pattern
This raised texture forms the signature look of the entire gown. The pattern works over a multiple of 6 stitches plus 4.
Foundation: Work one row of dc.
Row 1 (RS): Ch 3 (counts as dc), turn. Dc in next st. FPdc around the post of the dc 2 rows below the next st (skip the st behind the FPdc), dc in next 4 sts. Rep from beginning of sequence across, ending dc in last 2 sts.
Row 2 (WS): Ch 3, turn. Dc in next st. BPdc around post of FPdc from previous row (skip st behind), dc in next 4 sts. Rep across, ending dc in last 2 sts.
Row 3 (RS): Ch 3, turn. Dc in next 4 sts. FPdc around post of FPdc from 2 rows below (now shifted 3 sts to the right), dc in next 4 sts. Rep across.
Row 4 (WS): Ch 3, turn. Dc in next 4 sts. BPdc around post of prev FPdc, dc in next 4 sts. Rep across.
Rows 5 through 12 continue shifting the post stitch diagonally to complete two full diamond shapes before returning to the original position. The pattern repeats every 12 rows.
Section 1: Turtleneck Collar
The collar is worked in the round, then divided for the front and back panels.
Using D-3 / 3.25 mm hook, ch 80 (84, 88). Join with sl st to first ch, being careful not to twist.
Rnd 1: Ch 1 (does not count as st). Sc in each ch around. Join with sl st to first sc. (80, 84, 88 sc)
Rnds 2 through 8: Ch 1, BPsc in first st, FPsc in next st. Rep (BPsc, FPsc) around. Join. (80, 84, 88 sts)
Checkpoint: Collar should measure 2.5 in / 6.5 cm tall and 16 in / 40.5 cm circumference unstretched. The turtleneck folds over itself when worn.
Keyhole Setup Row
Rnd 9 (Dividing round): Ch 1. Sc in 38 (40, 42) sts for front half. Ch 4 for keyhole bridge. Skip 4 sts at center front. Sc in rem 38 (40, 42) sts. Join with sl st to first sc. (76, 80, 84 sc plus 4-ch keyhole bridge)
Rnd 10: Ch 1. Sc in first 38 (40, 42) sc. Sc in each of 4 ch across keyhole bridge. Sc in rem 38 (40, 42) sc. Join. (80, 84, 88 sc)
Work 1 rnd of sc around keyhole opening to reinforce edges, working 3 sc in each corner. Fasten off, weave in end.
Section 2: Front Bodice Panel
Switch to E-4 / 3.5 mm hook.
The front panel covers the front of the body only. Join yarn at the right side of the collar’s lower edge. The working width is 40 (42, 44) sts.
Foundation Row: Ch 3, dc in each of next 39 (41, 43) sts across front collar edge. Turn. (40, 42, 44 dc)
Row 1 (RS): Ch 3. Dc in next st. FPdc around post of dc from Foundation Row 2 rows below, skip st behind. Dc in next 3 sts. Rep across to last 2 sts. Dc in last 2 sts. Turn. (40, 42, 44 sts)
Rows 2 through 12: Work Diamond Lattice Pattern as established. No shaping. (40, 42, 44 sts per row)
Row 13 (Decrease row): Ch 3, dc2tog over next 2 sts, work pattern to last 3 sts, dc2tog, dc in last st. Turn. (38, 40, 42 sts)
Rows 14 and 15: Work even in pattern. (38, 40, 42 sts)
Row 16 (Decrease row): Ch 3, dc2tog, work pattern to last 3 sts, dc2tog, dc in last st. Turn. (36, 38, 40 sts)
Rows 17 through 24: Work even in Diamond Lattice Pattern. (36, 38, 40 sts)
Checkpoint: After Row 24, the front bodice panel should measure approximately 8 in / 20 cm tall.
Section 3: Back Bodice Panels
The back is open. Two narrow structural strips provide attachment points for the collar and maintain the halter silhouette. Each strip is 6 (6, 8) sts wide.
Right Back Strip
Join yarn at right back collar lower edge.
Foundation Row: Ch 3, dc in next 5 (5, 7) sts. Turn. (6, 6, 8 sts)
Work Diamond Lattice Pattern for 24 rows total. Fasten off, leaving a 12 in tail for seaming.
Left Back Strip
Join yarn at left back collar lower edge. Work identical to right back strip.
Section 4: Waistband
Using D-3 / 3.25 mm hook, ch 16.
Foundation Row: Sc in 2nd ch from hook and in each ch across. Turn. (15 sc)
Row 1: Ch 1. BPsc in first st. (FPsc in next st, BPsc in next st) rep to last st. Sc in last st. Turn. (15 sc)
Row 2: Ch 1. FPsc in first st. (BPsc in next st, FPsc in next st) rep to last st. Sc in last st. Turn. (15 sc)
Rep Rows 1 and 2 until waistband measures:
Seam short ends together using mattress stitch. Align the seam at center back. Attach the upper edge to the lower edge of the front bodice and back strips.
Section 5: Skirt in the Round
Switch to E-4 / 3.5 mm hook.
Foundation Rnd: Join yarn at center back lower waistband edge. Ch 3, work dc evenly around. Target stitch count: S: 130 sts. M: 136 sts. L: 148 sts. Join with sl st. (130, 136, 148 sts)
Rnds 1 through 6: Work Diamond Lattice Pattern in the round. (130, 136, 148 sts)
Rnd 7 (Increase Rnd 1): Work in pattern, placing 1 extra dc every 13th (17th, 18th) st. S: 10 increases. M: 8 increases. L: 8 increases. (S: 140 sts. M: 144 sts. L: 156 sts)
Rnds 8 through 13: Work even. (140, 144, 156 sts)
Rnd 14 (Increase Rnd 2): Inc 1 dc every 14th (18th, 19th) st. (S: 150 sts. M: 152 sts. L: 164 sts)
Rnds 15 through 20: Work even. (150, 152, 164 sts)
Rnd 21 (Increase Rnd 3): Inc 1 dc every 15th (19th, 20th) st. (S: 160 sts. M: 160 sts. L: 172 sts)
Rnds 22 through 28: Work even. (160, 160, 172 sts)
Section 6: Mermaid Flare Worked Flat
At the end of Rnd 28, do not join. Turn and begin working flat rows. The opening becomes the center front slit.
Row 1 (RS): Ch 3. Work Diamond Lattice Pattern across all sts. Turn. (160, 160, 172 sts)
Rows 2 through 6: Work even. (160, 160, 172 sts)
Row 7: Inc evenly to reach 178 sts for all sizes.
Continue working increase rows at Rows 15, 25, 35, and 45 as detailed in the pattern, gradually expanding to 298 sts by Row 52.
Checkpoint: After Row 52, the skirt should measure approximately 38 in / 97 cm from the lower waistband edge.
Section 7: Train Extension
The train adds approximately 5.3 in / 13.5 cm at center back.
Mark the center back stitch. Work on the 100 center back stitches only.
Train Rows 1 through 16: Work Diamond Lattice Pattern across 100 train sts. (100 sts)
Fasten off.
Section 8: Finishing Details
Slit Trim
Pre-string approximately 300 seed beads onto yarn. Work beaded single crochet up both edges of the slit, placing one bead approximately every second stitch.
Hem Scallop Border
Work a foundation round of sc around the full lower hem perimeter. Then work Scallop Shell Edging: in each designated ch-3 space, work (sc, hdc, dc, dc, dc, hdc, sc).
Tips for Success
Block aggressively. Cotton relaxes significantly when wet blocked. Pin out the train and mermaid flare to their full dimensions and let dry completely.
Take breaks. At 180 to 240 hours, this is a marathon project. Working in focused sessions prevents burnout and maintains consistent tension.
Mark your diamonds. Place locking markers at the start of each 12-row repeat so you never lose your place in the lattice progression.
Try it on as you go. Fitted garments need checking. Baste the side seams temporarily and try on after completing the bodice and again at the waistband.
This Midnight Navy Diamond Lattice Mermaid Gown crochet pattern represents the pinnacle of handmade couture. The combination of textured stitchwork, dramatic silhouette, and thoughtful construction details creates a garment that rivals anything found in high-end boutiques.
Thank you so much for choosing this pattern for your next ambitious project. I would absolutely love to see your finished gown, so please tag me on Instagram or share your photos in my Facebook group. The navy is stunning, but I bet this design would look incredible in burgundy, emerald, or classic black too.
If this pattern inspires you, go ahead and pin it to your Pinterest boards so you can find it when you are ready to start. And please drop a comment below once you finish. I cannot wait to celebrate your beautiful work with you!
