
I don’t know about you, but I’m a sucker for a good granny square bag. There’s something about the classic construction mixed with modern neutral tones that just works every single time.
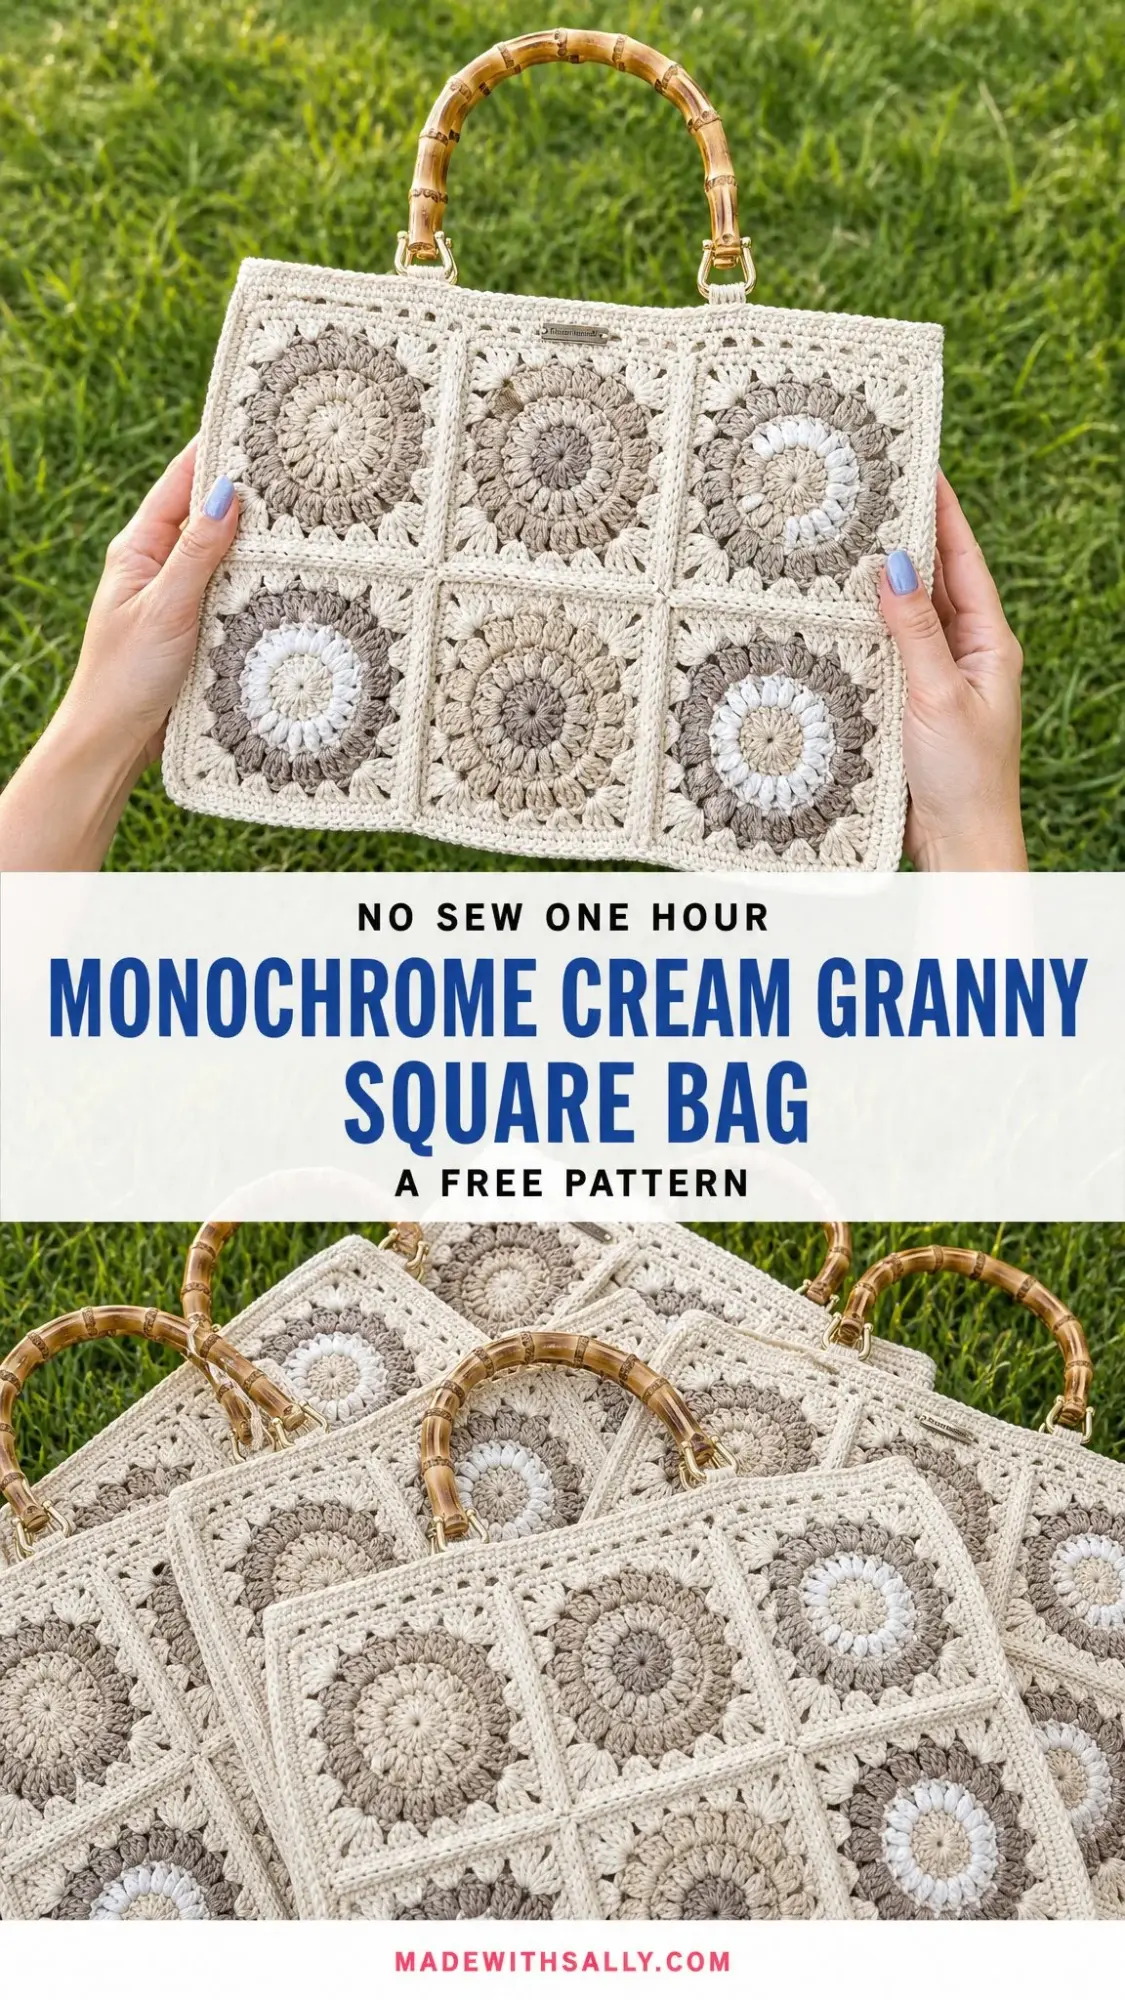
This Monochrome Cream Granny Square Bag hits all the right notes. You get that vintage crochet charm with a fresh, sophisticated palette that goes with absolutely everything in your closet.
The sunflower-style squares are satisfying to make, the assembly is straightforward, and those bamboo handles? Pure elegance. Let me walk you through exactly how to create your own.
About This Granny Square Handbag Pattern
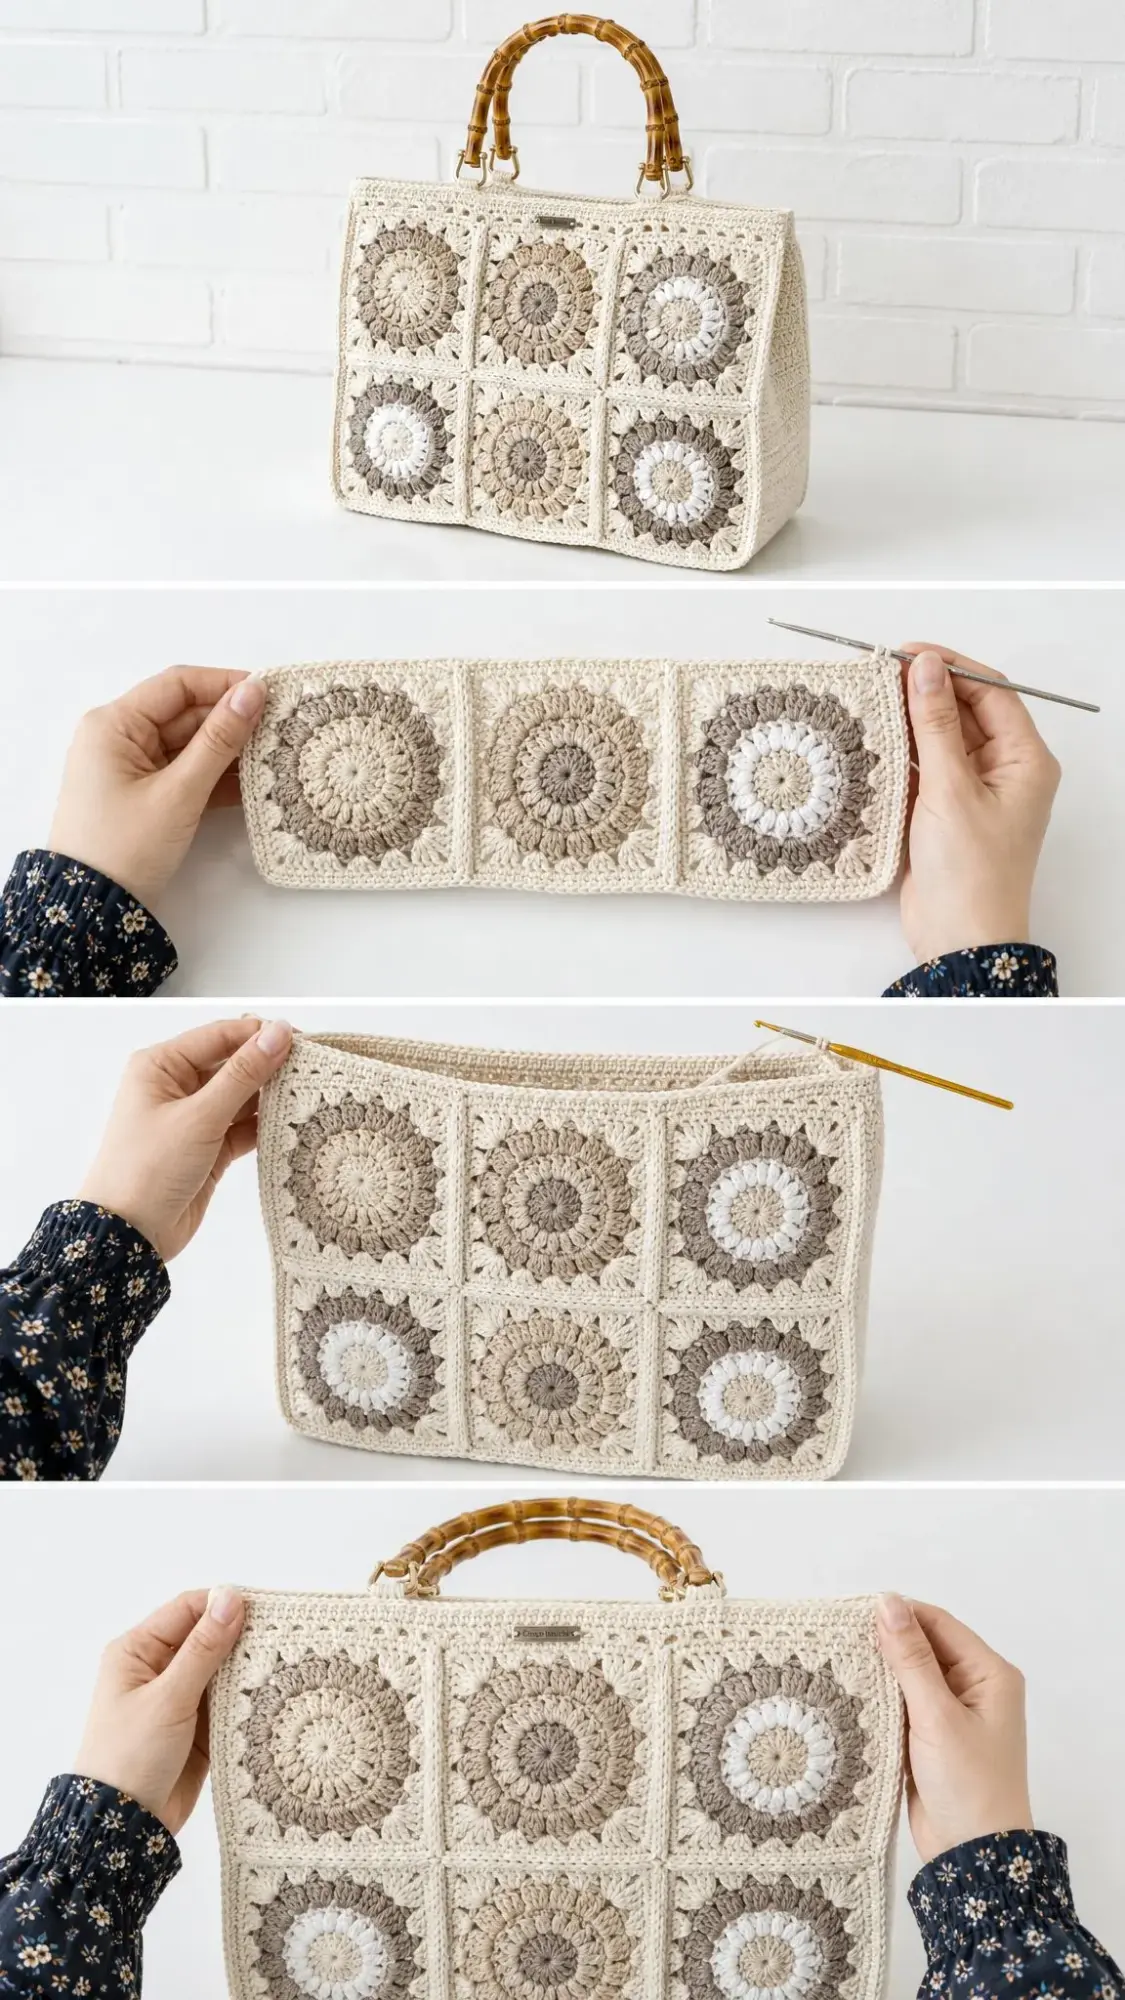
This pattern creates a structured tote made from twelve wheel-style sunflower squares. Each square features layered puff stitches that radiate outward like petals, framed in cream and joined into a beautiful grid. The finished bag has a boxed base so it stands on its own, and the bamboo handles give it that heirloom quality.
The skill level is intermediate. You should be comfortable with the magic ring, puff stitches, and basic seaming techniques. If you’ve never done puff stitches before, don’t worry. I’ll explain exactly how they work, and once you get the rhythm, they’re incredibly satisfying.
Finished size: 11 × 9½ × 2½ inches (28 × 24 × 6 cm), not including the handles.
One square measures: 3¾ inches (9.5 cm) after blocking.
Time to complete: Approximately 14 to 20 hours over a few relaxed sittings. This is a perfect project to work on while watching your favorite show.
Materials You’ll Need
Yarn
You’ll need DK weight 100% cotton yarn, approximately 280 to 320 grams total. A smooth DK cotton holds the puff texture beautifully and gives the bag its crisp, structured body.
Here’s the color breakdown:
| Color | Amount | Used For |
|---|---|---|
| Cream (MC) | ~150 g | Frames, top border, handle tabs, seams |
| Oatmeal | ~35 g | Motif petals |
| Taupe | ~35 g | Motif petals |
| Mushroom | ~30 g | Motif petals |
| Soft white | ~25 g | Accent petals and centers |
Yarn suggestions that work beautifully:
Hook and Notions
Gauge
One finished sunflower square should measure 3¾ inches (9.5 cm) after blocking. Alternatively, 20 single crochet (sc) × 22 rows = 4 inches (10 cm).
Here’s the thing about gauge for this project: it’s really about size, not stitch police. If your square blocks to roughly 3¾ inches, your bag will land close to the measurements above. Smaller squares simply make a daintier bag, which can be just as lovely.
I recommend making one test square first, blocking it, and measuring. Then you’ll know exactly what size your finished bag will be.
Abbreviations and Special Stitches
This pattern is written in US crochet terms. If you’re a UK crocheter, US single crochet equals UK double crochet, and US double crochet equals UK treble. The stitch counts stay the same.
| Abbreviation | Meaning |
|---|---|
| ch | chain |
| sl st | slip stitch |
| st(s) | stitch(es) |
| sc | single crochet (UK: dc) |
| dc | double crochet (UK: tr) |
| sp | space |
| yo | yarn over |
| rep | repeat |
| RS / WS | right side / wrong side |
| BLO | back loop only |
Special Stitches Explained
Puff Stitch: This creates those gorgeous textured petals. Here’s how to work it: [yarn over (yo), insert hook in stitch or space, yo, pull up a loop] 3 times in the same place. You’ll have 7 loops on your hook. Then yo and pull through all 7 loops, chain 1 (ch 1) to close. That’s one puff complete.
Long Puff Stitch: This is worked the same way as the regular puff, but you repeat the pull-up step 4 times instead of 3. You’ll have 9 loops on your hook. Then yo and pull through all 9 loops, ch 1 to close. These form the long radiating petals that give the sunflower its dramatic look.
2-dc Group: Simply work 2 double crochet (dc) stitches into the same stitch or space.
Corner: Work (2 dc, ch 2, 2 dc) into the same space. This creates the corner of your square.
Pattern Notes Before You Begin
The Sunflower Square Pattern
Rounds 1 to 3: Building the Flower
These first three rounds create the flower itself: a tidy center, a ring of puffs, then those long petals that give the motif its sunburst effect.
Round 1 (Center):
With your Center color, make a magic ring. Ch 3 (this counts as your first dc), work 15 dc into the ring. Pull the ring closed and sl st to the top of the ch-3. (16 dc)
Round 2 (Inner Petals):
Ch 1. Puff in next dc, ch 1; repeat from * around. Join with sl st to the top of the first puff. You will have one puff over each dc. (16 puffs, 16 ch-1 spaces)
Round 3 (Outer Petals):
Join your Outer-petal color with a sl st in any ch-1 space. Ch 1, long puff in next ch-1 sp, ch 1; repeat from * around. Join to the top of the first long puff. (16 long puffs, 16 ch-1 spaces)
Tip: Keep the ch-1 between puffs relaxed. The long puffs of Round 3 should sit directly over the puffs of Round 2, so the petals stack into clean rays.
Rounds 4 to 5: Framing the Square
Now we square off that circle with four corners and a clean cream border.
Round 4 (Frame):
Join Cream with a sl st in any ch-1 space (this becomes a corner). In that same sp work (2 dc, ch 2, 2 dc). In each of the next 3 ch-1 sps work 2 dc; in the next ch-1 sp work a corner of (2 dc, ch 2, 2 dc); repeat from * around, ending the last repeat with the 3 plain spaces. Join to the top of the first dc. (40 dc, 4 corner spaces)
Round 5 (Frame):
Ch 3 (counts as dc). Dc in each dc around, working (2 dc, ch 2, 2 dc) in each corner ch-2 sp. Join to the top of the ch-3. You will have 14 dc along each side between corners. (56 dc, 4 corner spaces)
Squaring Checkpoint: Round 4 places a corner in every fourth ch-1 space, with three plain spaces between. The 16 spaces divide evenly into four corners. After Round 5, each side should measure about 3¾ inches (9.5 cm) once blocked.
Make 12 squares. Weave in ends, then block each square firmly to 3¾ inches (9.5 cm) square. Stack into two sets of six.
Choosing Your Colorways
Here’s where the magic happens. The bag reads as one calm neutral from a distance, yet every square is subtly different. That’s the charm, and it’s very forgiving.
The simple formula: Keep Round 1 (center) and Rounds 4 to 5 (frame) in cream on every square. Then mix and match your Inner and Outer petal tones (oatmeal, taupe, mushroom, and soft white) so no two neighboring squares share the same pairing.
Tips for a balanced grid:
Joining the Panels
Each panel is three squares across and two down. You’ll make two identical panels.
Arrange:
Lay six blocked squares in a 3-wide × 2-tall grid, right sides up, in your chosen color order.
Join Method:
Hold two squares with right sides together. With Cream and a tapestry needle, whip stitch through the back loops only along one edge, matching stitch for stitch. That’s 14 stitches per edge. (14 sts joined per seam)
Build Rows:
Join the three squares of the top row into a strip, then the three of the bottom row. Press the seams open.
Join Rows:
Whip stitch the two strips together along their long edge to complete one 3 × 2 panel. Repeat for the second panel. (2 panels)
Prefer a crochet seam? You can also join with a single crochet seam in Cream through back loops for a raised ridge, or with slip stitches for a flatter join. Keep whichever method you choose consistent across every seam.
Shaping and Seaming the Bag
The two panels seam together around three sides, then a boxed base gives the bag its standing depth.
Seam Sides and Base:
Hold the two panels with wrong sides together. With Cream, whip stitch (or sc) down the right side, across the bottom, and up the left side, leaving the top open. (3 sides seamed)
Box the Corners:
At each bottom corner, pinch the corner so the side seam meets the bottom seam, forming a small triangle. Flatten about 1¼ inches (3 cm) across and seam straight through both layers. Repeat at the other corner. (2 boxed corners)
Turn and Shape:
Turn the bag right side out. The boxed corners create the gentle base depth and let the bag stand. (6 cm base depth)
Top Border and Handle Tabs
A few rounds of cream firm up the opening, and small tabs carry the bamboo handles.
Border Round 1 (Cream):
Join Cream at a top side seam. Work sc evenly around the entire opening, keeping an even, firm tension. Aim for about 45 sc across the front and 45 across the back. Join with sl st. (~90 sc)
Border Rounds 2 to 3:
Ch 1, sc in each sc around; join. Repeat once more for a clean, stable rim. (~90 sc each round)
Make 4 Tabs
With Cream, ch 6. Sc in 2nd ch from hook and in each ch across; turn. Work 9 more rows of sc on these 5 stitches. Fasten off, leaving a long tail. (5 sc × 10 rows)
Attach Handles
Thread a tab through a handle ring (or swivel clasp), fold it in half to the inside of the bag, and stitch the end firmly to the border. Place two tabs per handle, each sitting above the gap between squares so the handle centers over the panel. (4 tabs, 2 handles)
Tip: Try the handles on before stitching down. A tab span of about 4 to 5 inches (10 to 13 cm) keeps the handles upright and the opening flat.
Finishing Your Granny Square Bag
Weave in every remaining end on the wrong side, splitting each yarn end as you go so nothing works loose.
Give the finished bag a light steam or spray block, gently squaring the corners and easing the top rim flat.
Let it dry fully, stuffed lightly with tissue to hold the shape, before adding the handles if you blocked after seaming.
Optional Fabric Lining
If you want to add a lining, here’s how:
1. Measure the bag flat and cut two lining pieces, adding ½ inch (1.3 cm) seam allowance all round plus boxed corners to match
2. Sew the lining sides and base, box the corners, and press the top edge under
3. Add a magnetic snap to the lining top center before inserting
4. Hand-stitch the lining just below the border rim
Care Instructions
Size Customization Options
Your finished measurements follow your yarn and tension. Block a single square first and scale the rest of your plan from whatever size it lands at.
Whenever you add squares, increase the top border count to match by continuing to work sc evenly around.
You Did It!
Thank you so much for making this granny square bag with me. I absolutely love how the neutral tones create something that feels both timeless and fresh. This bag is going to get so many compliments, I promise.
If you make one, I would love to see it! Tag me on Instagram or share a photo in my Facebook group. Seeing your finished projects genuinely makes my day.
If you loved this pattern, go ahead and save it to your Pinterest boards so you can find it easily when you’re ready to start. And please drop a comment below if you have any questions or just want to share how yours turned out. Happy crocheting!
