
I have been dreaming about this bag for months. I wanted something structured and vintage looking, with that box shape that holds its form beautifully. The kind of bag you could carry to a farmers market or a weekend brunch and have people stop you to ask where you got it.
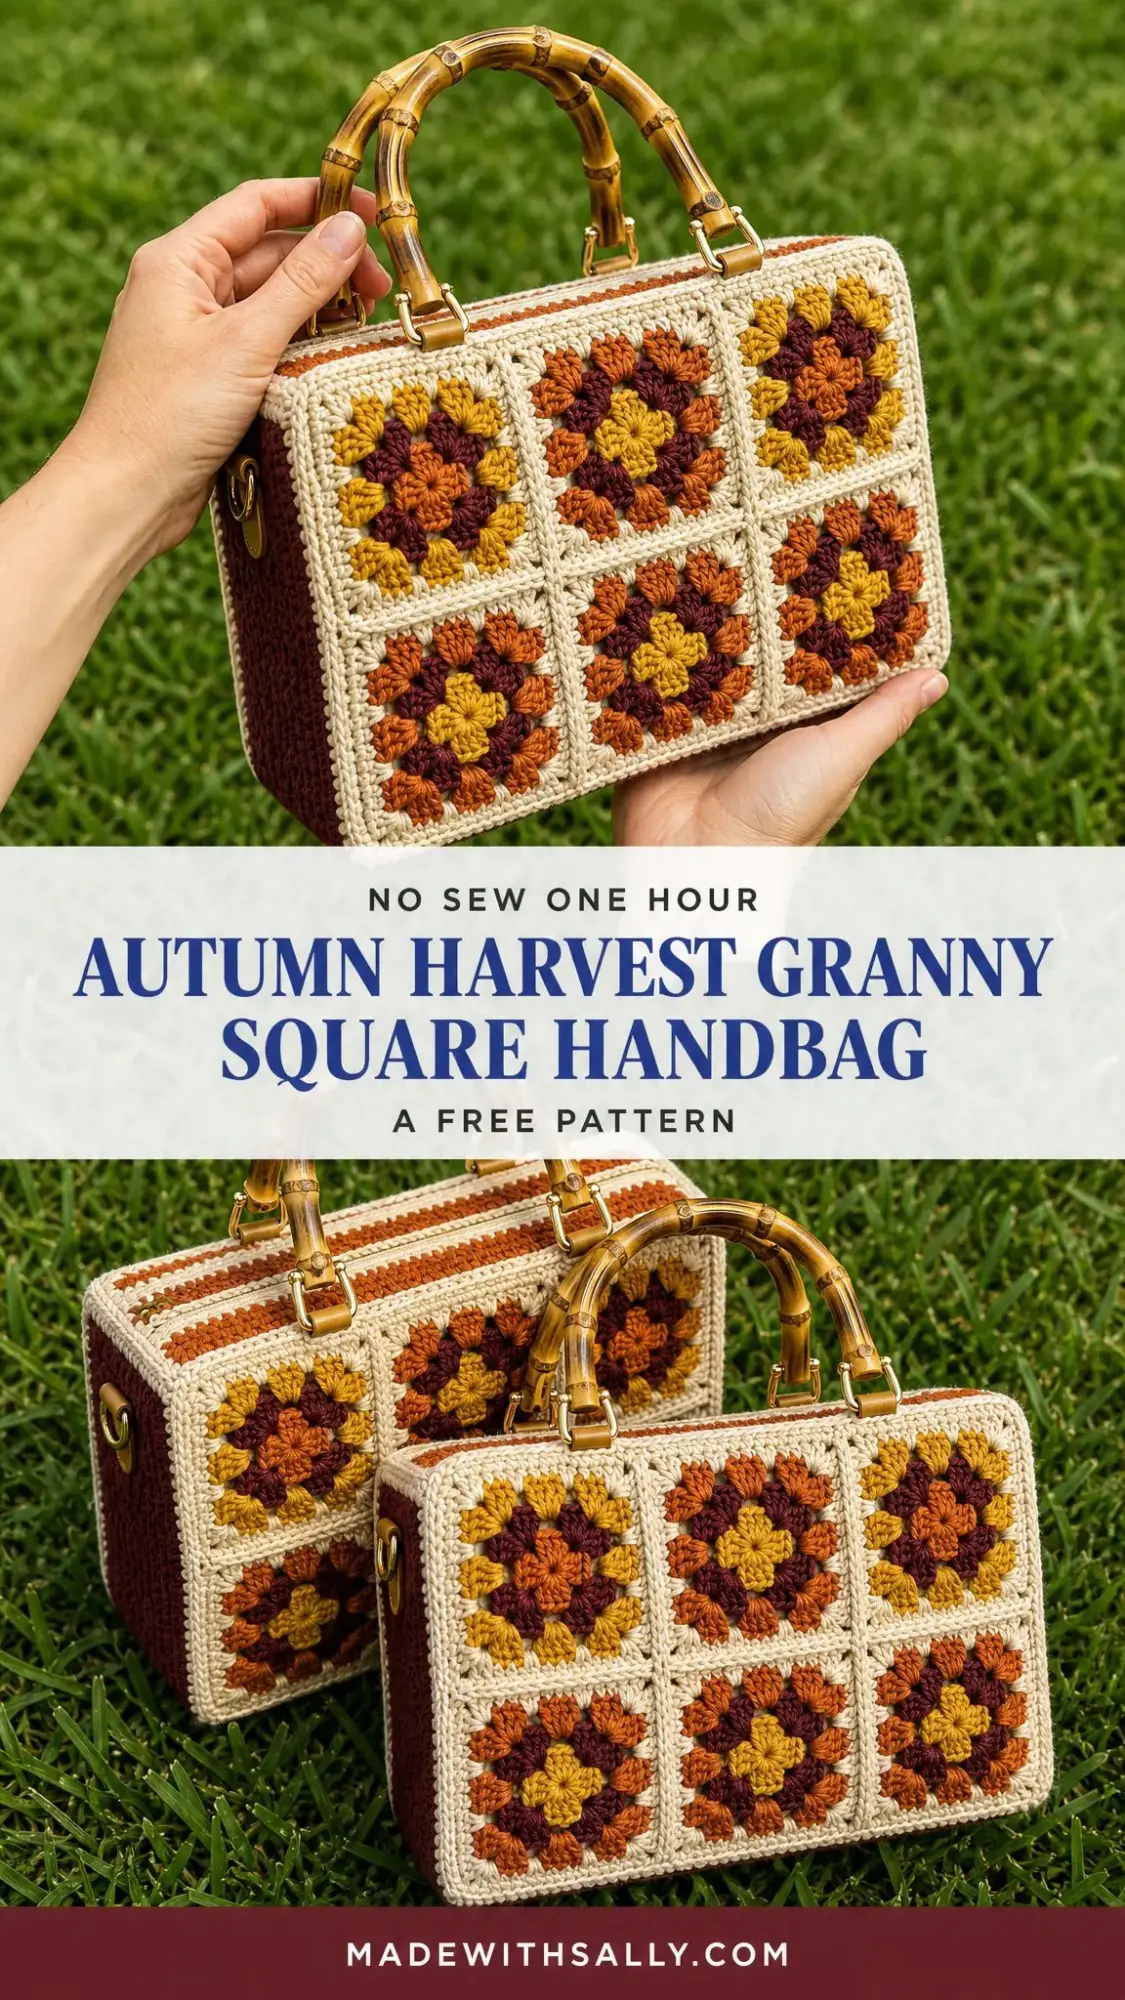
When I finally sat down to design it, I knew exactly what I wanted. Warm fall colors in a classic granny square layout, bamboo handles for that retro touch, and a firm gusset so it would not flop over. I wanted it to be approachable for confident beginners but still impressive enough to feel like an achievement.
I am SO pleased with how this turned out. The autumn tones of mustard, burnt orange, rust, and deep maroon against that cream frame just sing together. Every time I pick it up, it feels like holding a little piece of fall.
About This Crochet Handbag Pattern
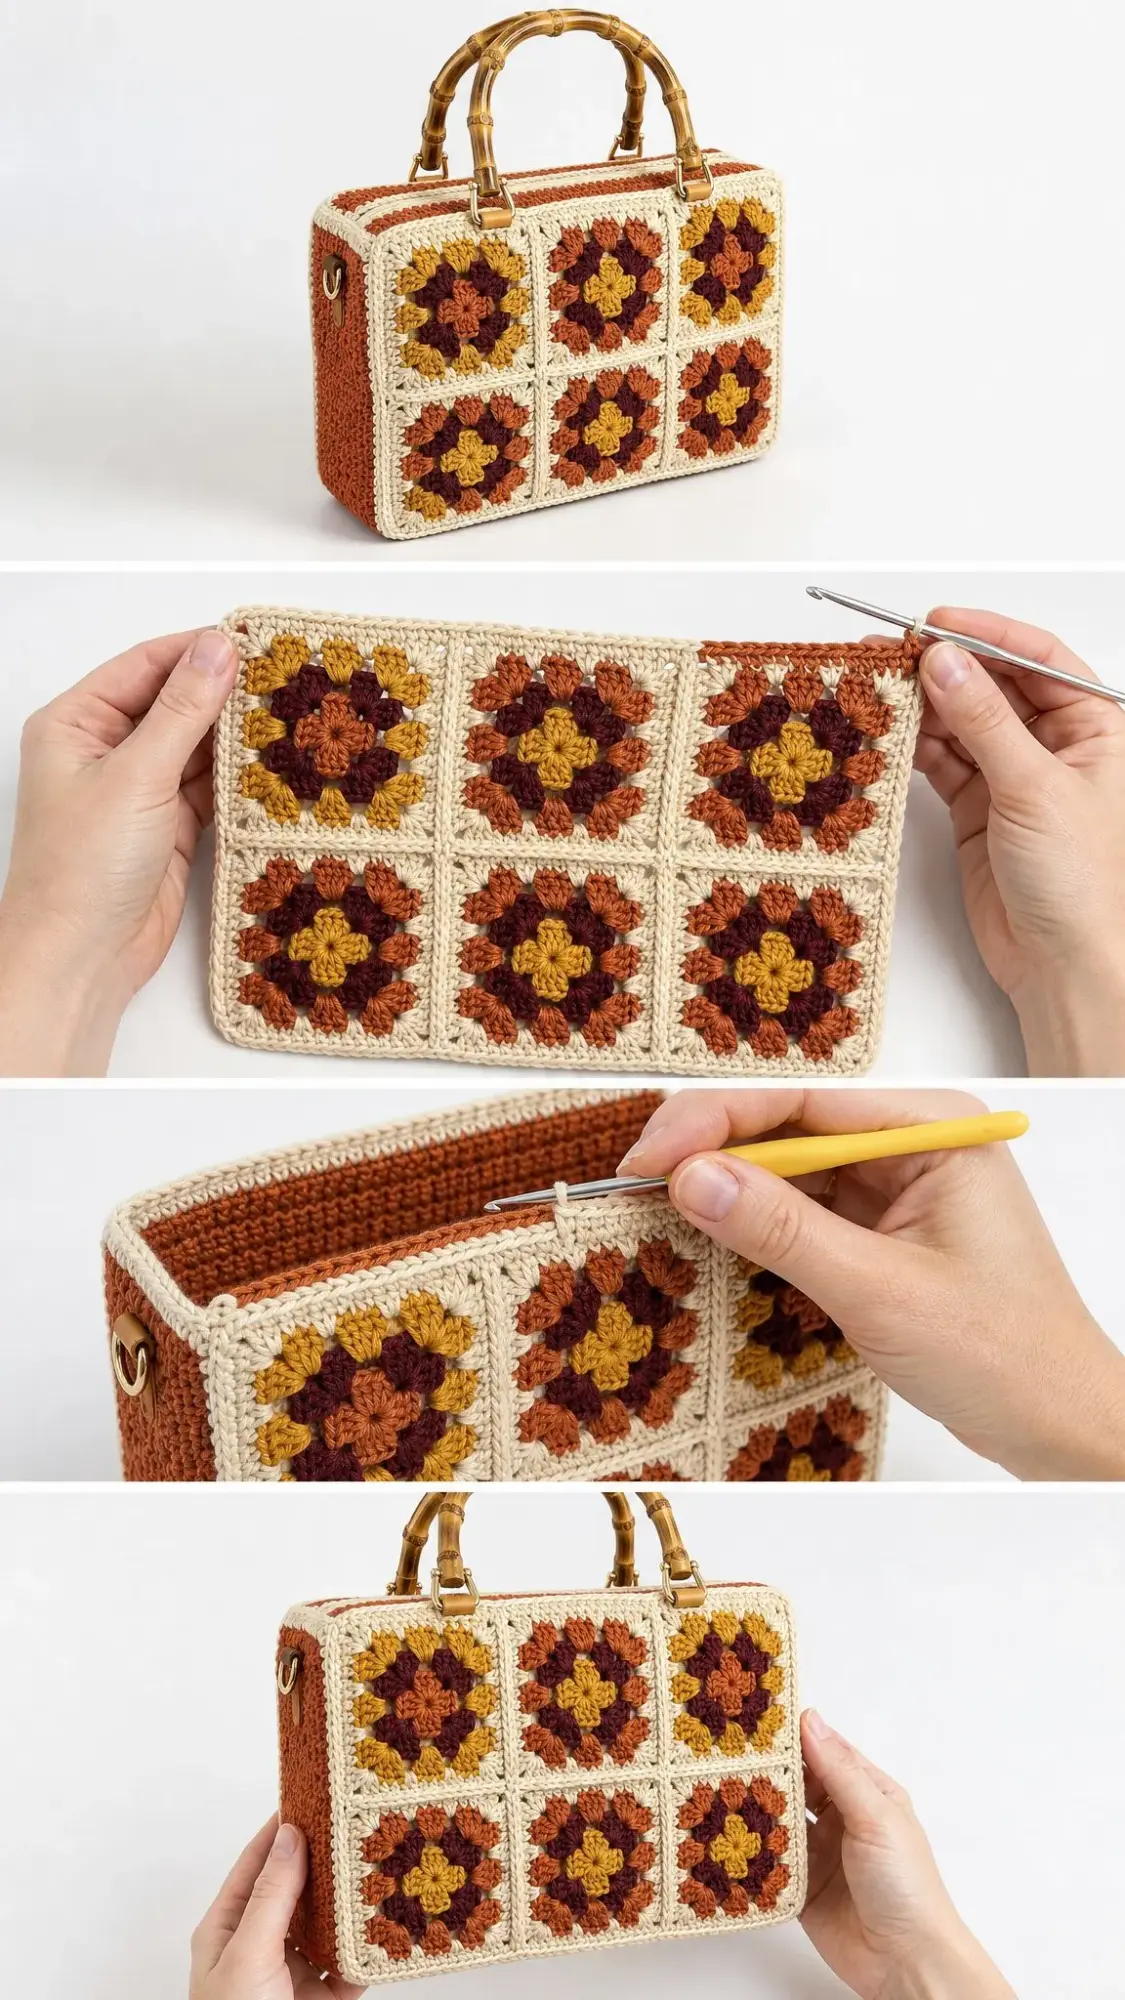
This Autumn Harvest Granny Square Handbag is a structured box bag made from twelve classic granny squares arranged in a three by two grid on each panel. The squares feature warm harvest colors framed in cream, joined together and built around a firm gusset that gives the bag its beautiful boxy shape.
The finished bag measures approximately 12 inches wide by 8 inches tall by 3.5 inches deep (30 by 20 by 9 cm), not including the handles. It is the perfect size for carrying your essentials without being too bulky.
This pattern is rated for confident beginners. If you can make a basic granny square and work single crochet seams, you can absolutely make this bag. I will walk you through every step.
Materials You Will Need
Before you start, gather all your supplies. Having everything ready makes the project flow so much smoother.
Yarn
You will need worsted weight yarn (also called #4 or aran weight). I recommend cotton or a sturdy cotton blend because it gives crisp stitch definition and helps the bag hold its structure. Here is the color breakdown and approximate yardage:
| Color | Role | Yardage Needed |
|---|---|---|
| Cream | Square frames and borders (main color) | 330 yd / 300 m |
| Deep Maroon | Gusset and flower centers | 220 yd / 200 m |
| Burnt Orange | Flower rounds | 120 yd / 110 m |
| Rust | Flower rounds and top stripe | 110 yd / 100 m |
| Mustard Gold | Flower rounds and centers | 120 yd / 110 m |
Yarn suggestions that work beautifully:
Tools and Notions
Gauge Information
Getting your gauge right matters for this project since you want all your squares to be the same size and your bag to match the finished dimensions.
One finished granny square should measure 4 inches / 10 cm square after blocking, using a US H-8 (5.0 mm) hook and worsted cotton.
To check your gauge within the pattern itself: 3 double crochet (dc) clusters and 2 chain spaces should measure about 2 inches / 5 cm across.
If your squares are coming out too big, try going down a hook size. If they are too small, go up a hook size. Do not skip this step. It really makes a difference in how your finished bag turns out.
Abbreviations Used in This Pattern
This pattern uses US crochet terms. Here is every abbreviation you will encounter:
A note for UK crocheters: US single crochet (sc) equals UK double crochet (dc), and US double crochet (dc) equals UK treble (tr). Convert each stitch and the pattern works identically.
Special Stitches Explained
These are the specific techniques you will use throughout this pattern:
Beg-cluster (beginning cluster): Chain 3 (this counts as your first dc), then work 2 more dc in the same space. This starts off your rounds neatly.
3-dc cluster (also called a shell): Work 3 double crochet stitches together into one chain space. This is the classic granny group that forms the heart of the square.
Corner: Work (3 dc, ch 2, 3 dc) all into the same corner ch-2 space. This creates the turn that shapes your square.
Invisible join: When you finish a round, cut your yarn and thread the tail through a tapestry needle. Mimic one last stitch to create a seamless edge instead of a visible join.
Pattern Notes Before You Begin
Read through these notes before you start crocheting. They will save you confusion later.
Color Recipe for Each Square
Here is how to color each square for that gorgeous harvest look:
Mix the inner three rounds freely so no two squares look exactly alike. That scrappy, randomized mix is what gives the bag its beautiful harvest character.
Part 1: Making the Granny Squares
You will make 12 squares total. Begin each square with a magic ring (or chain 4 and slip stitch to form a ring if you prefer).
Round 1 (Center Color)
Into the ring: ch 3 (counts as dc), 2 dc, ch 2, [3 dc, ch 2] three times. Join with sl st to top of beg ch-3. Pull the ring tight.
(4 clusters, 4 ch-2 corners)
Round 2 (Change Color)
Join your new color in any corner ch-2 sp. In the same sp: (3 dc, ch 2, 3 dc) to make your first corner. Ch 1, in next corner sp work (3 dc, ch 2, 3 dc); rep from around. Ch 1, join to first dc.
(8 clusters, 4 corners)
Round 3 (Change Color)
Join your new color in any corner sp. Work (3 dc, ch 2, 3 dc) in corner, ch 1, 3 dc in next ch-1 sp, ch 1; (3 dc, ch 2, 3 dc) in corner, ch 1, 3 dc in side sp, ch 1; rep from around. Join to first dc.
(12 clusters, 4 corners)
Round 4 (Cream Frame)
Join Cream in any corner sp. Work (3 dc, ch 2, 3 dc) in corner, [ch 1, 3 dc in next sp] twice, ch 1; (3 dc, ch 2, 3 dc) in corner, [ch 1, 3 dc in next sp] twice, ch 1; rep from around. Join, fasten off, weave in ends.
(16 clusters, 4 corners)
Your finished square should measure approximately 4 inches / 10 cm. Each side of the square now has 4 three-dc clusters between its corners. This even count is what allows the squares to join cleanly in the next section.
Part 2: Joining the Panels
Now you will make two identical panels: the front and the back. Each panel is 3 squares wide and 2 squares tall (6 squares each).
Join-As-You-Go Method (Flat Seam)
Hold two squares with wrong sides together. With Cream and a tapestry needle, whip stitch through the back loops only along one edge. Match cluster to cluster and corner to corner. Work 16 stitches across each 4-inch side.
(16 join sts per seam)
Building Each Panel
1. Join 3 squares side by side into a row. Make 2 rows. (2 rows of 3)
2. Join the two rows along their long edges to form the 3 by 2 panel. (panel = 6 squares)
3. Repeat for the second panel so you have a matching front and back.
Border Round (Work on Both Panels)
With RS facing, join Cream in any corner. Work sc evenly all around the panel edge, placing 3 sc in each outer corner and 1 sc in each st / ch-sp along the sides. Across a 3-square top edge, work about 60 sc. Down a 2-square side, work about 40 sc. Join with sl st.
(approx. 204 sc + 4 corners)
Part 3: Creating the Gusset and Assembly
The gusset is one long strip in Deep Maroon that wraps around the two sides and the bottom of the bag. This is what gives it depth and that beautiful firm box shape.
The sc border you worked on each panel becomes your sewing line for the gusset, so keep it firm and even. A row of sc in Rust just inside the top edge adds the warm stripe visible on the finished bag.
Gusset Strip Instructions
With Maroon, ch 19. (19 ch)
Row 1: Sc in 2nd ch from hook and each ch across, turn. (18 sc)
Rows 2 onward: Ch 1, sc in each st across, turn. (18 sc)
Repeat Row 2 until the strip measures about 28 inches / 71 cm long. This is long enough to travel up one side (8 in), across the bottom (12 in), and down the other side (8 in). Fasten off.
(strip approximately 3.5 in / 9 cm wide by 28 in / 71 cm long)
Attaching the Gusset
1. Mark the strip’s center. This will align with the center bottom of the front panel.
2. With WS together and Cream yarn, sc the gusset to the front panel border. Start at one top corner, work down the side, across the bottom, and up the other side. (approx. 100 sc seam)
3. Attach the back panel to the free edge of the gusset the same way. (approx. 100 sc seam)
4. Turn right side out. The bag now holds its box shape!
Part 4: Top Edge and Handles
Top Edge
With RS facing, join Cream at one top-side seam. Work 1 round of sc evenly around the entire opening, keeping the count balanced front and back. Join with sl st.
(approx. 132 sc)
Round 2: Ch 1, sc in each st around, join. For the warm accent stripe, work one round in Rust, then one in Mustard, before finishing in Cream.
(approx. 132 sc per round)
Handle Tabs
Make 4 tabs total.
With Cream, ch 7.
Row 1: Sc in 2nd ch and across, turn. (6 sc)
Work 6 rows total. Fasten off, leaving a long tail for sewing.
(tab approximately 1 by 1.5 inches)
Loop each tab through a bamboo handle ring (or a gold swivel clasp if you prefer). Fold the tab in half and sew firmly to the inside top edge. Attach two tabs per handle, evenly spaced above the panel.
For the optional crossbody strap, sew a D-ring tab to one gusset side.
Important tip: Anchor each tab through several stitches and back again. The handles carry all the bag’s weight, so reinforce these joins generously.
Finishing and Blocking Your Handbag
Take your time with finishing. It makes all the difference in how professional your bag looks.
Customizing the Size
Want to make this bag bigger or smaller? Here are some easy modifications:
Bigger tote: Use a 4 by 2 grid (8 squares per panel) for a 16-inch-wide bag.
Mini bag: Stop each square at Round 3 for approximately 3-inch squares and a daintier purse.
Deeper bag: Widen the gusset to 24 sc (about 4.5 inches / 11 cm).
Taller bag: Add a third row of squares to each panel for a 12-square front and back.
Care Instructions
Your handmade bag deserves proper care to keep it looking beautiful for years.
Why You Will Love This Crochet Handbag Pattern
This bag hits that sweet spot between impressive and achievable. The granny squares work up quickly once you get into a rhythm, and watching the autumn colors come together is so satisfying.
The construction is straightforward. You make squares, join them into panels, add a gusset, and finish with a neat top edge. No complicated shaping or tricky decreases.
And that finished result? People will not believe you made it yourself. The bamboo handles elevate it from craft project to fashion accessory, and the firm structure means it actually functions as a real everyday bag.
I hope you love making this Autumn Harvest Granny Square Handbag as much as I loved designing it. If you want to find this pattern easily later, save it to your Pinterest boards so it is there when you are ready to start. And please leave a comment below if you make one. I would absolutely love to see your color combinations and finished bags!
