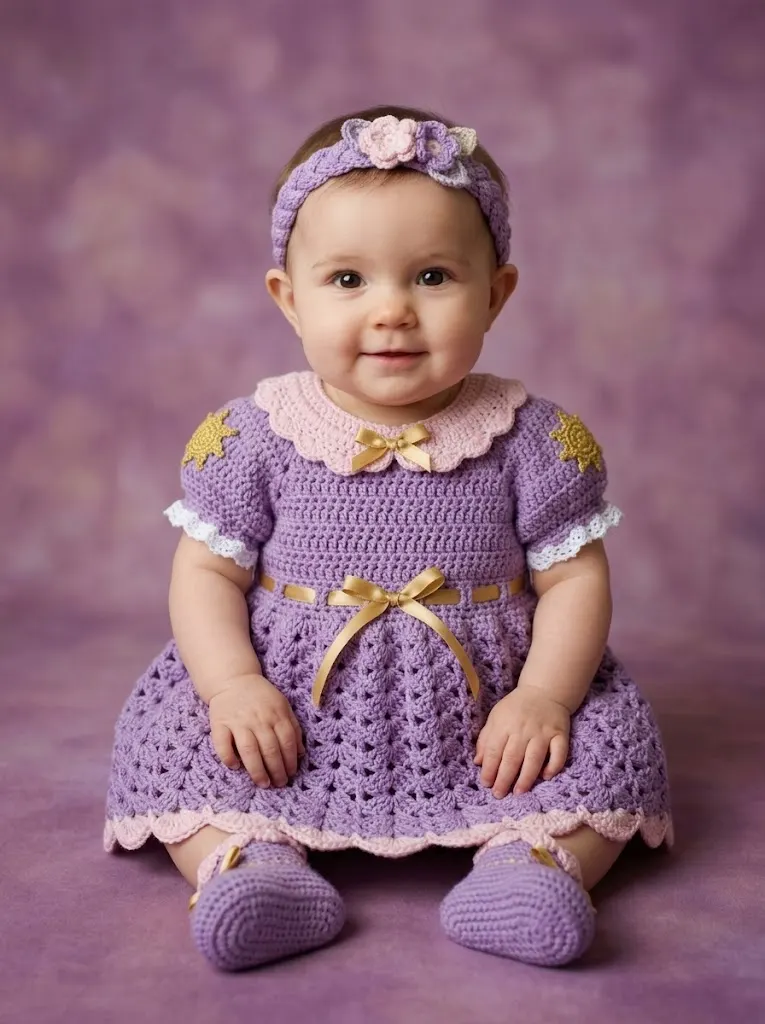
I made this dress for my niece’s first birthday party, and honestly, I cried a little when I finished it. She was going through a major Tangled phase, and I wanted to create something that captured all that princess magic without looking like a costume. The purple lace skirt, the sweet Peter Pan collar in blush pink, those tiny golden ribbon accents. Every detail came together better than I imagined. This is the pattern I keep coming back to whenever someone announces a baby girl, and now I’m sharing every single step with you.
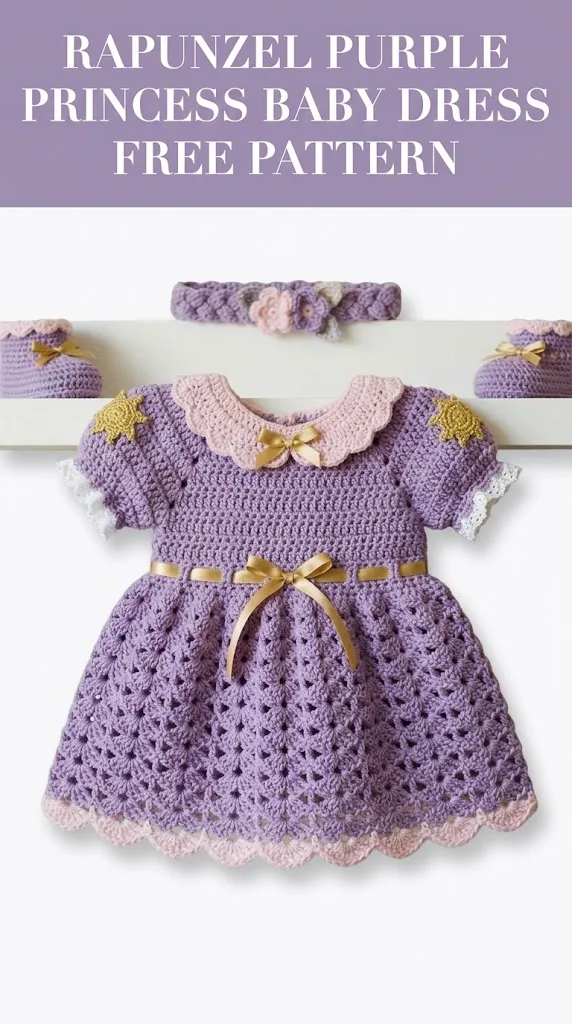
This crochet baby dress pattern creates a complete princess-inspired outfit including the dress, matching headband, and adorable booties. The combination of a fitted bodice worked in basic stitches and a flowing shell stitch skirt makes this project approachable for confident beginners while still impressing experienced crocheters. You’ll love how the scalloped edges and delicate collar elevate the entire look.
Why This Princess Baby Dress Pattern Works
The construction method here is clever. You work the bodice flat with simple rows, then join in the round for the skirt. This means no complicated shaping and no seaming the main body. The sleeves are added afterward, which gives you total control over the fit.
The shell stitch skirt creates natural drape and that beautiful lacy effect you see in the photos. Shells are just clusters of stitches worked into the same space, and they’re far easier than they look. I promise.
The Peter Pan collar is worked separately and attached, so if your first attempt doesn’t turn out perfect, you can redo it without unraveling the whole dress. Same goes for the booties and headband. Each piece is its own mini project.
Materials You’ll Need
Yarn:
I used a soft acrylic blend for easy washing. Look for yarn labeled "baby" or "soft" for comfort against delicate skin.
Hook:
Notions:
Gauge:
16 stitches and 18 rows = 4 inches in single crochet with 4.0mm hook
Always check your gauge before starting. A dress that’s too small won’t fit over baby’s head, and one that’s too large will swallow her whole.
Size Information
This pattern is written for 6 to 12 months.
Finished measurements:
For a smaller size (0 to 6 months), use a 3.5mm hook throughout. For larger (12 to 18 months), use a 5.0mm hook.
Abbreviations and Stitch Definitions
Ch = Chain. Wrap yarn over hook and pull through loop on hook.
Sl st = Slip stitch. Insert hook, yarn over, pull through stitch and loop on hook in one motion.
Sc = Single crochet. Insert hook, yarn over, pull up loop (2 loops on hook), yarn over, pull through both loops.
Dc = Double crochet. Yarn over, insert hook, yarn over, pull up loop (3 loops), yarn over, pull through 2 loops, yarn over, pull through remaining 2 loops.
Hdc = Half double crochet. Yarn over, insert hook, yarn over, pull up loop (3 loops), yarn over, pull through all 3 loops.
Shell = 5 dc worked into the same stitch or space.
Sk = Skip. Miss the indicated number of stitches.
Inc = Increase. Work 2 stitches into the same stitch.
St(s) = Stitch(es).
Crochet Pattern Instructions

Bodice Back Panel
Row 1: With MC and 4.0mm hook, ch 37. Sc in 2nd ch from hook and in each ch across. Turn. (36 sts)
Row 2: Ch 1, sc in each st across. Turn. (36 sts)
Rows 3 through 14: Repeat Row 2. (36 sts)
You now have a rectangle measuring approximately 9 inches wide by 3 inches tall. This forms the back of the bodice.
Bodice Front Panel
Work exactly as Back Panel, Rows 1 through 14. (36 sts)
Joining the Bodice
Lay front and back panels with right sides facing. Using sl st, join the shoulder seams by connecting the first 10 stitches on each side. Leave the center 16 stitches open on each panel for the neck opening. Leave the remaining side edges open for armholes.
Joining row: With right side facing, join MC at bottom corner of back panel. Ch 1, sc evenly around the entire bottom edge of both panels, working through both layers at the side seams to join. Join with sl st to first sc. (72 sts)
This creates a tube for the bodice.
Bodice Waist Rows
Round 1: Ch 1, sc in each st around. Join with sl st. (72 sts)
Rounds 2 through 4: Repeat Round 1. (72 sts)
These extra rounds create the waistband where your ribbon will thread through.
Shell Stitch Skirt
Here’s where the magic happens. Don’t be intimidated by the shell stitch. If you can double crochet, you can do this.
Round 1 (Increase round): Ch 3 (counts as dc), dc in same st, 2 dc in each st around. Join with sl st to top of ch 3. (144 sts)
This doubling creates the fullness for the skirt.
Round 2: Ch 3, dc in next 2 sts, sk 2 sts, shell in next st, sk 2 sts, *dc in next 3 sts, sk 2 sts, shell in next st, sk 2 sts*. Repeat from * around. Join with sl st. (18 shells)
Round 3: Ch 3, sk to center dc of shell, shell in center dc, *sk to next set of 3 dc, dc in center dc, sk to center dc of next shell, shell in center dc*. Repeat from * around. Join with sl st.
Rounds 4 through 20: Repeat Round 3.
Your skirt should measure approximately 10 inches from waist to hem.
Skirt Border
Round 1: Join CC in any st. Ch 1, sc in each st around. Join with sl st. (approximately 144 sts)
Round 2: Ch 1, *sc in next st, sk 1 st, 5 hdc in next st (scallop made), sk 1 st*. Repeat from * around. Join with sl st. Fasten off.
This creates the pretty pink scalloped edge you see at the hemline.
Sleeves (Make 2)
Round 1: Join MC at center bottom of armhole opening. Ch 1, sc evenly around armhole opening. Join with sl st. (approximately 32 sts)
Rounds 2 through 8: Ch 1, sc in each st around. Join with sl st. (32 sts)
Round 9 (Decrease): Ch 1, *sc in next 2 sts, sc2tog (insert hook in next st, pull up loop, insert hook in following st, pull up loop, yarn over, pull through all 3 loops)*. Repeat from * around. Join with sl st. (24 sts)
Round 10: Ch 1, sc in each st around. Join with sl st. Fasten off MC.
Sleeve Lace Trim
Round 1: Join white lace yarn or fingering weight. Ch 1, sc in each st around. Join with sl st.
Round 2: Ch 3, 2 dc in same st, sk 2 sts, *3 dc in next st, sk 2 sts*. Repeat from * around. Join with sl st. Fasten off.
The white trim adds a lovely delicate touch at the sleeve edge.
Peter Pan Collar
Row 1: With CC and 3.5mm hook, ch 52. Sc in 2nd ch from hook and in each ch across. Turn. (51 sts)
Row 2: Ch 1, 2 sc in first st, sc in each st to last st, 2 sc in last st. Turn. (53 sts)
Row 3: Repeat Row 2. (55 sts)
Row 4: Ch 1, sc in each st across. Turn. (55 sts)
Row 5: Ch 1, *sc in next st, sk 1 st, 5 dc in next st (scallop), sk 1 st*. Repeat from * across. Fasten off.
Attaching the Collar
Position collar around neckline with scalloped edge facing outward. Using CC and yarn needle, whip stitch the straight edge of collar to the neckline, centering the collar at front with slight overlap.
Add a small ribbon bow at the center front collar point.
Headband
Row 1: With MC and 4.0mm hook, ch 8. Dc in 4th ch from hook and in each ch across. Turn. (5 dc)
Rows 2 through 40: Ch 3, dc in each st across. Turn. (5 dc)
This creates a long strip approximately 12 inches long.
Seam the short ends together to form a circle that fits baby’s head.
Flower embellishment: With CC, ch 4, join with sl st to form ring. *Ch 3, 3 dc in ring, ch 3, sl st in ring*. Repeat from * 4 more times for 5 petals. Fasten off. Attach flower to headband.
Booties (Make 2)
Sole:
Round 1: With MC, ch 10. Sc in 2nd ch from hook, sc in next 7 ch, 3 sc in last ch. Working on opposite side of foundation ch, sc in next 7 ch, 2 sc in last ch. Join with sl st. (20 sts)
Round 2: Ch 1, 2 sc in first st, sc in next 7 sts, 2 sc in each of next 3 sts, sc in next 7 sts, 2 sc in each of last 2 sts. Join with sl st. (26 sts)
Round 3: Ch 1, sc in first st, 2 sc in next st, sc in next 7 sts, *sc in next st, 2 sc in next st* 3 times, sc in next 7 sts, *sc in next st, 2 sc in next st* twice. Join with sl st. (32 sts)
Sides:
Rounds 4 through 6: Ch 1, working in back loops only for Round 4 (this creates the edge), sc in each st around. Join with sl st. (32 sts)
Toe shaping:
Round 7: Ch 1, sc in first 10 sts, sc2tog 6 times, sc in remaining 10 sts. Join with sl st. (26 sts)
Round 8: Ch 1, sc in first 8 sts, sc2tog 5 times, sc in remaining 8 sts. Join with sl st. (21 sts)
Cuff:
Rounds 9 through 12: Ch 1, sc in each st around. Join with sl st. (21 sts)
Round 13: With CC, ch 1, *sc in next st, sk 1 st, 3 dc in next st*. Repeat from * around. Join with sl st. Fasten off.
Add gold star buttons or ribbon bows to bootie fronts.
Finishing Your Princess Baby Dress
Weave in all ends securely. For baby items, I weave each end through at least 2 inches of stitches, then back again.
Thread the waist ribbon: Cut ribbon to approximately 24 inches. Using a yarn needle or safety pin, weave ribbon through the waist rows, going over 2 stitches then under 2 stitches around the entire waist. Tie in a bow at center front.
Add gold accents: Attach small gold star buttons or appliques to the sleeves if desired. You can also add a small bow to the collar center.
Blocking: Wet block the dress by soaking in cool water, gently squeezing out excess, and laying flat to dry. This evens out your stitches and helps the skirt drape beautifully.
Tips for Success
The bodice should fit snugly. The shell stitch skirt has plenty of stretch, so don’t worry if the waist seems small.
If your collar curls, a light steam blocking will help it lay flat.
For a different look, try the skirt in white with a purple collar for a reversed color scheme.
This crochet pattern makes an incredible baby shower gift. Pair it with the headband and booties in a pretty box, and watch the new parents melt.
Caring for Your Handmade Baby Dress
Machine wash on gentle cycle with cold water. Lay flat to dry. Store carefully to avoid crushing the shell stitch skirt.
Avoid fabric softener, which can coat yarn fibers and reduce softness over time.
Thank you so much for choosing this pattern for your little princess project. I truly hope you enjoy making it as much as I did designing it. If you create this dress, I would absolutely love to see your version. Tag me on Instagram or share a photo in my Facebook group. Seeing your finished projects genuinely makes my whole week.
If this Rapunzel Purple Princess Baby Dress caught your eye, go ahead and pin it to your baby crochet board so you can find it when you’re ready to start. And please drop a comment below if you make one. I read every single comment and love hearing which colors you chose.
