
Last summer, I found myself standing in a beachside market, completely mesmerized by a crocheted bucket bag hanging from a vendor’s display. The colors reminded me of tide pools and sun-bleached sand. I didn’t buy it that day, but I couldn’t stop thinking about it.
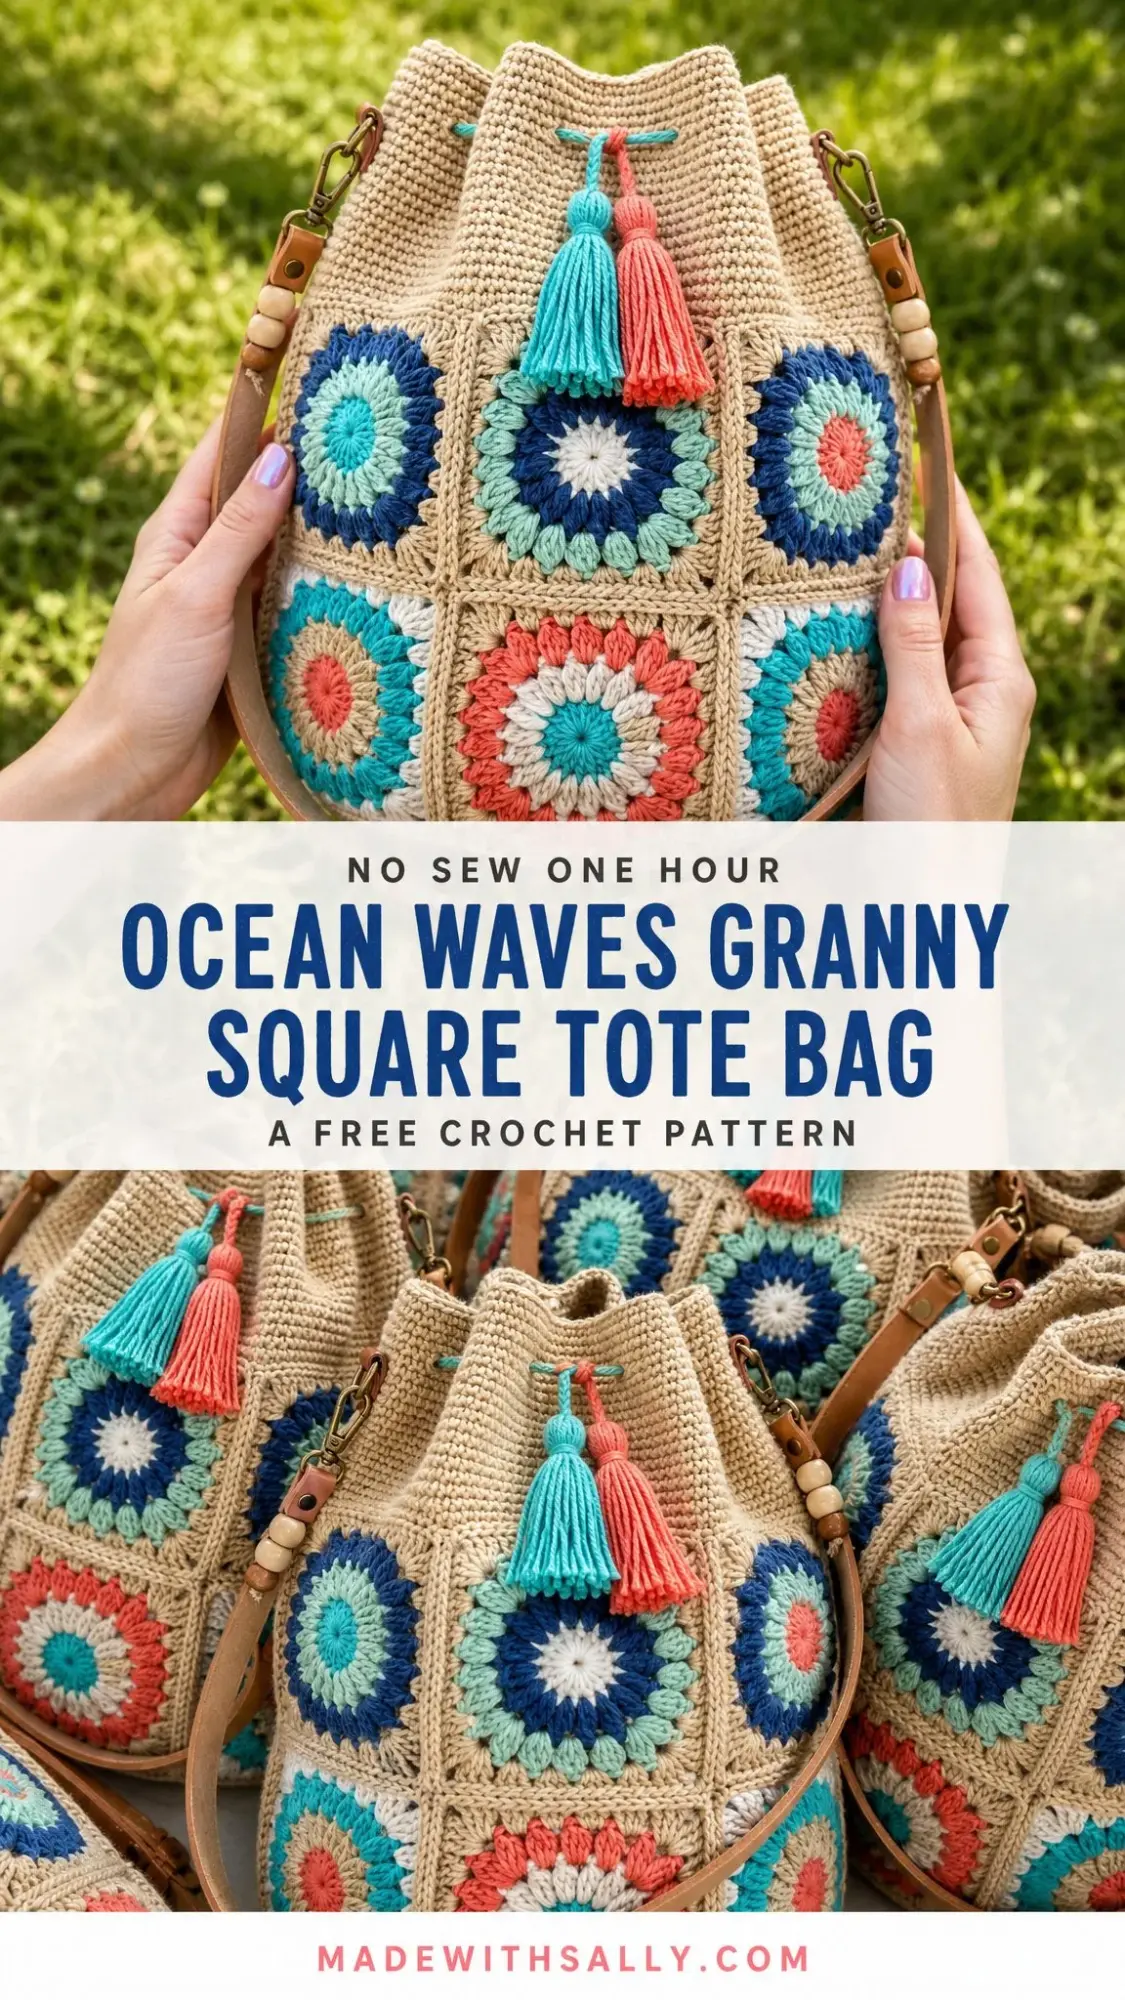
So I did what any yarn-obsessed crafter would do. I went home and designed my own version. After many swatches, some frogging, and a few late nights with my hook, the Ocean Waves Granny Square Tote was born.
This bag combines everything I love about summer crochet. Colorful sunburst granny squares, a practical bucket shape, playful tassels, and a crossbody strap that keeps your hands free for ice cream cones and sandy flip flops. If you’ve been looking for a project that’s satisfying to make and actually useful to carry, this is the one.
About This Crochet Tote Bag Pattern
The Ocean Waves Tote is built from twelve sunburst "wheel-in-square" motifs. You’ll join them six around and two high into a soft cylindrical body. A solid round base anchors the bottom, while a single crochet yoke gathers everything to a drawstring top. Two swingy tassels add personality, and a leather crossbody strap turns it into an everyday bag you’ll actually want to use.
Finished size: 7.5 inches diameter by 11 inches tall (19 cm by 28 cm)
Strap length: Adjustable leather crossbody, approximately 44 inches (112 cm)
Skill level: Intermediate
Time to complete: Approximately 15 to 20 hours
This pattern uses a classic granny square construction method with a twist. The sunburst center creates that beautiful wheel effect you see in the photos. Each square uses three accent colors at the center, plus a main color (Sand) for the final squaring round. This gives you tons of flexibility to customize your color palette while keeping the overall look cohesive.
Materials and Tools You’ll Need
Yarn
You’ll need worsted weight or aran weight cotton yarn (weight category 4). The bag uses one main background color plus six accent shades for the sunburst centers.
Approximate yarn amounts:
Recommended yarns:
Hook
4.0 mm hook (US G/6)
Additional Supplies
Gauge
One finished sunburst square should measure 4 inches by 4 inches (10 cm by 10 cm) with a 4.0 mm hook.
In single crochet (sc): 16 stitches by 18 rows equals 4 inches (10 cm).
Gauge isn’t critical for fit with this project, but matching it keeps your bag at the size shown and helps the base meet the body neatly. If your fabric feels loose, go down a hook size. A firm fabric helps the bag hold its shape better.
Abbreviations and Special Stitches
Let me walk you through all the abbreviations used in this pattern. If you’re newer to crochet, don’t worry. I’ll explain each one.
Important note for UK crocheters: This pattern uses US terminology. You’ll need to swap terms. US single crochet equals UK double crochet. US double crochet equals UK treble crochet. US half double crochet equals UK half treble crochet.
Special Stitch: Puff Stitch
The puff stitch creates those beautiful textured bumps in the sunburst center. Here’s how to work it:
Yarn over, insert hook in the stitch or space, yarn over and pull up a loop to the height of the round. Repeat this sequence 3 times in the same place. You’ll have 7 loops on your hook. Yarn over and draw through all 7 loops, then chain 1 to close.
Don’t pull your loops too tight. Keep them loose and even for a nice puffy result.
Pattern Notes Before You Begin
Read through these tips before you start. They’ll save you headaches later.
Color tip: Keep MC (Sand) as every square’s border so the colorful wheels "float" on a calm sandy ground. This is what unifies the whole bag and gives it that cohesive look.
Suggested color arrangement: Rotate the six accent colors across the twelve squares so no two neighboring squares have matching centers. A relaxed, no-rules arrangement reads most like the sample in the photos.
The Sunburst Square Pattern
Make 12 squares total. In these instructions, Colors A, B, and C are your chosen accents. Color D is MC (Sand).
Round 1 (Color A): Make a magic ring. Chain 3 (this counts as your first double crochet), work 11 double crochet into the ring. Pull the ring closed, slip stitch to the top of chain 3. (12 dc)
Round 2 (Color B): Join in any stitch. Chain 2, work a puff stitch in the same stitch, chain 1. Work a puff stitch in the next stitch, chain 1. Continue around working a puff in each stitch with chain 1 between. Slip stitch to the top of the first puff. (12 puffs, 12 chain-1 spaces)
Round 3 (Color C): Join in any chain-1 space. Chain 3, double crochet in the same space. Work 2 double crochet in each chain-1 space around. Slip stitch to the top of chain 3. (24 dc)
Round 4 (Color D/MC): Join in any double crochet. Chain 3, double crochet in the same stitch (this is your corner start). Double crochet in the next 5 stitches, then in the next stitch work (2 dc, chain 2, 2 dc) for the corner. Repeat from around, ending with double crochet in the last 5 stitches, then work (2 dc, chain 2) in the same stitch as the first. Slip stitch to the top of chain 3. (36 dc, 4 corner chain-2 spaces)
Understanding Round 4: You’re placing 4 corners evenly around the 24 double crochets. That means a corner on every 6th stitch, with 5 double crochets along each side. Each finished side has 9 double crochets plus a corner space, so your squares will join edge to edge with matching stitch counts.
Blocking: Block all 12 squares lightly to 4 inches (10 cm) before joining. Flat squares make a tidy body and an even drawstring top.
Joining the Squares and Creating the Body
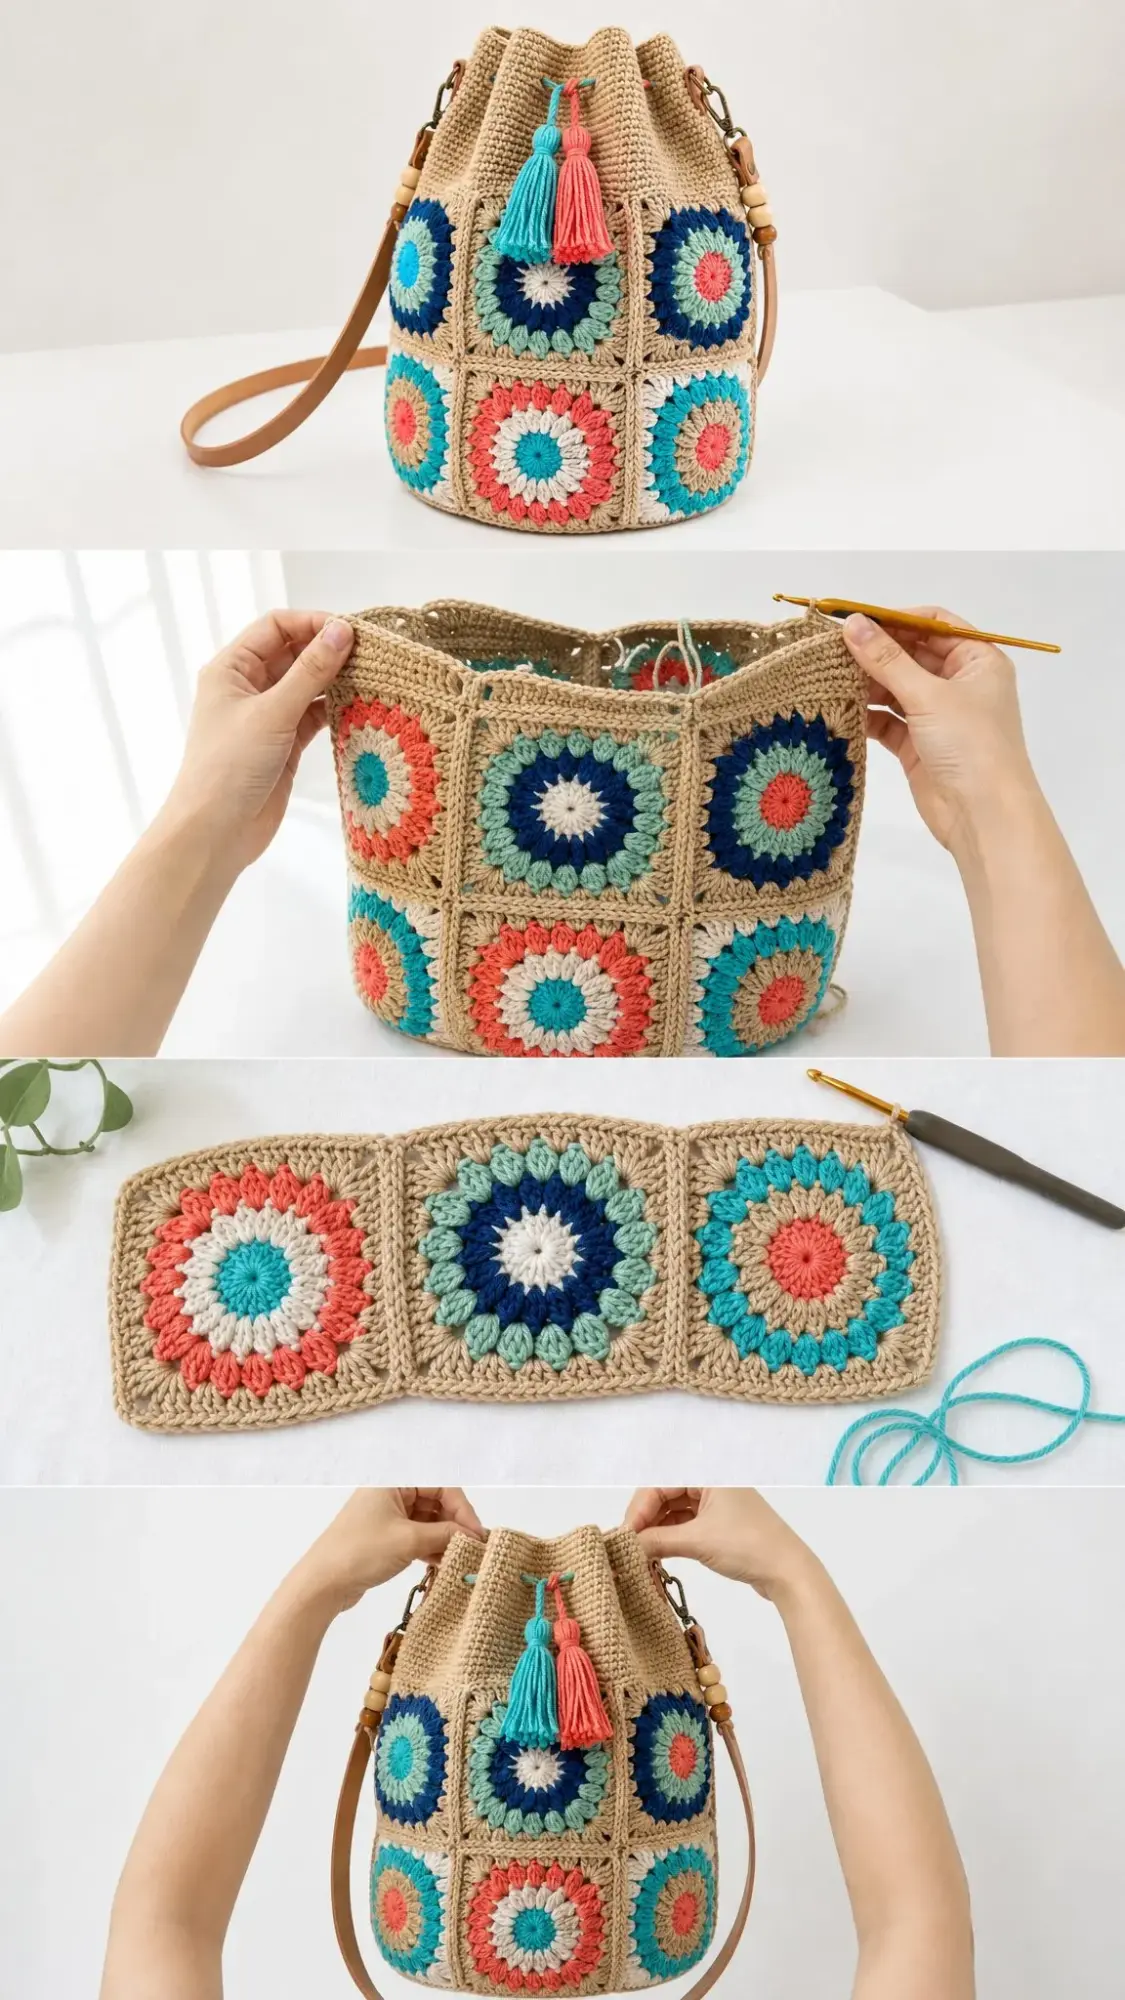
Arrange your squares in a grid that’s 6 wide by 2 tall. That’s two rows that will wrap into a cylinder. Balance your colors so the brightest centers spread evenly around the bag.
Join the Grid
Using MC and your tapestry needle (or a slip stitch/single crochet seam), join the squares side by side into two long strips of 6 squares each. Work through the back loops of matching stitches. Place a corner-to-corner stitch at each chain-2 space. (2 strips)
Join the two strips along one long edge to make a panel that’s 6 squares by 2 squares. (12 squares joined)
Fold the panel into a tube and join the two short ends together. You now have a body ring that’s 6 squares around and 2 squares high. (1 tube)
Seam tip: A whip stitch through back loops gives a flat, nearly invisible join. A single crochet seam on the right side adds a subtle raised "grout" line like the sample. Pick one method and use it throughout for consistency.
Set the tube aside. Next you’ll make the round base, then sew it into the lower opening.
Round Base Pattern
Work in spiral or joined rounds with MC (Sand). Mark the first stitch of each round with a stitch marker.
Round 1: Make a magic ring, work 6 single crochet into the ring. (6 sc)
Round 2: Work 2 single crochet in each stitch around. (12 sc)
Round 3: Single crochet in the next stitch, 2 single crochet in the next stitch. Repeat around. (18 sc)
Round 4: Single crochet in the next 2 stitches, 2 single crochet in the next stitch. Repeat around. (24 sc)
Round 5: Single crochet in the next 3 stitches, 2 single crochet in the next stitch. Repeat around. (30 sc)
Rounds 6 through 20: Continue increasing 6 single crochet evenly each round. Add one more plain single crochet between increases each round until you reach Round 20. (120 sc)
Your finished base should measure approximately 7.5 inches (19 cm) across. It should be a flat, firm disc. If it cups, your tension is too tight. Add a stitch marker round of plain single crochet. If it ruffles, it’s too loose. Skip the next increase round.
Attach the Base
With the body tube right side out, pin the base into the lower opening. Ease evenly so the disc edge meets the bottom of the squares. Sew or single crochet all the way around through both layers, then fasten off and weave in your ends. (1 closed bottom)
Drawstring Yoke Pattern
Work in joined rounds in MC (Sand), picked up around the top opening of the body.
Set-up: Join MC at the top edge. Work single crochet evenly around the top of the squares, adjusting to a multiple of 8. Aim for 96 single crochet. Slip stitch to join. (96 sc)
Rounds 1 through 4: Chain 1, single crochet in each stitch around. Slip stitch to join. (96 sc)
Round 5: Chain 1. Single crochet in the next 6 stitches, chain 2, skip 2. Repeat 12 times. Slip stitch to join. These are your drawstring eyelets. (72 sc, 12 chain-2 spaces)
Round 6: Chain 1, single crochet in each single crochet and 2 single crochet in each chain-2 space around. Slip stitch to join. (96 sc)
Rounds 7 and 8: Chain 1, single crochet in each stitch around. Slip stitch to join. Fasten off and weave in your ends. (96 sc)
Strap Loops
Sew a small D-ring loop (or make a 6-chain MC loop) at each side seam just below the yoke. These will hold the swivel clasps of your leather strap.
Tassels, Cord, and Strap
Drawstring Cord
With MC, make a cord approximately 44 inches (112 cm) long. You can either chain 150 and slip stitch back along the chain, or twist a 3-strand cord. Thread it in and out through the 12 eyelets all the way around, bringing both ends out at the front.
Two Tassels
Wrap teal yarn approximately 30 times around a 3.5 inch (9 cm) piece of cardboard. Tie the top, cut the bottom, wrap a neck about 1 cm down from the top, and trim even. Make a second tassel in coral. (2 tassels)
Tie one tassel to each cord end so they hang at the front. Slide a wood bead onto each end above the tassel if you like the look.
Leather Strap
Clip the swivel clasps of your leather strap to the two side loops. Thread a wood bead onto each clasp tab for the accent shown in the photos. Adjust the length for a comfortable crossbody hang, approximately 22 inches (56 cm) drop.
No leather? Crochet a strap instead. Chain 8, work single crochet rows until your strap is 40 to 44 inches (100 to 112 cm) long, then sew or clasp it to the loops.
Care Instructions
Customization Ideas
Want to make this bag your own size? Here are some options.
Taller bag: Add a third row of squares (18 total) and lengthen the base spiral to keep the disc matched to the new circumference.
Wider bag: Work 8 squares around instead of 6, and grow the base to 160 single crochet.
Roomier top: Add 2 more plain yoke rounds before the eyelet round.
Bigger squares: Add one more puff/double crochet round before squaring, then increase the base to match.
Final Thoughts on the Ocean Waves Tote
This Ocean Waves Granny Square Tote pattern brings together so many satisfying elements of crochet. The colorful sunburst squares are meditative to make. The construction teaches you useful skills like joining motifs and working in the round. And the finished bag is genuinely practical and beautiful.
I’ve carried mine to farmers markets, beach trips, and everyday errands. The bucket shape holds more than you’d expect, and the drawstring keeps everything secure. Plus, the compliments never stop.
Thank you so much for choosing this pattern. I hope you love making it as much as I loved designing it. If you create your own Ocean Waves Tote, I would absolutely love to see it. Tag me on Instagram or share a photo on Facebook. Seeing your finished projects is honestly the best part of sharing patterns.
If you enjoyed this crochet tutorial and want to come back to it later, go ahead and save it to your Pinterest boards. And please leave a comment below if you make this bag. I’d love to hear which colors you chose and how your project turned out.
