
Granny squares with flowers in the center look intimidating, right? All those petals, the color changes, the joining. I get it. But here’s the thing: if you can double crochet and work in the round, you can absolutely make this bag. The daisy center uses a simple puff stitch that looks far more impressive than it actually is. Whether you’re a confident beginner ready to level up or an experienced crocheter looking for a satisfying project, this pouch meets you where you are.
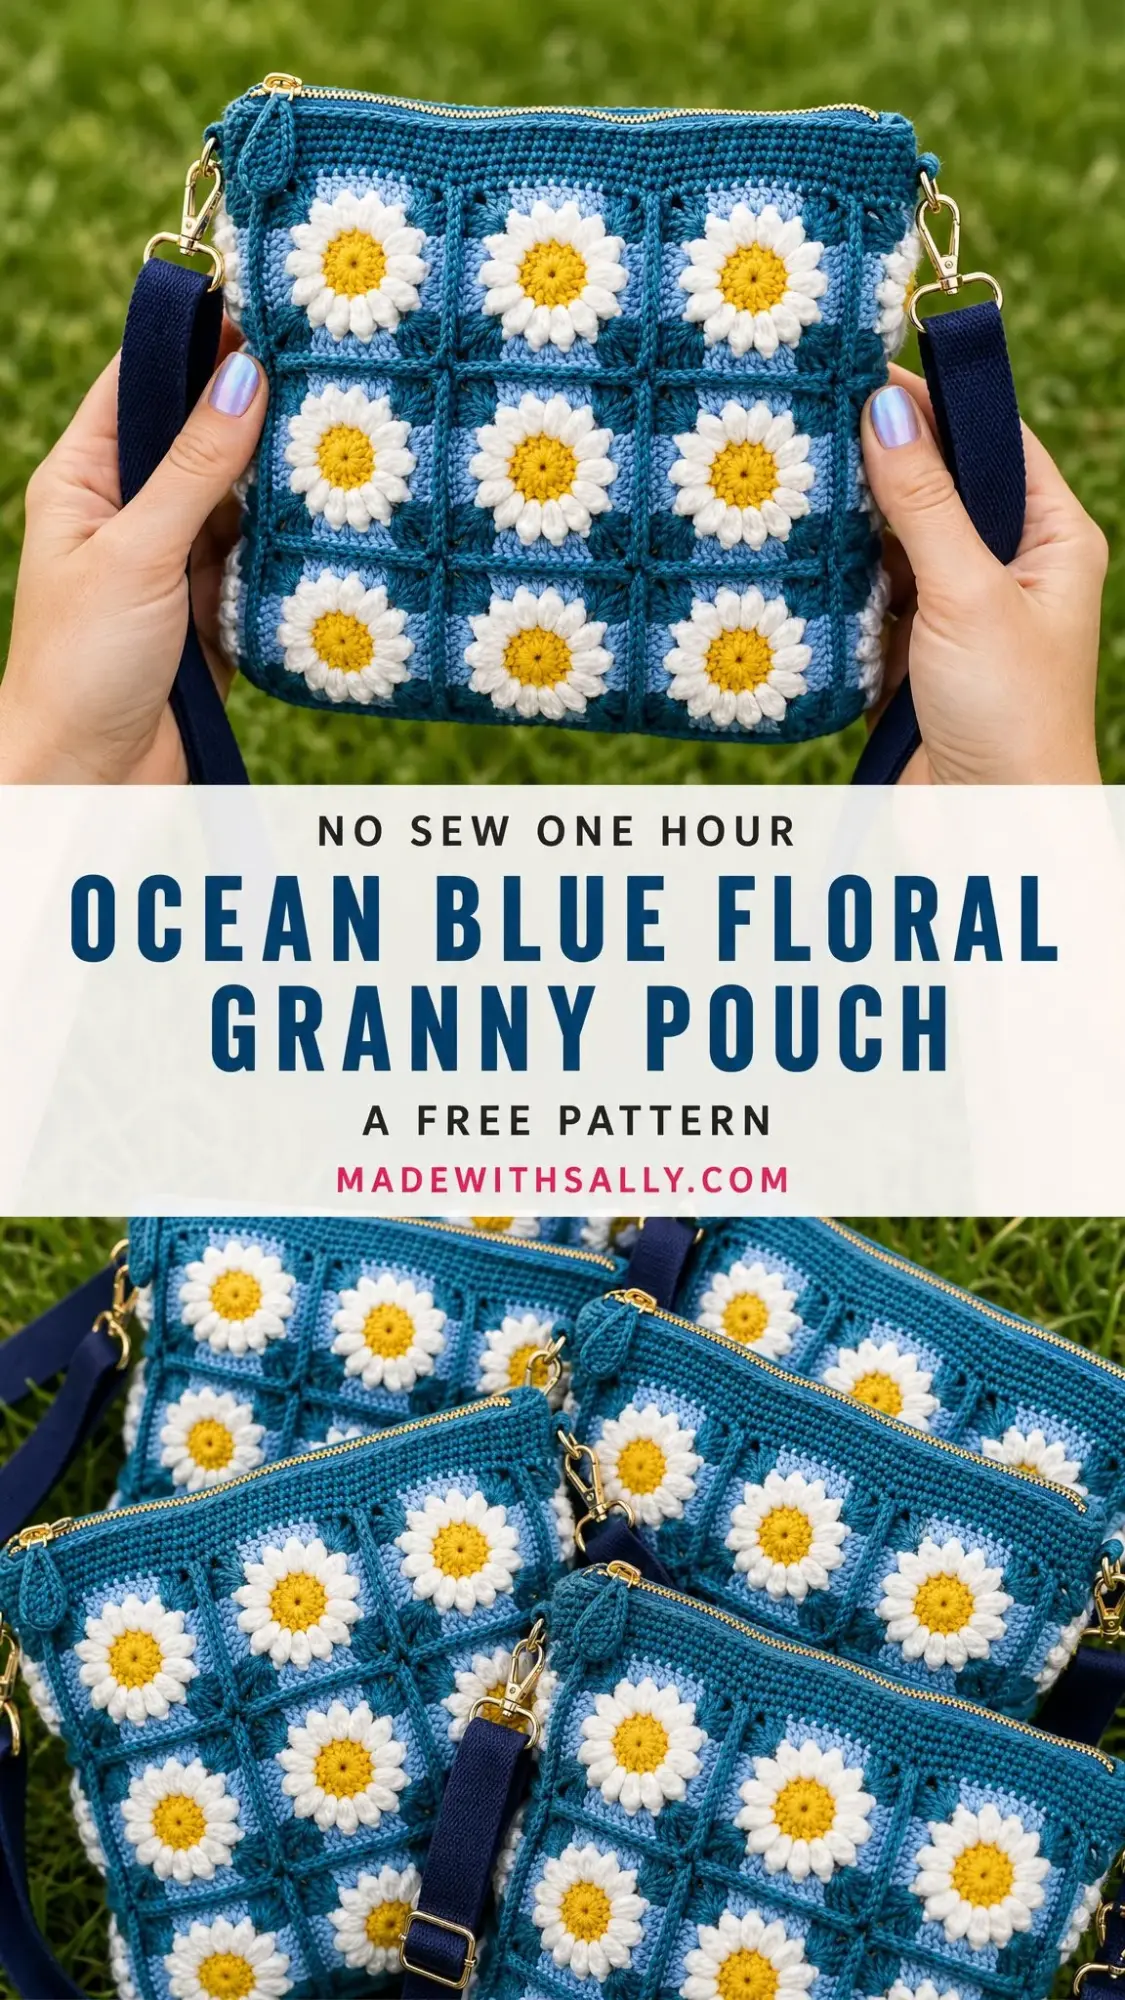
The Ocean Blue Floral Granny Pouch is built from eighteen individual squares. That might sound like a lot, but each one works up quickly, and the repetition helps you get into a rhythm. By your third or fourth square, you’ll be crocheting on autopilot. The construction is straightforward: make the squares, join them into two panels, add a top band, sew in a zipper, and attach a strap.
I love that this bag uses worsted weight cotton, which gives it structure without being stiff. The finished pouch holds its shape beautifully and is perfect as an everyday crossbody. Let me walk you through everything you need to know to make your own.
Project Overview and Finished Size
This daisy granny square crossbody bag features sky blue flower grounds, deep ocean teal borders, and a smart navy strap with gold hardware. The design is cheerful without being overwhelming, making it versatile enough for daily use.
Finished Dimensions (excluding strap):
Skill Level: Intermediate
Time to Complete: 12 to 16 hours
Total Squares Needed: 18 (9 for the front panel, 9 for the back)
Materials and Yarn
This pattern uses worsted weight or aran weight cotton yarn for crisp, structured squares that hold their shape. Cotton is ideal here because it doesn’t stretch out over time like acrylic might.
Yarn Amounts:
Yarn Suggestions:
Hook:
Notions:
Gauge
Getting your gauge right matters for this project because you want all eighteen squares to be the same size. If they’re not, your panels won’t line up properly when you join them.
Gauge: One finished daisy square equals 3.25 inches / 8 cm square (13 double crochet stitches and 7 rounds across).
Make one square first and block it. If your square is too small, go up a hook size. If it’s too large, go down a hook size. Taking time to check gauge now saves frustration later.
Stitch Abbreviations and Special Stitches
This pattern uses US crochet terms. I’ve included the UK equivalents in parentheses for reference.
Standard Abbreviations:
Special Stitches:
Magic Ring: This is an adjustable starting loop that allows you to pull the center closed tightly. If you’ve never made one before, there are lots of video tutorials available. You can also substitute chain 4 and slip stitch to form a ring if you prefer.
Puff Petal: In one stitch, work the following: yarn over, insert hook, pull up a loop. Repeat this sequence 4 times total so you have 9 loops on your hook. Yarn over and draw through all 9 loops at once. The chain 3 on each side of the puff forms the petal point. This creates a plump, rounded petal.
Corner: Work (2 dc, ch 2, 2 dc) all in one corner chain 2 space. This creates the defined corners of your granny square.
Pattern Notes
Before you begin, keep these tips in mind:
How to Crochet the Daisy Granny Square
Make 18 squares total. Nine squares will form the front panel and nine will form the back panel.
Round 1 (Yellow)
Using Golden Yellow, make a magic ring. Chain 1, then work 12 single crochet stitches into the ring. Join with a slip stitch to the first single crochet. (12 sc)
Round 2 (White)
Join White yarn to any single crochet stitch. In each single crochet, you will work one complete petal as follows:
Chain 3, work a puff petal in the same stitch, chain 3, slip stitch in the same stitch, then slip stitch in the next single crochet.
Repeat this sequence around the entire round. You’re creating one petal per stitch. Fasten off White. (12 petals)
Round 3 (Sky Blue)
This round is worked behind the petals you just made. Join Sky Blue to any Round 1 single crochet stitch (you’ll be working into the original yellow stitches, behind the white petals).
Chain 3 (this counts as your first dc), double crochet in the same stitch. Work 2 double crochet in each stitch around. Join with a slip stitch to the top of the chain 3. (24 dc)
Round 4 (Sky Blue)
Chain 3. In the next stitch, work a corner: (2 dc, ch 2, 2 dc). Then double crochet in each of the next 5 stitches.
Repeat from the corner 3 more times, ending the last side at the join. Make sure to adjust the first corner so the starting chain 3 sits in a corner group. Join with a slip stitch. (36 dc, 4 corner spaces)
Round 5 (Ocean Teal)
Join Ocean Teal in any corner chain 2 space. Work a corner (2 dc, ch 2, 2 dc) in the corner space, then double crochet in each of the next 9 double crochet stitches along the side.
Repeat from the corner around the entire square. Join with a slip stitch. Fasten off, leaving a long tail for joining later. (52 dc total: 13 dc per side, 4 corner spaces)
Color Recap Per Square
Yellow center, then White petals, then two Sky Blue rounds, then one Ocean Teal frame. Each finished square should measure 3.25 inches / 8 cm.
Square Layout
Block all 18 squares to an even 3.25 inches / 8 cm before joining. Blocking opens up the petals and squares the corners, which makes joining much easier.
Lay out your squares in two grids of 3 across by 3 down. Each panel contains 9 squares.
Tip: Keep all the petals facing the same direction and all teal frames aligned so the grid lines run straight across the finished bag. The front and back should look identical.
Joining the Panels
Join the squares of each panel using Ocean Teal yarn. Hold two squares with wrong sides together, matching stitch for stitch along one side (13 dc).
Method
Using a tapestry needle and Teal yarn, whip stitch through the back loops of both squares from corner to corner.
Work in rows: first join the three squares of the top row side by side, then join the middle row, then join the bottom row. (13 stitches joined per seam)
Then
Join the three rows to one another the same way, matching corners precisely so the grid stays square. Repeat the entire process for the second panel. (2 panels, 3 by 3 each)
Prefer Crochet Joins? You can hold squares wrong sides together and single crochet through both back loops along each seam (13 sc per side). A flat slip stitch join also works. Pick whichever method keeps your tension even.
Keep It Square: Pin corners before seaming. If a panel skews or warps, re-block it flat under a damp cloth before moving on to the top band.
Top Band and Assembly
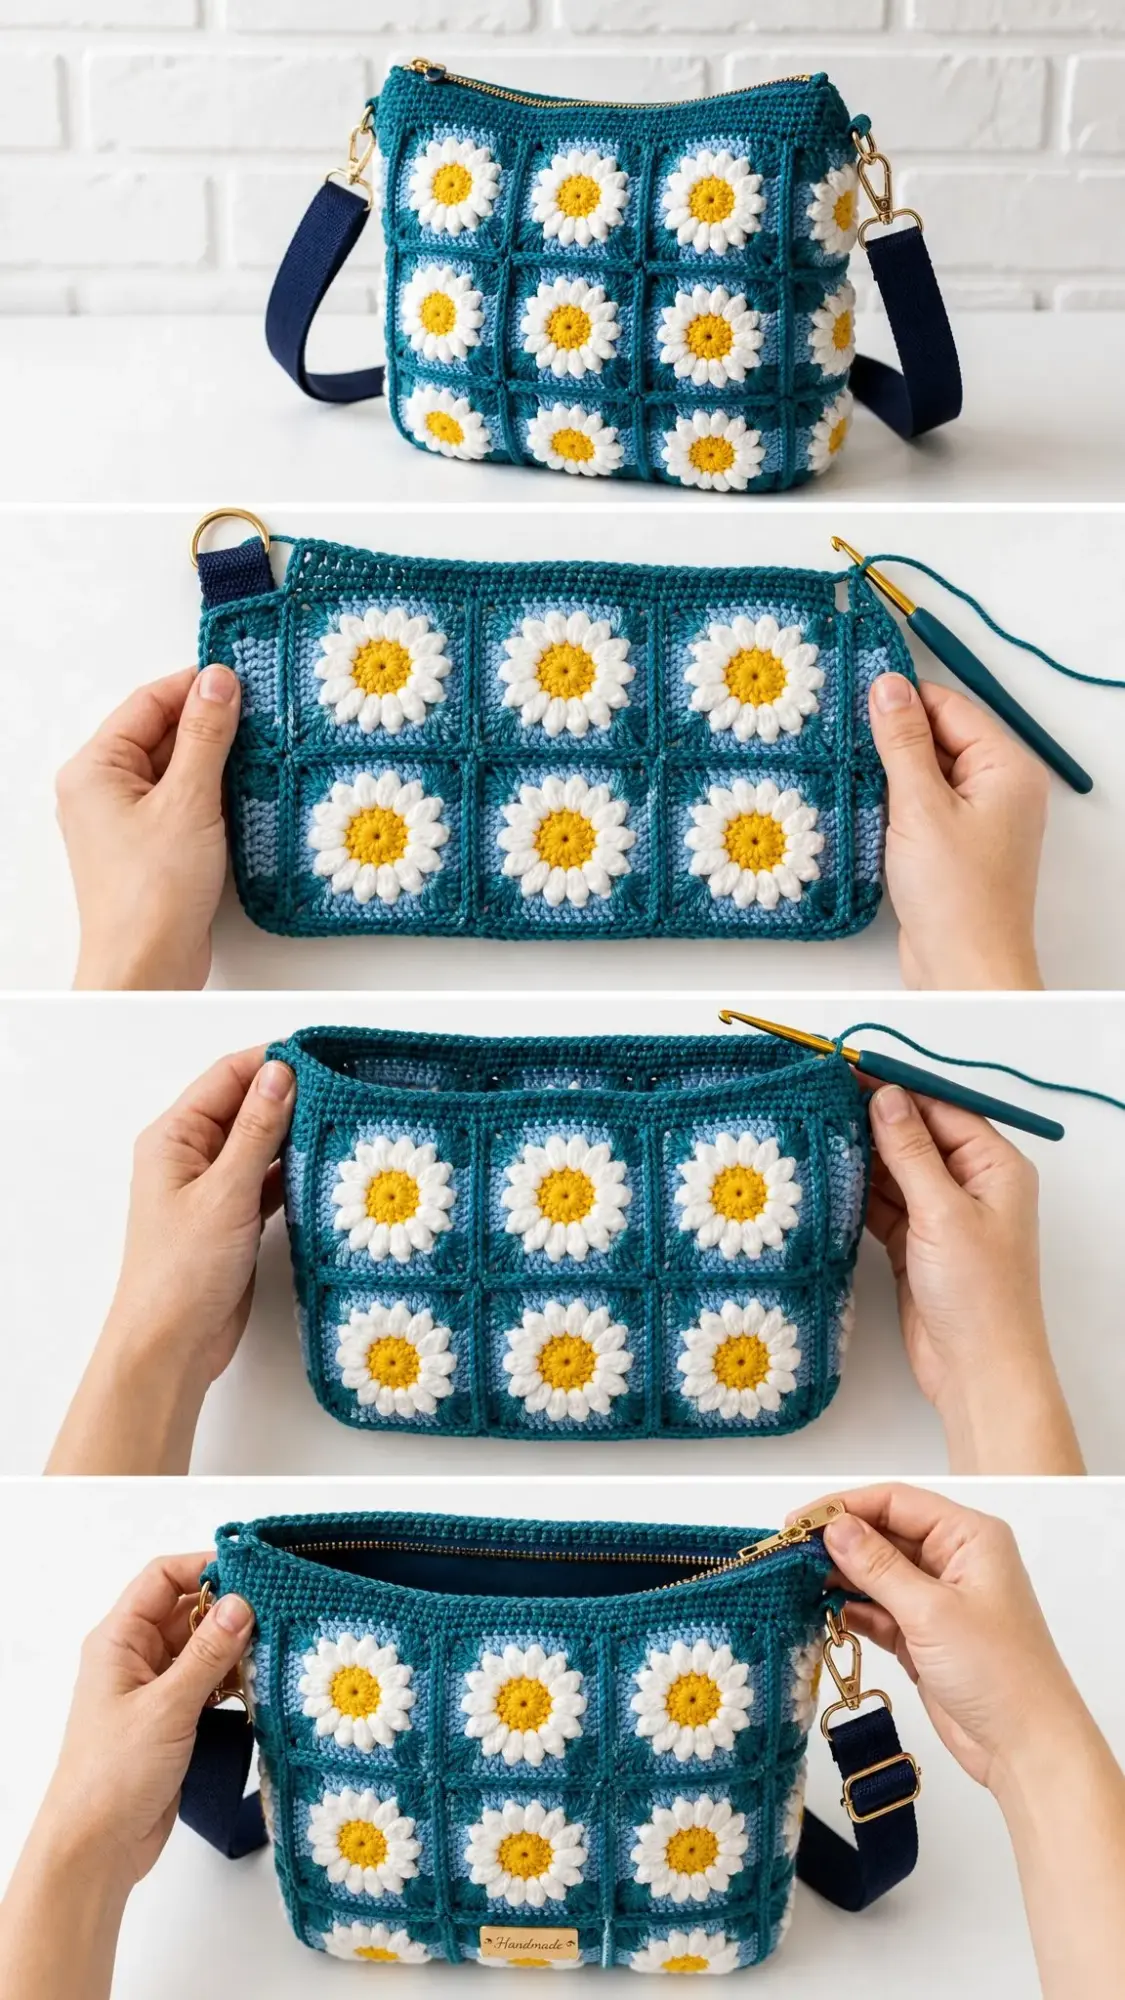
The solid teal band sits above the squares and carries the zipper. Work it flat across the top of each panel before seaming the bag together.
Set-up (Ocean Teal)
With the right side facing, join Teal yarn at the top right corner of a panel. Single crochet evenly across the top edge, working 13 sc across each square’s top and 1 sc into each seam. (41 sc)
Rows 1 through 5 (Ocean Teal)
Chain 1, turn. Half double crochet in each stitch across. Repeat for 5 rows total to build the band. Fasten off after Row 5.
Work the same band on the second panel. (41 hdc each row)
Seam the Bag
Hold the two panels with wrong sides together. Using Teal yarn, whip stitch (or single crochet) up the right side, across the bottom, and down the left side. Leave the top band open. (3 sides closed)
Top Edging
Join Teal at one top corner and single crochet once around the full opening (both band edges). Join and fasten off. This firms up the rim and prepares it for the zipper. (approximately 84 sc around)
Shaping the Depth
To give your pouch a soft box base, pinch each bottom corner and tack a small triangle (about 1.5 inches / 4 cm) on the inside. This creates the depth shown in the side view of the finished bag.
Zipper, Strap, and Finishing
Installing the Zipper
Open the zipper completely. Pin one tape behind the inside edge of one band so the teeth sit just below the rim. Pin the second tape to the other band.
Hand sew with backstitch close to the teeth, then sew again near the tape edge for security. Tuck and tack the tape ends inside to hide them.
Making the Strap Loops
For each side of the bag, make a teal loop: chain 8, single crochet in each chain back (7 sc). Fold the loop and sew both ends to the inside top corner of a side seam.
Alternatively, you can slip a gold D-ring through the loop before tacking it in place. (2 loops total)
Attaching the Strap
Clip the navy webbing strap’s gold swivel hooks to the two loops or D-rings. Adjust to your preferred crossbody length.
Final Finishing Steps
Care Instructions
Taking care of your handmade bag properly will keep it looking beautiful for years.
Size Customization Options
Want to make this bag bigger or smaller? Here are some adjustments you can try:
Bigger Tote: Use 4 by 4 squares per panel (16 squares each) for roughly a 13 inch / 33 cm bag.
Mini Pouch: Use 2 by 2 squares per panel, or switch to DK weight cotton with a 3.5 mm hook for a smaller version.
More Depth: Add a gusset strip. This is a column of squares (or a teal hdc band) seamed between the front and back along the sides and bottom.
Taller Band: Work extra half double crochet rows in the top band for a deeper zip opening.
Tension Fix: If your squares curl inward, go up a hook size. If they ruffle or wave, go down a hook size.
Tips for Success
Block Every Square: I know it adds time, but blocking makes joining so much easier. Unblocked squares tend to be slightly different sizes, and those small differences add up across nine squares.
Count Your Stitches: Each side of your finished square should have 13 double crochet stitches. If you’re consistently getting a different number, recheck your corner placement.
Use Stitch Markers: Place a marker in each corner space as you work. This helps you stay oriented, especially on the later rounds.
Weave As You Go: Seriously. Eighteen squares means a lot of ends. Weaving them in as you finish each color change makes the finishing process much more manageable.
Test Your Zipper First: Before sewing, lay the zipper against the opening to make sure it fits. A zipper that’s slightly too short is better than one that’s too long.
Why This Bag Works
The combination of the daisy granny square and the structured cotton yarn creates a bag that’s both pretty and practical. The squares have enough visual interest to be eye-catching, but the repeating pattern keeps the overall look cohesive.
The crossbody style is comfortable for everyday wear, and the adjustable strap means you can customize the fit. The zipper closure keeps your belongings secure, which is something you don’t always get with crocheted bags.
This is also an excellent project for using up yarn from your stash. The main color requires the most yarn, but the flower colors only need small amounts. If you’ve been holding onto partial skeins of cotton yarn, this is a great way to use them.
I hope you love making this Ocean Blue Floral Granny Pouch as much as I enjoyed putting this pattern together for you. It’s the kind of project that feels rewarding from start to finish, watching those daisies bloom one square at a time.
If you’re planning to make this bag, save this pattern to your Pinterest boards so you can find it easily when you’re ready to start. And if you do make one, I would absolutely love to see it! Drop a comment below or tag me on social media with your finished pouch. Happy crocheting!
