
I have been dreaming about designing a structured handbag that combines crochet with beautiful fabric accents, and this lavender butterfly barrel bag is everything I hoped it would be. My goals were specific: I wanted clean lines, a polished boutique finish with gold hardware, and that perfect balance between handmade charm and sophisticated style. The moment I attached those butterfly fabric end panels and clipped on the tassel charm, I knew this design had exceeded my expectations. I am SO pleased with how it turned out, and I cannot wait for you to make one too!
Get the Ad-Free PDF Pattern
You can find the free pattern below, or you can purchase the ad-free printable PDF from my shop.
Get the Printable PDF →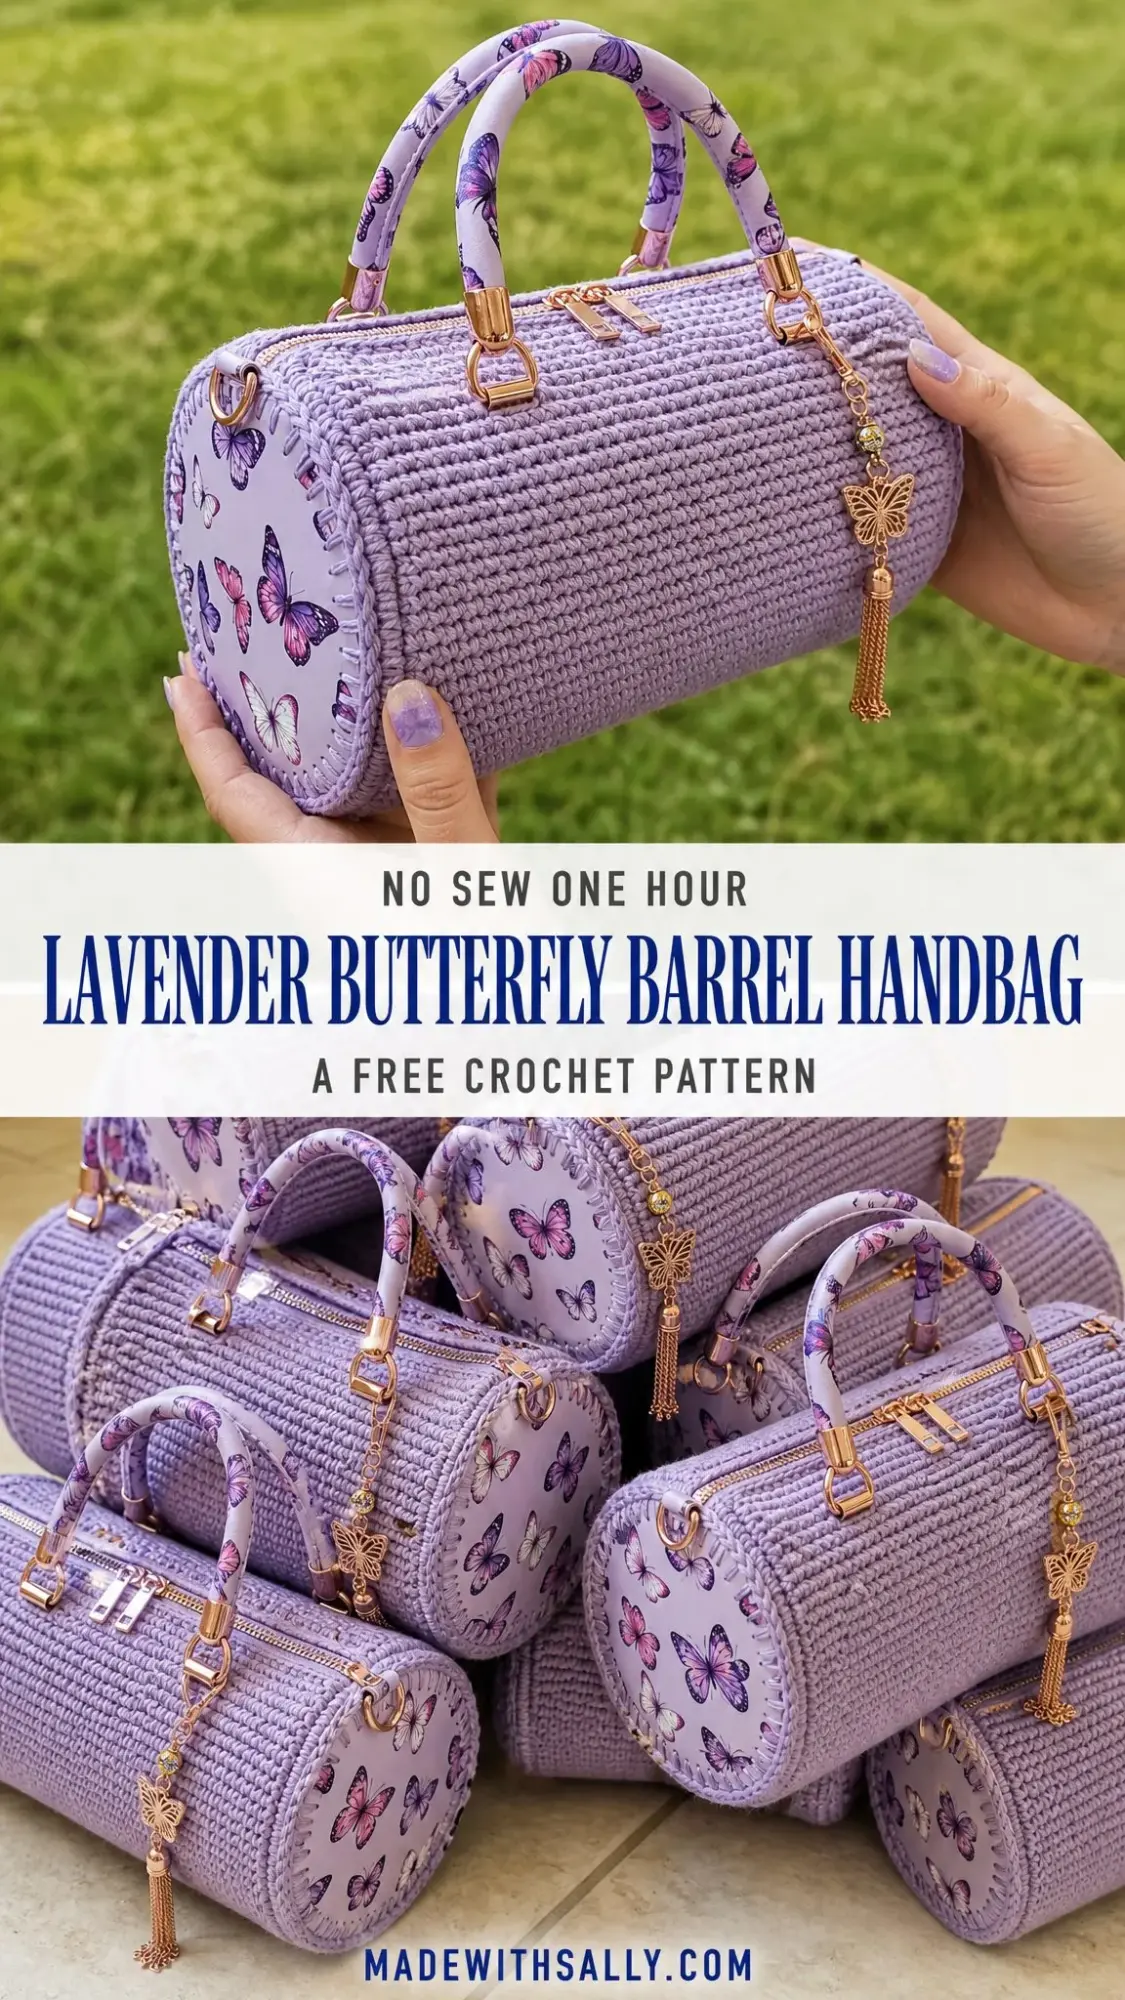
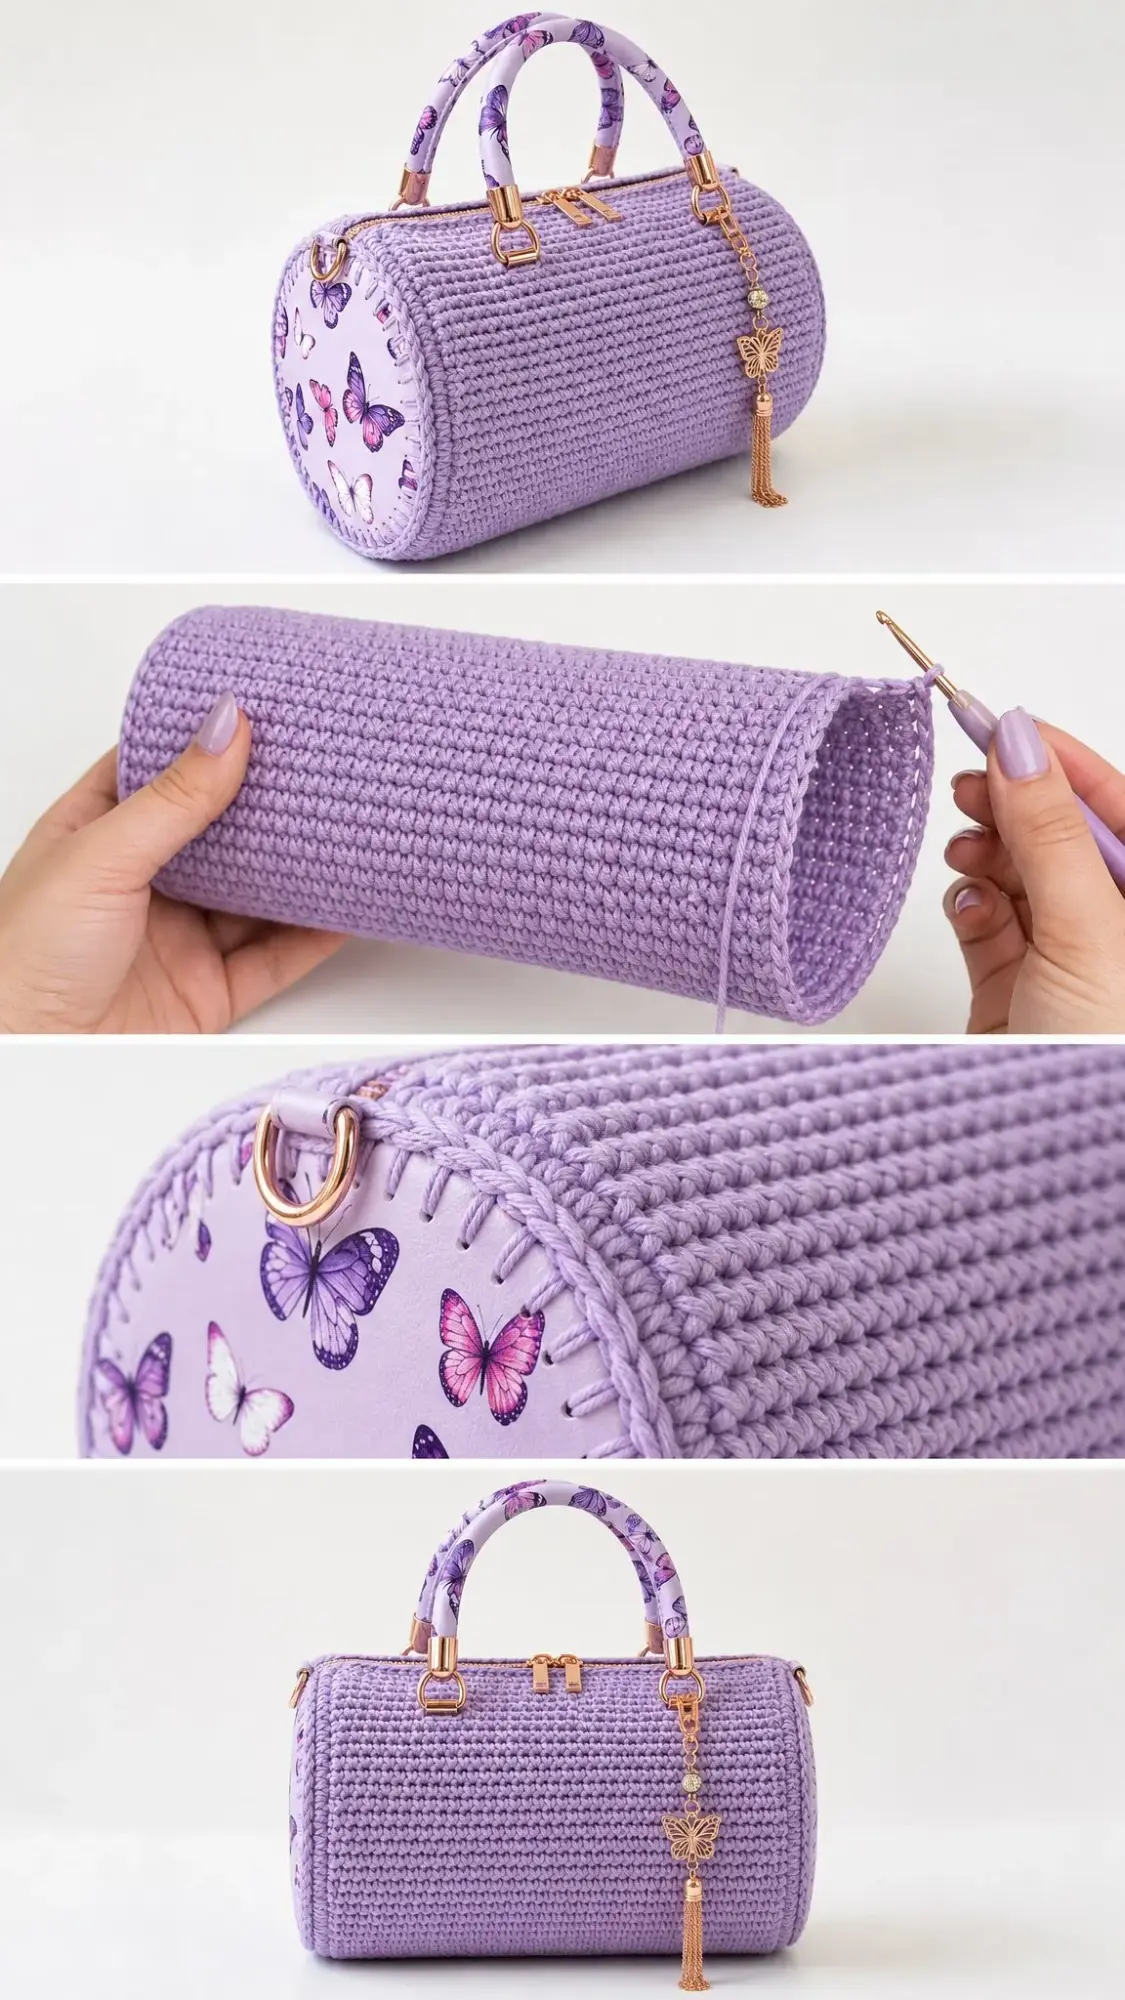
This barrel handbag measures 9.5 inches long with a 5 inch diameter, making it the perfect size for everyday essentials. The construction is satisfyingly straightforward once you understand the method. You will work a flat single crochet panel, shape it into a barrel, then attach fabric circles with a crocheted border to create those stunning end panels. Add a zipper, wrapped handles, and gleaming gold hardware, and you have a bag that looks like it belongs in a boutique window.
Why You Will Love This Pattern
This project sits at that sweet spot between confident beginner and intermediate skill level. If you can work consistent single crochet (sc) and are willing to try some basic sewing, you can absolutely make this bag. The techniques involved include even single crochet fabric, a neat blanket stitch edge around fabric circles, hand sewing a zipper, and attaching hardware.
The finished bag has real structure and presence. Unlike floppy crochet bags that lose their shape, this barrel holds its form beautifully thanks to the dense stitch pattern and optional lining. The butterfly fabric on the end panels adds a gorgeous pop of pattern, and those gold D-rings, handle caps, and tassel charm elevate everything.
Finished Measurements:
Materials You Will Need
Yarn: Worsted weight cotton or cotton blend yarn in lavender, approximately 150 to 180 yards / 137 to 165 meters.
Hook: US G-6 / 4.0 mm crochet hook, or the size needed to achieve gauge.
Fabric: Butterfly cotton fabric, one fat quarter or approximately 9 x 18 inches / 23 x 46 cm. Optional light cotton lining fabric, one fat quarter.
Hardware: 8 inch / 20 cm zipper, 2 D-rings, 2 handle loops or tabs, 4 handle end caps, 2 zipper pulls if desired, 1 butterfly tassel charm.
Tools: Stitch markers, yarn needle, sewing needle, matching thread, pins or clips, scissors, ruler, fabric pen, optional lightweight interfacing.
Yarn Suggestions
Choosing the right yarn makes a big difference in how your finished bag holds its shape. Here are my top recommendations:
Lion Brand 24/7 Cotton gives you crisp stitch definition and strong structure. This is an excellent choice for bags that need to maintain their form.
Paintbox Yarns Cotton Aran offers a smooth matte finish with a wonderful color range to choose from.
WeCrochet Dishie is a sturdy cotton that creates firm, practical handbag fabric.
A quick note on substitutions: choose a smooth worsted weight cotton that can create a dense, non-stretch fabric. You can use acrylic yarn, but your bag will be softer and may need firmer lining or interfacing to maintain the barrel shape.
Gauge
18 sc x 19 rows = 4 inches / 10 cm in single crochet, blocked lightly.
Please take the time to check your gauge before starting. A dense fabric helps the barrel hold its shape, which is essential for this structured bag design.
Checkpoint swatch: A 20 sc x 22 row swatch should measure approximately 4.5 x 4.6 inches / 11 x 11.5 cm before edging.
Abbreviations and Stitch Guide
Let me walk you through all the abbreviations and techniques you will use in this pattern.
ch = chain
rep = repeat
rnd(s) = round(s)
RS = right side
sc = single crochet
sl st = slip stitch
st(s) = stitch(es)
WS = wrong side
yo = yarn over
Special Techniques Explained
Single crochet (sc): Insert your hook in the next stitch, yarn over and pull up a loop so you have two loops on your hook, then yarn over and pull through both loops. This is the foundational stitch for the entire body panel.
Blanket stitch fabric foundation: Using sewing thread or yarn and a sharp needle, make evenly spaced blanket stitches around each fabric circle. Keep the loops close to the edge but not so close that the fabric frays. These loops become the foundation for your crochet border. If you have never done blanket stitch before, do not worry. It is simply a row of connected loops that look like little upside down U shapes around the edge of your fabric.
Whipstitch join: Hold two edges together with right sides facing out. Insert your needle through the next body row end and the matching end panel border stitch, pull snug, and repeat one to one all the way around.
Surface slip stitch accent: Hold yarn at the back of your work, insert hook from front to back, pull up a loop, then insert hook into the next spot and pull a new loop through the old loop. Keep your tension loose so the edge does not pucker.
Pattern Notes Before You Begin
The body is worked flat for a neat zipper opening, then shaped into a barrel. The chain 1 at the beginning of each row does not count as a stitch. Work every row in firm single crochet, keeping consistent tension throughout. I recommend placing markers at the first and last stitch of each row to keep your panel edges perfectly straight.
For the end panels, your crochet border will have the same count as the number of body rows. This makes the join clean and simple: one body row end joins to one end panel border stitch.
UK crocheters: This pattern uses US terms. US single crochet equals UK double crochet.
Left handed crocheters: Work the same stitch counts. Your seam may spiral in the opposite direction. Just keep the zipper opening centered along the top edge and mirror handle placement as needed.
Body Panel Instructions
With your lavender yarn and 4.0 mm hook, you will make one rectangular wrap panel.
Foundation: Chain 44.
Row 1: Single crochet in the 2nd chain from hook and in each chain across. Chain 1, turn. (43 sc)
Rows 2 through 78: Single crochet in each stitch across. Chain 1 and turn after each row except Row 78. (43 sc each row)
Checkpoint after Row 20: Your panel should measure approximately 9.5 inches / 24 cm wide and 4.2 inches / 10.5 cm tall.
Checkpoint after Row 78: Your completed panel should measure approximately 9.5 inches / 24 cm wide and 16 inches / 40.5 cm tall.
Shaping the Barrel
Now comes the exciting part where your flat panel transforms into a three dimensional barrel shape.
Shape the barrel: Bring Row 1 and Row 78 together along the long zipper edge with wrong sides together. Clip the first 0.75 inch / 2 cm at each end and whipstitch those short end sections closed. Leave the center 7.75 to 8 inches / 20 cm open for the zipper.
Lower seam: Continue aligning Row 1 and Row 78 around the underside of the barrel and sew the remaining edge closed with a firm whipstitch or mattress seam. Keep the seam centered so it becomes the top and underside line of the bag.
Body Math Quick Reference
| Section | Count / Measurement |
|---|---|
| Starting chain | 44 ch |
| Working stitches | 43 sc |
| Total rows | 78 rows |
| End panel join points | 78 row ends per side |
| Panel before seaming | approx. 9.5 x 16 inches / 24 x 40.5 cm |
Fabric End Panels
Make two matching circular fabric ends. Add interfacing if your fabric is lightweight for extra stability.
Cutting: Cut 2 butterfly fabric circles, each 5.25 inches / 13.5 cm across. If you are lining your bag, cut 2 lining circles the same size.
Prepare: Press a narrow 0.125 inch / 3 mm turning allowance to the wrong side, or baste the circle to a lightweight interfacing circle for stability.
Blanket stitch: Around each circle, make exactly 78 evenly spaced blanket stitches. This number is important because it matches your body panel rows. Mark quarters first: 19 or 20 loops per quarter, adjusted to total 78.
Crochet Border for End Panels (Make 2)
Round 1: Join lavender yarn in any blanket stitch loop. Chain 1, single crochet in the same loop and in each loop around. Join with slip stitch to first single crochet. (78 sc)
Round 2: Chain 1, single crochet in each single crochet around. Join with slip stitch to first single crochet. Fasten off, leaving a 36 inch / 90 cm tail for seaming. (78 sc)
Optional decorative rim: After assembly, you can work surface slip stitch or neat embroidery stitches around the join to echo the lavender stitched edge.
Checkpoint: Each finished end panel should measure approximately 5 inches / 13 cm across after the crochet border is added. If the panel cups inward, your blanket stitches are too close together. If it waves or ruffles, they are too far apart or too loose.
Joining End Panels to Body
Pin one end panel to one open side of the barrel, matching 78 border stitches to 78 body row ends. Join one to one around with whipstitch. Repeat for the second end panel.
Important: Keep the butterfly print upright on both sides before sewing so your butterflies are oriented the same way on each end of the bag.
Join count: 78 joins per end panel. Work evenly and do not skip row ends.
Zipper, Handles, and Charm
Installing the Zipper
Use an 8 inch / 20 cm zipper. With the bag right side out, pin the zipper tape under the centered top opening. Hand sew the tape to the inside edge using small backstitches, catching the crochet fabric without pulling the stitches out of shape.
Checkpoint: The zipper should sit flat, open smoothly, and not shorten the barrel length. Add decorative gold zipper pulls if desired for extra polish.
Adding the Handles
Use two pre-made wrapped handles or make fabric sleeves over firm cord. The finished handle drop is approximately 3.9 inches / 10 cm.
Place handle loops on the top of the barrel, about 1.25 inches / 3 cm in from each end panel and evenly spaced from the zipper.
Secure each handle loop with strong sewing thread through the crochet fabric and lining or interfacing. Add handle end caps for that beautiful polished finish.
Creating the Lining
Cut a rectangle 9.5 x 16 inches / 24 x 40.5 cm and two circles 5 inches / 13 cm across. Sew these pieces into a barrel lining, leaving the zipper edge open.
Slip the lining into the bag with wrong sides facing wrong sides. Hand stitch the lining to the zipper tape and upper edge for a clean professional interior.
Attaching the Butterfly Tassel Charm
Clip the charm to one D-ring so it hangs neatly beside the zipper. For visual balance, place it on the side where the zipper pull rests when closed.
Customizing Your Bag
Changing the Size
To change the length: Chain to your desired width using this formula: desired length in cm x 1.8, then add 1 turning chain. Round to the nearest whole chain.
To change the diameter: Choose your desired diameter, multiply by 3.14 for circumference, then multiply that circumference in cm by 1.9 to get the number of body rows. Make the same number of blanket stitches around each fabric circle.
Important: Keep the zipper opening 1 to 2 inches / 2.5 to 5 cm shorter than the full bag length so the end seams remain strong.
Blocking and Care
Blocking Your Finished Bag
Steam lightly from the wrong side without flattening the stitch texture. Shape the body around a towel roll until cool and dry. If you used acrylic yarn, do not over steam as this can damage the fibers.
Care Instructions
Spot clean with cool water and mild soap. Reshape while damp and dry flat. Avoid soaking if you are using metal hardware, fabric glue, or interfacing.
Troubleshooting Common Issues
| Issue | Solution |
|---|---|
| Body panel twists | Count 43 sc every row and keep row edges aligned before seaming |
| End panel puckers | Loosen the seam and join one border stitch to one row end without skipping |
| Zipper ripples | Re-pin with zipper tape relaxed and do not stretch the crochet edge while sewing |
| Bag feels soft | Add lining, interfacing, or a plastic canvas insert along the lower inside curve |
Time Estimate
Plan for approximately 6 to 8 hours to complete this project, plus drying time if you steam or block the body panel. The crocheting itself moves quickly since it is all basic single crochet. The assembly, zipper installation, and hardware attachment take additional time but are absolutely worth the effort for that professional finish.
Thank you so much for choosing this pattern! I hope you love making your Lavender Butterfly Barrel Handbag as much as I loved designing it. The combination of crochet texture, beautiful butterfly fabric, and gleaming gold hardware creates something truly special.
If you make this bag, I would absolutely love to see it! Share your photos on Instagram or Facebook and tag me so I can admire your work.
Be sure to save this pattern to your Pinterest boards so you can find it easily when you are ready to start. And please drop a comment below if you make one. I love hearing how your projects turn out and seeing the color combinations you choose!
Want a Quick & Easy Printable Version?
Get a clean, beautifully formatted PDF of this pattern — easy to follow step by step, ready to print or save on any device. No scrolling, no distractions, just the pattern.
Get the Printable PDF →