
I’ve been on the hunt for the perfect summer backpack pattern for ages, and this Coral Hibiscus Tropical Backpack is hands down my favourite find. The granny cluster body gives it that breezy, vacation-ready vibe while the solid base keeps everything structured and sturdy. If you’ve ever wanted to crochet a bag that looks store-bought but feels completely handmade, this is the one.
Get the Ad-Free PDF Pattern
You can find the free pattern below, or you can purchase the ad-free printable PDF from my shop.
Get the Printable PDF →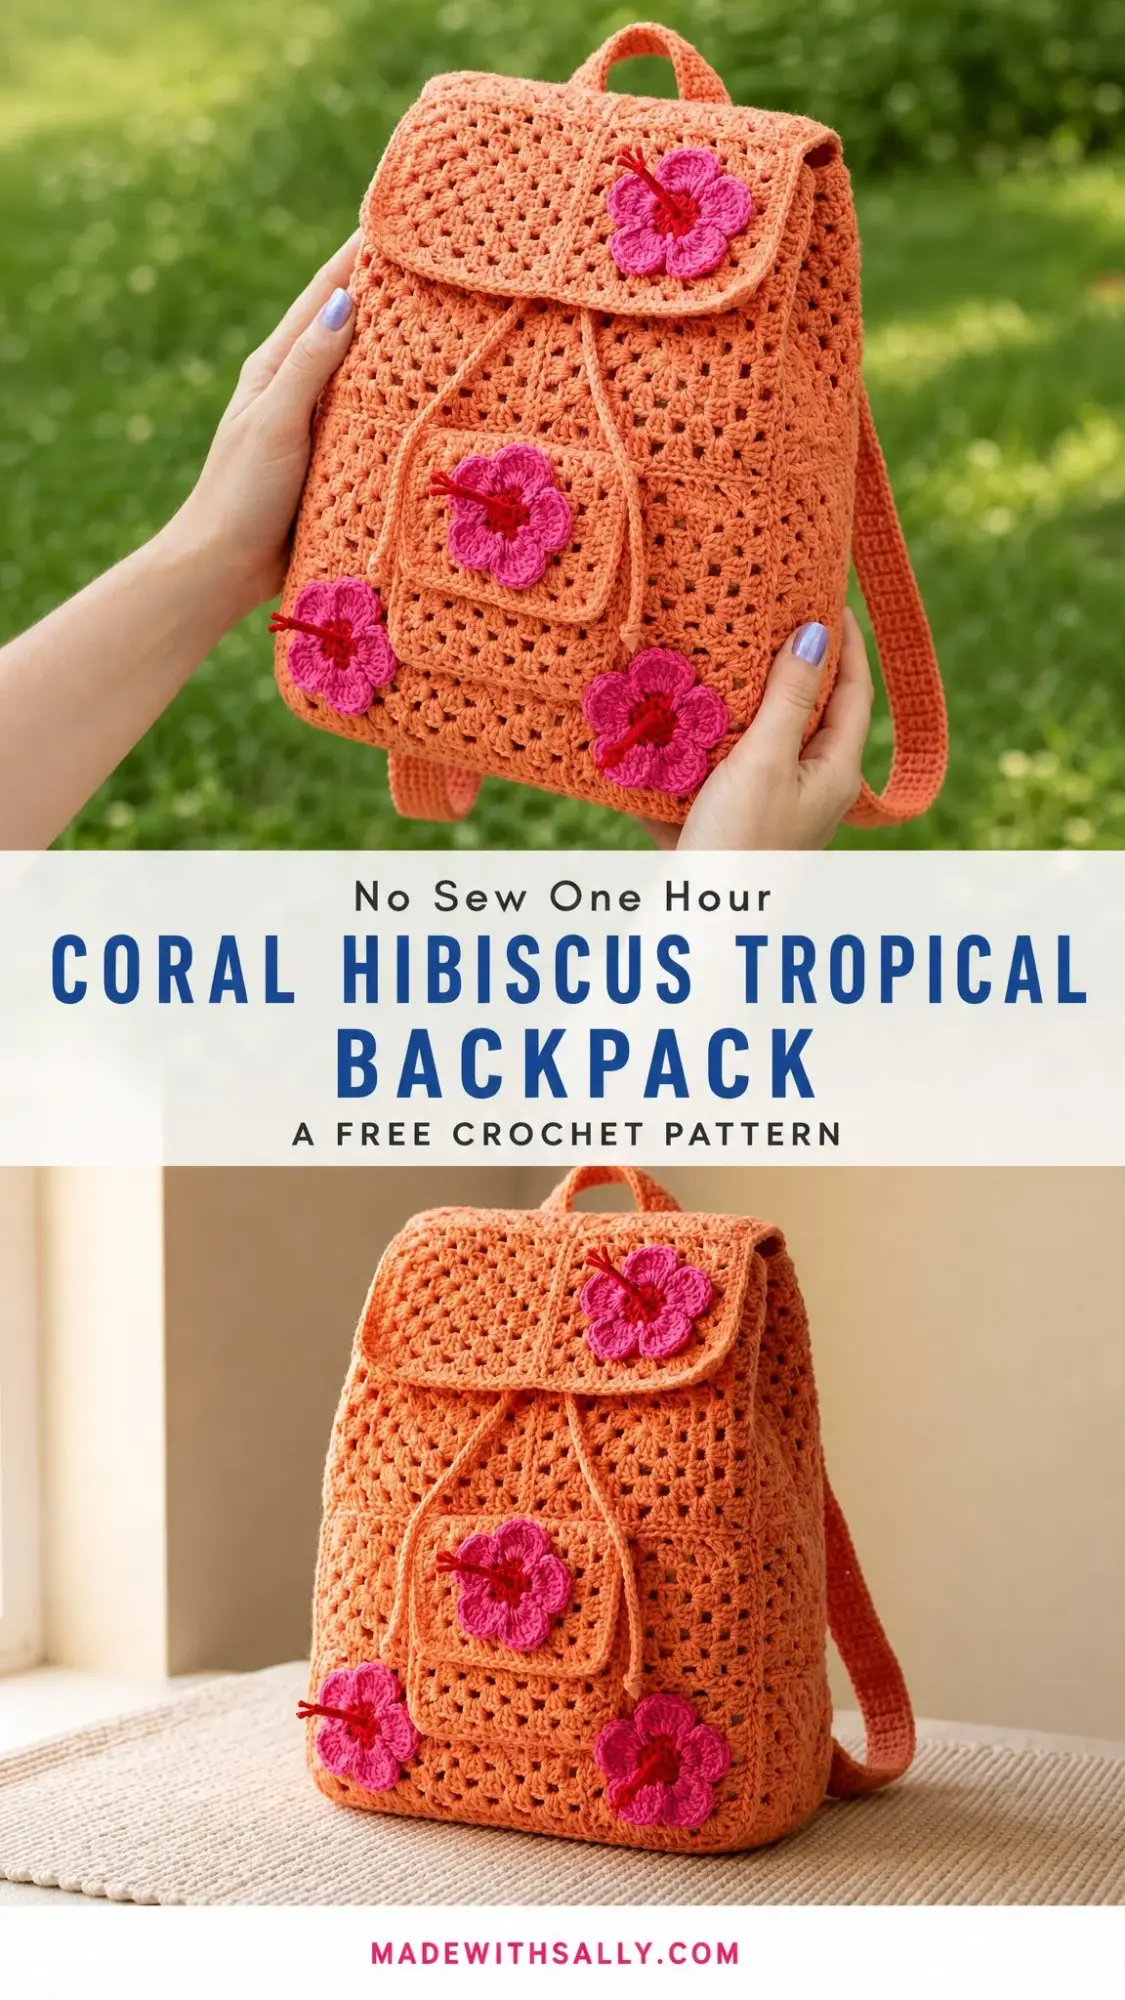
About This Tropical Crochet Backpack Pattern
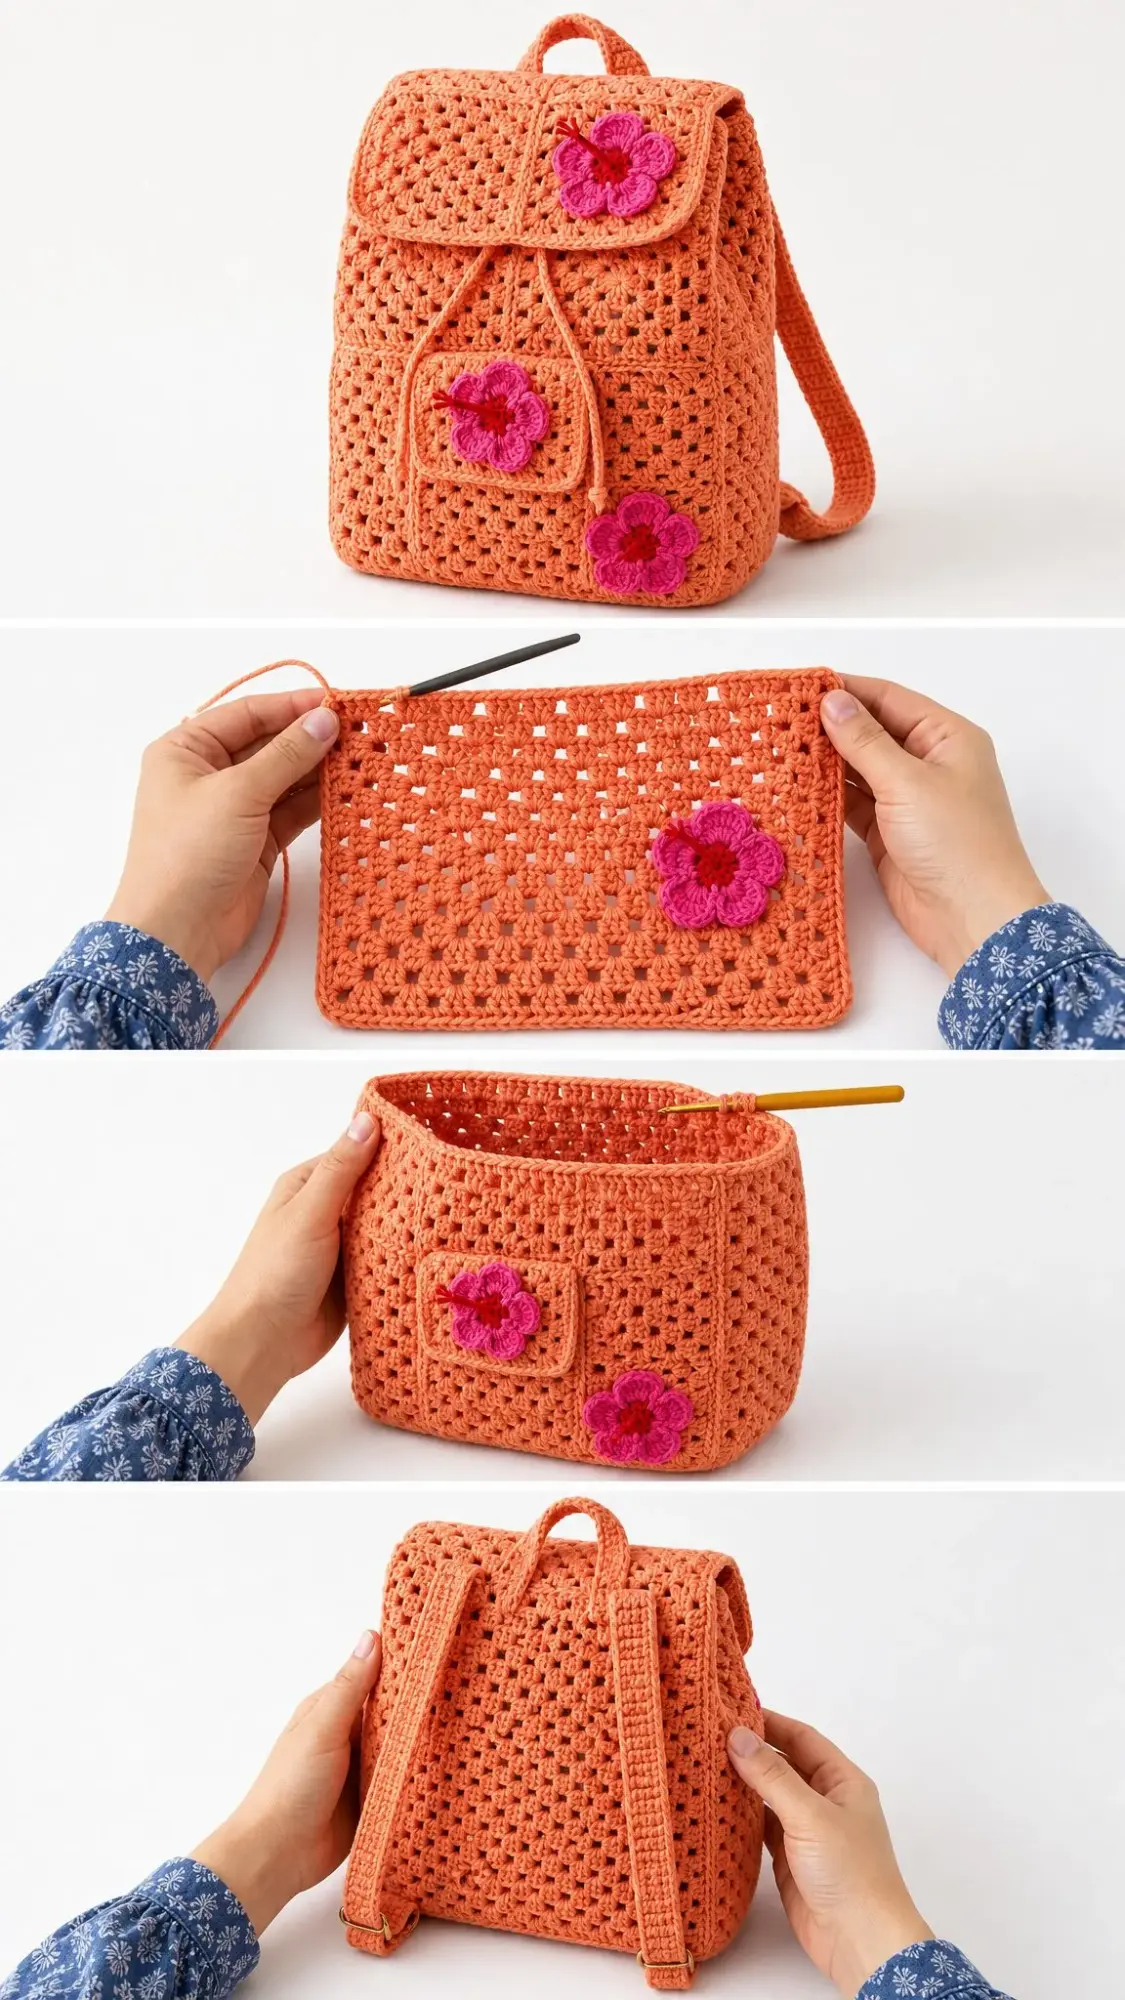
This gorgeous structured backpack combines the best of both worlds. You get the classic, airy look of granny clusters on the body with a firm single crochet (sc) base that holds its shape beautifully. The design features a rounded flap with a magnetic snap closure, two drawstrings for extra security, adjustable straps, a handy front pocket, and four cheerful hibiscus flower appliques.
The finished backpack measures approximately 11 inches tall by 9.5 inches wide by 4.75 inches deep (28 x 24 x 12 cm), not including the top handle. The straps are adjustable from about 23.5 to 39 inches (60 to 100 cm), so you can customize the fit perfectly.
Skill level: Adventurous beginner to intermediate. You’ll work in rows and joined rounds, maintain stitch counts, sew components neatly, and add simple surface embroidery for the flower stamens. The stitches themselves are straightforward. The polished finish comes from careful counting and assembly.
Time estimate: 12 to 16 relaxed hours from start to finish.
Materials You’ll Need
Before you dive in, gather these supplies:
| Item | Amount/Detail |
|---|---|
| Main yarn | Worsted-weight cotton in coral orange, 350 g / approximately 610 m |
| Flower yarn | Worsted-weight cotton in hot pink, 40 g / approximately 70 m |
| Center yarn | Worsted-weight cotton in red, 5 g / approximately 10 m |
| Hook | US E / 3.5 mm crochet hook, or size needed for gauge |
| Notions | Yarn needle, scissors, stitch markers, 14 mm magnetic snap, optional cord stoppers, optional 1 inch / 2.5 cm strap adjusters |
Yarn Suggestions
Choose a firm cotton or cotton-blend yarn that holds a bag shape well. Good options include Lily Sugar’n Cream, Paintbox Yarns Cotton Aran, or Hobbii Friends Cotton 8/8. You can substitute any worsted cotton that matches gauge and creates a dense fabric for the base, flap, pocket, and straps.
Gauge
Getting gauge right is especially important for bags since you want structural integrity.
| Swatch | Target Gauge |
|---|---|
| Solid sc, blocked | 18 sc x 13 rows = 4 in / 10 cm |
| Granny-cluster body | 5 cluster repeats x 9 rounds = 4 in / 10 cm wide x tall, measured relaxed |
If your base measures much larger than expected, go down a hook size. If it’s coming out too small, go up a hook size.
Abbreviations and Stitch Guide (US Terms)
Let me break down every abbreviation you’ll encounter:
UK crocheters take note: US sc equals UK dc. US dc equals UK tr.
Special Stitches
Granny cluster: Work 3 dc into the same ch-sp. On body rounds, ch 1 after each cluster unless the instruction says otherwise. This creates that signature lacey look with nice spaces between each cluster.
Standing sc join: Make a slip knot on your hook, insert hook in the indicated stitch, yarn over and pull up a loop, yarn over and pull through both loops. Use this technique when you need to attach yarn cleanly without a visible join.
Five-petal hibiscus applique: Each petal is made into the same center ring: ch 2, 2 dc, ch 2, sl st. The red center gets embroidered after the flower is sewn onto the backpack.
Pattern Notes
Join each round with a sl st to the first stitch or top of beginning ch-3. The beginning ch-3 counts as 1 dc on granny rounds. Place a marker at the center front of the body and keep it aligned as you work. Work over yarn tails where practical, but sew structural tails firmly for durability.
Left-handed note: Left-handed makers can follow the same stitch counts. Your rounds will travel in the opposite direction, so place the front pocket and flowers by measurement rather than by right/left round orientation.
How to Crochet the Backpack Base
The base is worked flat in rows, then finished with a border round. This solid sc fabric creates a firm foundation for the entire bag.
With main yarn, ch 43.
Row 1: Sc in 2nd ch from hook and in each ch across. Turn. (42 sc)
Rows 2-15: Ch 1, sc in each st across. Turn after Rows 2-14 only. (42 sc)
Border round: Ch 1. Work 42 sc across top edge, 15 sc evenly down first side edge, 42 sc across foundation edge, and 15 sc evenly up second side edge. Join. (114 sc)
Checkpoint
Your base should measure about 9.5 in x 4.75 in (24 x 12 cm) after light blocking. If it’s much larger, switch to a smaller hook. If it’s much smaller, go up a hook size.
Building the Granny Cluster Body
Now comes the fun part! The body grows up from the base in continuous rounds of granny clusters. Don’t worry if you’ve never done granny clusters in the round before. Just focus on working into each ch-sp from the previous round.
Setup round: Ch 1, sc in next st, ch 1, skip next 2 sts; rep from around. Join to first sc. (38 sc + 38 ch-1 sps)
Round 1: Sl st into first ch-sp. Ch 3, 2 dc in same sp, ch 1, 3 dc in next ch-sp, ch 1; rep from around. Join. (38 clusters)
Rounds 2-24: Sl st into next ch-sp. Ch 3, 2 dc in same sp, ch 1, 3 dc in next ch-sp, ch 1; rep from around. Join. (38 clusters each round)
Top round 25: Ch 1, sc in each dc and each ch-sp around. Join. (152 sc)
Top round 26: Ch 1, sc in each st around. Join and fasten off. (152 sc)
Checkpoint
After Round 24, the body height from base should be about 10.5 to 11 inches (26.5 to 28 cm) before the top edging. The top opening should remain flexible enough for the drawstrings to work smoothly.
Crocheting the Front Pocket
The front pocket uses the same solid sc fabric as the base for a cohesive look.
With main yarn, ch 21.
Row 1: Sc in 2nd ch from hook and in each ch across. Turn. (20 sc)
Rows 2-15: Ch 1, sc in each st across. Turn after Rows 2-14 only. (20 sc)
Edging round: Ch 1, work 20 sc across top, 15 sc down side, 20 sc across bottom, 15 sc up side, placing 2 extra sc in each corner as you go. Join. (78 sc)
Sew the pocket to center front, with the bottom edge about 2 inches (5 cm) above the base. Leave the top edge open. You’ll sew one hot-pink hibiscus flower centered on the pocket later.
Making the Rounded Flap
The flap gets a slightly curved shape at the corners for that polished, professional finish.
With main yarn, ch 38.
Row 1: Sc in 2nd ch from hook and in each ch across. Turn. (37 sc)
Rows 2-12: Ch 1, sc in each st across. Turn after Rows 2-11 only. (37 sc)
Edging round: Ch 1, work 37 sc across top, 12 sc down side, 37 sc across bottom, 12 sc up side, placing 2 extra sc in each lower corner for a softened curve. Join. (102 sc)
Sew the straight top edge of flap to the back upper edge, centered over 37 sts. Sew one half of the magnetic snap inside the flap and the other half to the front body so the flap closes smoothly. One flower will go on the right side of the flap during assembly.
Creating the Drawstrings
These simple slip stitch cords thread through the granny spaces to cinch the bag closed.
Make 2: Ch 90, sl st in 2nd ch from hook and in each ch across. Fasten off. (89 sl sts each cord)
Thread cords through the granny spaces just below the top edging. One cord enters from the left front and exits at the same point. The second enters from the right front and exits at the same point. Add cord stoppers or knot the ends to keep them from slipping out.
Handle and Adjustable Straps
The handle and straps use the same solid sc fabric for strength and durability.
Top handle: Ch 20. Row 1: sc in 2nd ch from hook and across. Rows 2-4: ch 1, sc across. (19 sc per row)
Straps, make 2: Ch 101. Row 1: sc in 2nd ch from hook and across. Rows 2-4: ch 1, sc across. (100 sc per row)
Strap loops, make 2: Ch 12. Row 1: sc in 2nd ch from hook and across. Rows 2-3: ch 1, sc across. (11 sc per row)
Sew the handle to top center back/front edge with reinforced stitches. Sew upper strap ends to the back, about 2 inches (5 cm) apart at the top. Sew strap loops to the lower back corners. If using adjusters, thread each strap through an adjuster before securing the lower end.
Crocheting the Hibiscus Flowers
These cheerful five-petal flowers are the star of the show! Make 4 flowers with hot pink yarn.
Center: With hot pink, make a magic ring.
Petals: Ch 2, 2 dc in ring, ch 2, sl st in ring; rep from 5 times. Pull ring snug. (5 petals)
Finish: Fasten off, leaving a long tail for sewing. With red yarn, embroider 3-5 straight stamens from the center of each flower.
Suggested placement: One flower on the flap, one on the pocket, one at lower left front, and one at lower right front. Sew securely through the flower center and petal bases while keeping the petal edges slightly dimensional so they pop.
Assembly and Finishing
1. Weave in all ends on the WS, especially around strap joins and flap attachment.
2. Steam or wet block the base, flap, pocket, straps, and flowers lightly. Don’t flatten the flower petals completely.
3. Sew the pocket to the front, then attach the flap, snap, cords, handle, straps, and flowers.
4. Check that the flap closes over the drawstrings without pulling the front body out of shape.
5. Add a fabric lining if you plan to carry small items frequently.
Customization Tips
Want to make this backpack your own? Here are some easy modifications:
Care Instructions
Hand wash gently in cool water. Press out water in a towel, reshape the base and sides, and dry flat. Avoid hanging the wet backpack by the straps, as cotton can stretch while damp.
Troubleshooting Common Issues
| Issue | Fix |
|---|---|
| Body leans or twists | Make sure every granny round starts in the next ch-sp and that each round has 38 clusters. Block gently before assembly. |
| Top edge flares | Use a smaller hook for the two sc top rounds or work Round 26 through back loops only for firmness. |
| Base feels soft | Add a plastic canvas insert or sew in a firm fabric lining cut to the base size. |
| Flap does not align | Re-center the flap over the body front marker before sewing the snap. |
| Straps stretch | Work straps with a firm tension, add woven ribbon to the WS, or line them with fabric. |
Final Thoughts on This Crochet Backpack Pattern
This Coral Hibiscus Tropical Backpack is such a satisfying project to complete. You end up with a truly functional, beautiful piece that looks amazing at the beach, farmers market, or just running errands around town. The granny stitch body works up faster than you’d expect, and those hibiscus flowers add the perfect tropical touch.
Thank you so much for choosing this pattern! I really hope you love making it as much as I loved putting it together. If you give it a try, I’d absolutely love to see your finished backpack. Tag me on Instagram or share a photo on Facebook so I can admire your work!
If this pattern caught your eye, go ahead and save it to your Pinterest boards so you can find it when you’re ready to start. And please drop a comment below if you make one. I love hearing which colors you choose and seeing how everyone puts their own spin on it!
Want a Quick & Easy Printable Version?
Get a clean, beautifully formatted PDF of this pattern — easy to follow step by step, ready to print or save on any device. No scrolling, no distractions, just the pattern.
Get the Printable PDF →