
Let me guess. You took one look at this stunning bridal doll gown and thought, "There is no way I can make that." The layered skirt, the delicate roses, the fitted bodice with those pretty straps. It looks like something that belongs in a museum or a fancy bridal boutique, not something that could come off your own hook.
Get the Ad-Free PDF Pattern
You can find the free pattern below, or you can purchase the ad-free printable PDF from my shop.
Get the Printable PDF →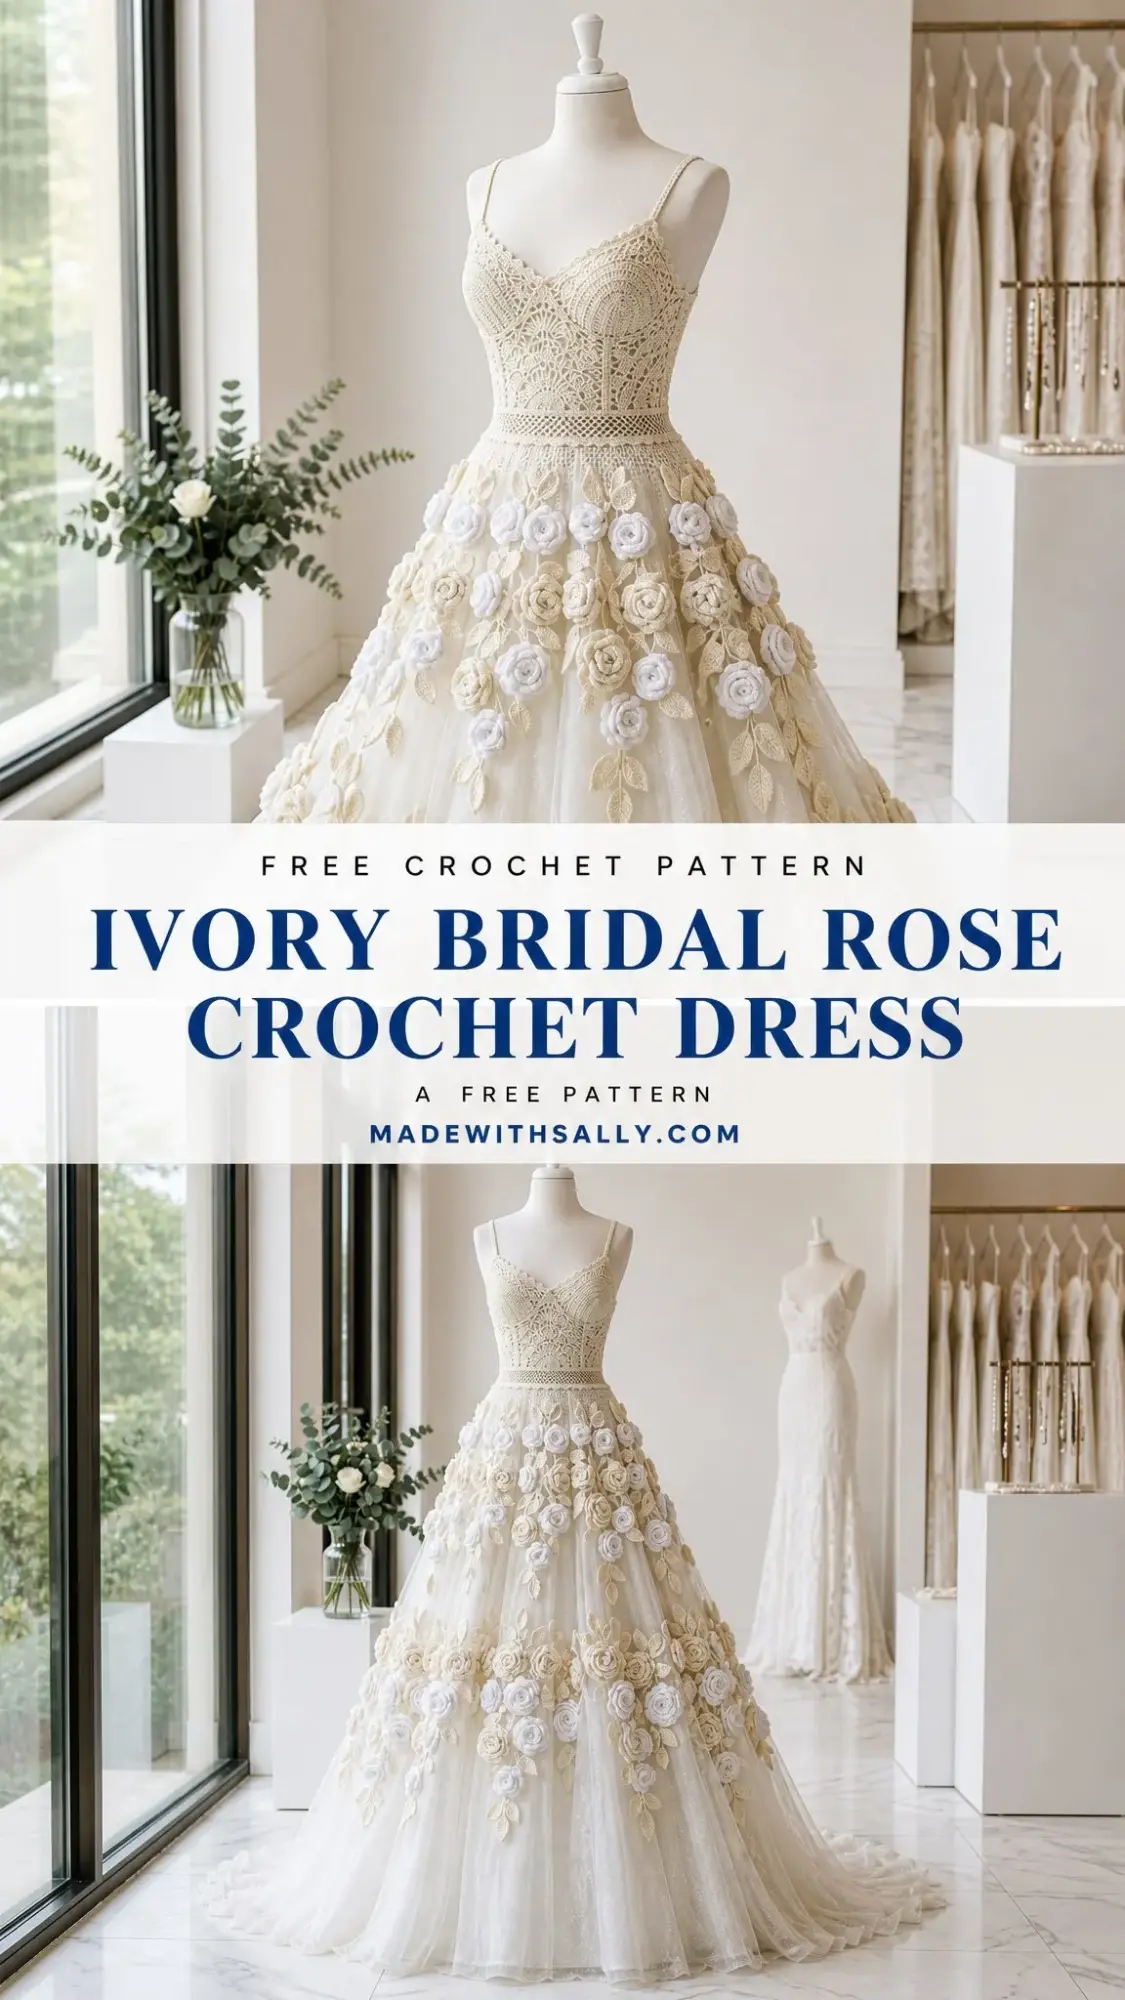
Here is the truth. This dress is absolutely within your reach. Yes, even if you have never made a doll dress before. Yes, even if rolled roses sound intimidating. The pattern breaks everything down into manageable pieces, and I am going to walk you through every single part of it.
By the time you finish reading this, you will understand exactly how this heirloom-style gown comes together. You will see that the "lace" is just a simple mesh repeat, the roses are rolled strips with a basic stitch sequence, and the bodice is flat crochet with strategic shaping. If you can single crochet, double crochet, and follow a table, you can make this dress. Let me show you how.
About This Pattern
This romantic ivory bridal gown is designed for an 11 inch (28 cm) crochet doll. The finished dress measures approximately 7 inches from shoulder to hem, with a skirt circumference of about 16 to 17 inches around before blocking. The design features a smooth amigurumi doll base, a fitted flat-work bodice, a flared lace-textured skirt, rolled crochet roses, embroidered leaves, and a matching floral headpiece.
The skill level is intermediate. You should be comfortable with amigurumi shaping, neat seaming, working flat and in joined rounds, simple lace repeats, and small appliqué placement. If some of those terms are new to you, do not worry. I will explain everything as we go.
Time estimate: 12 to 16 relaxed hours, plus blocking and finishing time. This is not a weekend project you rush through. It is something you savor, piece by piece.
Materials You Will Need
Gather these supplies before you start:
Yarn A (skin/base): 45 yards (41 m) sport weight cotton in soft beige
Yarn B (hair): 35 yards (32 m) sport weight cotton in light brown
Yarn C (gown): 130 yards (119 m) sport weight cotton in cream
Yarn D (roses): 25 yards (23 m) ivory white and 20 yards (18 m) pearl beige
Yarn E (leaves): 15 yards (14 m) linen beige
Hooks: 2.0 mm for the doll, hair, roses, and leaves. 2.5 mm for the dress.
Additional supplies: 6 mm safety eyes, fiberfill stuffing, yarn needle, stitch markers, sewing pins, two tiny snaps or buttons for the back closure, and optional soft tulle for the underlay.
Yarn Suggestions
The pattern recommends Scheepjes Catona for crisp stitch definition, Paintbox Cotton DK for a soft matte finish, or DMC Natura Just Cotton for smooth delicate roses and lace work.
If you substitute yarn, choose a smooth sport or light DK cotton and match the gauge first. A thicker yarn will enlarge the doll and reduce the crispness of the flowers.
Gauge
Getting gauge right matters for this project because the bodice needs to fit snugly around the doll body.
Doll/base gauge: 22 single crochet (sc) x 24 rounds = 4 inches (10 cm) with a 2.0 mm hook, lightly stuffed
Dress gauge: 20 sc x 22 rows = 4 inches (10 cm) with a 2.5 mm hook
Skirt lace gauge after blocking: 7 double crochet (dc) rounds = approximately 2 inches (5 cm)
Stitch Abbreviations and Definitions
Here are all the abbreviations used in this pattern with plain-English explanations:
ch (chain): Yarn over, pull through the loop on your hook. This creates a foundation or adds height.
sl st (slip stitch): Insert hook, yarn over, pull through both the stitch and the loop on your hook in one motion. Used for joining or moving across stitches invisibly.
sc (single crochet): Insert hook, yarn over and pull up a loop (2 loops on hook), yarn over and pull through both loops. A short, tight stitch.
hdc (half double crochet): Yarn over, insert hook, yarn over and pull up a loop (3 loops on hook), yarn over and pull through all 3 loops. Slightly taller than single crochet.
dc (double crochet): Yarn over, insert hook, yarn over and pull up a loop (3 loops on hook), yarn over and pull through 2 loops (2 loops remain), yarn over and pull through remaining 2 loops. A tall stitch that creates nice drape.
inc (increase): Work 2 stitches in the next stitch. This adds one stitch to your count.
dec (decrease): Single crochet 2 stitches together. This removes one stitch from your count.
BLO (back loop only): Insert your hook under only the back loop of the stitch instead of both loops. Creates a ridge effect.
RS/WS (right side/wrong side): The front and back of your work.
st(s) (stitch/stitches): Individual stitches.
Special Stitches
Invisible decrease: Insert hook in the front loop of the next 2 stitches, yarn over and pull through both loops, yarn over and pull through 2 loops. This creates a neater decrease for amigurumi.
Picot: Chain 3, slip stitch in the first chain made or in the top of the last single crochet. Creates a tiny decorative bump.
V-stitch: Work (dc, ch 1, dc) in the indicated stitch or space.
Rolled rose strip: Work scalloped petals along a chain, roll from the smaller end, and stitch through the base to secure.
Surface embroidery leaf: With linen yarn, make a center straight stitch, then add short angled stitches from the center line to each side.
Doll Base and Hair
This section creates your 11-inch doll. Use Yarn A (soft beige) and your 2.0 mm hook.
Head and Neck
| Round | Instruction | Stitch Count |
|---|---|---|
| 1 | Magic ring (MR), 6 sc | 6 |
| 2 | Inc in each st | 12 |
| 3 | (sc, inc) x6 | 18 |
| 4 | (2 sc, inc) x6 | 24 |
| 5 | (3 sc, inc) x6 | 30 |
| 6 | (4 sc, inc) x6 | 36 |
| 7 | (5 sc, inc) x6 | 42 |
| 8 | (6 sc, inc) x6 | 48 |
| 9-18 | Sc around; place eyes between Rounds 14-15, 8 sts apart | 48 |
| 19 | (6 sc, dec) x6 | 42 |
| 20 | (5 sc, dec) x6 | 36 |
| 21 | (4 sc, dec) x6 | 30 |
| 22 | (3 sc, dec) x6 | 24 |
| 23 | (2 sc, dec) x6 | 18 |
| 24 | (sc, dec) x6; stuff firmly | 12 |
| 25-27 | Sc around for neck | 12 |
Checkpoint: After Round 18, your head should be a smooth globe approximately 3 inches (7.5 cm) tall.
Torso and Arms
Continue from the neck in Yarn A.
Round 28: (sc, inc) x6 (18 sts)
Round 29: (2 sc, inc) x6 (24 sts)
Rounds 30-35: Sc around (24 sts)
Round 36: (2 sc, dec) x6 (18 sts)
Rounds 37-38: Sc around (18 sts)
Stuff the torso firmly and close the lower body with 9 sc worked through both layers.
Arms (Make 2)
Round 1: Magic ring, 6 sc (6 sts)
Rounds 2-20: Sc around (6 sts)
Lightly stuff only the lower half, flatten the opening, close with 3 sc through both layers, and sew to the shoulders.
Hair Cap
Switch to Yarn B (light brown).
Rounds 1-8: Work the same increase sequence as the head to reach 48 sc.
Rounds 9-12: Sc around (48 sts)
Fasten off with a long tail. Sew the cap to the head. Add side-part strands and create a low bun by making 8 chains of 18 stitches each, then stitching them into a coil at the back of the head.
Dress Bodice and Straps
Use Yarn C (cream) and your 2.5 mm hook. This section is worked flat. Chain 31 to begin.
| Row | Instruction | Stitch Count |
|---|---|---|
| 1 | Sc in 2nd ch from hook and each ch across | 30 |
| 2 | Ch 1, turn, sc across | 30 |
| 3 | Ch 1, turn, sc 5, inc, sc 4, inc, sc 8, inc, sc 4, inc, sc 5 | 34 |
| 4 | Ch 1, turn, sc across | 34 |
| 5 | Ch 1, turn, sc 6, inc, sc 5, inc, sc 10, inc, sc 5, inc, sc 6 | 38 |
| 6 | Ch 1, turn, sc across in BLO for waist texture | 38 |
| 7 | Ch 1, turn, sc 7, inc, sc 6, inc, sc 10, inc, sc 6, inc, sc 7 | 42 |
| 8 | Ch 1, turn, sc across | 42 |
| 9 | Ch 1, turn, sc across; do not fasten off | 42 |
Back Closure and Straps
Fold the bodice around the doll with the right side facing out. Overlap the back edges by 2 stitches and sew the lower 5 rows closed. Add two tiny snaps or buttons to the upper back for closure.
For each strap, join yarn to the front top corner, chain 18, slip stitch to the matching back edge, turn, and work 17 single crochet back along the chain. Fasten off and weave in the ends.
Checkpoint: The bodice lower edge should have 42 stitches available for the skirt and should sit snugly at the doll waist without twisting. After Row 9, measure approximately 7.5 inches (19 cm) around at the lower edge before closing.
Full Floral Skirt
Join Yarn C at the lower bodice edge. This section is worked in joined rounds. The chain 2 at the beginning of double crochet rounds does not count as a stitch.
| Round | Instruction | Stitch Count |
|---|---|---|
| 1 | Sc evenly around the lower bodice edge | 42 sc |
| 2 | (2 sc, inc) x14 | 56 sc |
| 3 | (3 sc, inc) x14 | 70 sc |
| 4 | (4 sc, inc) x14 | 84 sc |
| 5 | (dc, ch 1, skip 1) x42, join | 42 dc + 42 ch-sps |
| 6 | Dc in each dc and ch-sp around | 84 dc |
| 7 | (6 dc, 2 dc in next st) x12 | 96 dc |
| 8 | (dc, ch 1, skip 1) x48 | 48 dc + 48 ch-sps |
| 9 | Dc in each dc and ch-sp around | 96 dc |
| 10 | (7 dc, 2 dc in next st) x12 | 108 dc |
| 11 | (dc, ch 1, skip 1) x54 | 54 dc + 54 ch-sps |
| 12 | Dc in each dc and ch-sp around | 108 dc |
| 13 | (8 dc, 2 dc in next st) x12 | 120 dc |
| 14 | (dc, ch 1, skip 1) x60 | 60 dc + 60 ch-sps |
| 15 | Dc in each dc and ch-sp around | 120 dc |
| 16 | (9 dc, 2 dc in next st) x12 | 132 dc |
| 17 | (dc, ch 1, skip 1) x66 | 66 dc + 66 ch-sps |
| 18 | Dc in each dc and ch-sp around | 132 dc |
| 19 | (sc 5, picot) x22; sl st to join | 132 sc + 22 picots |
Checkpoint: After Round 19, your skirt should measure approximately 5.5 to 6 inches (14-15 cm) long from the waist.
Optional Tulle Underlay
For extra fullness, cut a soft tulle strip 5 inches (13 cm) tall and 18 inches (46 cm) wide. Gather the top edge to fit 42 stitches and sew it inside the waistband after blocking the skirt.
Roses, Leaves, and Headpiece
This is where the magic happens. These simple rolled roses and leaves transform your dress into something truly special.
Rolled Roses
Make 30 roses total: 14 in ivory white and 16 in pearl beige. Use Yarn D and your 2.0 mm hook.
For each rose, chain 25.
Row 1: Sc in the 2nd chain from hook and each chain across (24 sc)
Row 2: Work (sc, hdc, 3 dc, hdc, sc) in the next stitch, slip stitch in the next stitch. Repeat this sequence 12 times to create 12 petals.
Fasten off, leaving a tail. Roll the strip from the smaller end (where you started), keeping the base edges aligned. Stitch through the base several times to secure the shape.
Leaves
Make 34 leaves in linen beige using Yarn E and your 2.0 mm hook.
Chain 8. Working down one side of the chain: slip stitch in the 2nd chain, sc, hdc, dc, hdc, sc, slip stitch.
Chain 1, rotate your work, and repeat the same sequence on the other side of the foundation chain.
Fasten off, leaving a sewing tail.
Skirt Placement
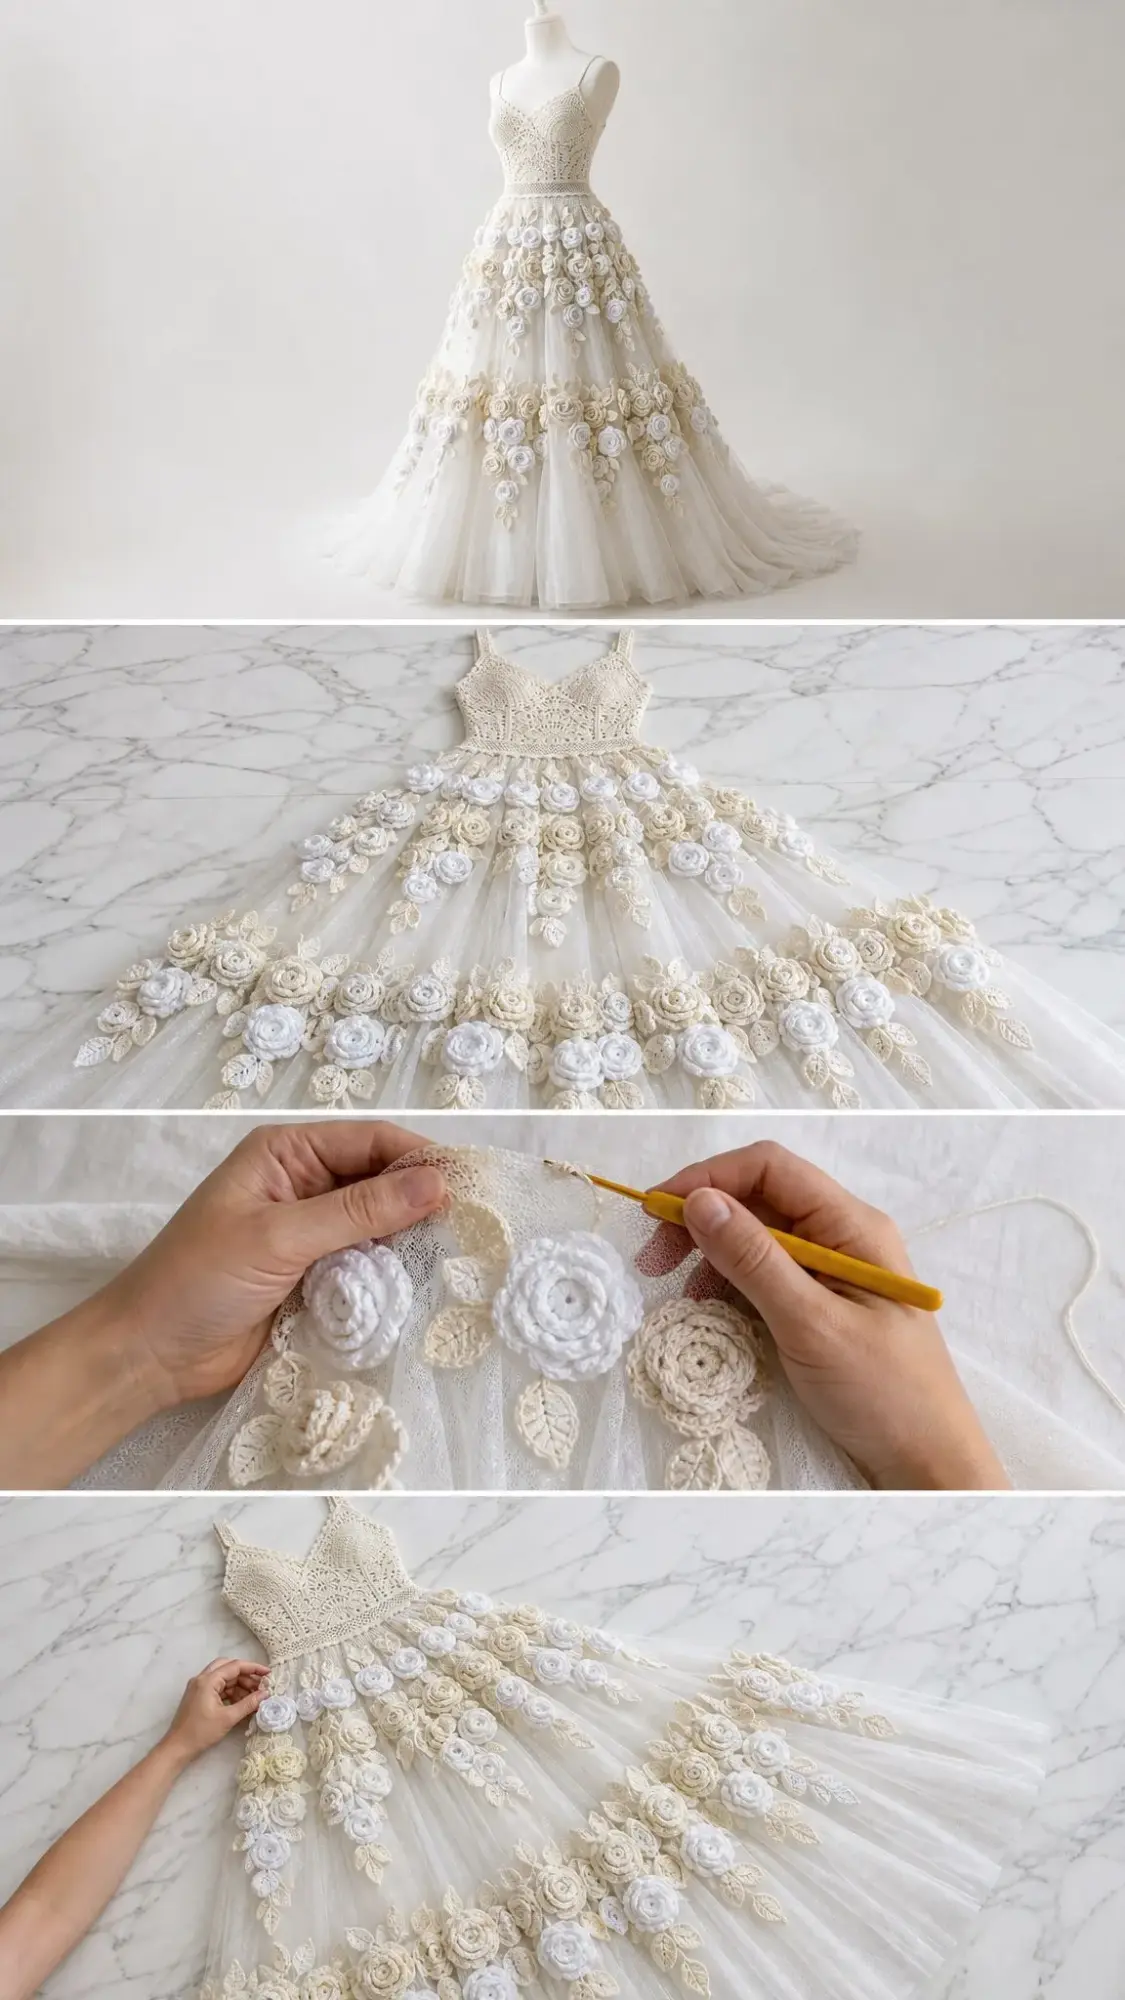
Arrange and sew the roses in three horizontal bands:
Top band: Sew 10 roses around Rounds 6-8, alternating ivory and pearl colors.
Middle band: Sew 10 roses around Rounds 11-13, staggering them between the top roses so they fill the gaps.
Lower band: Sew 10 roses around Rounds 16-18, keeping the picot hem visible below.
Add leaves in pairs under or beside the roses, with the stems angled downward for a natural look.
Floral Headpiece
Band: Chain 43. Single crochet in the 2nd chain from hook and each chain across (42 sc). Fasten off.
Sew the ends together to fit around the hair cap. Add 6 small roses (you can make these slightly smaller by using ch 20 instead of ch 25) and 8 leaves along the front and sides. Stitch the band invisibly to the hair.
Assembly and Finishing
Follow this order for the smoothest assembly process:
1. Crochet the head, body, arms, and hair cap. Sew the arms and hair securely.
2. Work the bodice flat, fit it on the doll, close the back, and add the straps.
3. Work the skirt directly from the bodice lower edge.
4. Block the skirt gently before adding roses.
5. Pin the rose bands first, then sew each rose and leaf firmly through the skirt fabric.
6. Add the headpiece and weave in all remaining ends.
Blocking
Steam the skirt lightly from above without pressing the roses flat. Shape the skirt into an even bell, smooth the straps, and let everything dry completely before handling.
Care Instructions
Spot clean with cool water and mild soap. Do not wring. Reshape while damp and dry flat. Keep safety eyes and small embellishments away from children under 3 years old.
Troubleshooting Common Issues
| Issue | Solution |
|---|---|
| Bodice too loose | Use a smaller hook for the bodice or overlap the back by 3-4 stitches instead of 2 |
| Skirt ruffles too early | Keep Rounds 1-4 flat; do not add extra increases |
| Skirt pulls narrow | Block the lace rounds and relax your tension on the ch-1 spaces |
| Roses look bulky | Use the 2.0 mm hook and roll more loosely before sewing |
| Headpiece slips | Stitch it directly to the hair cap at both sides and back |
Size Customization Options
Want to adjust the pattern? Here are some tips:
For a taller doll, add plain rounds to the torso or skirt before the border round.
For a wider waist, increase the bodice lower edge in multiples of 6 and begin the skirt with an even count that supports the mesh rounds.
For more floral coverage, add roses in odd-numbered clusters so the bands stay balanced from the front view.
For a softer bridal look, use ivory-on-ivory roses and reserve pearl beige for the leaves or hair flowers only.
Left-Handed Crocheters
Work the written instructions exactly as stated. Your pieces will mirror horizontally, which is perfectly fine. For appliqué placement, pin the roses while viewing the doll from the front and keep the top, middle, and lower bands level.
Final Thoughts on This Ivory Bridal Rose Crochet Dress Pattern
This heirloom-style bridal doll gown is proof that beautiful, complex-looking projects are really just a series of simple steps done well. The bodice is basic shaping. The skirt is a repeating mesh pattern. The roses are rolled strips. Put them all together with patience and care, and you create something truly breathtaking.
Take your time with this one. Make a rose or two before committing to all 30 so you can perfect your rolling technique. Block your skirt before adding the flowers. And most importantly, enjoy the process. This is the kind of project that deserves to be savored.
I hope you love making this dress as much as I loved writing up this pattern. If you do give it a try, please save this post to your Pinterest boards so you can find it easily later. And I would absolutely love to see your finished gown, so drop a comment below or tag me when you share your creation. Happy crocheting!
Want a Quick & Easy Printable Version?
Get a clean, beautifully formatted PDF of this pattern — easy to follow step by step, ready to print or save on any device. No scrolling, no distractions, just the pattern.
Get the Printable PDF →