
This tote bag is made from 40 sunburst granny squares joined into two panels with a crisp white band and scalloped trim. The construction uses basic stitches plus one special puff stitch for the petals. If you can work double crochets and follow a simple four-round square pattern, you can absolutely make this bag.
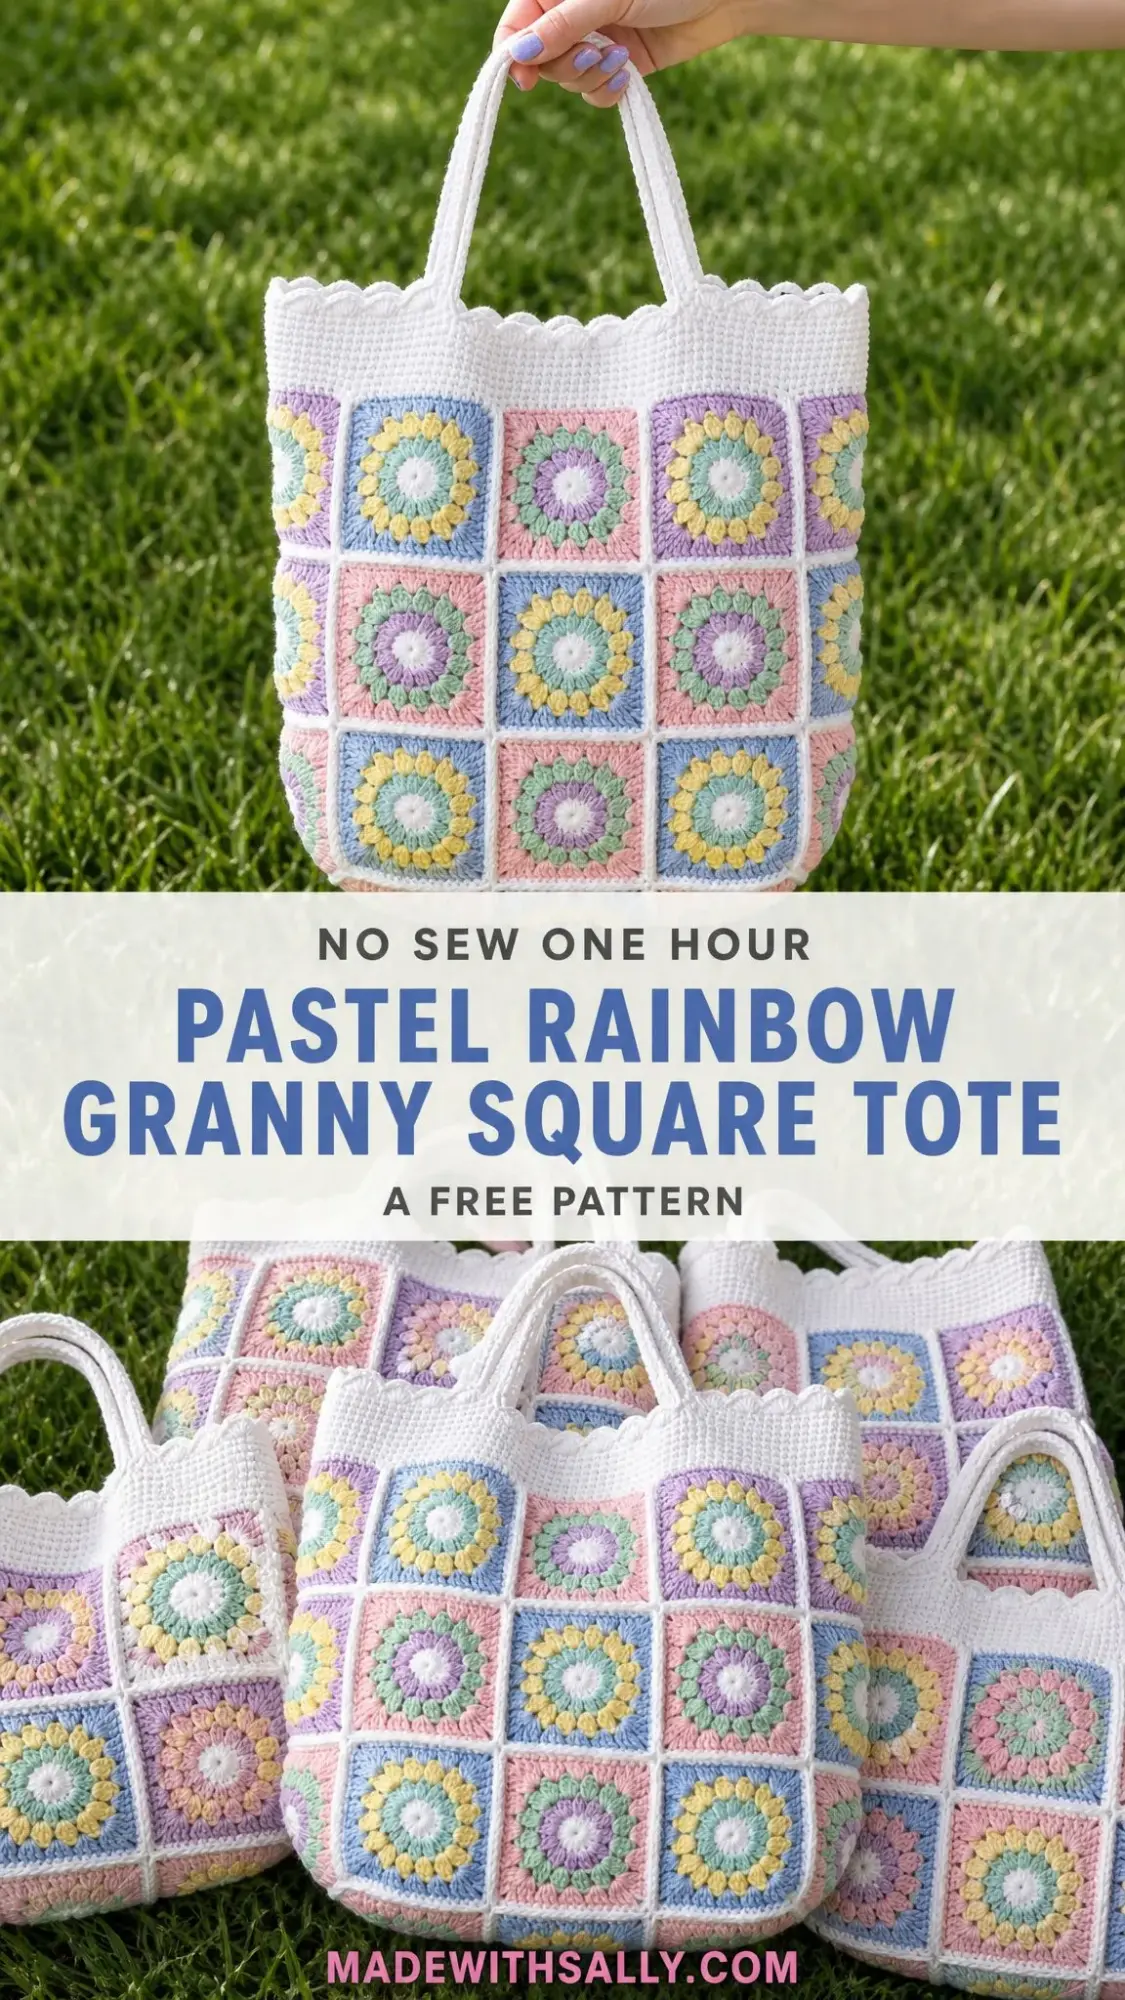
I designed this project for intermediate crocheters who want something cheerful and practical. The squares work up quickly once you get the rhythm, and the scattered pastel colors give you creative freedom without any strict color planning. Each square uses just three colors, so you can mix and match your stash.
The finished tote measures 15 inches wide by 15 inches tall, perfect for farmers market trips or beach days. Worsted weight cotton gives it structure and makes it machine washable. Let me walk you through everything you need to make your own.
Materials You Will Need
Gather these supplies before you start. Having everything ready makes the project flow smoothly.
Yarn: Worsted weight cotton (also called Aran or 10-ply) in six colors:
Recommended yarns: Paintbox Yarns Cotton Aran works beautifully with its matte finish and true pastel shades. Lion Brand 24/7 Cotton has a smooth mercerized sheen that holds shape well. Hobbii Rainbow Cotton 8/8 is budget friendly with a lovely soft hand.
Hook: 4.0 mm (US G/6 or UK 8)
Notions: Tapestry needle for joining and weaving ends, stitch markers, scissors
Gauge
One completed sunburst square should measure 3 inches / 7.5 cm across using the 4.0 mm hook and worsted cotton. If your square runs large, drop down a hook size. If it measures small, go up a hook size. Getting gauge right matters here because you need 40 identical squares to line up perfectly.
Abbreviations
Here are all the abbreviations used in this pattern. I am using US crochet terms throughout.
For UK crocheters: This pattern uses US terms. US single crochet equals UK double crochet. US double crochet equals UK treble. Stitch counts stay the same.
Special Stitches
Puff Stitch (The Petals)
This creates the rounded petal effect in each square. Here is how to work it:
Yarn over, insert your hook in the stitch or space, yarn over and pull up a loop to the height of the round. Repeat this sequence 3 times in the same place. You will have 7 loops on your hook. Yarn over and draw through all 7 loops, then chain 1 to close. Each puff forms one rounded petal.
5-dc Shell (Scallop Trim)
Work 5 double crochets into the same stitch to create a fanned scallop along the top band.
Whip-Stitch Join
Hold two squares with right sides facing up and edges aligned. With white yarn and a tapestry needle, sew through the back loops of matching stitches across the seam. This creates a flat, nearly invisible join.
The Sunburst Square Pattern
Make 40 squares total (20 for each panel). Start each square with a magic ring in white.
Round 1: White Center
Magic ring. Chain 3 (this counts as your first double crochet), work 11 dc into the ring. Join with a slip stitch to the top of the chain 3. Pull the ring closed. Fasten off white. 12 dc
Round 2: Petal Color
Join your petal color in any dc. Chain 1. Work a puff in the same stitch, chain 1. Puff in the next dc, chain 1. Repeat from * around. Join with a slip stitch to the top of the first puff. Fasten off. 12 puffs, 12 ch-1 spaces
Round 3: Frame Color (Squares It Off)
Join your frame color in any ch-1 space. Chain 3, work 2 dc in the same space (this is your corner start). Work 3 dc in each of the next 2 ch-1 spaces. In the next ch-1 space, work (3 dc, ch 2, 3 dc) for a corner. Repeat from * around, ending the final corner with (3 dc, ch 2) and join to the top of the chain 3. Fasten off. 48 dc, 4 corner spaces
The corners fall at every third space, turning the 12 petals into a neat square with 12 dc per side.
Round 4: White Border
Join white in any corner ch-2 space. Chain 1. (Sc, ch 2, sc) in the corner space, then 1 sc in each of the next 12 dc along the side. Repeat from * around. Join with a slip stitch to the first sc. Fasten off and weave in ends. 56 sc, 4 corner spaces
After Round 4, each square is a tidy 3 inch tile with 14 stitches along every side (12 side sc plus a corner sc at each end). That even count is what lets the squares line up perfectly when joined.
Color Planning Tips
Each square uses three yarns: a white center, a petal color, and a frame color. Mix the five pastels freely so no two touching squares share the same frame color. That scattered sherbet look is what gives the tote its charm.
I recommend jotting down a 5×4 color grid before you start. This helps you keep your petals and frames balanced. Repeating petal colors is totally fine. Just avoid identical frame colors side by side.
Building the Panels
Lay out 20 squares in a 5×4 grid for the front panel, then repeat for the back panel.
Step 1: Arrange
Set out your front grid with 5 squares across and 4 squares down. Step back and shuffle any squares with clashing frame colors.
Step 2: Join Rows
With white yarn, whip-stitch the squares together side by side through the back loops, matching all 14 stitches. Join the four rows into one panel.
Step 3: Join Columns
Whip-stitch the horizontal seams to complete the 5×4 panel. Repeat steps 1 through 3 for the back panel.
Seam tip: Keep your tension relaxed and even. Tight seams pucker the corners while loose seams gap. Aim for a flat, fabric-like join.
Joining the Bag
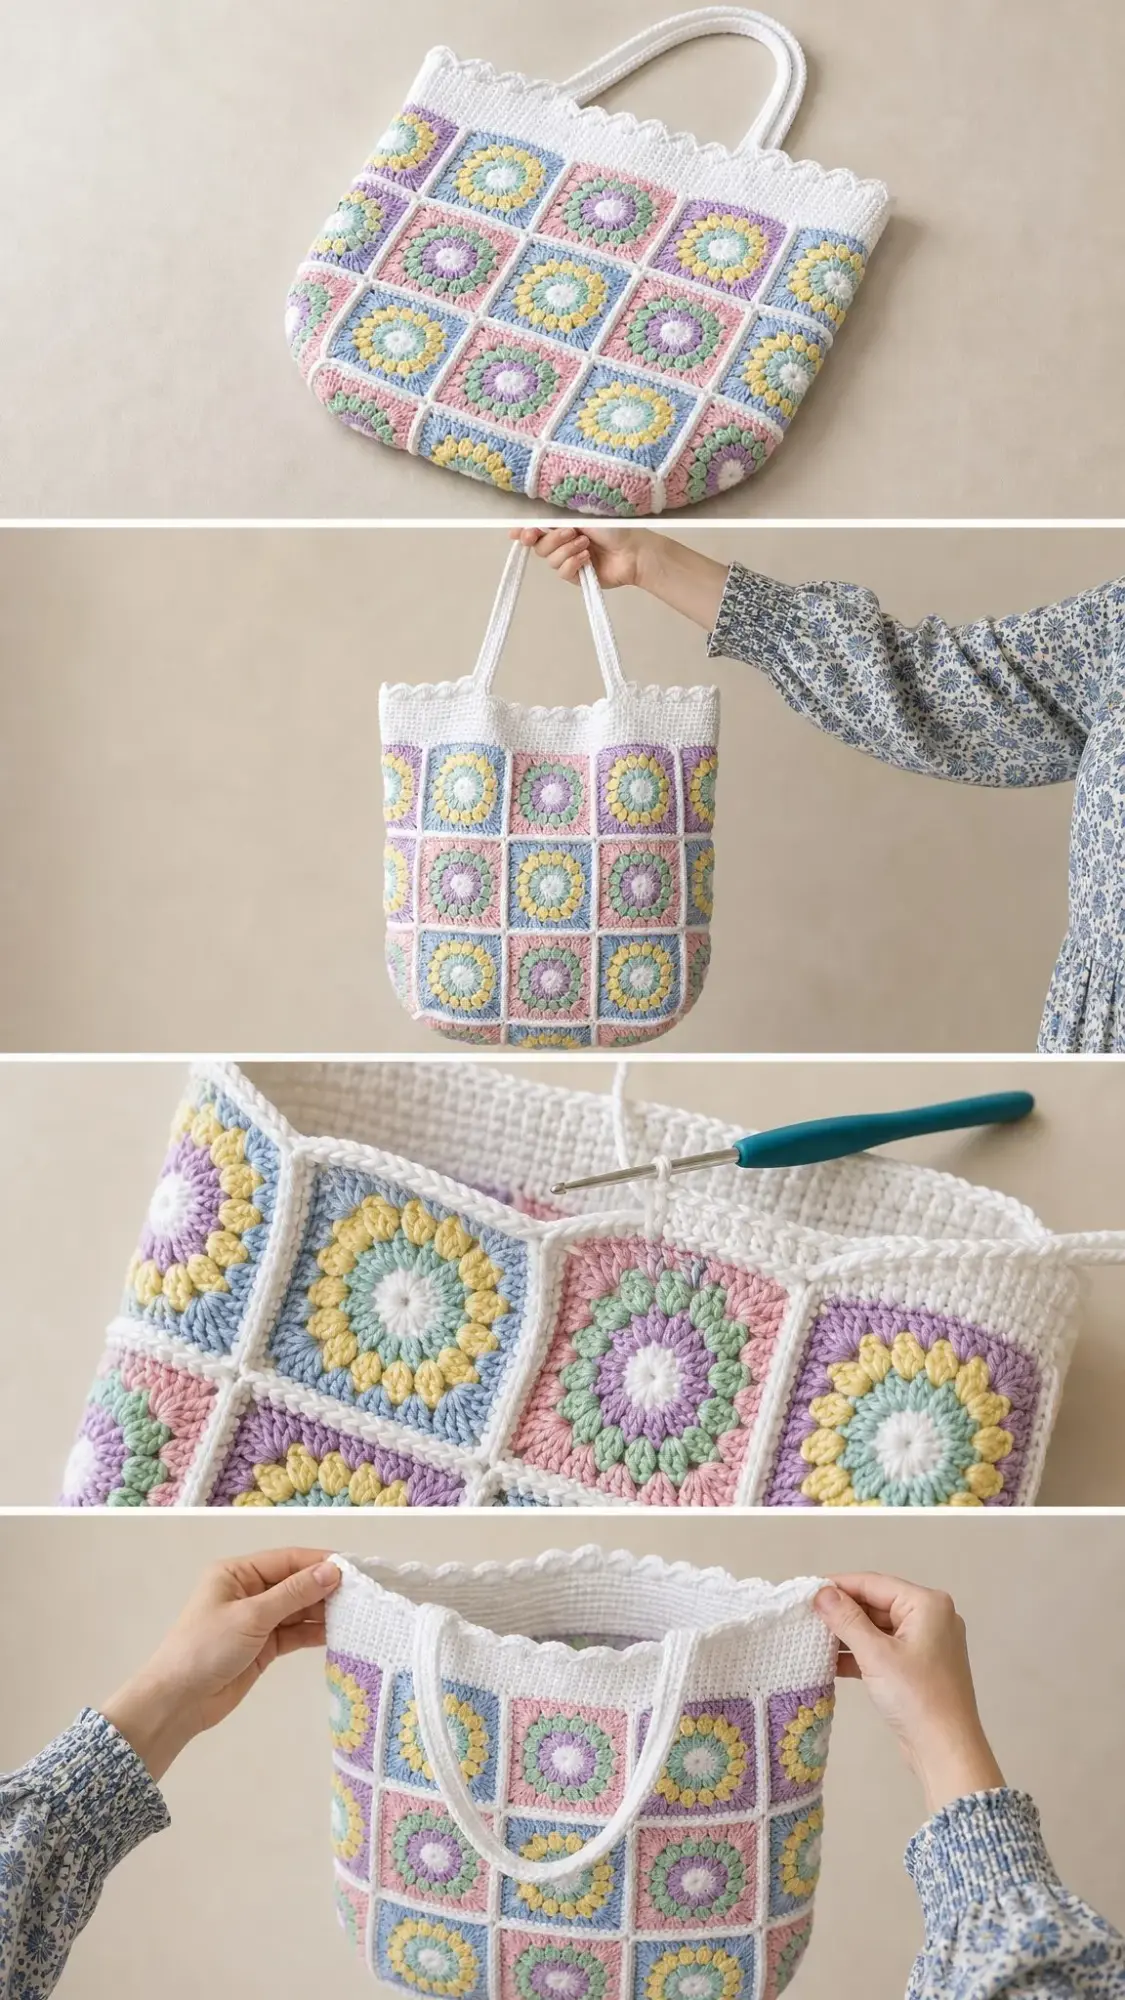
Hold the two panels together with right sides facing out (wrong sides together) so the seam sits on the outside like the rest of the squares.
Step 1: Sides and Bottom
With white yarn, whip-stitch the front and back together down one side, across the bottom, and up the other side. Leave the top edge open. 3 seams
Step 2: Reinforce Corners
Work a few extra anchoring stitches at the two bottom corners where stress is highest.
Step 3: Shape
Turn right side out. The bag naturally rounds at the base, just like the sample.
Want a flat bottom? For a flat-bottomed tote, pinch each lower corner into a small triangle and tack it down with a few stitches before adding the band.
Top Band and Scallop Edge
Work this section in continuous rounds in white around the open top.
Round 1: Foundation
Join white at a side seam. Work 144 sc evenly around the opening (about 72 across the front and 72 across the back). Join with a slip stitch. 144 sc
Rounds 2 through 8: Band
Chain 1, sc in each stitch around, join. Repeat for a total of 7 plain rounds, building a band about 3 inches / 7.5 cm tall. 144 sc each round
Round 9: Scallop Edge
Chain 1. Sc in the next stitch, skip 2 stitches, 5 dc in the next stitch, skip 2 stitches. Repeat from * around (the repeat divides evenly into 24). Join with a slip stitch and fasten off. 24 shells
Why 144? This number divides cleanly by 6, so every scallop lands evenly with no awkward gap at the seam.
Handles
Make 2 handles in white for a 9 inch / 23 cm drop.
Handle Instructions (Make 2)
Chain 71. Sc in the 2nd chain from hook and in each chain across. Turn. 70 sc
Rows 2 through 5: Chain 1, sc in each stitch across. Turn. Fasten off, leaving a long tail. 70 sc
For a rounder handle, fold the strip lengthwise and whip-stitch the long edges together.
Attaching the Handles
Step 1: Place. On the front band, position the handle ends above the 2nd and 4th squares, roughly 3 inches / 7.5 cm apart. Mirror this placement on the back.
Step 2: Secure. Sew each end firmly to the inside of the band with the long tails, stitching back and forth several times for strength.
Finishing Your Tote
Weave in every remaining end and trim closely. With 40 squares and all those color changes, you will have quite a few ends to manage. I recommend weaving them in as you go during construction.
Gently steam-block the bag over a towel-stuffed form to even out the squares. Let it dry fully before use so the cotton sets its shape.
Care Instructions
Cotton may relax slightly with use. A quick reshape after washing keeps the squares looking crisp.
Size Customizing Options
Mini pouch: 3 wide x 3 tall per panel (18 squares total), band Round 1 = approximately 84 sc
Standard (as shown): 5 wide x 4 tall (40 squares total), band = 144 sc
Beach bag: 6 wide x 5 tall (60 squares total), band = a multiple of 6 to keep scallops even
Band math tip: Whenever you resize, round the band’s Round 1 count to the nearest multiple of 6 so the scallop edge still divides evenly.
Want longer straps? Add chains in multiples of about 6 per extra inch of drop.
Skill Level and Time Estimate
This pattern is rated intermediate. You should be comfortable with basic crochet stitches, working in the round, and joining motifs. The puff stitch may be new to some crocheters, but it becomes intuitive after a few petals.
Expect this project to take 18 to 25 hours depending on your speed. The squares work up quickly once you find your rhythm, but 40 of them plus assembly and finishing adds up. This makes a wonderful TV project or travel crochet.
Pattern Notes to Remember
This tote makes a wonderful gift for someone who loves cheerful, handmade accessories. The pastel palette works for spring and summer, but you could easily swap in autumn tones or jewel colors for a completely different look.
Thank you so much for choosing this pattern. I hope you love making your Pastel Rainbow Granny Square Tote as much as I enjoyed designing it. If you make one, I would absolutely love to see it. Tag me on Instagram or share a photo in my Facebook group.
If you found this pattern helpful, save it to your Pinterest boards so you can find it when you are ready to start. And please leave a comment below if you have any questions or just want to share your color choices. Happy crocheting!
