
Last summer, I found myself standing in my local yarn shop, holding the most beautiful skein of sage green cotton. I had no idea what I wanted to make with it. I just knew I needed it. You know the feeling, right? That yarn sat in my stash for months until one afternoon when I was packing for a farmer’s market trip and realized I had nothing cute to carry my haul in.
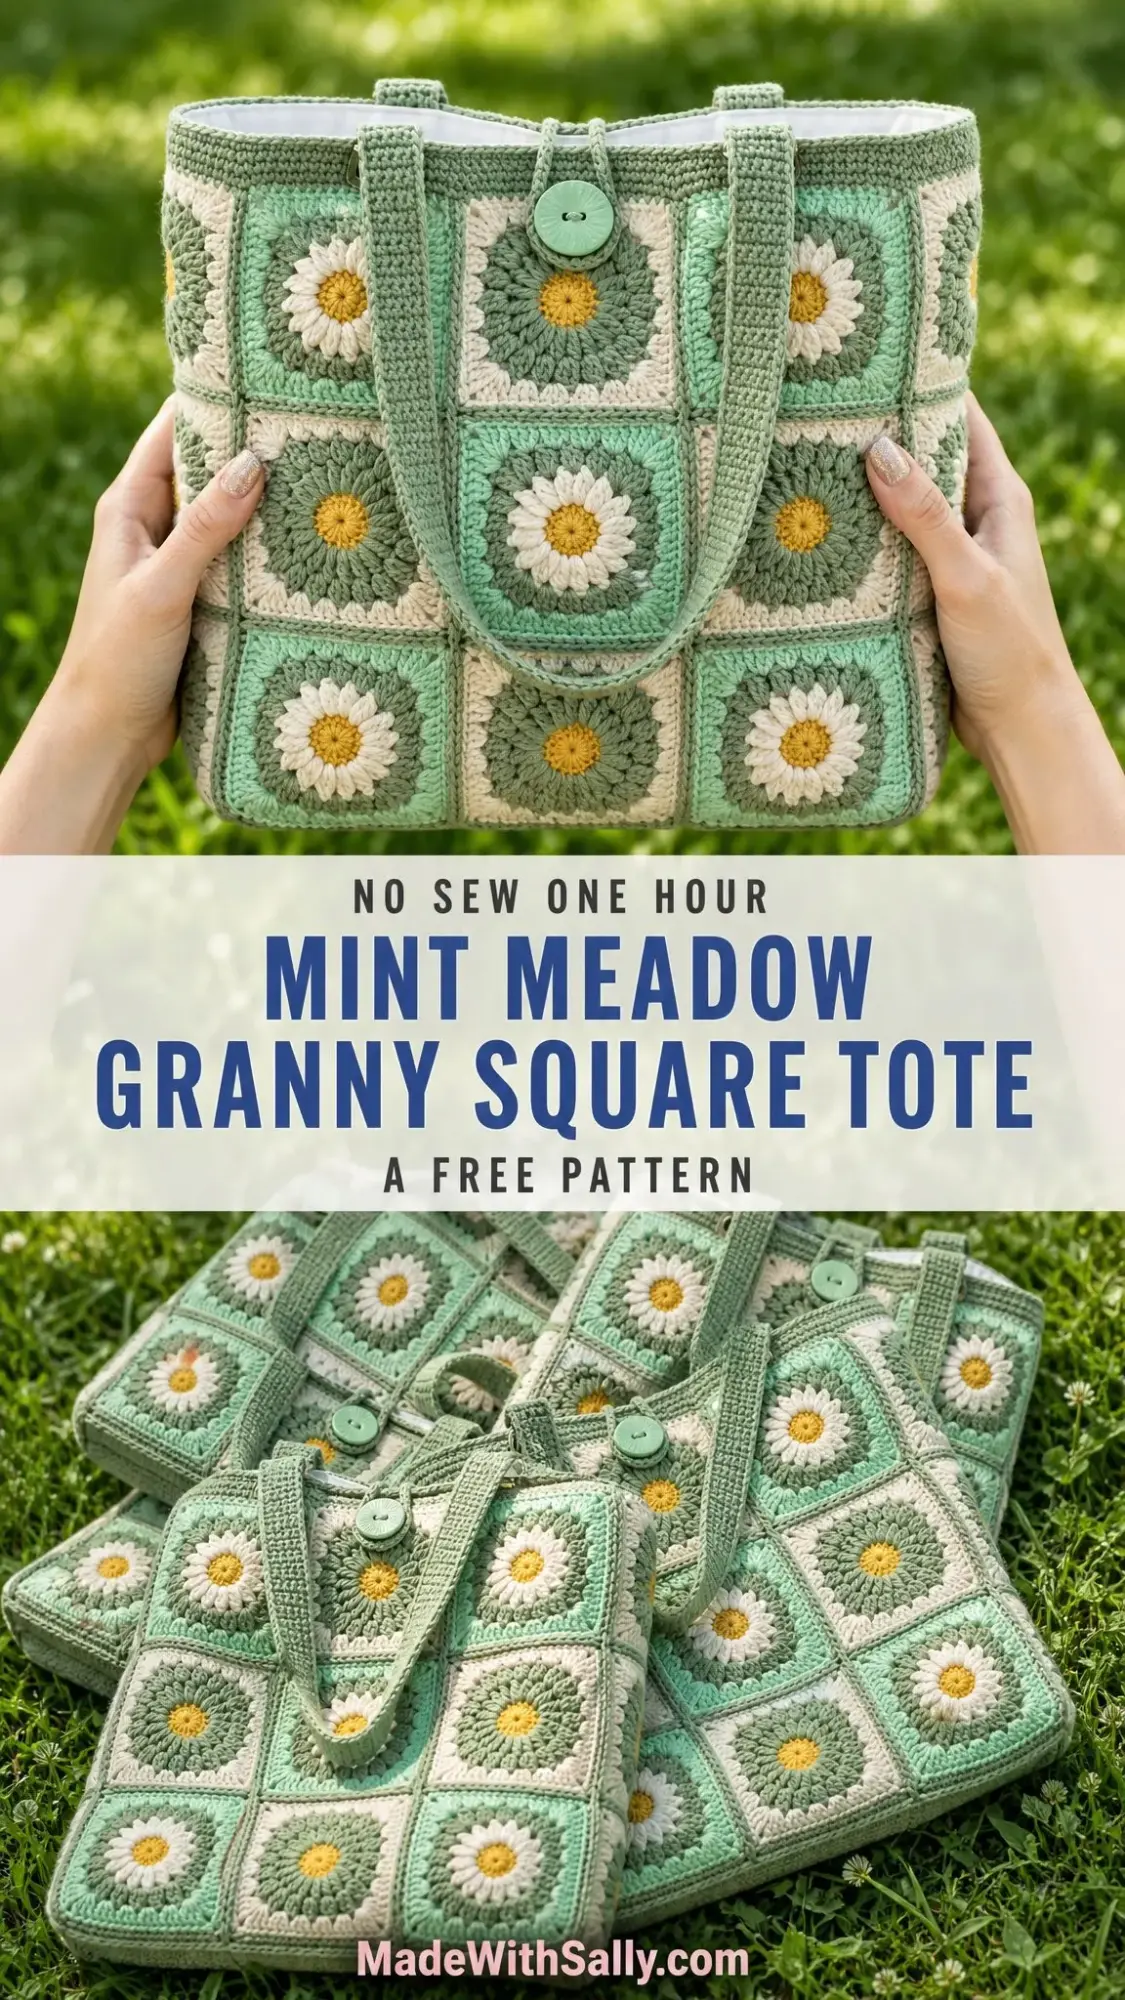
That’s when the idea hit me. What if I combined my love of cheerful daisy motifs with a sturdy, practical tote? Something pretty enough to show off but tough enough to handle a bag full of fresh produce and impulse buys. I pulled out that sage cotton, grabbed a few coordinating colors, and started swatching.
The result is this Mint Meadow Granny Square Tote. It’s become my go-to bag for everything from beach days to library runs. And today, I’m walking you through every single step so you can make your own.
About This Crochet Tote Bag Pattern
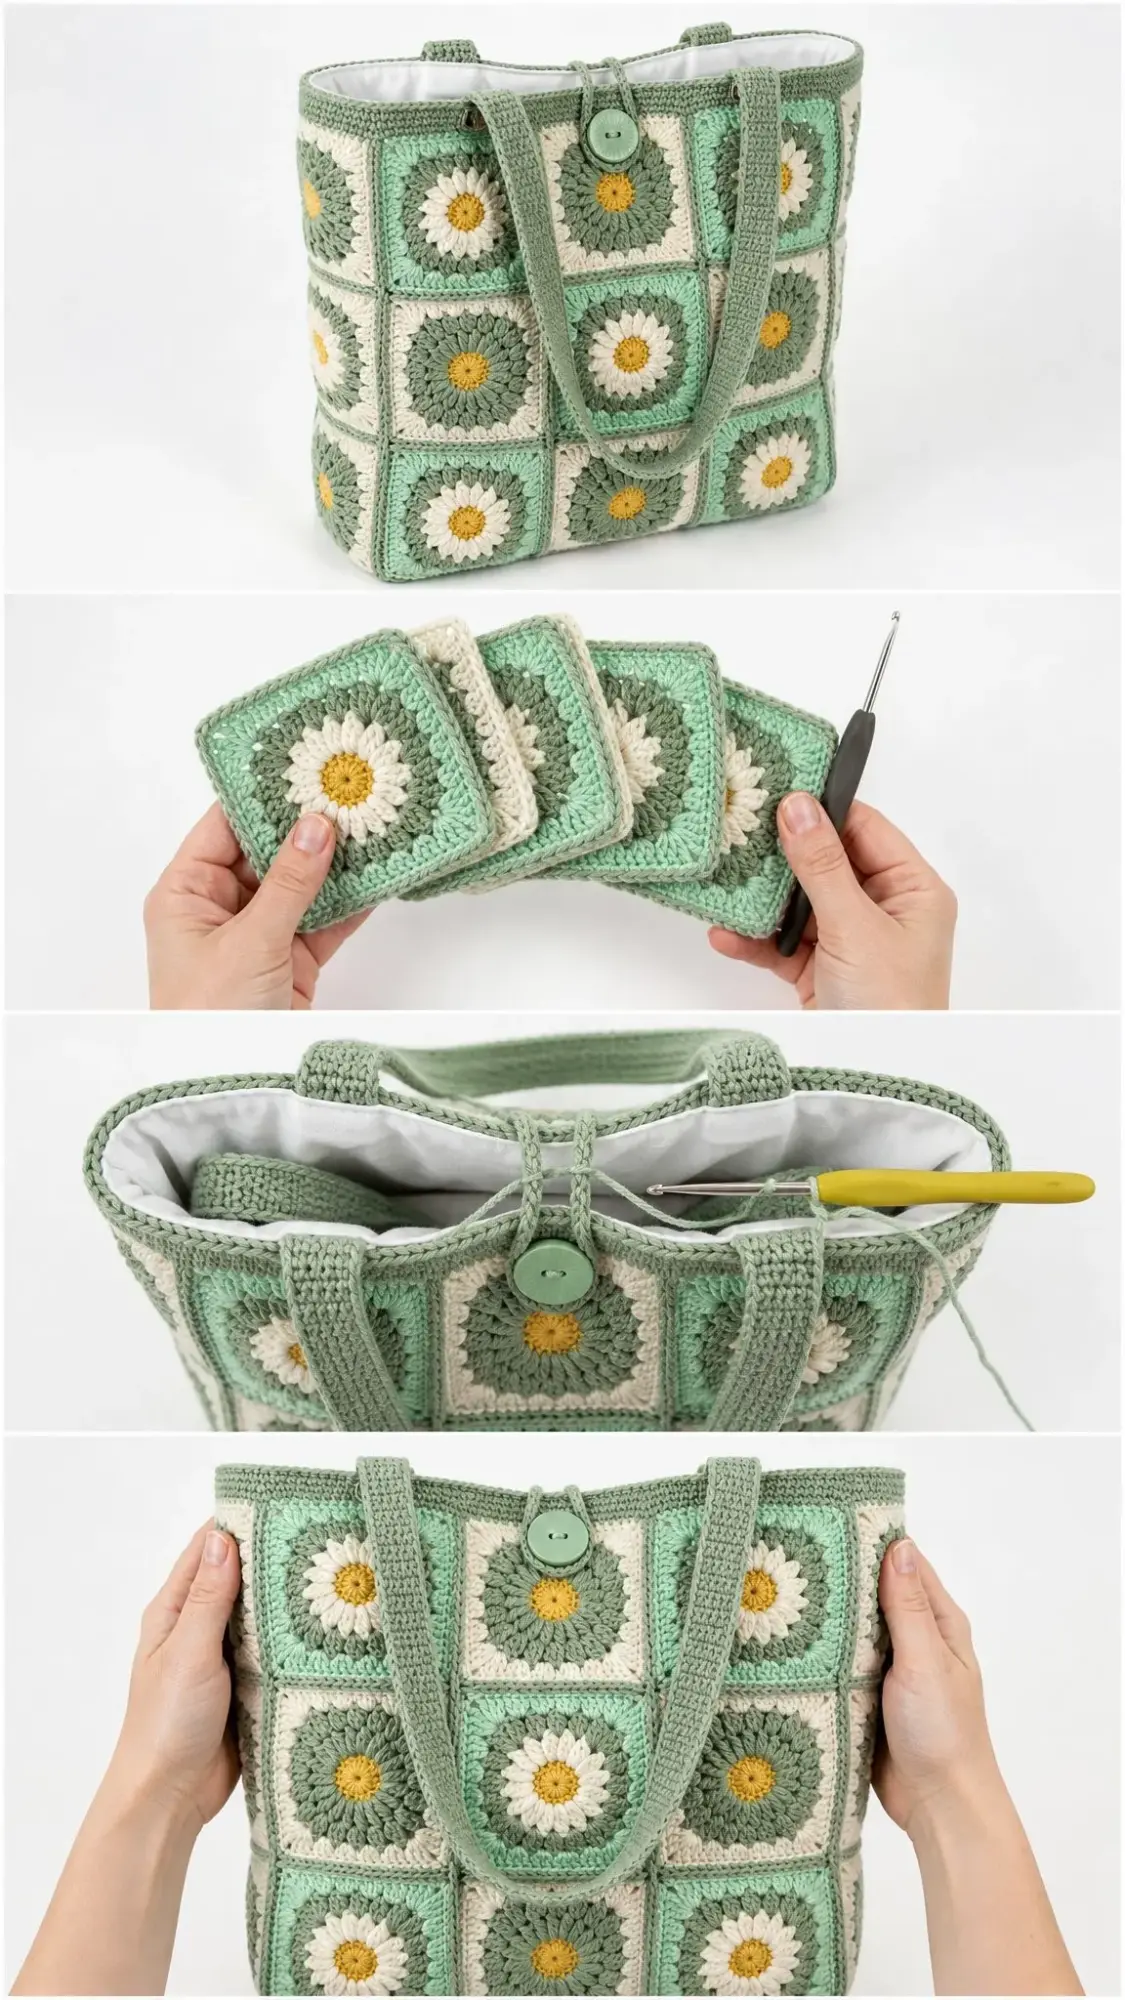
This granny square tote bag pattern creates a roomy box-bottom carryall that measures 12 × 12 × 4 inches deep, plus 9-inch straps for comfortable shoulder carrying. The design uses 27 cheerful daisy sunburst squares arranged in a checkerboard pattern across five panels.
The construction is simpler than it looks. You’ll make all your squares first, which makes this wonderfully portable. Toss a few in your project bag and work on them anywhere. Then you’ll seam them together, add a sturdy border, attach the straps, and finish with a button closure.
Skill level: Intermediate. You should be comfortable with basic crochet stitches, working in rounds, color changes, and seaming. If you’ve made granny squares before, you’re ready for this project.
Time to complete: 12 to 18 hours total, depending on your pace.
Materials You’ll Need
Gathering your supplies before you start makes the whole process smoother. Here’s everything you’ll need for this crochet tote pattern.
Yarn
This pattern uses worsted weight cotton yarn, which gives the tote crisp stitch definition and a sturdy body that holds its shape. Choose a firm, low-stretch cotton for best results.
Here are the approximate amounts for each color:
| Color | Amount |
|---|---|
| Sage Green | ~450 yards / 415 meters |
| Cream or Ivory | ~260 yards / 240 meters |
| Mint Green | ~220 yards / 200 meters |
| White | ~120 yards / 110 meters |
| Mustard | ~40 yards / 37 meters |
Yarn suggestions: Paintbox Yarns Cotton Aran, Lion Brand 24/7 Cotton, or DROPS Paris all work beautifully for this project.
Tools and Notions
Gauge
Getting gauge right matters for this pattern because all your squares need to match up perfectly when you seam them together.
One finished square = 4 inches (10 cm) across using a 4.0 mm hook. That works out to roughly 16 double crochet stitches and 8 rounds to 4 inches.
Make a test square before you commit to all 27. If yours is too big, try a smaller hook. Too small? Go up a hook size.
Abbreviations
This pattern is written in US crochet terms. I’ve included UK equivalents where they differ.
Special Stitches
Before we dive into the pattern, let me explain the special stitches you’ll encounter.
Petal: Work (sl st, ch 3, 2 dc, ch 3, sl st) all in the same stitch. This creates one daisy petal.
Corner: Work (2 dc, ch 2, 2 dc) all in the same stitch or space. This creates the corner that turns your circle into a square.
2-dc increase: Work 2 dc in the same stitch.
Pattern Notes
A few things to keep in mind as you work:
The Daisy Sunburst Square
This is the heart of the whole tote. You’ll make 27 squares total: 14 in Colorway A and 13 in Colorway B. Each finished square measures 4 inches (10 cm).
The instructions below use role names for colors (Center, Petals, Ring, Background). I’ll tell you exactly which yarn color to use for each colorway after the basic instructions.
Round 1 (Center)
Into a magic ring: ch 3 (this counts as your first dc), work 11 dc into the ring. Pull the ring closed and sl st to the top of the beg ch-3 to join. (12 dc)
Round 2 (Petals)
Join your petal color in any stitch. Work a Petal in the same stitch, then sl st in the next stitch. Repeat around, working one petal in every other stitch. (6 petals)
Round 3 (Ring)
Here’s the fun part. Fold your petals toward you so you can see Round 1 behind them. Working behind the petals into the Round 1 stitches: join your ring color in any dc, ch 3, dc in the same stitch, then work 2 dc in each stitch around. Sl st to join. (24 dc)
Round 4 (Ring)
Join your next ring color. Ch 3, dc in the same stitch, dc in the next stitch, 2 dc in the next stitch; rep from around. Sl st to join. (36 dc)
Round 5 (Corners)
This is where we turn the circle into a square.
Join your background color. Ch 3, dc in the next 3 stitches, work a Corner in the next stitch, dc in the next 8 stitches, work a Corner in the next stitch; rep from twice more, dc in the next 4 stitches. Sl st to join. (48 dc, 4 corners)
Round 6 (Square)
Ch 3, dc in each dc to the corner, work a Corner in each ch-2 corner space, continue around. Sl st to join. Fasten off. (64 dc, 4 corners)
Important: You should now have 16 stitches along each side of your square. This magic number is what makes all your seams and the top border work perfectly. Count carefully and keep that count consistent across all 27 squares.
Two Colorways
The checkerboard effect comes from alternating two colorways across every panel. The mustard centers stay the same in both versions.
Colorway A (Make 14)
Colorway B (Make 13)
When you arrange these in a checkerboard, the sage-centered squares sit beside cream-centered squares, creating that lovely scattered meadow look.
Building the Panels
Once all 27 squares are complete and blocked, sort them into five panels. Alternate colorways in a checkerboard pattern within each panel.
Joining the Squares
Join your squares with right sides facing up using either a flat whipstitch or a sc-join through the back loops. You’ll work through 16 stitches per seam edge.
Sew within each panel first before assembling the box. This keeps things manageable and lets you check your layout as you go.
For the front and back panels, start with a Colorway A square in one corner and alternate from there.
Box Assembly
Now the fun part. We’re turning flat panels into a three-dimensional bag.
1. Attach the base. Sew the base panel to the bottom edges of the front, back, and both side panels to form the box floor.
2. Seam the sides. Sew each side panel between the front and back along the vertical edges.
3. Turn and shape. Turn the bag right-side out and ease the corners square.
Your bag should now stand on its own. If it’s a little floppy, don’t worry. The border will add stability, and you can always add a stiffened base later.
Top Border, Straps, and Button Closure
Top Border
With Sage yarn and right side facing:
Round 1: Join at a top corner and sc evenly around the opening. You’re working across 8 square-edges × 16 stitches. (128 sc)
Rounds 2-4: Ch 1, hdc in each stitch around, sl st to join. Fasten off after Round 4. (128 hdc)
Straps (Make 2)
With Sage yarn:
Row 1: Ch 91, sc in the 2nd chain from the hook and across. (90 sc)
Rows 2-7: Ch 1, turn, sc in each stitch across. Fasten off, leaving a long tail for sewing. (90 sc)
Pro tip: For extra firmness, work all rows in BLO (back loops only). Or fold each strap in half lengthwise and whipstitch the long edges together. Your finished strap will measure approximately 22 inches (56 cm).
Button Loop
At the center front of the border, join Sage yarn. Ch 12, sl st to the base to form a loop, then sc around the loop for stability. Fasten off.
Sew your button to the center back edge of the border so the loop reaches over to fasten.
Finishing Your Granny Square Tote
Almost done! These final steps pull everything together.
1. Attach the straps. Pin straps to the inside of the border, aligned just inside each side seam. Whipstitch securely with several passes. These straps will carry weight, so reinforce them well.
2. Weave in all ends. Yes, all of them. I know there are a lot, but it’s worth taking the time now.
3. Optional additions: Line the bag with fabric for a polished interior and add a plastic-canvas base for extra structure. Both of these are completely optional but nice upgrades.
Care Instructions
Cotton yarn is durable, but a little care keeps your tote looking fresh.
Customization Ideas
Want to make this pattern your own? Here are some easy modifications.
Bigger tote: Add a column or row of squares to any panel. Each additional square adds about 4 inches (10 cm).
Crossbody style: Lengthen the straps to your preferred drop before seaming. Just add more chain stitches at the start and work more rows.
Firmer fabric: Drop to a 3.5 mm hook or hold your yarn doubled. Add a stiffened base for extra structure.
Different yarn: You can substitute any worsted or aran weight yarn. Just make sure to check gauge. Change hook size until one square measures 4 inches (10 cm), then carry on with the rest of the pattern.
Tips for Success
After making several of these totes, here’s what I’ve learned.
Block religiously. I cannot stress this enough. Blocking your squares before assembly makes the seaming process infinitely easier. Your edges will line up, your corners will be crisp, and you’ll thank yourself later.
Count your stitches. That 16-stitch-per-side count is crucial. If one square is off, it throws everything else out of alignment.
Weave as you go. With five colors and 27 squares, you’ll have a lot of ends. Weaving them in as you finish each square keeps the task manageable.
Reinforce those straps. The straps take all the stress when you’re carrying a loaded bag. Sew them on securely and consider folding them double for extra strength.
Final Thoughts
There’s something so satisfying about turning a pile of colorful squares into a functional, beautiful bag. This Mint Meadow Granny Square Tote has become one of my favorite patterns to make and gift. The daisy motifs feel cheerful without being too cutesy, and the color palette works year-round.
Whether you’re heading to the farmer’s market, the beach, or just running errands around town, this tote has you covered. The box bottom means it sits upright and holds its shape, and the button closure keeps everything secure.
I hope you enjoy making this bag as much as I enjoyed designing it. Take your time with the squares, embrace the repetition, and before you know it, you’ll have a gorgeous handmade tote to show off.
If you loved this pattern, I’d be so grateful if you saved it to your Pinterest boards so you can find it again later. And please, if you make this tote, leave a comment below or tag me on social media. I absolutely love seeing your color choices and finished projects. Happy hooking, friend!
