
I have been dreaming about designing a bralette that feels effortlessly bohemian without being fussy to make. I wanted sculpted triangle cups that actually hold their shape, decorative details that look impressive but use basic stitches, and that perfect balance between fitted and adjustable. When I finished this terracotta beauty with its bobble edging and diamond cordwork panel, I actually did a little happy dance. I am SO pleased with how it turned out!
Get the Ad-Free PDF Pattern
You can find the free pattern below, or you can purchase the ad-free printable PDF from my shop.
Get the Printable PDF →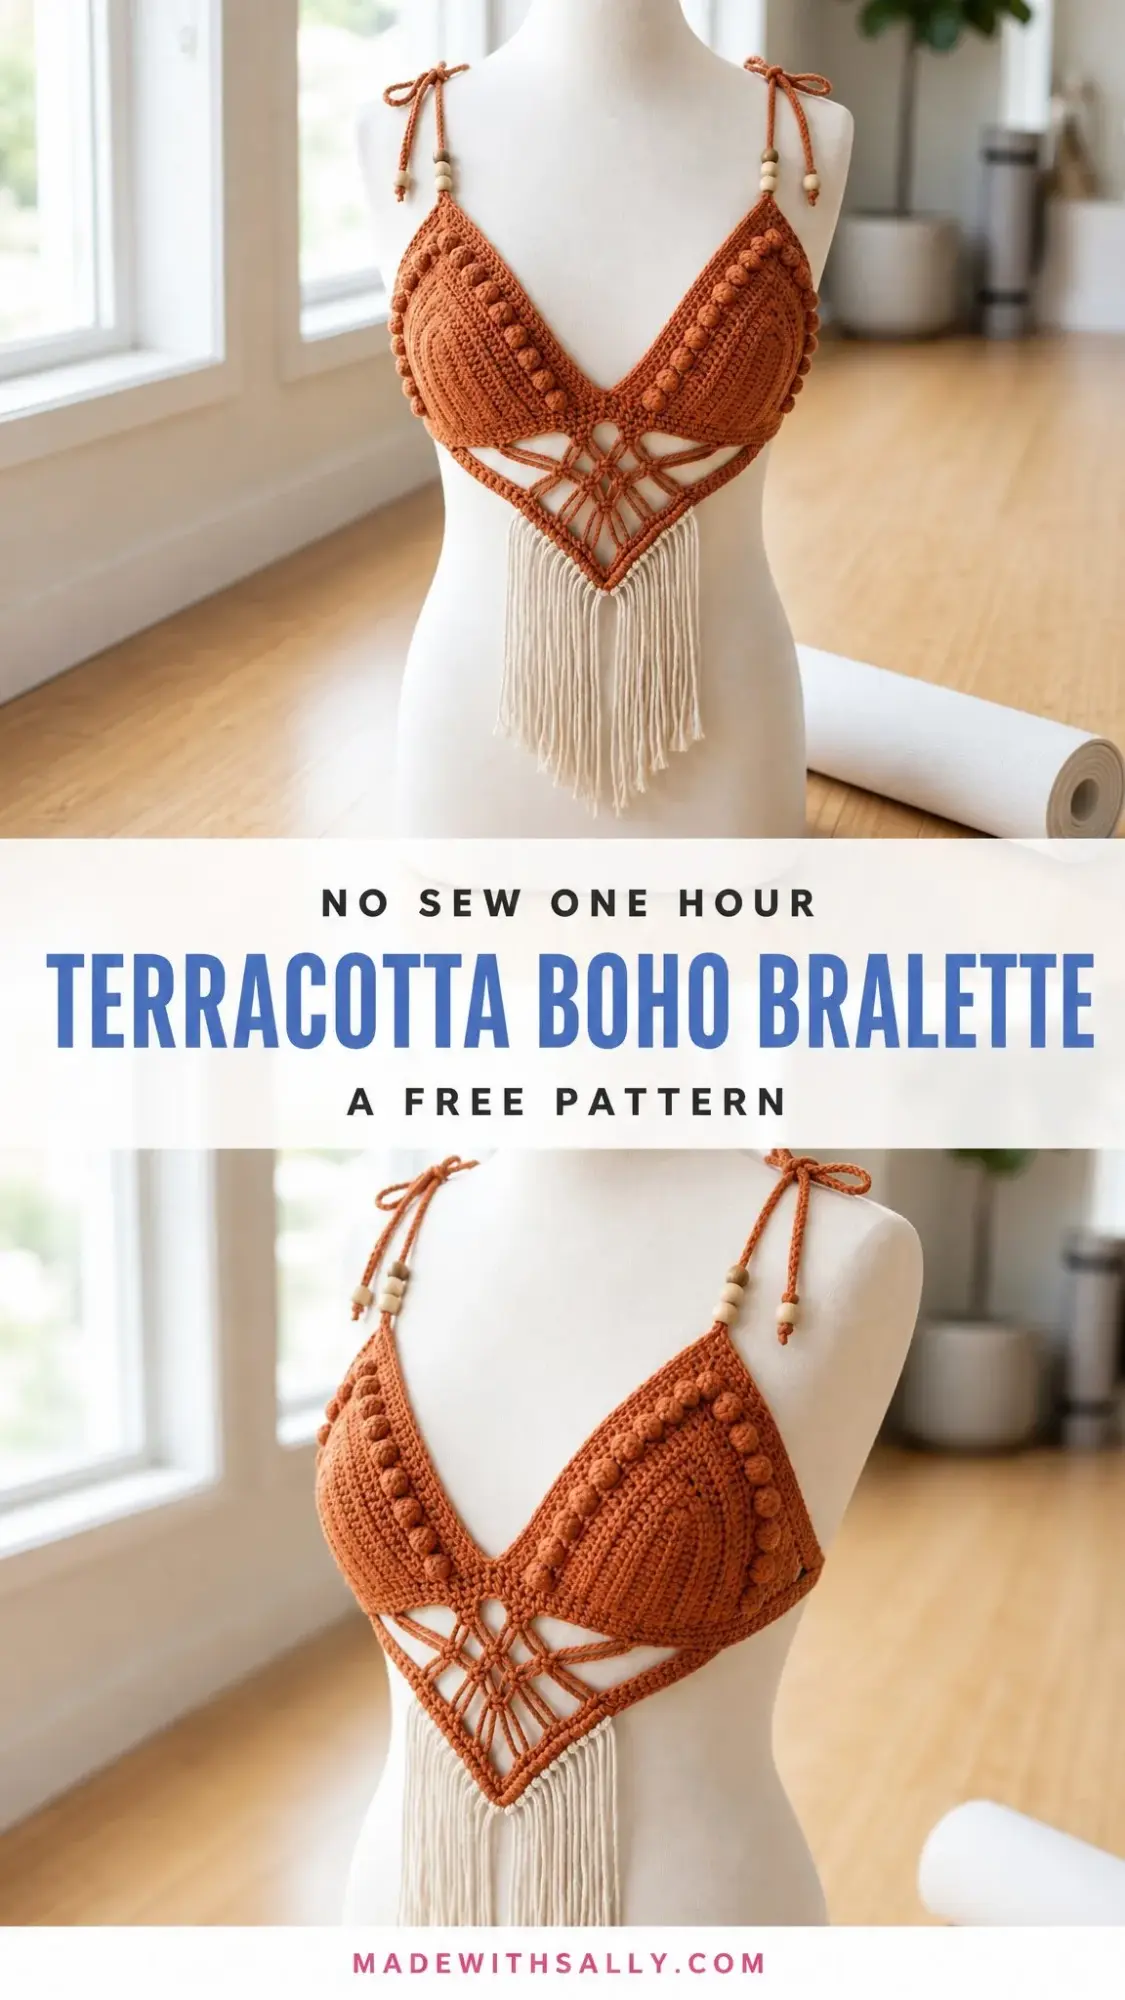
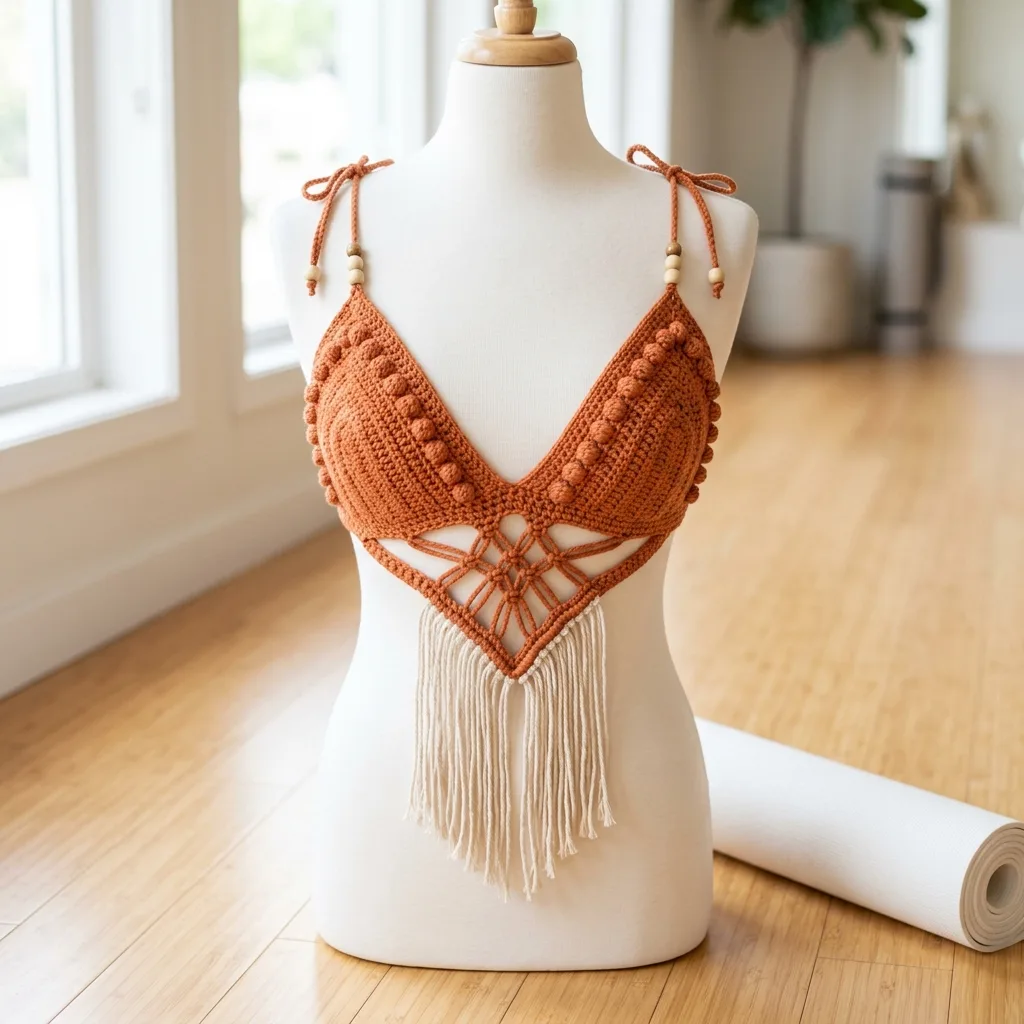
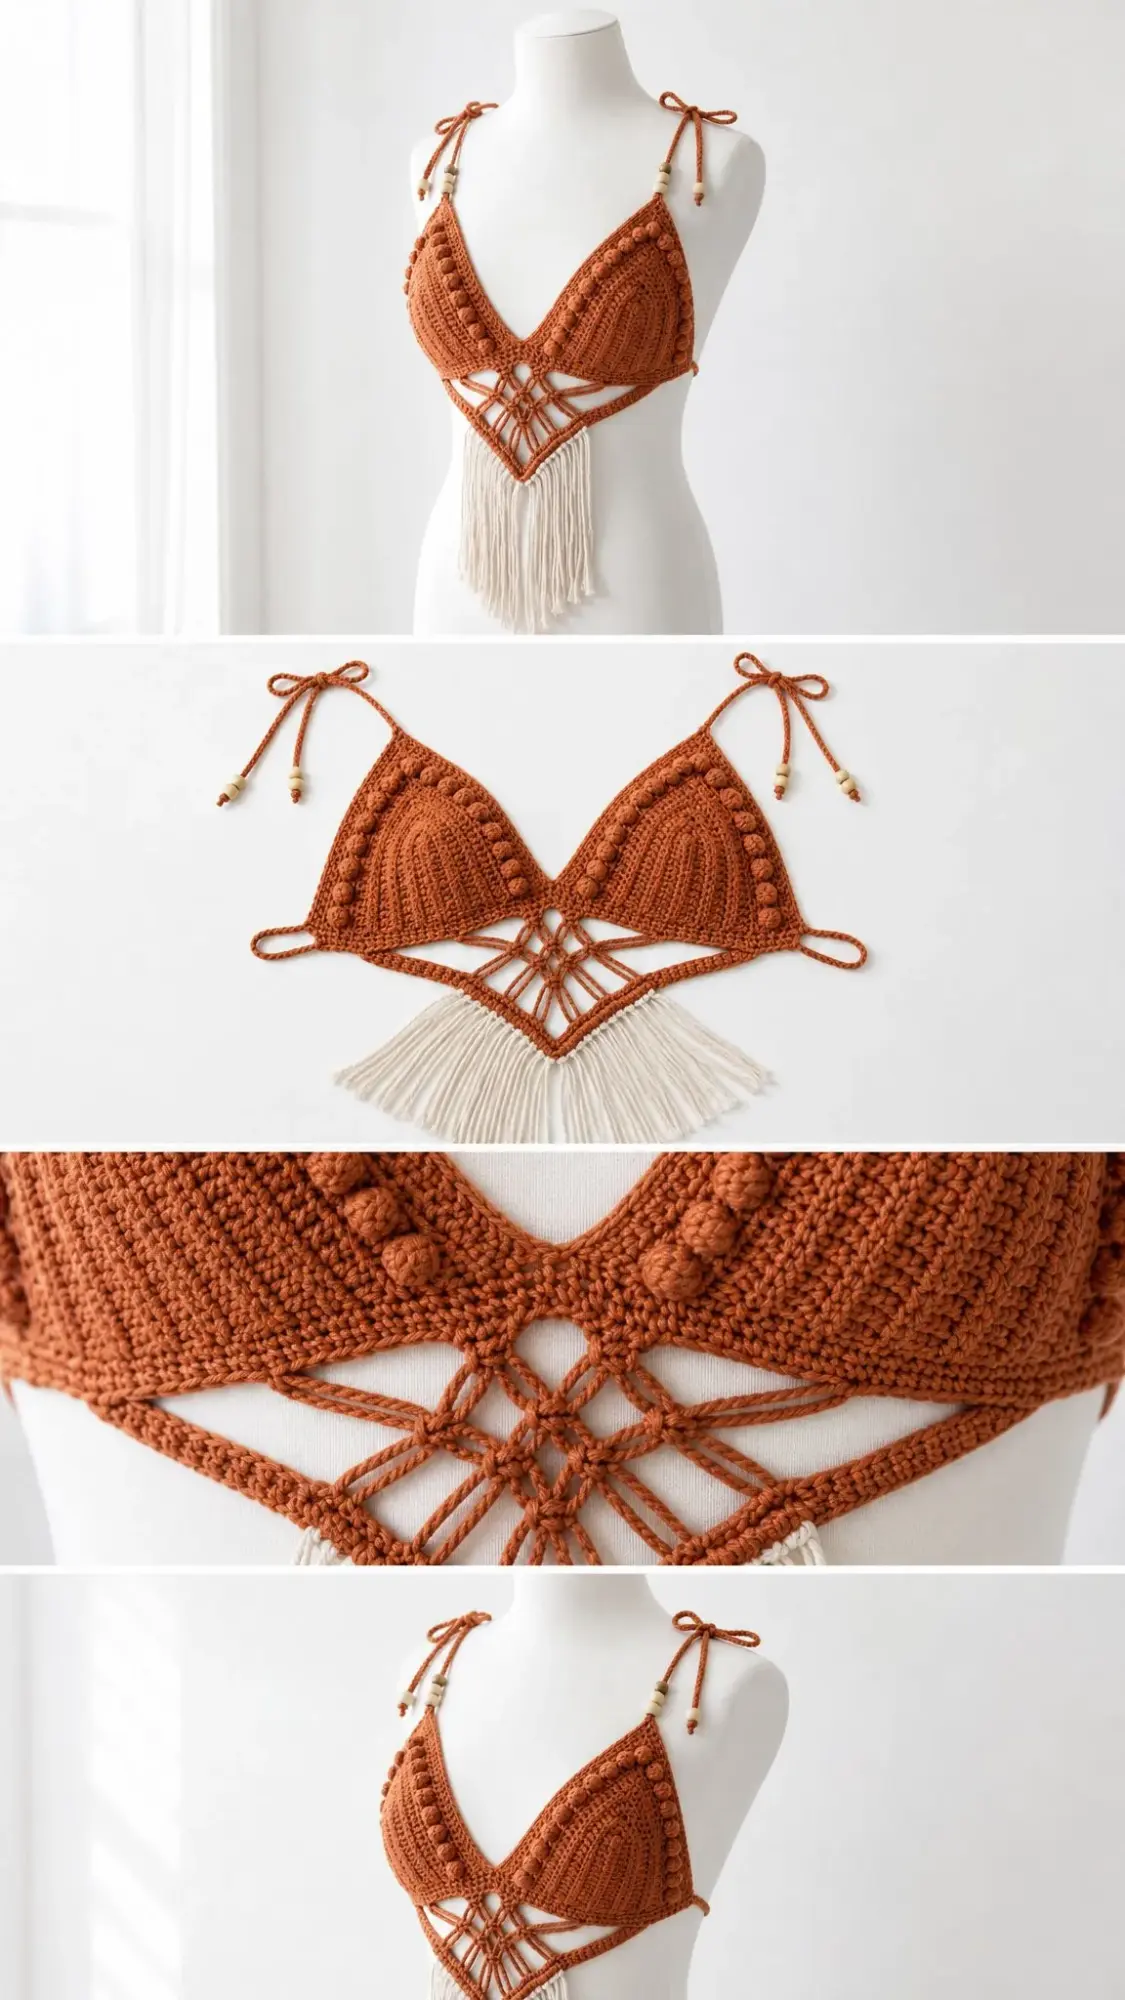
This Terracotta Boho Bralette crochet pattern combines everything I love about summer crochet. You get textured cups, a sweet lace center panel, wooden bead accents, and soft cream fringe that moves beautifully. It looks like a complicated festival piece, but the construction is straightforward once you understand the building blocks.
Why You Will Love This Crochet Bralette Pattern
This bralette hits that sweet spot between decorative and wearable. The cups are worked in half double crochet (hdc), which creates a dense, supportive fabric that will not stretch out over time. The bobble edging adds visual interest without bulk. And that diamond cordwork panel in the center? It is just chain loops worked in a simple decrease pattern. Looks intricate, works up quickly.
The tie closures at the back and shoulders mean you can customize the fit without worrying about exact measurements. Whether your underbust is 30 inches or 38 inches, the adjustable band accommodates you perfectly.
Skill level: Intermediate. You will work shaped hdc rows, bobbles, cord-style chains, careful joining, blocking, and adjustable garment finishing. If you have made a basic triangle top before and feel comfortable with increasing and decreasing, you are ready for this project.
Time estimate: About 6 to 8 relaxed hours from start to finish.
Materials You Will Need
Before you start, gather everything so you can work uninterrupted. There is nothing worse than getting into a rhythm and realizing you are missing something!
Yarn:
Suggested yarns:
Choose a smooth DK cotton with good stitch definition. Mercerized cotton gives you crisp bobbles and firm straps. A softer cotton blend gives more drape. Avoid stretchy acrylic for the band because the cups may grow with wear.
Hook:
Notions:
Gauge
Getting gauge right matters here since this is a fitted garment. Take time to swatch!
16 hdc x 12 hdc rows = 4 inches (10 cm) after light blocking
18 sc x 20 sc rows = 4 inches (10 cm) for band fabric
Swatch, block, and match gauge before starting. Fitted crochet changes noticeably with tension. If your swatch is too small, go up a hook size. Too large, go down.
Abbreviations and Special Stitches
Let me walk you through every stitch you will use. I am defining each one so there is no confusion.
Standard abbreviations:
UK crocheters note: This pattern uses US terms. US sc equals UK dc. US hdc equals UK htr. US dc equals UK tr.
Special Stitches
Bobble: This creates a little puffy ball on the right side of your work. Here is how to make one: Yarn over, insert hook in the indicated stitch, yarn over and pull up a loop, yarn over and pull through 2 loops. Repeat that sequence in the same stitch 4 more times. You will have 6 loops on your hook. Yarn over and pull through all 6 loops. Chain 1 to close the bobble unless the row says otherwise.
Cord chain: Chain firmly but not tightly. For neat straps, keep each chain the same height. Steam gently after knotting to help them relax evenly.
Picot point: Chain 3, then slip stitch in the first chain made. This creates a tiny decorative point. Used only at the lower diamond tip if you want a sharper look.
Pattern Notes Before You Begin
A few things to keep in mind as you work:
Left-handed crocheters: Work the same instructions. Your cup edging and diamond panel will mirror naturally. Place markers by function (top point, inner lower edge, outer lower edge) rather than by left/right wording.
Make the Cup Panels (Make 2)
Both cups are identical. The construction is clever: you work down one side of a foundation chain, make the top point at the end, then work back up the other side. This creates a pointed shape in one continuous row.
With Yarn A, chain 16.
Row 1: Hdc in 3rd chain from hook and in each of next 12 chains, 5 hdc in last chain (this creates the point), rotate to work along opposite side of foundation chain, hdc in each of next 13 bottom loops. Turn. (31 hdc)
Row 2: Ch 2, hdc in 15 sts, 5 hdc in next st (center point), hdc in last 15 sts. Turn. (35 hdc)
Row 3: Ch 2, hdc in 17 sts, 5 hdc in next st, hdc in last 17 sts. Turn. (39 hdc)
Row 4: Ch 2, hdc in 19 sts, 5 hdc in next st, hdc in last 19 sts. Turn. (43 hdc)
Row 5: Ch 2, hdc in 21 sts, 5 hdc in next st, hdc in last 21 sts. Turn. (47 hdc)
Row 6: Ch 2, hdc in 23 sts, 5 hdc in next st, hdc in last 23 sts. Do not turn after second cup if you are ready to edge. (51 hdc)
Cup Edging with Bobbles
Now we add that beautiful textured border. This is worked in two rounds.
Round 1: Ch 1. Work 13 sc evenly down the first lower side, 3 sc in bottom corner, 13 sc up the second lower side, then sc in each hdc across the Row 6 edge, placing 3 sc in the top point. Join with sl st. (82 sc)
Round 2: Sl st to first lower side stitch. Sc in first lower-side stitch, bobble in next stitch, sc in next 3 stitches; repeat from 3 times along first lower side, sc in bottom corner stitches, then repeat the same 13-stitch spacing along second lower side. Sc evenly across the top edge, working 3 sc at top point. Join and fasten off.
Cup checkpoint: Each cup should measure about 6.25 inches (16 cm) across the top curve and 5.25 inches (13.5 cm) from lower point to top point after light blocking. If yours is off, check your gauge.
Join Cups and Make Underbust Band
This is where everything comes together. Lay your cups right side up with the inner lower corners touching. The top points should angle outward. You will work the band from side tie to side tie across the lower edge.
Foundation row: Ch 15 for first side tie base, sc in 2nd ch from hook and next 13 ch, sc 17 evenly across lower edge of first cup, ch 5 for center bridge, sc 17 evenly across lower edge of second cup, ch 15, sc in 2nd ch from hook and next 13 ch back toward cup. Turn. (67 sc/ch positions: 14 + 17 + 5 + 17 + 14)
Row 1: Ch 1, sc in each st and ch across. Turn. (67 sc)
Rows 2 through 6: Ch 1, sc in each st across. Turn after Rows 2 through 5. Do not turn after Row 6. (67 sc each row)
Band Edging and Back Ties
Edging: Ch 1, sc evenly around the entire band and cup lower edge, placing 2 sc in each band corner. Join and fasten off.
Back ties: Attach Yarn A to one band end. Make a 16 to 20 inch (41 to 51 cm) cord chain, fasten off, and knot. Repeat at the other band end. Add wood beads before knotting if desired.
Band checkpoint: Front band should measure about 17 inches (43 cm) wide and 1.25 inches (3 cm) tall. The side ties provide the adjustable underbust fit.
Center Diamond Cordwork
This open diamond panel hangs below the center bridge and adds that beautiful boho touch. Keep your chain loops even. This panel is decorative and should hang flat, not pull the band downward.
Setup: With RS facing, mark 17 center stitches under the bridge and inner cup bases. Join yarn at first marked stitch.
Row 1: Ch 1, sc in first marked st, ch 5, skip 1 marked st, sc in next marked st; rep from 8 times total across. Turn. (8 ch-5 sps)
Row 2: Sl st into first ch-5 sp, ch 1, sc in same sp, *ch 5, sc in next ch-5 sp; rep across. Turn. (7 ch-5 sps)
Row 3: Repeat Row 2. (6 ch-5 sps)
Row 4: Repeat Row 2. (5 ch-5 sps)
Row 5: Repeat Row 2. (4 ch-5 sps)
Row 6: Repeat Row 2. (3 ch-5 sps)
Row 7: Repeat Row 2. (2 ch-5 sps)
Row 8: Sl st into first sp, ch 1, sc in same sp, ch 5, sc in last sp. Turn. (1 ch-5 sp)
Tip: Ch 1, work 5 sc into final ch-5 sp, picot point, 5 sc into same sp. Fasten off.
Optional stabilizing border: Join Yarn A at the top corner of the diamond. Sc evenly down one side to the tip and up the other side, placing 3 sc at the tip. Fasten off.
Straps, Beads, and Fringe
Shoulder Ties
At each cup top point, join Yarn A and make a 20 to 24 inch (51 to 61 cm) cord chain. Thread 2 to 3 wood beads onto each tie end, knot securely, and trim tails.
For extra strength, make two cords at each top point and tie them together at the shoulder.
Fringe
Cut 19 strands of Yarn B, each 18 inches (46 cm) long. Fold one strand in half, insert hook through a lower diamond edge space, pull the fold through, then pull tails through the fold to knot.
Place fringe across the lower diamond edge, spacing 1 strand in each sc or ch-space around the point. Add more strands for a fuller look.
Steam lightly and trim into a soft V shape, longest at center, about 6 to 7 inches (15 to 18 cm) after trimming.
Size Customization Tips
Cup depth: Add or remove cup rows before edging. Each added cup row adds 4 hdc and about 0.33 inches (0.8 cm) height.
Band fit: Lengthen or shorten back ties, or add more side-base chains in the foundation row. Add the same number to both ends.
Coverage: Widen the center bridge by adding chains in multiples of 2, then widen the diamond setup by the same amount.
Strap length: Try on before knotting beads. Cotton straps can relax slightly after the first wear.
Finishing and Blocking
Weave in all ends on the WS, splitting yarn plies for a secure finish. Pin cups symmetrically. Lightly steam or wet block until the cup points, bobbles, band, and diamond panel lie flat.
Do not over-stretch the band while blocking. Let dry fully before adding final knots and trimming fringe.
Try on over a camisole or lining if more coverage is preferred.
Care Instructions
Hand wash in cool water with mild soap. Roll in a towel to remove excess water. Reshape cups, band, and fringe while damp and dry flat. Comb fringe gently with fingers only.
Troubleshooting Common Issues
Cups curl inward: Your hdc tension is tight or the edge is too short. Block wider, or add one more cup row before edging.
Bobbles lean: Close each bobble with ch 1 and keep the next sc snug.
Band ripples: Band foundation is too long or yarn is too soft. Reduce side-base chains or switch to firmer cotton.
Diamond pulls: Chain loops are too tight. Remake the panel with taller ch-5 loops or use a larger hook for cordwork.
Fringe looks uneven: Steam lightly, hang for 10 minutes, then trim in one final pass.
Quick Stitch Count Reference
Keep this handy as you work:
I hope you love making this Terracotta Boho Bralette crochet pattern as much as I loved designing it. The combination of structured cups and flowing fringe creates something really special. Whether you wear it to a festival, layered over a sundress, or as a beach cover-up, it is going to turn heads.
If you found this crochet tutorial helpful, I would love for you to save it to your Pinterest boards so you can find it later when you are ready to start. And please, if you make your own version, drop a comment below or tag me on Instagram. Seeing your finished projects absolutely makes my day!
Want a Quick & Easy Printable Version?
Get a clean, beautifully formatted PDF of this pattern — easy to follow step by step, ready to print or save on any device. No scrolling, no distractions, just the pattern.
Get the Printable PDF →