
I’ve been calling this one the Sunset Bag ever since I first sketched it out in my notebook last autumn. The design came from wanting to capture that golden hour feeling you get on warm September evenings. You know the one. When the sky turns all those burnt orange and amber shades right before dusk.
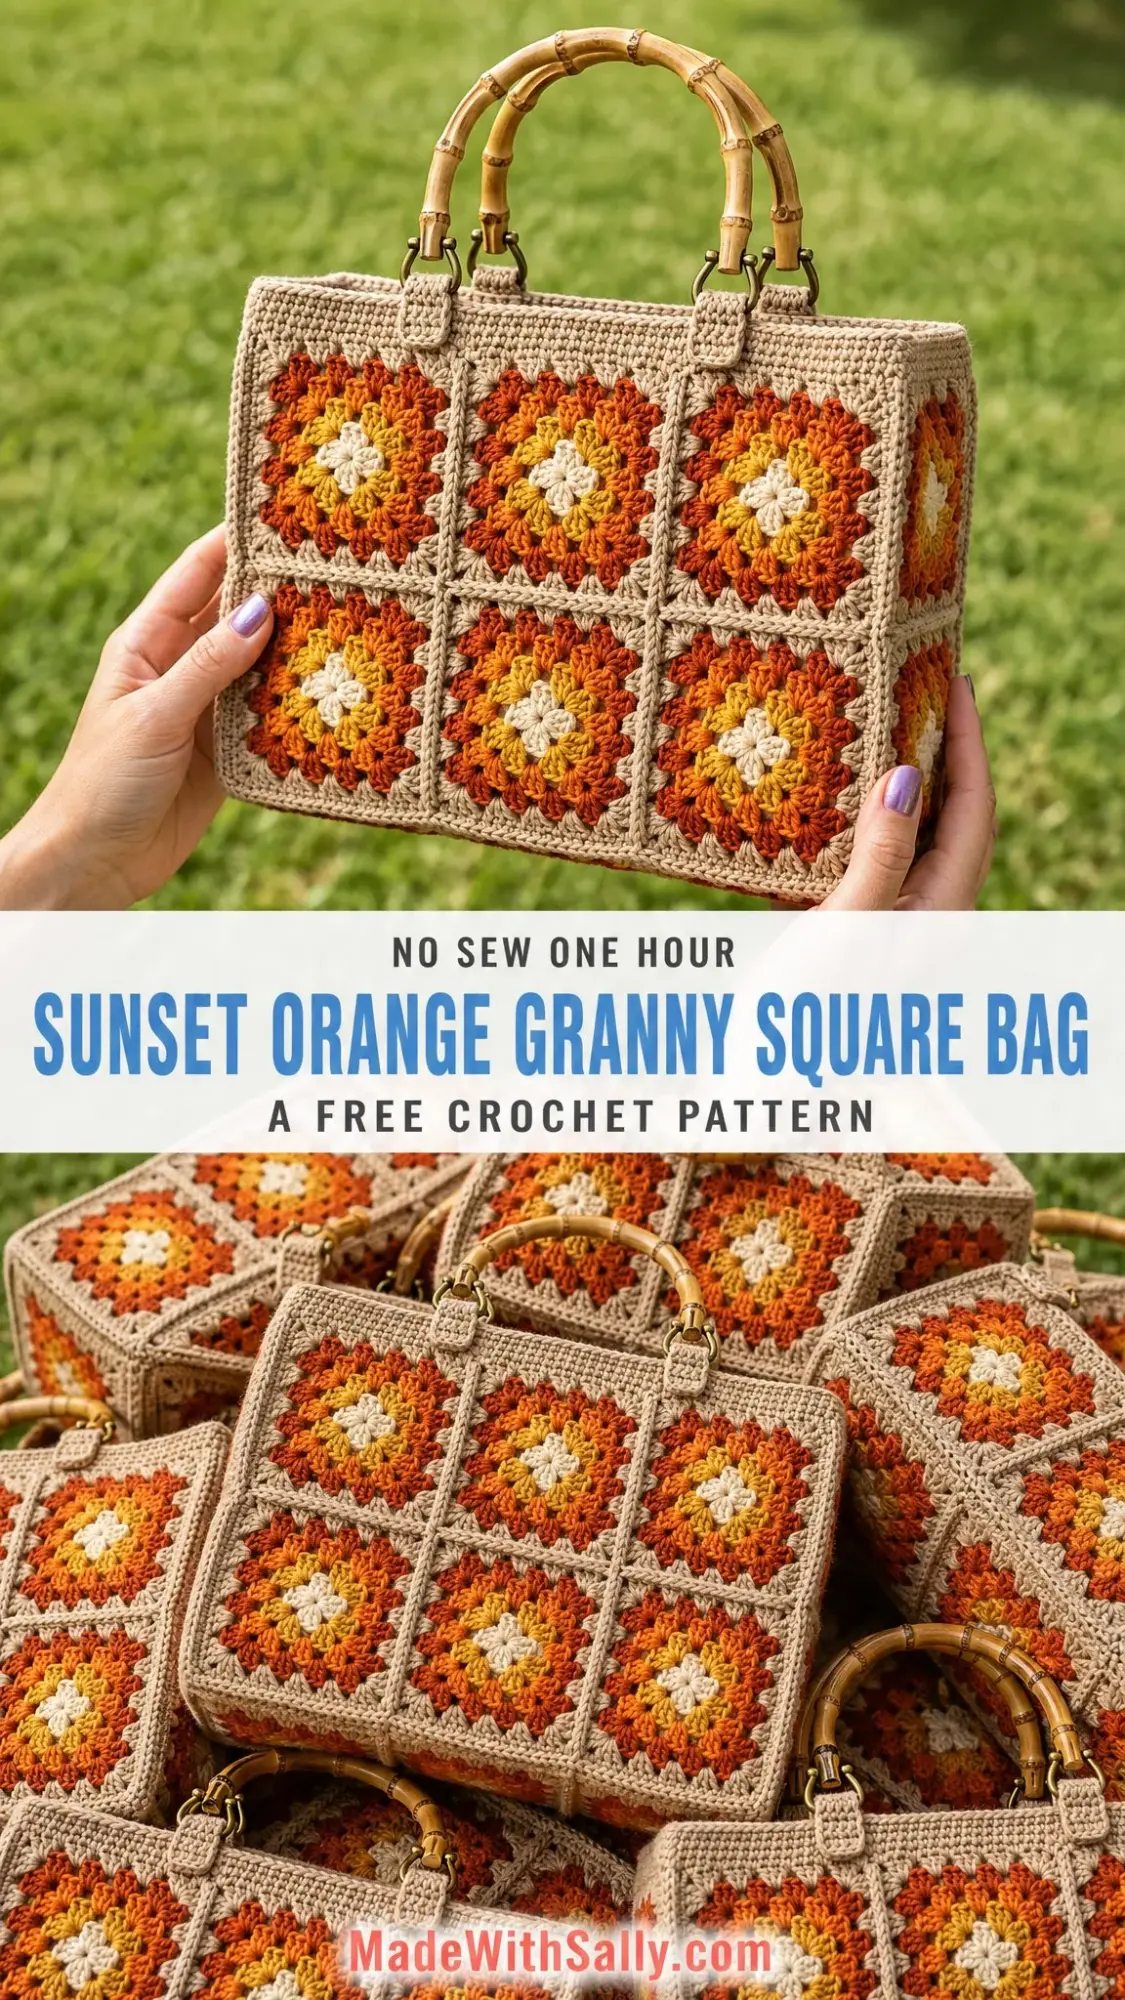
This pattern has been living in my project folder for months, waiting for the right moment to share. I originally made the first version for my sister who needed a sturdy tote for farmers market trips. She wanted something with vintage charm but practical enough to carry produce home without stretching out of shape.
What I love most about how it turned out is the way the concentric color rings in each granny square create that radiating sunburst effect. Sixteen squares come together to form a structured cotton tote finished with smooth bamboo handles. It looks like something from a boutique, but you can absolutely make this yourself.
Why This Granny Square Bag Works So Well
The classic granny square gets a fresh update here with a specific color placement that creates a gradient from the center outward. Each square starts with a cream center, then builds through golden yellow, pumpkin orange, rust, and finally a beige border that ties everything together.
Cotton yarn is the secret to the bag’s structure. Unlike wool or acrylic blends that stretch and slouch under weight, cotton holds its shape beautifully. Your finished bag will stand up on its own, keeping that crisp boxy silhouette even when you load it up.
The bamboo handles attached with gold hardware give the whole piece an elevated look. People will ask you where you bought it.
Skill Level and Time Estimate
This pattern is rated Easy Plus, meaning you should be comfortable with basic crochet stitches before starting. If you can work a granny square and join pieces together, you have all the skills you need.
Expect to spend around 10 to 14 hours from start to finish. That includes making all sixteen squares, blocking them, joining the panels, creating the base, and attaching the handles. Perfect for a weekend project or something to work on during evening TV time over a week or two.
Finished Size
Your completed bag will measure approximately 12 inches wide by 8.5 inches tall by 4 inches deep (30.5 cm x 21.5 cm x 10 cm), not including the handles. Each individual granny square blocks to 4 inches by 4 inches (10 cm x 10 cm).
This gives you a generously sized tote that fits a tablet, wallet, water bottle, and all your daily essentials with room to spare.
Materials You Will Need
Yarn: Worsted weight or aran weight cotton yarn (CYC 4) in five colors:
| Color | Role | Approximate Amount |
|---|---|---|
| A – Beige/Tan | Main color, borders, base, tabs | 250g (approximately 460 yards) |
| B – Cream | Square center, Round 1 | 40g |
| C – Golden Yellow | Round 2 | 45g |
| D – Pumpkin Orange | Round 3 | 50g |
| E – Rust/Terracotta | Round 4 | 55g |
Recommended yarns: Paintbox Yarns Cotton Aran works beautifully for clean solid colors. Lily Sugar’n Cream is budget friendly and creates very firm fabric. DROPS Paris has a lovely soft hand while still giving good stitch definition.
Hook: 4.0 mm (US G/6) crochet hook
Notions:
Gauge
One sunburst granny square should measure 4 inches by 4 inches (10 cm x 10 cm) after blocking, using a 4.0 mm hook with worsted or aran weight cotton.
For the base panel, 14 half double crochet stitches by 11 rows equals 4 inches.
Gauge matters here because it controls your finished bag size. Take a few minutes to check yours before diving into all sixteen squares. If your squares come out larger, try dropping down a hook size. If they come out smaller, go up a hook size.
Abbreviations and Special Stitches
This pattern uses US crochet terms. UK equivalents are noted in brackets.
Special Stitches:
Granny cluster means working 3 double crochet stitches together into one space.
Corner means working (3 dc, ch 2, 3 dc) all into one chain 2 space.
Pattern Notes Before You Begin
The chain 3 at the start of a double crochet round counts as the first double crochet unless stated otherwise.
Change colors cleanly by switching to the new color in the last yarn over of the final stitch of each round. This gives you crisp color transitions.
Weave in ends as you go. With sixteen squares, you will have a lot of tails. Dealing with them along the way saves you from facing a mountain of ends at the finish.
Block every single square to a true 4 inches before joining. I know it feels tedious, but uniform squares make seaming so much easier. Trust me on this one.
Stitch counts appear in parentheses at the end of each instruction, like this: (60 dc).
The Sunburst Granny Square Pattern
Make 16 squares total. Work in joined rounds from the center outward using this color sequence: B (cream) to C (gold) to D (pumpkin) to E (rust) to A (beige).
Round 1 (Cream):
Using Color B, make a magic ring. Ch 3 (counts as dc), work 2 dc in ring, ch 2. Work 3 dc in ring, ch 2. Repeat from * two more times. Join with sl st to top of beginning ch 3. Pull the magic ring closed. (12 dc, 4 ch-2 corners)
Round 2 (Gold):
Join Color C in any ch 2 corner space. Ch 3, work (2 dc, ch 2, 3 dc) in same space. Ch 1, work (3 dc, ch 2, 3 dc) in next corner. Repeat from * two more times. Ch 1, join. (24 dc, 4 corners)
Round 3 (Pumpkin):
Join Color D in any corner space. Ch 3, work (2 dc, ch 2, 3 dc) in same space. Ch 1, work 3 dc in next ch 1 space, ch 1, work (3 dc, ch 2, 3 dc) in corner. Repeat around. Ch 1, join. (36 dc, 4 corners)
Round 4 (Rust):
Join Color E in any corner space. Ch 3, work (2 dc, ch 2, 3 dc) in same space. [Ch 1, work 3 dc in next ch 1 space] twice, ch 1, work (3 dc, ch 2, 3 dc) in corner. Repeat around. Ch 1, join. (48 dc, 4 corners)
Round 5 (Beige):
Join Color A in any corner space. Ch 3, work (2 dc, ch 2, 3 dc) in same space. [Ch 1, work 3 dc in next ch 1 space] 3 times, ch 1, work (3 dc, ch 2, 3 dc) in corner. Repeat around. Ch 1, join and fasten off. (60 dc, 4 corners)
Your finished square should measure 4 inches. Block all sixteen squares to match before moving on to joining.
Base Panel Pattern
The base is a firm beige rectangle that gives your bag its structure. It measures approximately 12 inches by 4 inches (30.5 cm by 10 cm).
Foundation: With Color A, ch 43. (43 ch)
Row 1: Hdc in 2nd ch from hook and in each ch across. Turn. (42 hdc)
Rows 2 through 11: Ch 1, hdc in each st across. Turn. (42 hdc each row)
Edge Round: Do not fasten off. Ch 1, sc evenly around all four sides, working 3 sc in each corner. Join. (approximately 112 sc)
If your base panel depth does not match 4 inches, add or remove rows until it does. The base length should equal your front panel width so everything aligns during assembly.
How the 16 Squares Split Up
| Panel | Layout | Number of Squares |
|---|---|---|
| Front | 3 wide x 2 tall | 6 |
| Back | 3 wide x 2 tall | 6 |
| Side (make 2) | 1 wide x 2 tall each | 4 |
| Total | 16 |
Building and Joining the Panels
Join your squares using Color A with either a flat whip stitch through back loops only, or a single crochet join from the right side if you prefer a raised seam. Keep your tension consistent so panels stay square and even.
Step 1: Front and Back Panels
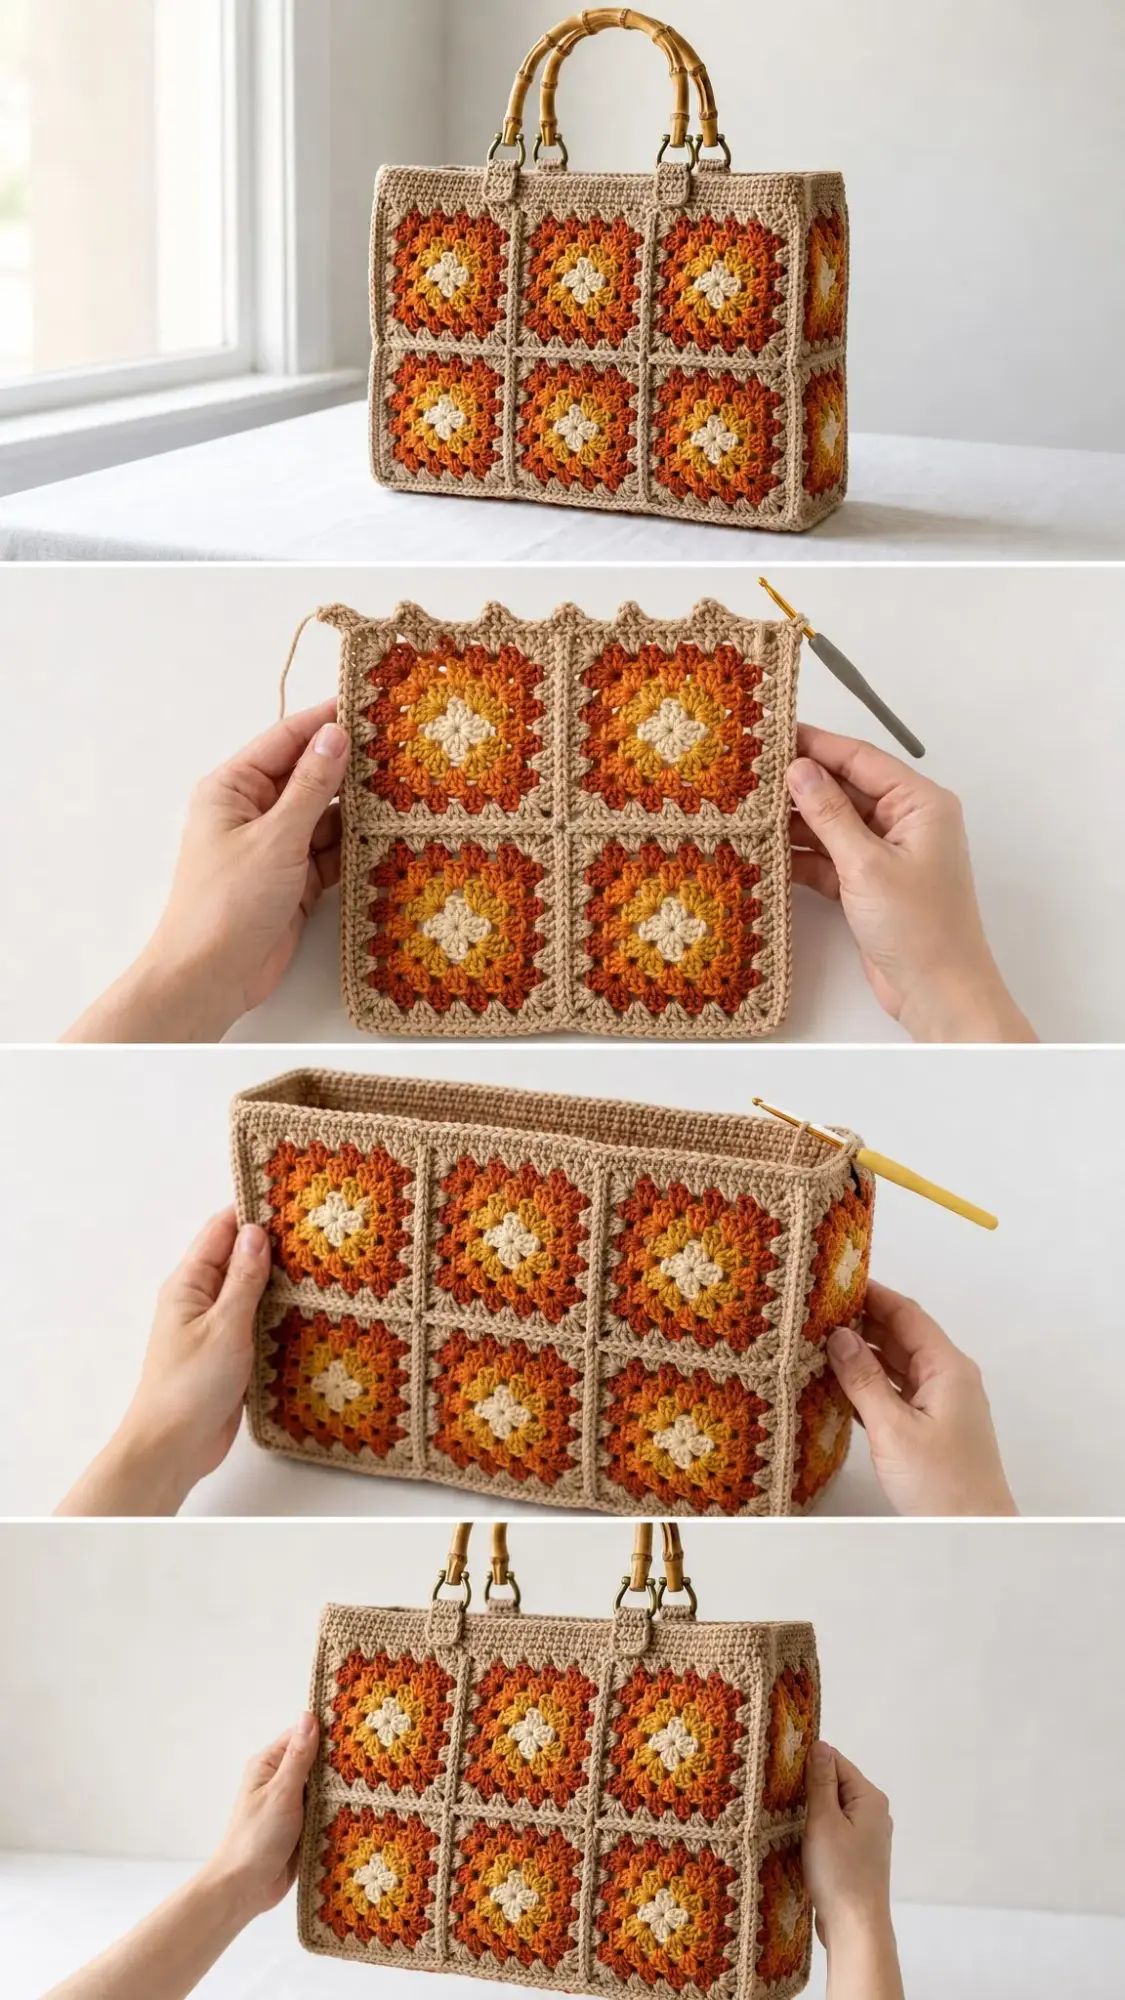
Lay out 6 squares in a 3 wide by 2 tall grid. Seam the three squares of each row together horizontally, then join the two rows together. Repeat this process for the back panel. You now have 2 panels of 6 squares each.
Step 2: Side Strips
Seam 2 squares top to bottom for each side strip. You will have 2 strips of 2 squares each.
Step 3: Join Sides to Front
Attach one side strip to the left edge of the front panel and the other strip to the right edge. Match up your square seams as you go.
Step 4: Close the Loop
Seam the back panel to the free edges of both side strips. You now have an open ended tube with the structure: front, side, back, side.
Attaching the Base and Top Border
Step 5: Attach the Base
With wrong sides facing together, pin the base panel to the bottom edge of your tube. The long sides of the base align with the front and back panels. The short ends align with the side panels. Single crochet or whip stitch all the way around using Color A. Your bag now stands up on its own.
Step 6: Top Border
Join Color A at a back corner of the bag opening. Single crochet evenly around the entire top edge. Join. (approximately 112 sc)
Border Rounds 2 and 3: Ch 1, sc in each st around. Join. Repeat once more for a total of 3 border rounds. This creates a firm, clean rim. (approximately 112 sc each round)
Troubleshooting tip: If your rim flares outward, drop down to a 3.5 mm hook for the border rounds. If it cups inward, add 4 to 6 single crochets evenly spaced on the first border round. A tidy rim makes the whole bag look professionally made.
Handle Tabs
Make 4 tabs in Color A.
Foundation: With A, ch 7. (7 ch)
Row 1: Sc in 2nd ch from hook and across. Turn. (6 sc)
Rows 2 through 9: Ch 1, sc in each st across. Turn. Fasten off after Row 9, leaving a long tail for sewing. (6 sc each row)
Mounting the Handles and Final Finishing
Step 7: Mount the Handles
Thread each tab through a bamboo handle ring (or through a D-ring that is fixed to the handle). Fold the tab in half and stitch the end down securely to the inside of the top edge. Attach two tabs per side, spacing them to match the width of your handles.
Step 8: Final Finishing
Weave in every remaining yarn end. Steam block or wet block the entire assembled bag to even out the squares and sharpen the corners.
For an extra polished finish, consider stitching in a fabric lining with an inner pocket. This is completely optional but gives the bag a boutique quality feel.
Care Instructions
Remove the bamboo handles first if they are not water safe. Hand wash the bag in cool water with mild detergent. Do not wring. Press flat between towels, reshape carefully, and dry away from direct heat. Store your bag stuffed lightly so the squares maintain their shape.
Size Customization Ideas
Bigger tote: Add a square column. Go 4 wide by 2 tall (8 squares per face) and lengthen the base to 16 inches (40 cm).
Taller bag: Work 3 rows of squares per face and add one square to each side strip.
Deeper bag: Widen the base panel and use 2 wide side strips.
Mini version: Stop each square at Round 4 for 3 inch (7.5 cm) motifs.
Always keep the base length equal to your front panel width so all your seams line up properly.
Make the Gradient Your Own
The warm sunset palette is classic, but you can swap the four accent shades for any gradient you love. Try dusty rose fading to plum for a romantic look, or sea glass blues and greens for a coastal vibe. Keep the beige (or any neutral) as your unifying border color and the structure stays exactly the same.
I hope you love making this sunset granny square bag as much as I loved designing it. The structured shape and warm retro colors make it one of those pieces that gets compliments everywhere you carry it.
If you found this crochet pattern helpful, I would love for you to save it to your Pinterest boards so you can find it easily when you are ready to start. And please drop a comment below if you make one. Seeing your finished bags absolutely makes my day, and I would love to know what colors you chose for your version. Happy hooking!
