
I pulled this design out of my project notebook a few months ago, and honestly, I had almost forgotten how much I loved it. The Daisy Garden Tote started as a sketch during a long car ride, inspired by a field of wildflowers we passed on the highway. I wanted something cheerful, something that felt like carrying a little garden wherever you went. After testing and tweaking, this pattern finally feels ready to share with you.
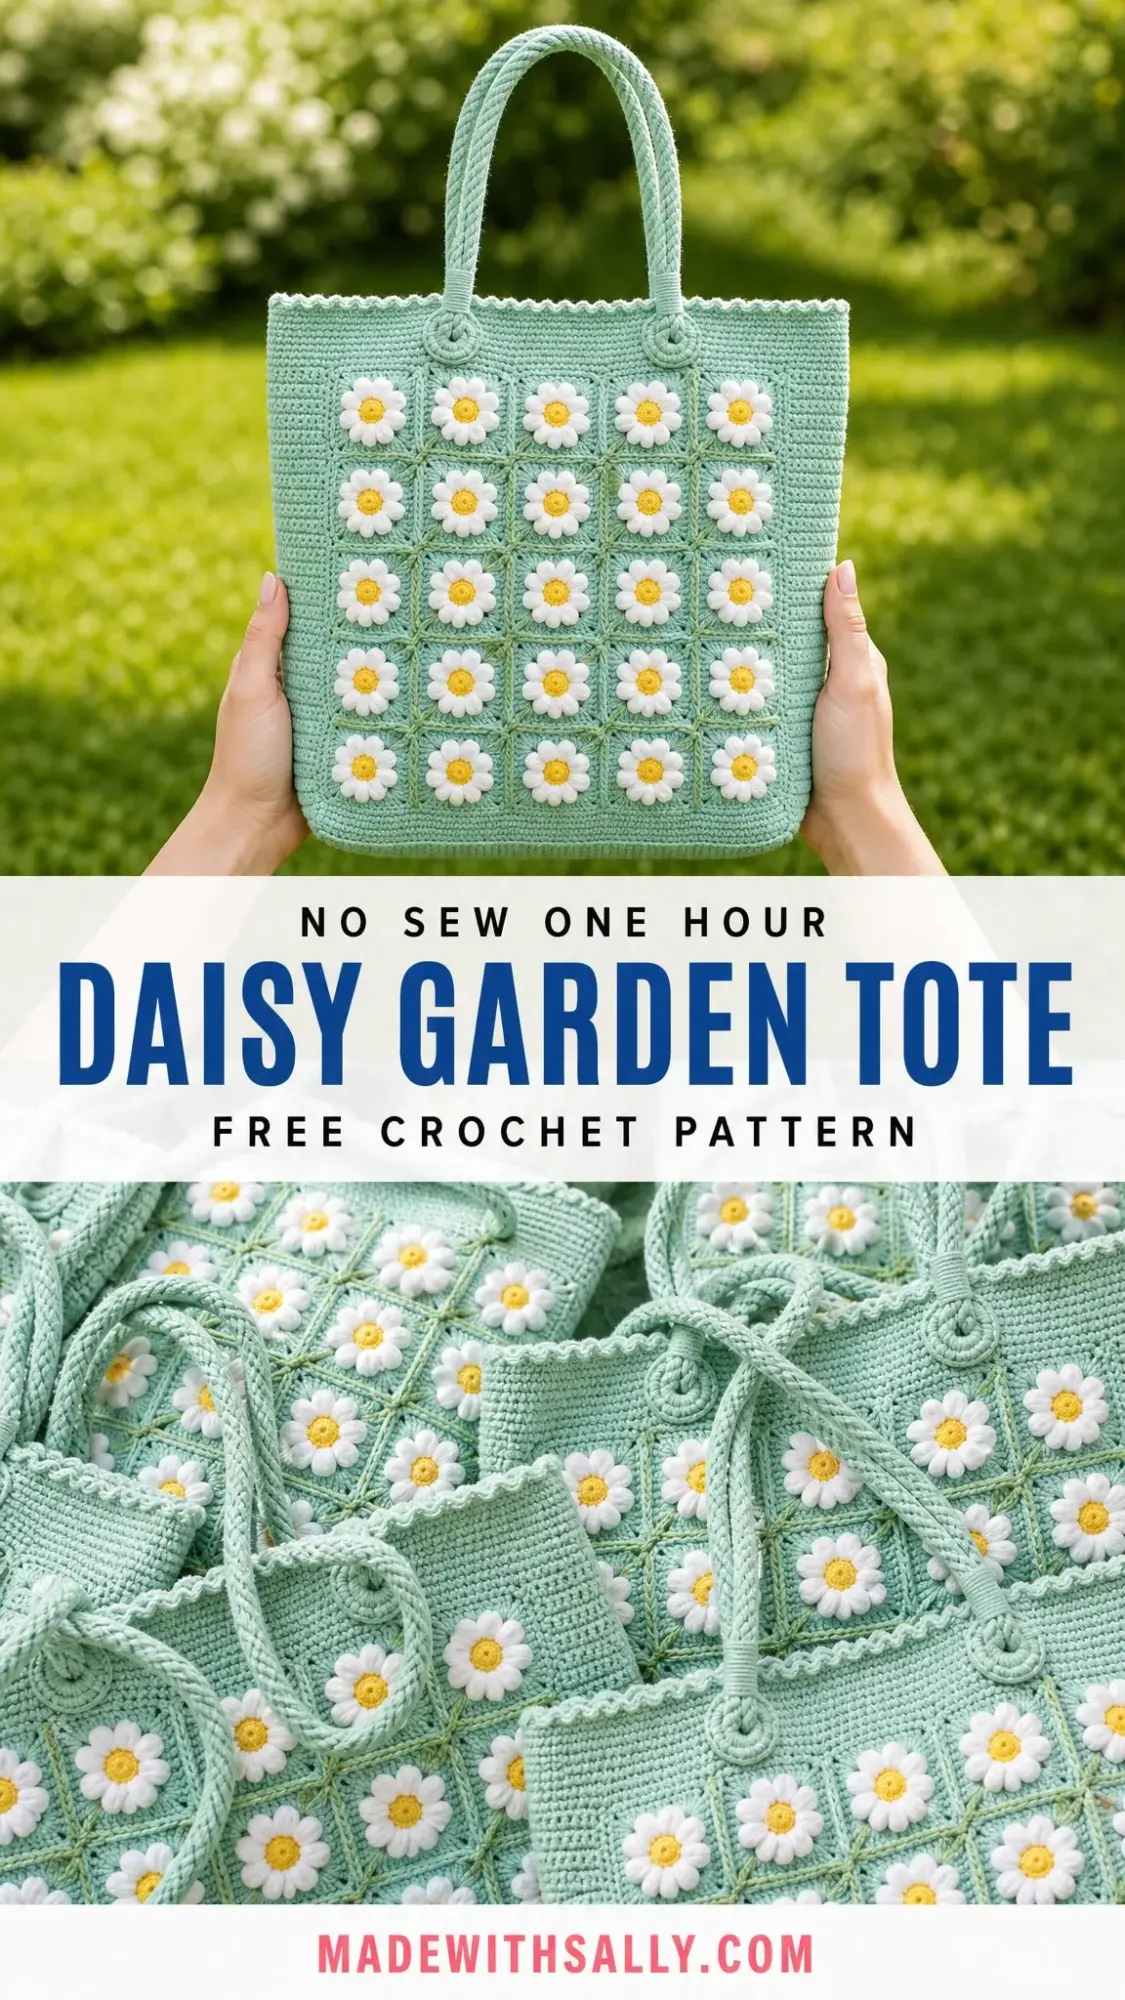
This tote combines twenty-five puffy three-dimensional daisy squares on the front with a clean, simple back panel. The result is a roomy market bag that works just as well for grocery runs as it does for beach days or hauling your current work-in-progress. The daisies really pop against the soft mint background, and every time I use mine, someone asks about it.
The best part? Each square is small and portable, so you can stitch a few while watching TV or waiting at appointments. Before you know it, you have a whole garden ready to assemble.
About This Crochet Pattern
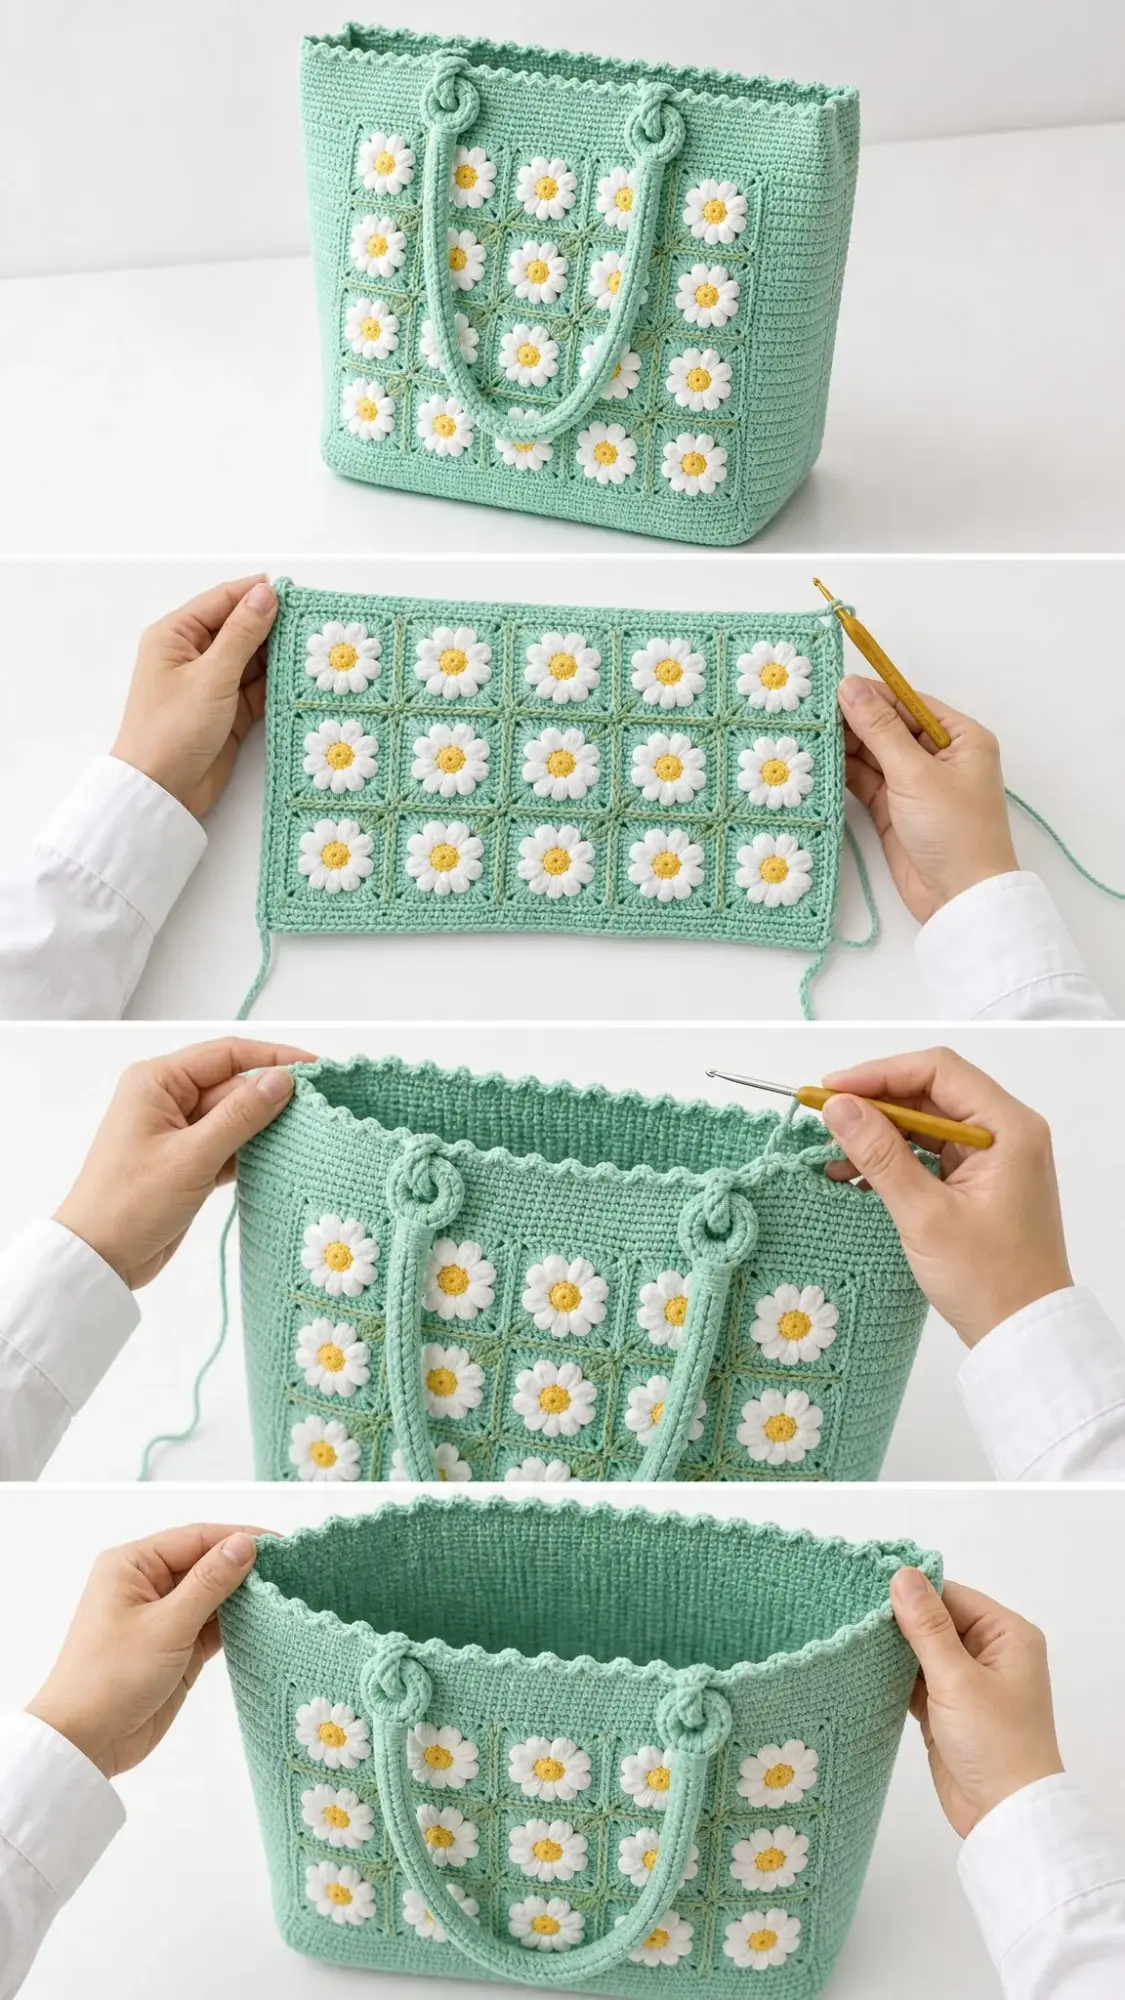
This Daisy Garden Tote crochet pattern is rated for confident beginners. If you can work basic stitches in the round and are comfortable joining granny squares, you can absolutely make this bag. The construction breaks down into manageable pieces: make the daisy squares, join them into a front panel, crochet the back and gusset, then assemble everything together.
Finished Dimensions: 12 inches wide by 13 inches tall by 3 inches deep (30 cm x 33 cm x 7.5 cm)
Time to Complete: 12 to 16 hours total
The pattern uses worsted weight cotton yarn, which gives you excellent stitch definition and creates handles that hold their shape nicely. Cotton also washes well, making this tote practical for everyday use.
Materials and Tools You Will Need
Before you start crocheting, gather these supplies:
Yarn (Medium Weight #4 Cotton):
Suggested Yarn Brands:
Tools:
Gauge Information
Getting your gauge right keeps your finished tote true to the pattern size. Take a few minutes to check before diving in.
Daisy Square Gauge: One finished daisy square measures about 2.4 inches / 6 cm across using a 4.0 mm hook.
Solid Fabric Gauge (for back and gusset): 16 stitches by 12 rows equals 4 inches / 10 cm in half double crochet (hdc).
If your squares come out larger, try going down a hook size. If they come out smaller, try going up a hook size.
Abbreviations and Terms
This pattern uses US crochet terminology. Here is every abbreviation you will encounter:
For UK crocheters: sc=dc, hdc=htr, dc=tr, tr=dtr. Hook size and gauge stay the same.
Pattern Notes Before You Begin
Read through these notes before starting. They will save you confusion later.
Special Stitches Explained
This pattern uses a few special techniques. Here is how to work each one:
Magic Ring
An adjustable loop that starts the yellow center of each daisy. Work your stitches into the ring, then pull the tail tight to close the hole completely. This gives you a neat center with no gap.
Daisy Petal
This creates one raised petal and is worked entirely into one stitch of the yellow center:
Ch 3, (tr, ch 1, tr) in same st, ch 3, sl st in same st.
The chains and treble crochets form a puffy petal that stands up from the background.
Picot
A tiny decorative bobble used on the top edge:
Ch 3, sl st into the first of those 3 chains.
Invisible Join
To finish a round seamlessly, cut your yarn leaving a tail. Thread the tail through your tapestry needle, then sew under the V of the first stitch in the round. This creates a smooth, invisible closure.
Tip for Fluffier Daisies: For extra puffy petals, use a hook half a size smaller for the white petal round only. The tighter petals stand up taller against the green square.
How to Crochet the Daisy Square (Make 25)
Each square is worked in the round in three color stages: a yellow center, raised white petals, then a sage green square frame. These work up quickly and are wonderfully portable.
Round 1: Yellow Center
With CY (golden yellow), make a magic ring. Ch 1.
Work 8 sc into the ring. Pull the ring tight to close the hole. Join with sl st to the first sc.
(8 sc)
Round 2: White Petals
Join CW (white) to any sc with a sl st.
In each sc around, work one petal as follows:
Ch 3, (tr, ch 1, tr) in same sc, ch 3, sl st in same sc, sl st in next sc.
Repeat this petal sequence in all 8 stitches around. Fasten off CW.
(8 petals)
Round 3: Sage Square Begins
Join CG (sage green) behind the petals in any petal tip (the ch-1 space at the top of a petal).
Corner: (2 dc, ch 2, 2 dc) in this petal tip. Ch 1.
Side: 2 dc in next petal tip. Ch 1.
Repeat the pattern [corner, ch 1, side, ch 1] around all 8 petals.
(24 dc, 4 corner spaces)
Round 4: Complete the Square
Join CG in any corner ch-2 space.
In each corner space: (2 dc, ch 2, 2 dc).
Along each side: ch 1, 2 dc in next ch-1 sp, ch 1, 2 dc in next ch-1 sp, ch 1.
Continue around, working corners and sides. Join with sl st to the first dc. Fasten off, leaving a long tail for joining later.
(32 dc, 4 corners)
Make 25 squares total.
Before joining, lay your squares out in a 5 by 5 grid to make sure the colors and petals sit evenly. This becomes your front panel.
Joining the Front Panel
Join the 25 squares into a 5 by 5 panel using the whip stitch method through back loops only. This creates a soft, flat seam that lets the daisies stay raised and visible.
Step 1: Row by Row
Place two squares with right sides together. Using CG and a tapestry needle, whip stitch through the back loops across one edge, matching stitch for stitch. You will have about 14 stitches per side.
Step 2: Build the Strips
Join 5 squares side by side into a horizontal row. Make 5 rows total.
Step 3: Join the Rows
Lay the 5 rows in order from top to bottom. Whip stitch them together the same way, lining up every corner so the grid stays square.
Step 4: Weave in Ends
Secure and weave in all join tails on the wrong side as you go. This saves you from a mountain of ends at the finish.
Alternative Method: If you prefer no seams, you can join squares as you go on Round 4 by slip stitching corner ch-2 spaces to the neighboring square.
Crocheting the Back Panel
The back panel is a simple rectangle of half double crochet that matches the size of your joined daisy front.
With MC (mint green), ch 49.
Row 1: Hdc in 2nd ch from hook and each ch across. Turn. (48 hdc)
Rows 2 through 36: Ch 2, hdc in each st across. Turn. (48 hdc)
Fasten off. Your back panel should measure approximately 12 inches by 12 inches.
Crocheting the Gusset
The gusset is one long strip that wraps up one side of the bag, across the bottom, and down the other side. This gives your tote its depth and structure.
With MC, ch 13.
Row 1: Hdc in 2nd ch from hook and each ch across. Turn. (12 hdc)
Rows 2 through 108: Ch 2, hdc in each st across. Turn. (12 hdc)
Fasten off. The strip should measure approximately 3 inches wide by 36 inches long.
Assembling the Bag Body
Now comes the satisfying part where everything comes together.
1. With MC and your tapestry needle, pin the gusset around the front panel. Start at one top corner, go down one side, across the base, and up the other side.
2. Whip stitch the gusset to the front panel, easing gently around the two base corners.
3. Attach the back panel to the open edge of the gusset the same way, leaving the top of the bag open.
Take your time at the corners. A little patience here makes for clean, professional-looking seams.
Adding the Top Edging
The top edging gives your bag a finished look with a pretty picot scallop border.
Round 1
Join MC at a top side seam. Work an even round of sc around the entire top opening, keeping your stitch count a multiple of 4. Join with sl st.
(approximately 120 sc)
Round 2 (Picot Scallop)
Ch 1. Sc in next 3 sc, picot (ch 3, sl st in first ch). Repeat from * around. Join and fasten off.
(30 picots)
Making the Handles (Make 2)
The handles are worked as firm tubes. For extra body that prevents stretching, you can crochet around a length of cotton cord.
With MC, ch 6. Sl st to first ch to form a ring.
Round 1: Sc in each ch around. (6 sc)
Rounds 2 through 110: Sc in each st around, working in a continuous spiral. Do not join rounds. (6 sc)
The tube should measure approximately 22 inches / 56 cm. Fasten off, leaving a long tail for attaching.
Attaching the Handles
Position one handle’s ends on the front of the bag, about 3 inches in from each side seam, just below the picot edge.
Push each end through to the inside of the bag. Stitch firmly through several stitches to secure. Reinforce with a few extra passes for durability.
Repeat with the second handle on the back panel so both handles line up when the bag hangs.
Finishing Your Tote
Almost done! These final steps give your Daisy Garden Tote a polished, professional finish.
1. Weave in every remaining end on the wrong side and trim closely.
2. Turn the bag inside out and gently steam block the seams flat. Avoid pressing directly on the raised daisies.
3. Reshape the base into a flat rectangle and let dry fully before using.
4. Optional: Cut a piece of plastic canvas to fit the base for a firmer bottom that holds its shape.
Care Instructions
Your cotton tote is easy to care for with a little gentleness.
Customizing Your Size
One of the best things about this crochet pattern is how easy it is to resize. Since it is built from modular squares and plain panels, you have lots of flexibility.
Smaller Tote or Handbag: Join a 4 by 4 grid (16 squares). Shorten the back panel to 38 hdc wide and the gusset to about 28 inches.
Larger Beach Bag: Use a 6 by 6 grid (36 squares). Widen the back panel to 58 hdc and lengthen the gusset to approximately 44 inches.
Taller Bag: Add extra plain hdc rows in MC between the daisy panel and the top edging.
Chunkier Look: Hold your cotton yarn doubled and move up to a 5.5 mm hook. Re-check your square size and adjust panel counts to match.
Longer Handles: Add more rounds to each handle tube. Every 5 rounds adds roughly 1 inch of length.
Tips for Success
Here are a few things I learned while designing this tote that might help you:
Block your squares before joining. Even a light steam helps them lie flat and makes matching edges much easier.
Count your stitches at the end of every row. It takes two seconds and catches mistakes before they become problems.
Use stitch markers liberally. Mark your corners on the squares, mark your handle attachment points, mark anything that helps you stay oriented.
Do not stress about perfection. Handmade items have character. Small variations in your daisy squares will disappear once they are all joined together.
Why Cotton Yarn Works Best
I specifically designed this Daisy Garden Tote pattern for cotton yarn, and here is why. Cotton has almost no stretch, which means your handles will not sag under the weight of groceries or library books. It also shows stitch definition beautifully, making those daisy petals really pop.
Cotton washes well too. When your tote inevitably picks up some dirt from everyday adventures, you can hand wash it without worrying about the fibers felting or losing their shape.
If you cannot find cotton, a cotton-acrylic blend will also work. Just be aware that pure acrylic tends to stretch more over time, so your handles might need reinforcement with cord inside.
Wrapping Up
The Daisy Garden Tote crochet pattern is one of my favorite designs because it hits that sweet spot between impressive-looking and actually achievable. Yes, you are making twenty-five individual squares, but each one takes only minutes. Before you know it, you have a whole garden ready to become a bag.
Whether you make this for yourself or as a gift, I hope it brings you as much joy as it has brought me. There is something wonderful about carrying a little burst of flowers with you, no matter the season.
Thank you so much for choosing this pattern! I would absolutely love to see your finished tote. If you make one, please save this pattern to your Pinterest boards so you can find it again later, and drop a comment below to share how it turned out. Happy crocheting!
