
I don’t know about you, but I have a thing for bags that look like they belong at a farmers market or a weekend road trip. Something about a handmade tote just feels right, especially when it’s covered in sunburst granny squares and earthy colors that go with everything.
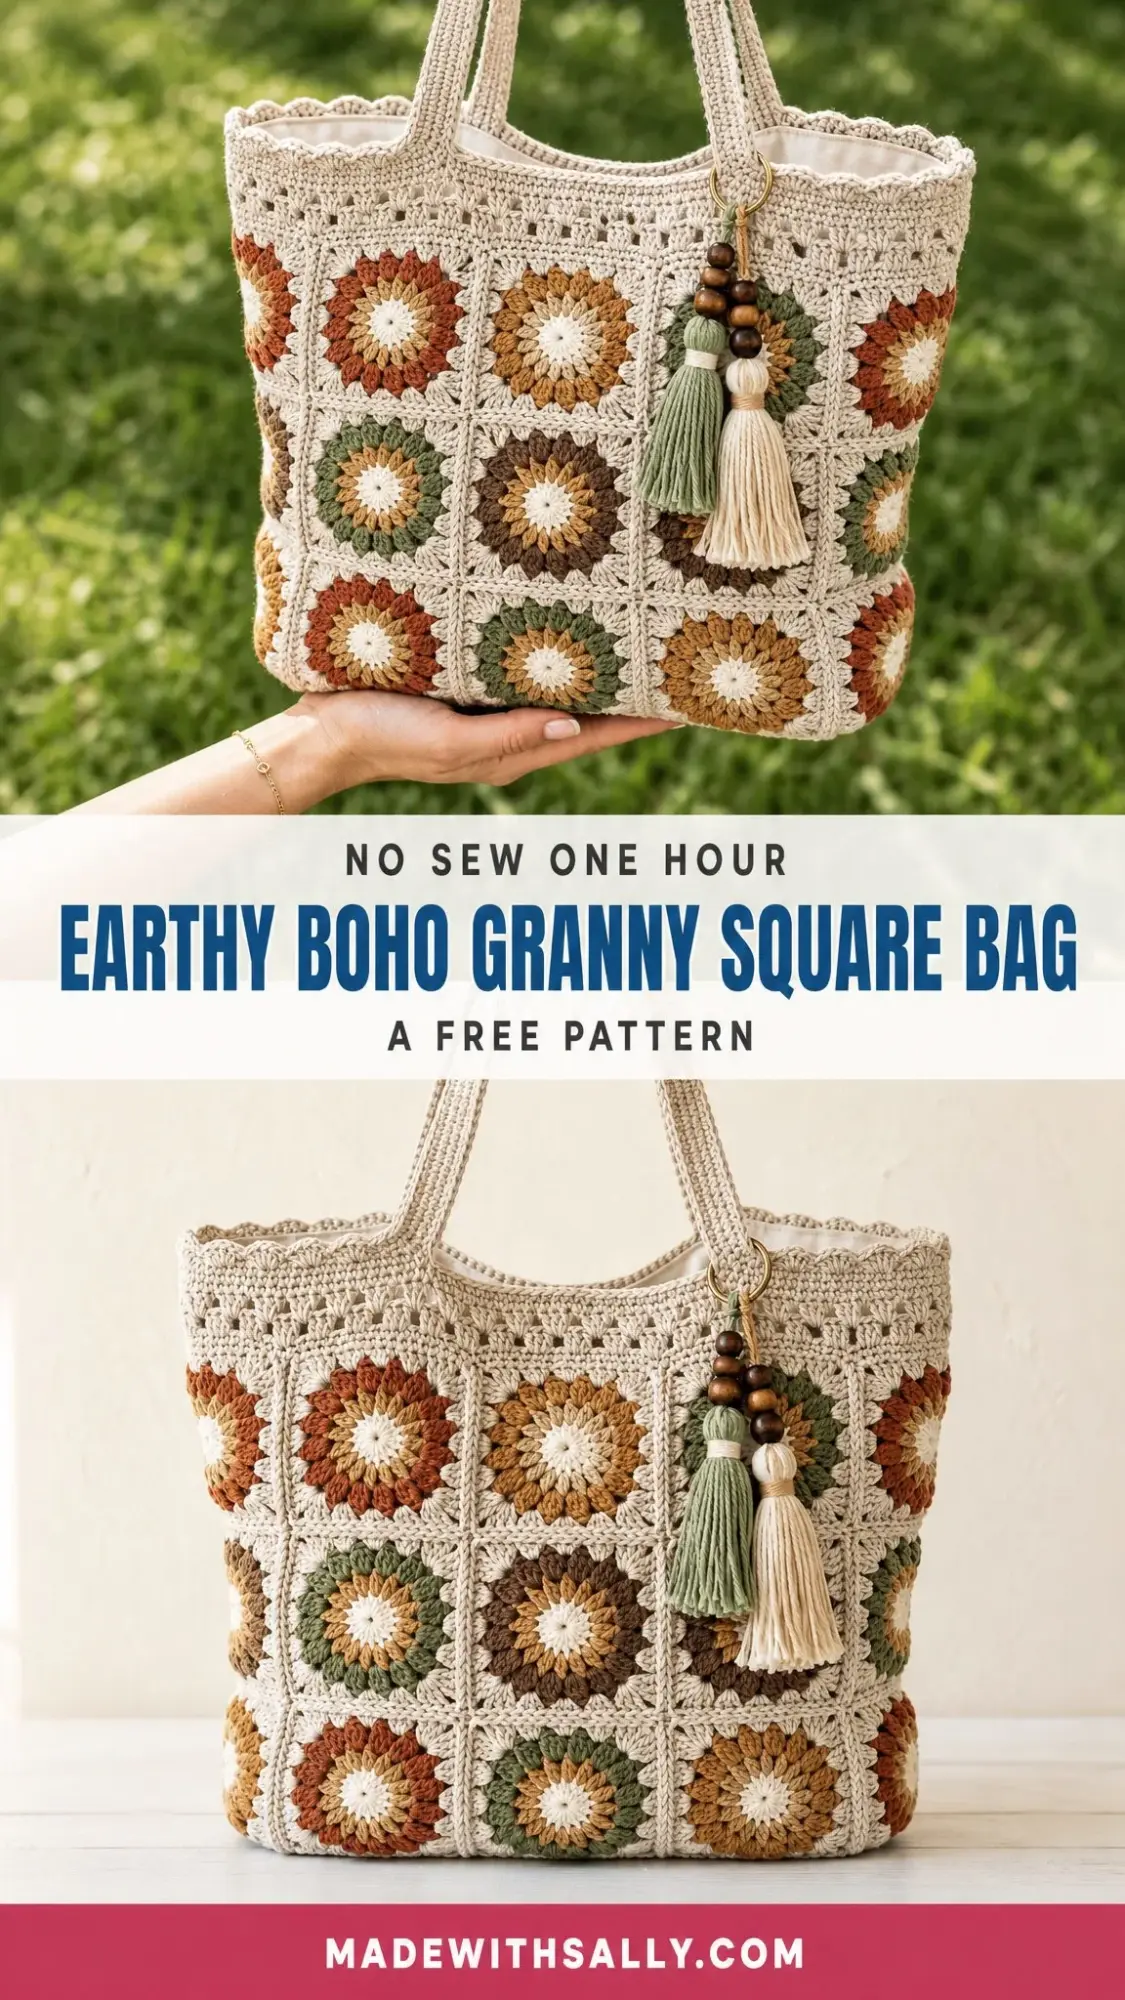
This Earthy Boho Granny Square Bag is exactly that kind of project. It’s roomy enough for books, produce, or your current work in progress. The construction is satisfying without being fussy. And those puff stitch petals? They add just the right amount of texture without overwhelming the whole design.
If you’ve been looking for a bag pattern that lets you play with color, use up some stash yarn, and end up with something genuinely useful, this is the one. Let me walk you through everything you need to know.
What Makes This Bag Special
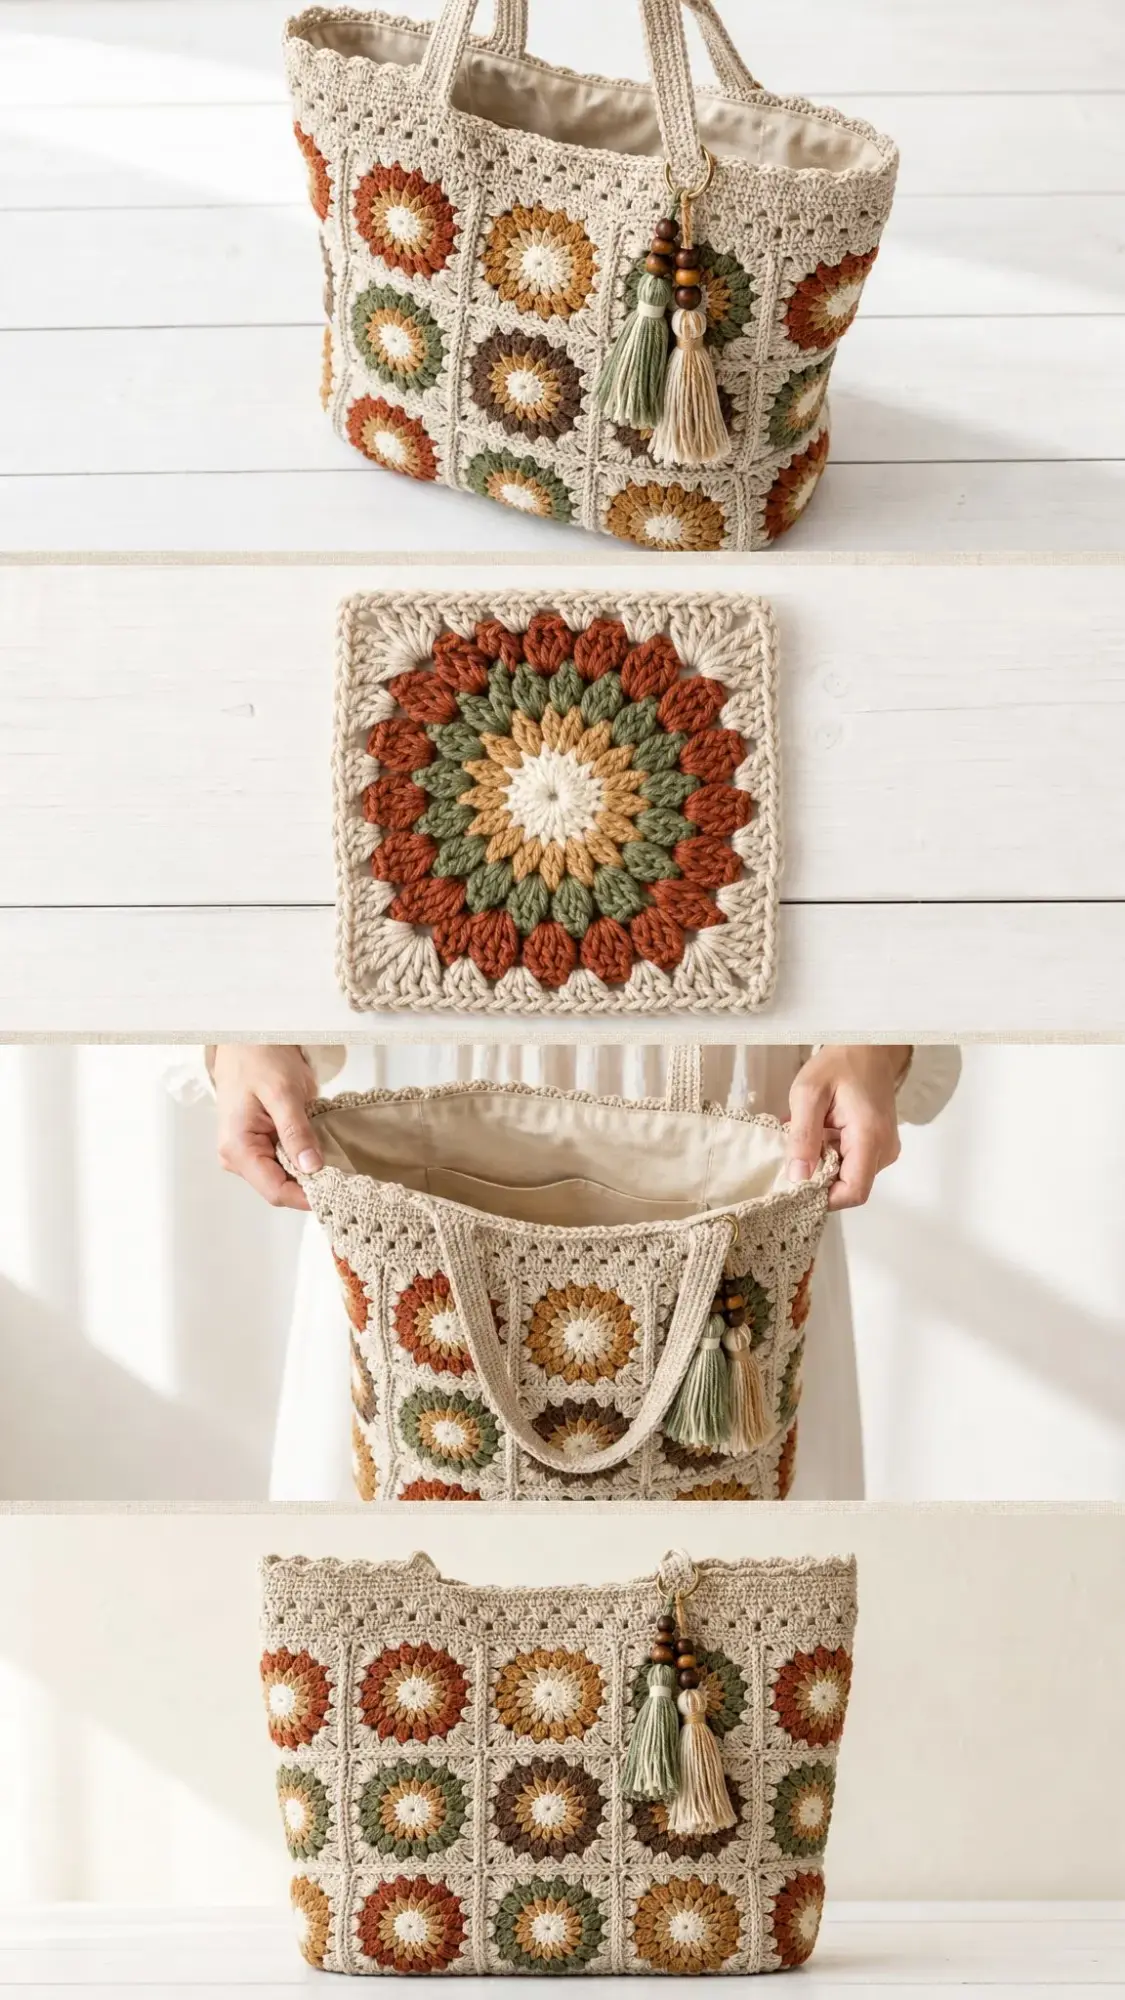
This tote is built one square at a time. Each sunburst square starts with a cream center, gets a ring of plump petal puffs in your chosen accent color, then finishes with a soft cream frame. You make 24 of these little blocks, join them into a tube, seam the bottom into a boxed base, and finish with a shell-edged band, two soft straps, and an optional beaded tassel charm.
The result is a bag that measures 12 × 4 × 14½ inches (30 × 10 × 37 cm) with an 11-inch strap drop. It’s structured enough to hold its shape but soft enough to feel handmade and cozy. The scrappy color mix means no two bags will ever look exactly the same, which is part of the charm.
Skill Level and Time Commitment
This pattern is rated intermediate. You should be comfortable with basic crochet stitches, working in the round, and joining granny squares. The puff stitch might be new to some, but I’ll explain it fully below.
Expect to spend around 20 to 25 hours on this project from start to finish. Most of that time goes into making the 24 squares. Once those are done, assembly moves pretty quickly.
Materials You’ll Need
Yarn
You’ll need worsted weight (#4) cotton yarn for this project. Cotton blocks beautifully and holds the bag’s shape well over time.
Main Color (MC): Natural or cream, approximately 750 yards / 685 meters. This color is used for every center, both frame rounds on each square, the top band, and the straps. It does most of the work, so buy a little extra just in case.
Petal Colors (5 colors): Approximately 90 yards / 82 meters each in Terracotta, Mustard Gold, Sage Green, Warm Brown, and Ochre. One skein or leftovers of each will work perfectly.
Great yarn options include Lily Sugar’n Cream, Paintbox Yarns Cotton Aran, or DROPS Paris. A cotton blend will work too, but expect a slightly softer, more relaxed drape.
Hook
4.0 mm (US G/6) crochet hook. If you crochet tightly, you might want to try a 4.5 mm (US 7) for the band section.
Notions and Extras
Gauge
One finished sunburst square should measure 4 inches / 10 cm square using a 4.0 mm hook and worsted cotton. Rounds 1 and 2 should sit at about 2 inches / 5 cm across.
If your square runs large, drop a hook size. If it’s small, go up. Getting the square right is all the gauge you need for this project.
Abbreviations and Special Stitches
Before we dive into the pattern, let’s cover the abbreviations and special techniques you’ll encounter.
Standard Abbreviations (US Terms)
A Note for UK Crocheters
This pattern uses US terms. To convert: US sc equals UK dc, US hdc equals UK htr, and US dc equals UK tr. Work the puff stitch to the height of a US dc (UK tr).
Puff Stitch (puff)
This creates the plump petals in each square.
[Yarn over, insert hook in the indicated stitch or space, yarn over and pull up a loop to the height of a double crochet] 4 times in the same place. You’ll have 9 loops on your hook. Yarn over and draw through all 9 loops, then chain 1 to close.
Beginning Puff (beg puff)
Chain 2, then work the puff stitch bracket above 3 times in the same stitch. You’ll have 7 loops on your hook. Yarn over through all loops, chain 1 to close.
Shell
5 double crochet stitches worked in the same stitch. This creates the scalloped edge along the top of the bag.
Pattern Notes
Keep these tips in mind as you work:
The Sunburst Square Pattern
Make 24 squares total. Each square is four quick rounds: a cream center, a ring of petal puffs, then two cream rounds that square it off to a tidy 4-inch block with a 12-stitch edge on each side.
Round 1 (Natural)
With MC, make a magic ring. Chain 3 (counts as dc), work 11 dc in the ring. Pull the ring closed. Join with a slip stitch to the top of the beginning chain 3.
Stitch count: 12 dc
Round 2 (Petal Color)
Join your chosen petal color in any dc. Work a beginning puff in the same stitch, chain 1. Puff in the next dc, chain 1. Repeat from * around. Join to the top of the beginning puff.
Stitch count: 12 puffs, 12 ch-1 spaces
Round 3 (Natural)
Join MC with a slip stitch in any ch-1 space (this will become a corner). Chain 3, (dc, ch 2, 2 dc) in the same space. 2 dc in each of the next 2 ch-1 spaces, (2 dc, ch 2, 2 dc) in the next ch-1 space. Repeat from * twice more. 2 dc in each of the last 2 ch-1 spaces. Join.
Stitch count: 32 dc, 4 corners
Round 4 (Natural)
Slip stitch into the first corner space. Chain 3, (dc, ch 2, 2 dc) in the same corner. Dc in each stitch to the next corner, (2 dc, ch 2, 2 dc) in the corner space. Repeat from * around. Dc in each stitch to the beginning. Join. Fasten off.
Stitch count: 48 dc, 4 corners
Color and Layout Tips
There’s no fixed color map for this bag, and that’s part of its charm. Spread your five petal shades so no two neighboring squares have the same color. Aim for roughly 5 squares per color (since you have 24 total, one color will land on just 4 squares).
Here’s my best tip: Lay all 24 squares out on the floor and shuffle them around until the balance feels right. Don’t join a single seam until you’re happy with the arrangement. Snap a photo of your layout so you have a reference map while assembling.
Joining the Squares Into a Tube
The body of the bag is a ring of 8 squares around (3 front, 1 side, 3 back, 1 side), stacked 3 rows tall.
Assembly method:
1. Hold two squares with right sides together and whipstitch through the outer loops, matching corner to corner and stitch for stitch. You’ll have about 12 stitches plus the corner per edge.
2. Join 8 squares side by side into a ring, then seam the last square back to the first.
3. Make 3 rings this way.
4. Stack the rings and seam them together, ring on ring, into a tube that’s open at the top and bottom.
Total: 24 squares
Alternative method: If you prefer no visible seams, you can use a join-as-you-go technique with single crochet through both loops as you work the final round of each square. Same layout, same counts.
Shaping the Boxed Base
With the tube right side out, flatten it so the three front squares face you and a single side square sits at each end. Now you’ll close the bottom.
1. Turn the bag inside out.
2. Fold flat so the bottom edge of the front meets the bottom edge of the back. Each side square will fold inward to form the gusset.
3. Whipstitch straight across the bottom through both layers, easing the side squares into neat box corners. This gives the bag its 4-inch / 10 cm depth.
4. Turn right side out and gently push the corners square.
Optional Firmer Bottom
For a sturdier floor (great if you plan to carry books or market finds), work this extra step with MC:
Single crochet evenly across the seamed base and work 2 rounds even, about 88 sc per round.
The Top Band and Shell Edge
A solid band steadies the opening while an airy openwork round and scallop edge give that vintage boho feel. Every round divides evenly from a 96-stitch base.
Round 1 (Natural)
With RS facing, join MC at a side seam. Chain 1, work 96 hdc evenly around the top opening (about 12 stitches across each of the 8 square edges). Join.
Stitch count: 96 hdc
Rounds 2 through 4 (Natural)
Chain 1, hdc in each stitch around. Join.
Stitch count: 96 hdc
Round 5 (Openwork)
Chain 4 (counts as dc, ch 1), skip 1 stitch. Dc in the next stitch, chain 1, skip 1 stitch. Repeat from * around. Join to the 3rd chain of the beginning chain 4.
Stitch count: 48 dc, 48 ch-1 spaces
Round 6 (Natural)
Chain 1, hdc in each dc and in each ch-1 space around. Join.
Stitch count: 96 hdc
Round 7 (Shell Edge)
Chain 1, sc in the first stitch. Skip 1 stitch, 5 dc in the next stitch, skip 1 stitch, sc in the next stitch. Repeat from * around. Join. Fasten off.
Stitch count: 24 shells
Straps (Make 2)
The straps are worked lengthwise. The back loop only rows create that soft ribbed texture. Finished straps measure about 22 inches / 56 cm long by 1¼ inches / 3 cm wide.
Foundation Row (Natural)
With MC and 4.0 mm hook, chain 90.
Row 1 (Natural)
Sc in the 2nd chain from the hook and in each chain across. Turn.
Stitch count: 89 sc
Rows 2 through 7 (Natural)
Chain 1, sc in the back loop only of each stitch across. Turn. After Row 7, fasten off, leaving a long sewing tail.
Stitch count: 89 sc
Attaching the Straps
Pin each strap to the inside of the band with the ends about 7 inches / 18 cm apart, mirrored on the front and back. Sew through the band twice for a secure hold. The strap drop is about 11 inches / 28 cm.
Tassel Charm (Optional)
This decorative touch adds that perfect boho finishing detail. Feel free to skip it if you prefer a cleaner look.
1. Wrap MC and petal color scraps around your 5-inch cardboard about 35 times.
2. Tie through the top loop, then cut the bottom fold.
3. Wrap the neck 6 to 8 times and secure.
4. Trim the tassel to about 4 inches / 10 cm.
5. Make 2 to 3 tassels in different colors.
6. Thread wooden beads on doubled yarn above each tassel.
7. Gather everything onto the O-ring and hang from a front shell.
Finishing and Care
Final Steps
Care Instructions
Customization Ideas
Want to make this bag your own size? Here are some easy modifications:
Keep any band stitch count a multiple of 4 so the openwork and shells still divide evenly.
Why This Pattern Works So Well
What I love most about this bag is how forgiving it is. The scrappy color placement means you don’t have to stress about perfection. Each square is small enough to carry around as a portable project. And the finished bag is genuinely useful, not just pretty.
The puff stitch petals give you that satisfying textured look without being complicated once you get the hang of them. And because every square has the same cream center and frame, your color choices will always tie together beautifully.
Whether you’re making this for yourself, as a gift, or to sell at a craft fair, it’s the kind of project that feels special from start to finish.
You Did It!
Thank you so much for choosing this pattern for your next project. I really hope you enjoy making your Earthy Boho Granny Square Bag as much as I enjoyed designing it. There’s something deeply satisfying about watching all those little sunbursts come together into something you’ll actually use every day.
If you make this bag, I would absolutely love to see it! Tag me on Instagram or share a photo in our Facebook group. Seeing your color combinations and finished projects genuinely makes my day.
And if you want to find this pattern again later, go ahead and save it to your Pinterest boards. That way it’ll be waiting for you whenever you’re ready to cast on. Drop a comment below if you have any questions or just want to share your progress. Happy hooking!
