
When I sat down to design this bag, I had a clear vision in mind. I wanted something with serious texture that could hold its shape, look polished enough for a day out, and still feel like a satisfying project from start to finish. The bobble stitch base, the smooth single crochet body, and those braided handles all came together exactly the way I hoped.
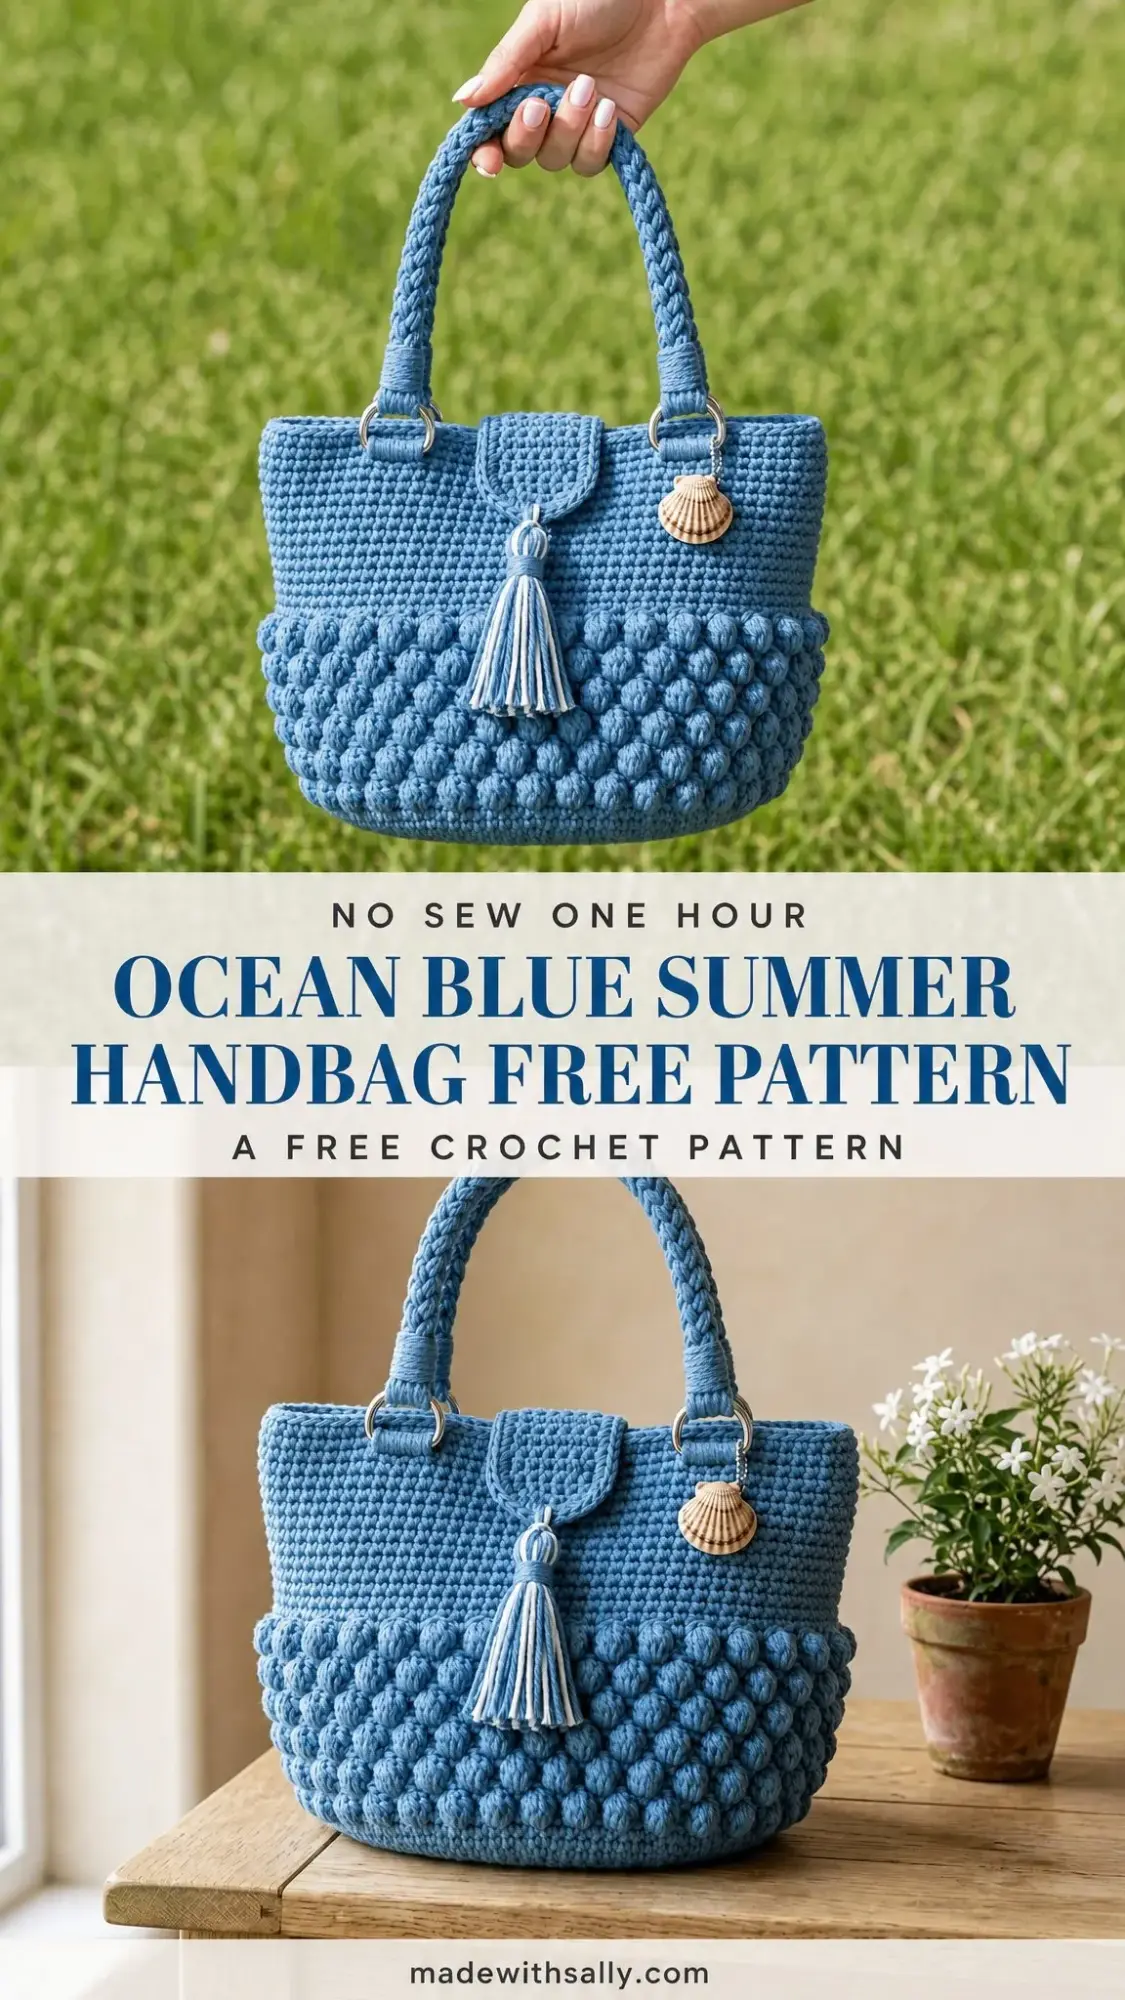
I am SO pleased with how it turned out. The seamless construction means no fussy side seams to sew up at the end. You just work from the base straight up the sides, attach the handles and trims, and you are done. It is the kind of project that feels rewarding the whole way through.
If you have been looking for a summer bag pattern that balances texture with a clean modern silhouette, this is the one. Let me walk you through everything you need to make your own Ocean Blue Summer Handbag.
About This Crochet Handbag Pattern
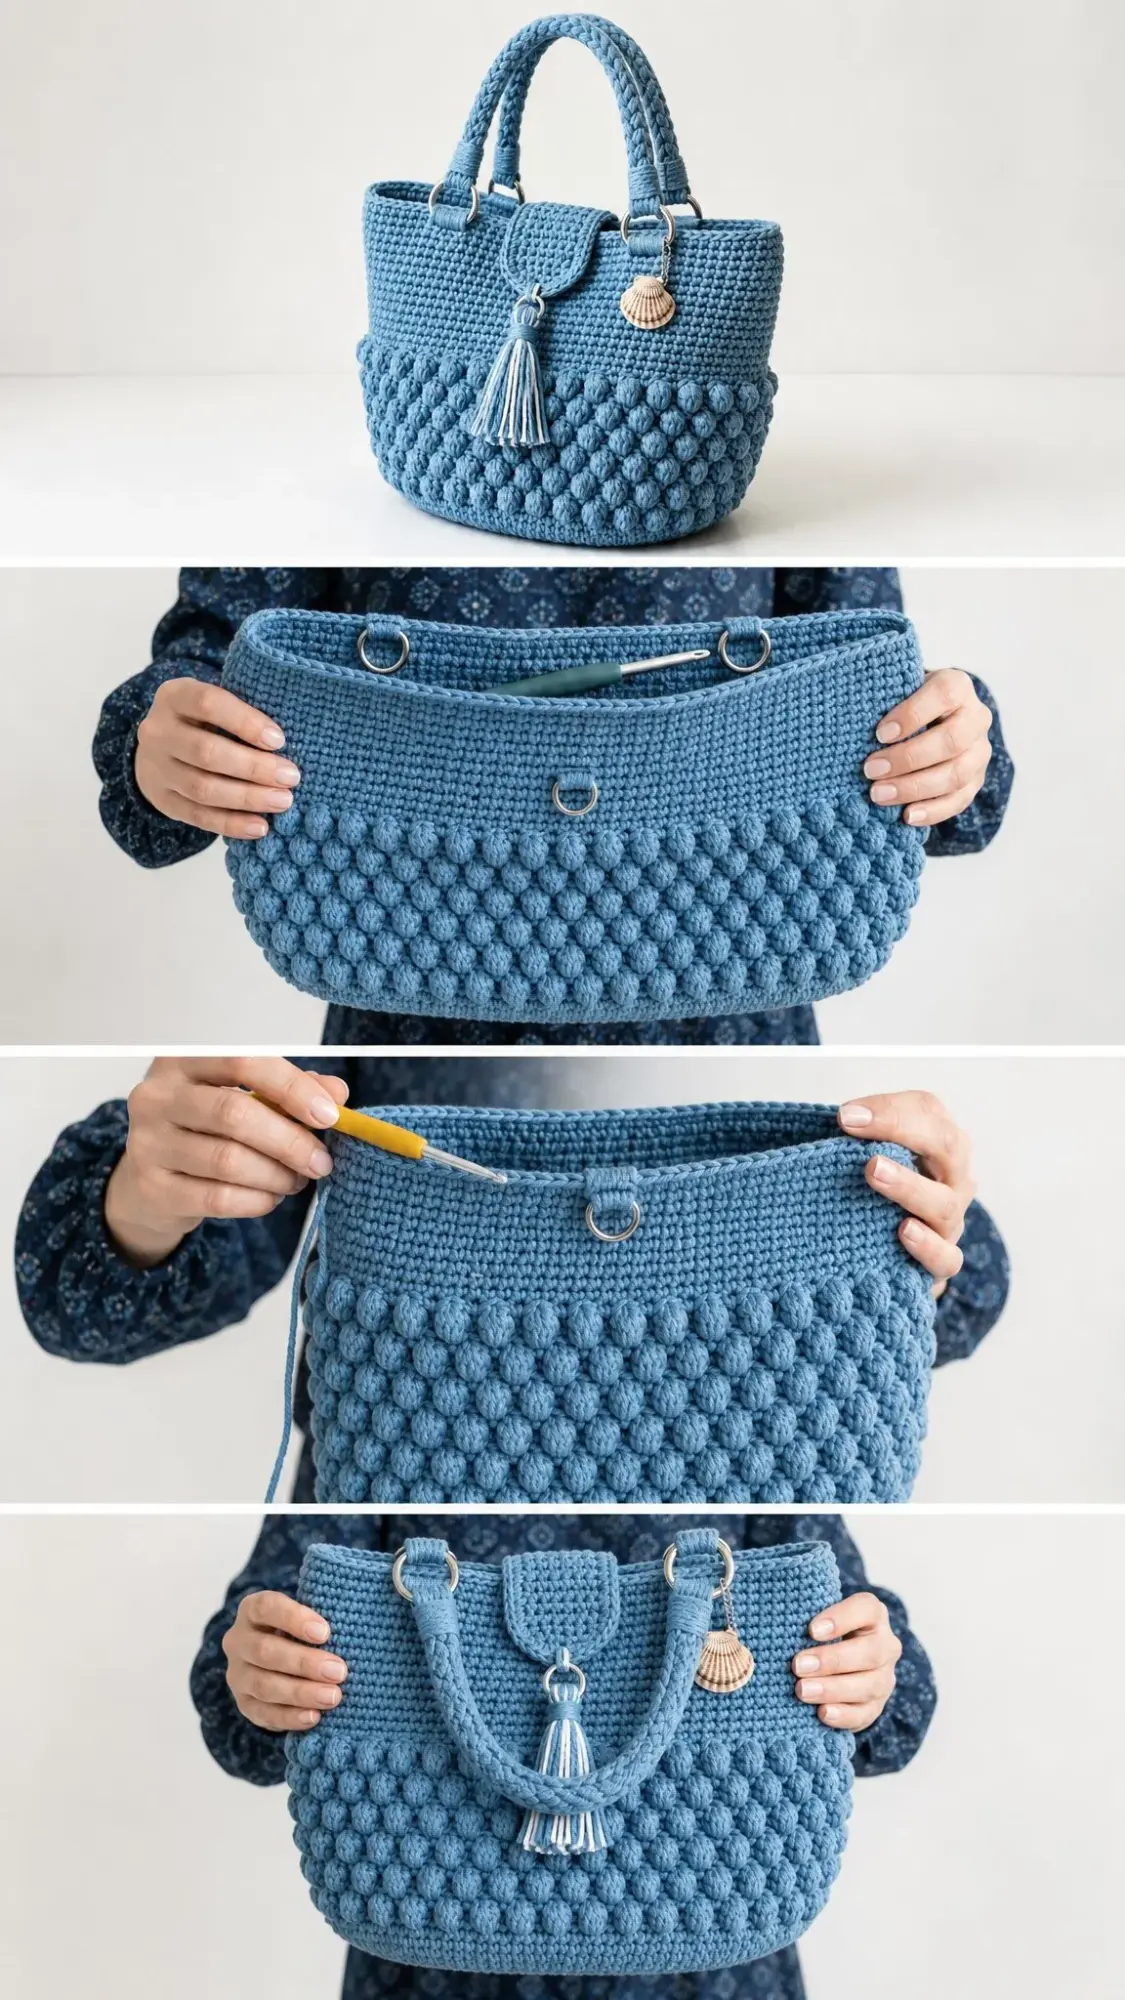
This breezy tote is all about texture and contrast. A field of plump bobble stitches anchors the lower portion of the bag, while a smooth single crochet (sc) body keeps the upper half crisp and modern. The braided handles, swinging cream tassel, and scallop shell charm finish it with a coastal wink that is perfect for warm weather.
The bag is worked seamlessly from a flat oval base straight up the sides using continuous spiral rounds. This means no joining at the end of each round unless the pattern tells you to. You will use a stitch marker to track your progress, moving it up as you go. Because every round faces the same direction, all the bobbles automatically land on the outside where you want them.
The finished bag measures approximately 11 inches wide by 9 inches tall by 3.5 inches deep at the base, not including the handles. It is roomy enough for everyday essentials while still looking structured and intentional.
Skill Level and Time Estimate
This pattern is rated confident beginner to easy intermediate. If you are comfortable with single crochet, double crochet, and working in the round, you can absolutely make this bag. The bobble stitch might be new to you, but I will walk you through it step by step below.
Expect to spend around 10 to 14 hours on this project, depending on your pace and how often you stop to admire those bobbles popping out.
Materials You Will Need
Gather these supplies before you start:
Yarn:
A smooth, firm worsted or aran weight cotton gives the best bobble definition and helps the bag hold its shape. You will need roughly 650 to 750 yards (595 to 685 meters) in the main blue color, plus a small amount of cream yarn for the tassel.
Suggested yarns:
Hooks:
Notions:
Gauge
16 stitches by 16 rounds equals 4 inches by 4 inches (10 by 10 cm) in single crochet with the 5.0 mm hook.
A firm, even tension keeps the bag sturdy. If your fabric feels floppy, drop down a hook size. Taking time to check your gauge will save you frustration later.
Abbreviations
This pattern uses US crochet terms. UK equivalents are noted where they differ.
Special Stitches
Bobble Stitch (BO)
The bobble stitch creates those plump, textured bumps on the lower half of the bag. Here is how to work it:
In the same stitch, work 5 incomplete double crochets. That means you yarn over, insert your hook, pull up a loop, yarn over and draw through 2 loops. Stop there. You now have 2 loops on your hook. Repeat this 4 more times in the same stitch. You will have 6 loops on your hook total.
Yarn over and draw through all 6 loops at once. Then chain 1 to lock the bobble in place.
The bobble naturally pops to the front of your work. Give each one a gentle push forward as you close it to make sure it sits on the right side.
In UK terms, this is a 5-treble bobble.
Reverse Single Crochet (Crab Stitch)
Reverse single crochet creates a corded, beaded edge at the top of the bag. Work it just like a regular single crochet, but move backward. For right-handers, that means working into the stitch to your right instead of your left. It feels awkward at first, but the finished edge is worth it.
Pattern Notes Before You Begin
Read these tips before starting:
Step by Step Crochet Pattern Instructions
Part 1: The Oval Base
The base is worked flat, increasing 12 stitches per round with 6 increases at each curved end. Mark your first stitch.
Foundation: Chain 21 in the main blue.
Round 1: Beginning in the 2nd chain from hook, sc in each chain across to the last chain (19 sc). Work 5 sc in the last chain. Rotate to work along the opposite side of the foundation chain. Sc in each chain across (19 sc). Work 5 sc in the last chain. Slip stitch to the first sc. (48 sc)
Round 2: Working in a spiral now, sc around and increase 12 stitches evenly, placing 6 increases across each curved end. (60 sc)
Round 3: Sc around, increase 12 evenly. Stagger your increases so they do not stack directly on top of each other. (72 sc)
Round 4: Sc around, increase 12 evenly. (84 sc)
Round 5: Sc around, increase 12 evenly. (96 sc)
Your base should now sit flat as a smooth oval, roughly 9 inches by 3.5 inches (23 by 9 cm). If it cups upward, add a few more increases. If it ruffles, you have too many.
Part 2: The Bobble Band
Now you will build the walls of the bag. The bobble band is a 4-round block repeated 3 times. Bobbles sit on every other stitch and shift by one stitch on each bobble round for that pebbled look.
Round 6: Working in BLO (back loop only) to set a crisp base edge, sc in each stitch around. (96 sc)
Bobble Block (work this 4-round sequence 3 times total for Rounds 7 through 18):
Block Round a: Sc in next stitch, BO in next stitch repeat around. (48 sc and 48 bobbles = 96 sts)
Block Round b: Sc in each stitch around. (96 sc)
Block Round c: BO in next stitch, sc in next stitch repeat around. This offsets the bobbles from the previous bobble round. (48 bobbles and 48 sc = 96 sts)
Block Round d: Sc in each stitch around. (96 sc)
Rounds 7 through 18: Work the block above 3 times total.
Round 19: Sc in each stitch around to settle the band. (96 sc)
Part 3: Smooth Body and Top Edge
A calm stretch of single crochet gives the bag its clean upper half and a sturdy rim.
Rounds 20 through 39: Sc in each stitch around. Work 20 rounds even. (96 sc each round)
Round 40: Sc in each stitch around. (96 sc)
Round 41: Sc in each stitch around, then slip stitch to the next stitch to even out the spiral. (96 sc)
Round 42: Work reverse sc (crab stitch) in each stitch around for a corded rim. Fasten off and weave in the end. (96 rev sc)
The bag body now stands about 9 inches (23 cm) tall. Steam block lightly with the bag stuffed to shape that smooth upper body before adding hardware.
Part 4: Braided Handles
Each handle is made from three slim cords braided together for a rope-like twist. Make 6 cords total (3 per handle) using the 4.0 mm hook.
Each cord: Chain 76. Sc in the 2nd chain from hook and in each chain across. Fasten off, leaving a 10 inch (25 cm) tail at each end. (75 sc)
Tip: Want a longer drop? Add 8 chains per cord for roughly 1.5 inches (4 cm) extra finished length after braiding.
Assembly:
1. Line up 3 cords and knot them together at one end with the tails.
2. Braid the three cords firmly and evenly to the opposite end. Knot to secure.
3. Thread one knotted end through an O-ring, fold back about 1 inch, and wrap and stitch tightly with a tail to bind it. Repeat on the other end with a second O-ring.
4. Make the second handle the same way using the remaining 3 cords and 2 O-rings.
Part 5: Tab, Tassel, and Shell Charm
Front Tab:
Foundation: Chain 9 in the main blue.
Row 1: Sc in the 2nd chain from hook and in each chain across. Turn. (8 sc)
Rows 2 through 9: Chain 1, sc in each stitch across. Turn. (8 sc each row)
Row 10: Chain 1, sc2tog, sc across to the last 2 stitches, sc2tog to round the tip. Fasten off. (6 sc)
Cream Tassel:
1. Wrap cream yarn around a 4 inch (10 cm) piece of cardboard about 30 times.
2. Tie a strand through the top loops and slide off the cardboard. Wrap and knot a binding strand about 0.5 inch below the top to form the neck.
3. Cut the bottom loops and trim level.
Shell Charm:
Attach the scallop shell to a split ring, then clip the ring onto one front O-ring so it rests beside the handle base.
Part 6: Assembly and Finishing
1. Decide which side is front and which is back. On the front, mark two handle points about 3.5 inches (9 cm) apart, centered. Mirror them on the back.
2. Stitch the base of each O-ring firmly to the inside top edge at the four marked points so the rings peek just above the rim.
3. Hang the handles by their O-rings, one handle on the front and one on the back.
4. Sew the straight top of the front tab to the inside rim, centered between the two front rings, so it flips down over the body.
5. Sew or tie the cream tassel to the rounded tip of the tab.
6. Clip the shell charm to a front O-ring.
7. Weave in all remaining ends. Stuff the bag and steam block to set the final shape.
Care Instructions
Hand wash gently in cool water with mild soap. Do not wring. Reshape while damp, stuff with a towel, and dry flat away from direct heat. Cotton may relax slightly with use. A quick steam restores its shape. Spot clean between washes when you can.
Size Customization Tips
You can easily adjust this pattern to fit your needs:
Wider bag: Add stitches to the base in multiples of 2 to keep the bobble repeat even. Each extra 8 stitches adds roughly 2 inches (5 cm) of width.
Taller bag: Work extra smooth rounds before the top edge. Every 4 rounds adds about 1 inch (2.5 cm).
More bobbles: Repeat the 4-round bobble block a 4th time for a deeper textured band.
Firmer shape: Hold a strand of thinner cotton along with the main yarn, or drop to a 4.5 mm hook, and add a base insert.
Longer handles: Add chains per cord before braiding as noted above.
Keep your total stitch counts even whenever you resize, and the bobble rounds will always divide cleanly.
Why This Pattern Works So Well
The combination of textures makes this bag visually interesting without being complicated to make. The bobble section gives you that satisfying tactile element, while the smooth body keeps the overall look clean and wearable. The braided handles add strength and style, and the O-ring hardware gives it a professional finish.
Because the bag is worked seamlessly in the round, you avoid the dreaded seaming step at the end. This makes it a great project for crafters who love the process of building something piece by piece but do not want to spend ages stitching panels together.
The cotton yarn choice is intentional too. It holds the structure beautifully, shows off the bobble definition, and is easy to care for. Perfect for a bag that is going to see regular use.
Final Thoughts on the Ocean Blue Summer Handbag Crochet Pattern
This crochet handbag pattern is one of my favorites because it hits that sweet spot between interesting and achievable. The bobble stitch adds texture without being fussy, the seamless construction keeps things flowing, and the finished bag genuinely looks like something you would find in a boutique.
Whether you are making it for yourself or as a gift, this is a project that will make you proud. The coastal touches like the shell charm and cream tassel are completely optional, so you can customize the look to match your style.
Thank you so much for choosing this pattern. I hope you enjoy every stitch of it.
If you make your own Ocean Blue Summer Handbag, I would absolutely love to see it. Tag me on Instagram or share a photo on Facebook. Seeing your finished projects is one of my favorite parts of designing patterns.
Do not forget to save this pattern to your Pinterest boards so you can find it easily when you are ready to start. And if you have any questions or want to share how yours turned out, drop a comment below. Happy crocheting!
