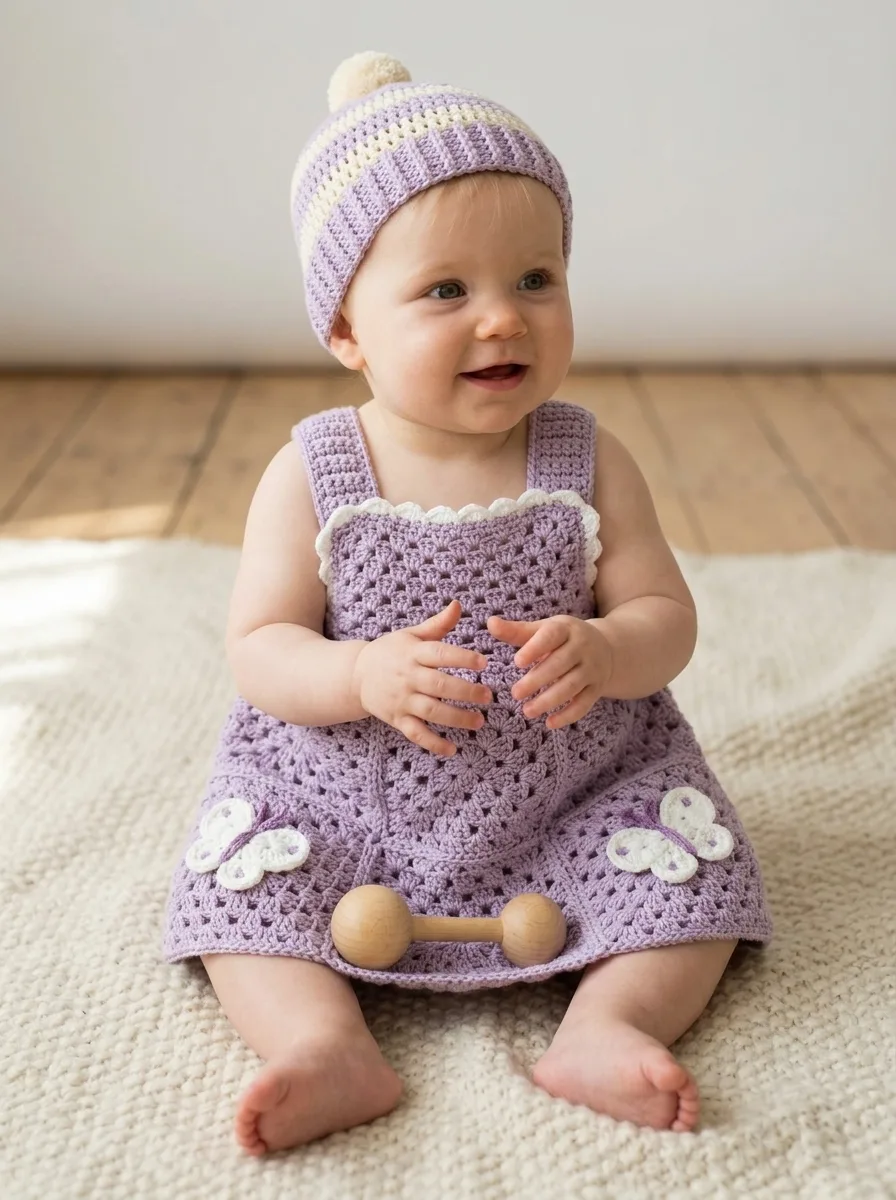
I have had this design sitting in my notebook for months, and I finally brought it to life last weekend. I call it the Lavender Dreams dress because honestly, that soft purple shade kept appearing in my actual dreams while I was planning it out. This little granny square pinafore started as a sketch during a rainy afternoon, and now it exists as a real wearable piece that I cannot stop photographing. The butterfly appliqués were a last minute addition that made everything feel complete.
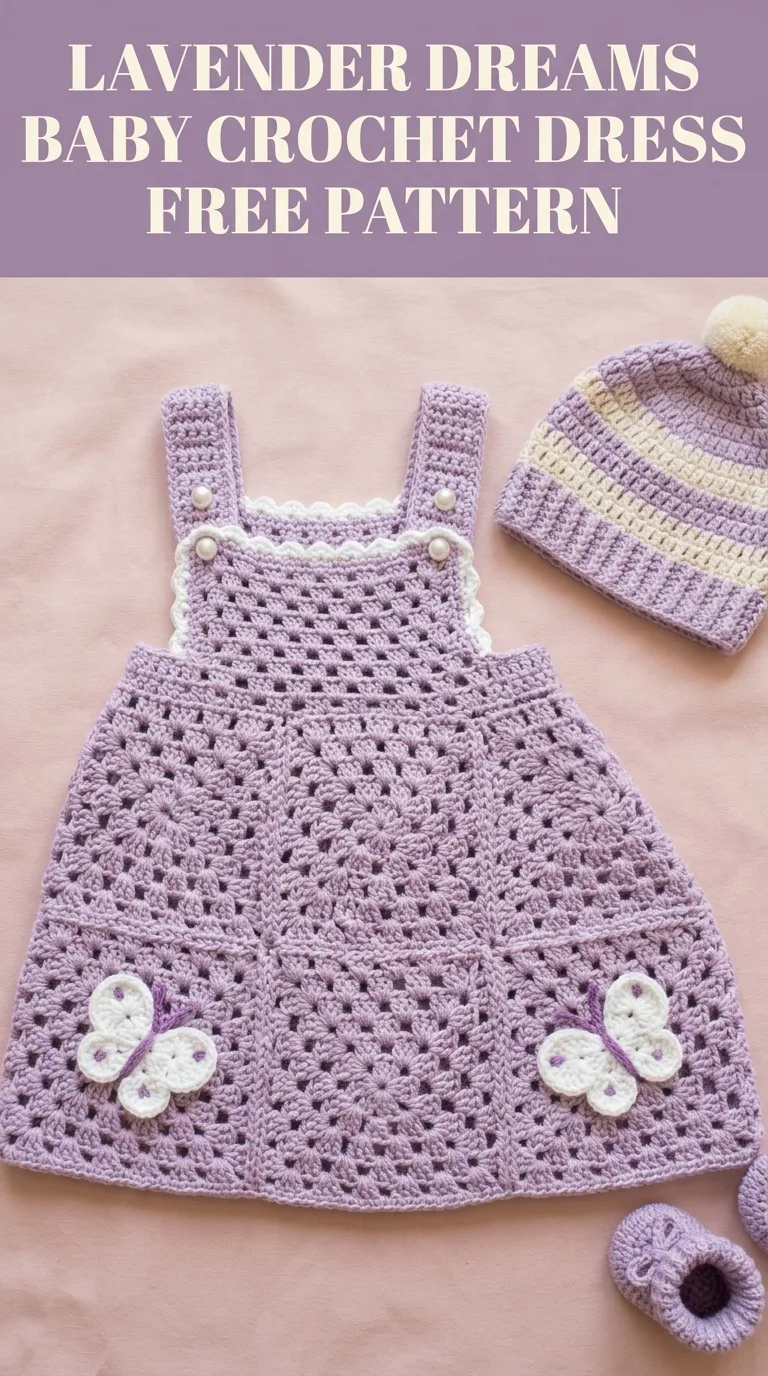
This crochet pattern creates an adorable baby pinafore dress using classic granny square construction. The dress features a sweet scalloped neckline trim, functional button straps, and two decorative butterfly appliqués near the hem. If you can make a granny square, you can absolutely make this dress. I promise.
Why This Baby Dress Pattern Works So Well
The granny square is one of the most forgiving stitch patterns in crochet. You probably already know how to make one. If not, you will learn today, and that skill will serve you for dozens of future projects.
This crochet tutorial breaks down the construction into manageable sections. You will make the front panel, the back panel, join them at the sides, add the straps, work the trim, and finish with optional butterfly embellishments. Each step builds on the one before it.
Skill level: Confident beginner to intermediate
Finished measurements: Approximately 10 inches wide at chest and 12 inches long from top of bodice to hem. This fits babies approximately 6 to 12 months. Adjust by adding or removing granny square rows.
Materials You Will Need
Yarn:
I recommend a soft acrylic or cotton blend for baby garments. Something machine washable makes life easier for parents. Look for yarn labeled as baby safe with no loose fibers.
Hook:
Notions:
Stitch Abbreviations and Definitions
Let me walk you through every stitch you will encounter. Read this section first if you are newer to crochet.
Ch = Chain. Wrap yarn over hook, pull through loop on hook. This creates the foundation for most crochet work.
Sl st = Slip stitch. Insert hook, yarn over, pull through both loops at once. Used for joining and moving across stitches invisibly.
Sc = Single crochet. Insert hook, yarn over, pull up a loop (2 loops on hook), yarn over, pull through both loops. The shortest basic stitch. About half the height of a double crochet.
Dc = Double crochet. Yarn over, insert hook, yarn over, pull up a loop (3 loops on hook), yarn over, pull through 2 loops, yarn over, pull through remaining 2 loops. This creates the main fabric of granny squares.
3dc cluster = Three double crochet stitches worked into the same space. This forms the building block of granny square construction.
Ch-2 sp = Chain 2 space. The gap created by chaining 2 between clusters. You will work into these spaces, not into individual stitches.
Understanding Granny Square Construction
Before we begin, let me explain how this dress comes together. Traditional granny squares grow outward from a center ring. You work clusters of double crochet stitches separated by chain spaces. Each round adds more clusters, and the square grows larger.
For this dress, we create rectangular granny panels instead of squares. The stitch pattern remains identical. We simply work back and forth in rows rather than around in rounds after establishing the base.
Do not worry if this sounds complicated. The step by step instructions below will guide you through every single row.
Front Panel Instructions
Foundation row: With MC and 5.0mm hook, ch 44.
Row 1: In 4th ch from hook, work 2dc (counts as first 3dc cluster). *Ch 2, skip 3 ch, work 3dc in next ch.* Repeat from * across until 3 ch remain. Ch 2, skip 2 ch, work 3dc in last ch. Turn. (11 clusters, 10 ch-2 spaces)
Row 2: Ch 3 (counts as first dc throughout), work 2dc in first ch-2 sp. *Ch 2, work 3dc in next ch-2 sp.* Repeat from * across. Turn. (11 clusters, 10 ch-2 spaces)
Rows 3 through 18: Repeat Row 2. Your panel should measure approximately 10 inches wide and 9 inches tall at this point.
This creates the main body of your front panel. Count your clusters at the end of each row. You should consistently have 11 clusters.
If your panel is curling, try relaxing your tension slightly. Granny squares can curl when worked too tightly, but blocking will also help.
Shaping the Bodice Top
Now we create the armhole openings and neckline by working partial rows.
Row 19 (Right strap setup): Ch 3, work 2dc in first ch-2 sp, ch 2, work 3dc in next ch-2 sp, ch 2, work 3dc in next ch-2 sp. Turn. Leave remaining stitches unworked. (3 clusters)
Rows 20 through 24: Continue working across these 3 clusters only, maintaining the granny pattern. Turn at end of each row. (3 clusters per row)
Fasten off and weave in ends for this strap section.
Row 19 (Left strap setup): Skip center 5 clusters for neckline opening. Join MC in the ch-2 sp before the 9th cluster with a sl st. Ch 3, work 2dc in same sp, ch 2, work 3dc in next ch-2 sp, ch 2, work 3dc in next ch-2 sp. Turn. (3 clusters)
Rows 20 through 24: Continue working across these 3 clusters only. (3 clusters per row)
Fasten off.
Back Panel Instructions
The back panel mirrors the front exactly. This creates the simple A-line silhouette.
Work Rows 1 through 24 exactly as written for the front panel, including the strap shaping.
When finished, you will have two identical panels.
Joining the Panels
Lay both panels with wrong sides facing each other. We will join at the sides, leaving armholes open.
Side seam joining: Using MC and yarn needle, whip stitch or mattress stitch the side edges together from the bottom hem up to Row 18. Leave the bodice and straps unjoined.
Alternatively, you can crochet the seam closed using slip stitches through both layers. This creates a slightly more visible seam but works faster.
Repeat for the second side.
Turn dress right side out.
Neckline Trim
This delicate scalloped edge finishes the neckline beautifully. It looks fancy but works up quickly.
Round 1: With CC (white) and right side facing, join yarn at center back neckline with a sl st.
Ch 1, work sc evenly around entire neckline opening, placing approximately 2 sc per row end and 1 sc per dc. Sl st to first sc to join. Do not turn.
Round 2 (Scallop round): *Sl st in next sc, skip 1 sc, work 5dc in next sc, skip 1 sc.* Repeat from * around neckline, adjusting spacing as needed to end evenly. Sl st to first sl st to join.
Fasten off and weave in ends.
The scallop creates that sweet feminine detail visible in the finished dress.
Strap Button Bands
Each strap needs a simple edging and buttonhole.
Front strap edging: With CC, join yarn at inside edge of front left strap. Work sc evenly along the short edge (approximately 6 to 8 sc). Fasten off.
Repeat for front right strap.
Back strap buttonhole edging: With CC, join yarn at inside edge of back left strap. Sc 2, ch 2, skip 2, sc 2 (or adjust numbers based on your button size). This creates the buttonhole.
Fasten off and repeat for back right strap.
Sew buttons to front straps, aligning with buttonholes.
Butterfly Appliqué Pattern
These sweet butterflies transform the dress from simple to special. Make 2.
Upper wings (make 2 per butterfly, so 4 total):
With CC and smaller hook, ch 4. Sl st in first ch to form ring.
Round 1: Ch 1, work 8 sc into ring. Sl st to first sc. (8 sc)
Round 2: Ch 3, dc in same st, 2dc in each sc around. Sl st to top of ch-3. (16 dc)
Fasten off, leaving a long tail for sewing.
Lower wings (make 2 per butterfly, so 4 total):
With CC and smaller hook, ch 4. Sl st in first ch to form ring.
Round 1: Ch 1, work 6 sc into ring. Sl st to first sc. (6 sc)
Round 2: Ch 3, dc in same st, 2dc in each sc around. Sl st to top of ch-3. (12 dc)
Fasten off, leaving a long tail.
Assembly: Position one larger wing and one smaller wing with edges touching, forming half a butterfly. The larger wing goes on top. Repeat for second half. Sew both halves together at center.
Body and antennae: Using purple yarn and yarn needle, embroider a simple straight stitch body down the center where wings meet. Create antennae with two small straight stitches curving outward from the top.
Sew completed butterflies to front of dress near hem, one on each side.
Finishing Your Baby Crochet Dress
Weave in all remaining yarn tails. Seriously, do this now. Future you will thank present you.
Blocking: Wet block your finished dress by soaking in lukewarm water for 15 minutes. Gently squeeze out excess water (do not wring). Lay flat on a blocking mat or clean towel. Shape the dress, smoothing the granny square pattern and straightening the straps. Pin if needed. Allow to dry completely.
Blocking makes an enormous difference with granny square projects. The stitches relax and even out, and the overall drape improves dramatically.
Button check: Before gifting, double check that buttons are securely attached. Babies put everything in their mouths, so button safety matters.
Pattern Customization Ideas
Size adjustments: Add 4 chains to your foundation for each additional cluster width. Add more rows before the bodice shaping for a longer dress.
Color variations: Try working the clusters in alternating colors for a rainbow effect. Or use one color for the body and a contrasting color for the bodice section.
Skip the butterflies: The dress looks lovely without any appliqués. You could substitute flowers, hearts, or simple pom poms.
Add a matching hat: Use the same yarn and stitch pattern to create a coordinating granny square beanie.
Helpful Tips for Success
Work your foundation chain loosely. A tight foundation makes the first row miserable and can cause the hem to pucker.
Count your clusters after every row for the first several rows. Catching a mistake early saves frogging later.
If you lose track of where you are, look for the ch-2 spaces. You always work your 3dc clusters into those spaces, never into the tops of stitches.
Take breaks. This project involves repetitive motion, and your hands will thank you for stretching.
A Note on Gifting
This step by step crochet pattern creates a truly special handmade gift. New parents appreciate the time and care that goes into handcrafted baby items. Consider including a care card with washing instructions.
Machine wash cold on gentle cycle and tumble dry low for most acrylic baby yarns. Cotton blends may need to lay flat to dry to prevent shrinking.
I like to photograph my finished projects before gifting them. It helps me remember what I made and gives me images for my own records.
You Did It
This beginner friendly crochet pattern walks you through creating a complete wearable garment. You learned granny square construction, basic shaping, decorative trim, and appliqué techniques. Those skills transfer to countless future projects.
The Lavender Dreams baby dress works up surprisingly quickly once you find your rhythm with the granny clusters. Most crocheters can complete this in a weekend of focused crafting time.
Thank you so much for choosing this pattern for your next project. I genuinely appreciate you being here and trusting me to guide you through the process. If you make this dress, I would absolutely love to see it. Tag me on Instagram or share a photo in my Facebook group. Seeing your finished projects honestly makes my entire week.
If you enjoyed this crochet tutorial, save it to your Pinterest boards so you can find it easily when you are ready to start. And please drop a comment below if you make this little dress. I read every single one, and I love hearing about your color choices and any modifications you try.
