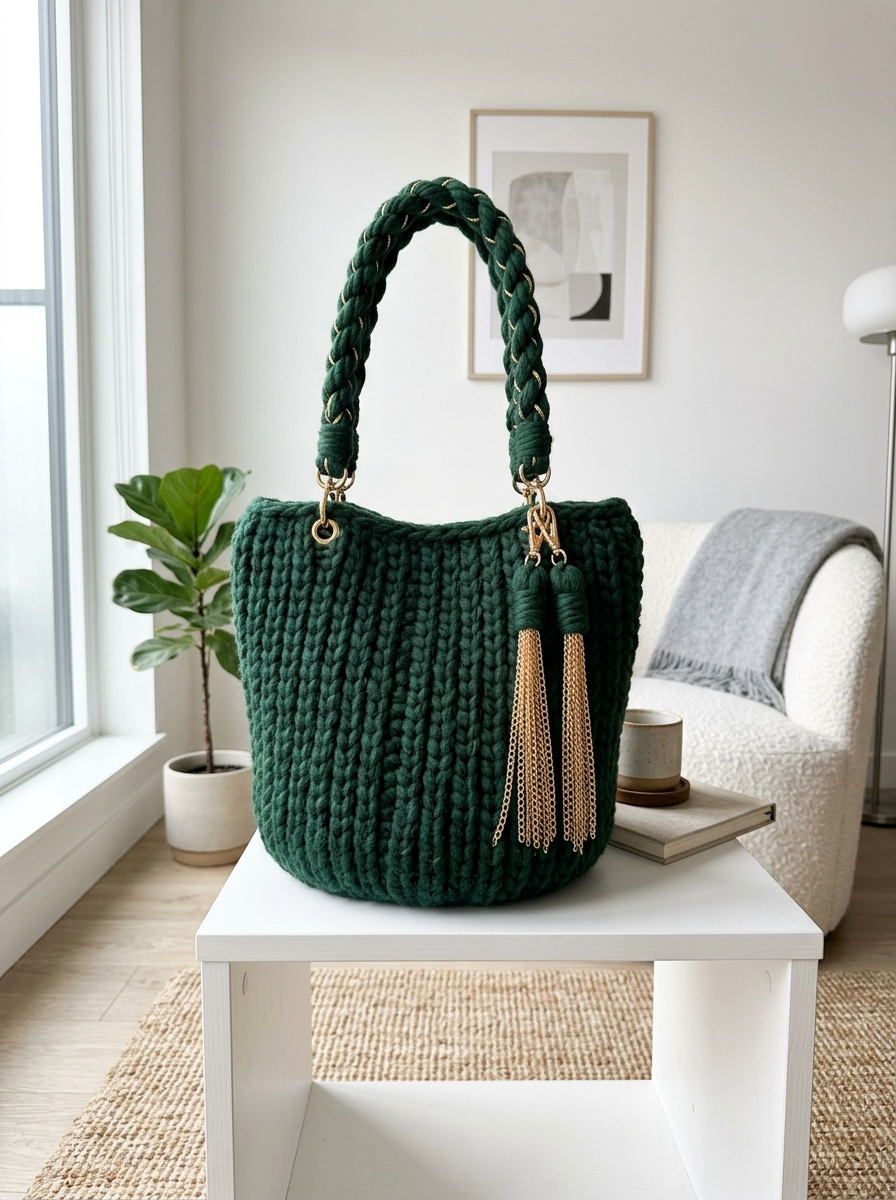
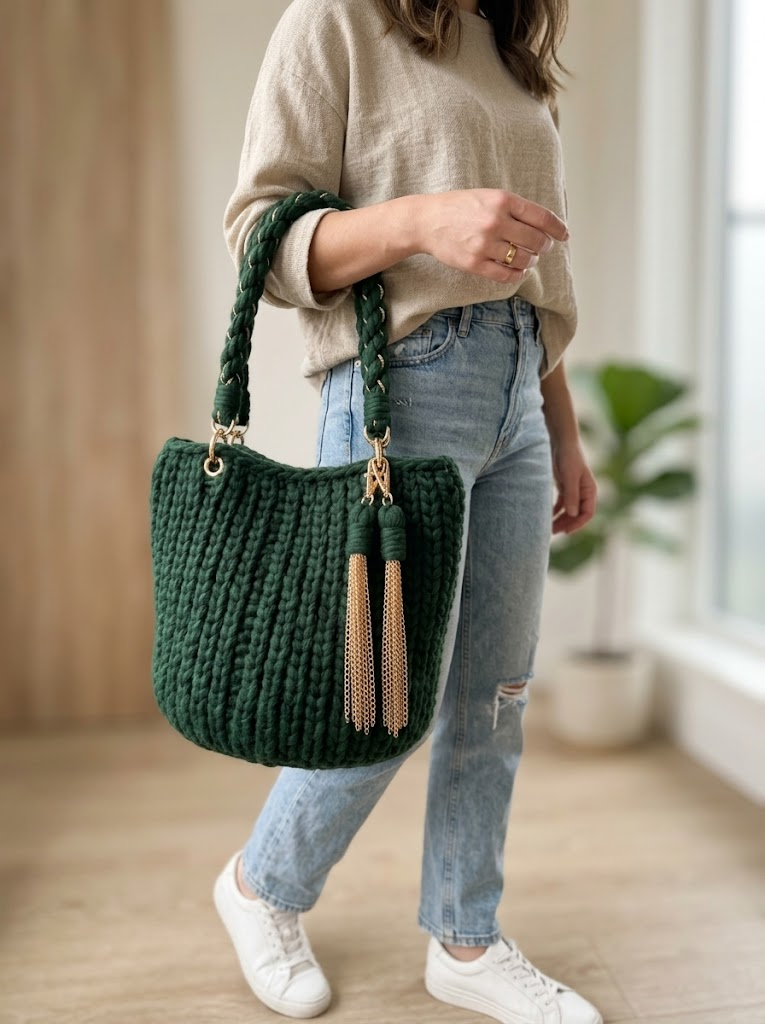
You’re looking at a showstopper. This Forest Green Chunky Tote with Gold Chain Tassels combines rustic handmade texture with luxe hardware accents. The result? A bag that looks boutique-bought but carries the satisfaction of “I made this.”
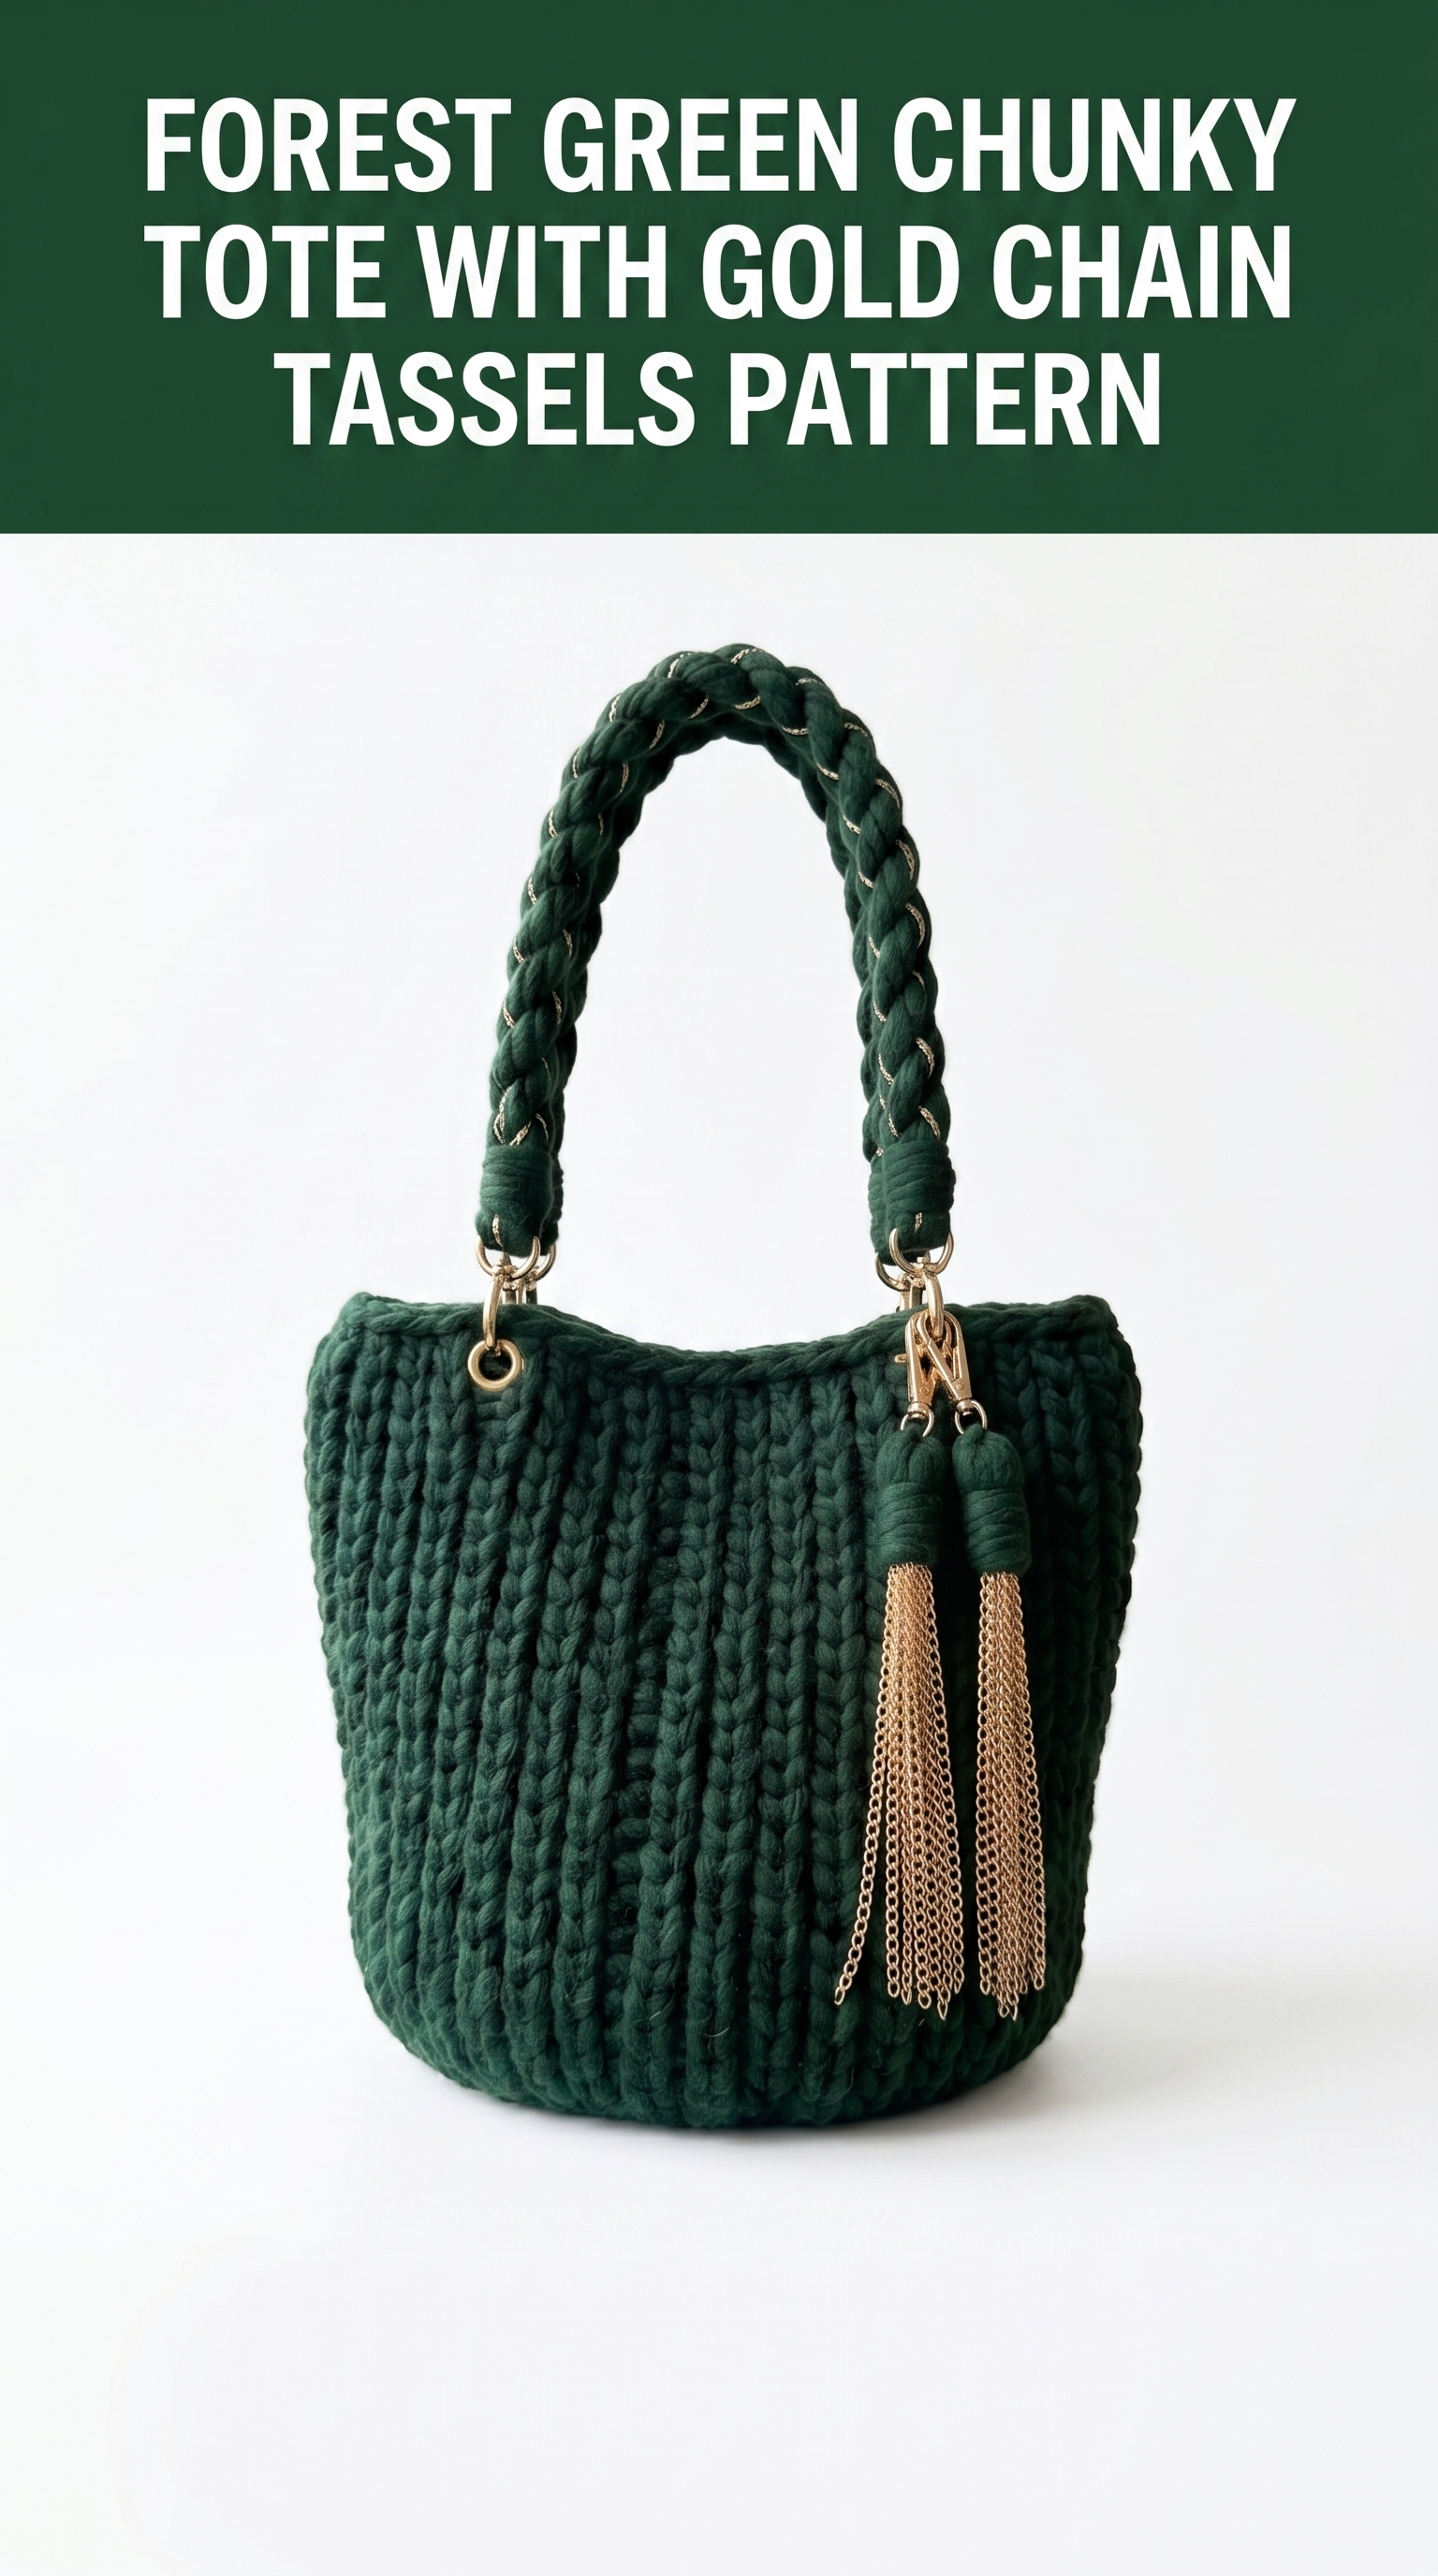
I designed this crochet pattern for crafters who want something practical yet elegant. The chunky yarn works up fast. The vertical ribbed texture adds visual interest without complicated stitches. And those gold chain tassels? Pure drama.
If you can work basic stitches in rows and rounds, you can absolutely make this bag. I’ll walk you through every step.
Why This Chunky Tote Crochet Pattern Works
Let me tell you why I love this design. The body uses a simple ribbed stitch pattern that creates those gorgeous vertical lines you see running from bottom to top. This texture mimics knitting but is 100% crochet.
The construction happens in two stages. First, you crochet the circular base working in continuous rounds. Then you build the walls upward, switching to a technique that creates the ribbed effect.
The braided handle combines yarn with a thin gold chain woven through. This reinforces the strap while adding that elevated detail. Hardware enthusiasts, this one’s for you.
Skill level: Confident beginner to intermediate. If you’ve made a basic bag or basket before, you’re ready.
Materials Needed for Your Crochet Tote Bag
Gather these supplies before you start. Having everything ready makes the process smooth.
Yarn
A yarn like Bernat Blanket, Lion Brand Wool-Ease Thick & Quick, or a t-shirt yarn/zpagetti yarn would work beautifully. The sample appears to use a tightly spun chunky cord yarn.
Hook
Check your gauge. You want firm fabric that holds its shape. If your stitches look loose and floppy, go down a hook size.
Hardware and Notions
For the Braided Handle
Abbreviations and Stitch Definitions
Let me define every stitch before we begin. No guessing required.
Ch = Chain. Wrap yarn over hook, pull through loop on hook. Creates foundation links.
Sl st = Slip stitch. Insert hook, yarn over, pull through stitch and loop on hook in one motion. Used for joining and invisible movement.
Sc = Single crochet. Insert hook, yarn over, pull up a loop (2 loops on hook), yarn over, pull through both loops. Creates short, tight stitches.
Hdc = Half double crochet. Yarn over, insert hook, yarn over, pull up a loop (3 loops on hook), yarn over, pull through all 3 loops. Slightly taller than sc.
BLO = Back loop only. Work into only the back loop of the stitch, leaving the front loop untouched. This creates the ribbed texture.
FLO = Front loop only. Work into only the front loop. Used for specific shaping.
Inc = Increase. Work 2 stitches into the same stitch.
St(s) = Stitch(es)
Rnd = Round
Gauge Check
Before diving into this crochet pattern, make a quick swatch.
Work 10 sc stitches across and 10 rows. Your swatch should measure approximately 4 inches by 4 inches (10cm x 10cm).
Too big? Go down a hook size. Too small? Go up. Gauge matters here because it determines your bag’s finished size and structural integrity.
Finished Dimensions
Step by Step Crochet Pattern Instructions
Part 1: The Circular Base
We start at the bottom and work outward in continuous rounds. Use a stitch marker to track round beginnings.
Magic ring: Create an adjustable loop. Work your first stitches into this ring, then pull the tail to close the center hole.
Not comfortable with a magic ring? Chain 4 and slip stitch to the first chain to form a loop instead.
Round 1: Work 8 sc into the magic ring. Pull ring closed. Place marker. (8 sts)
Round 2: Inc in each st around. (16 sts)
Round 3: *Sc 1, inc in next st* repeat around. (24 sts)
Round 4: *Sc 2, inc in next st* repeat around. (32 sts)
Round 5: *Sc 3, inc in next st* repeat around. (40 sts)
Round 6: *Sc 4, inc in next st* repeat around. (48 sts)
Round 7: *Sc 5, inc in next st* repeat around. (56 sts)
Round 8: *Sc 6, inc in next st* repeat around. (64 sts)
Your base should now measure approximately 7 inches across. If you need a larger bag, continue increasing in this pattern (sc 7, inc; sc 8, inc; etc.) until you reach your desired diameter.
Slip stitch to join the final round. Do not fasten off.
Part 2: Transition Round
This round sets up the vertical walls and creates a crisp edge between base and sides.
Round 9: Working in BLO only, sc in each st around. Do not join. Continue working in a spiral. (64 sts)
You’ll notice the bag starts standing up now. The unused front loops create that neat bottom edge.
Part 3: Ribbed Body
Here’s where the magic happens. The vertical ribbing comes from working half double crochet stitches through the back loop only. This pushes the front loops forward, creating raised ridges.
Continue in a spiral without joining rounds. Move your stitch marker up each round.
Rounds 10 through 35 (26 rounds total):
Working in BLO throughout, hdc in each st around. (64 sts per round)
Keep your tension consistent. Too tight and the bag will curl inward. Too loose and it won’t hold shape.
Your bag body should now measure approximately 9 to 10 inches tall from the base.
Part 4: Top Edge Finishing
We’ll create a clean, sturdy rim.
Round 36: Switch to sc through both loops. Sc in each st around. (64 sts)
Round 37: Sl st in each st around for a polished edge. (64 sts)
Fasten off. Weave in the end securely.
Part 5: O-Ring Attachment Points
You’ll attach O-rings to hold the handle hardware. Decide where you want them. They should sit on opposite sides of the bag, approximately 2 inches down from the top edge.
Option A: Crochet directly
With a new piece of yarn, attach to the inside of the bag at your chosen point. Ch 6, pass chain through the O-ring, sl st to starting point. Sc 8 to 10 stitches around this loop to cover it completely. Fasten off and weave in ends.
Repeat on the opposite side.
Option B: Yarn wrap attachment
Thread a 12-inch piece of yarn through the O-ring. Insert both ends through your tapestry needle. Stitch through the bag fabric 4 to 5 times, securing the ring tightly. Knot inside and weave in ends.
Part 6: The Braided Handle
This handle combines yarn braiding with woven gold chain. It’s sturdy and gorgeous.
Step 1: Cut three strands of yarn, each approximately 36 inches long (adjust based on your desired handle length).
Step 2: Cut one strand of gold chain the same length.
Step 3: Gather all four strands together. Tie an overhand knot at one end, leaving a 2-inch tail.
Step 4: Braid the strands together. You’ll work a standard 3-strand braid, incorporating the chain as part of one strand (pair yarn with chain). Or weave the chain around the braid after completing it.
The sample shows chain integrated throughout the braid, catching light between the yarn twists.
Step 5: When you reach your desired length (approximately 20 to 24 inches of braided section), tie another overhand knot.
Step 6: Wrap the ends tightly with matching yarn, creating a clean tassel cap about 1 inch long. This hides the knots and gives a polished look.
Part 7: Attaching the Handle
Thread one end of the braided handle through a lobster clasp or directly through an O-ring. Fold the wrapped end back on itself and stitch securely to the handle body.
Repeat on the other end.
Clip the lobster clasps onto your bag’s O-rings. The handle should now be fully attached and functional.
Part 8: Gold Chain Tassels
The tassels add movement and luxury. You can purchase pre-made chain tassels from jewelry supply stores or make your own.
To make chain tassels:
1. Cut 8 to 10 pieces of fine gold chain, each approximately 4 to 5 inches long.
2. Thread all chains onto a jump ring.
3. Create a yarn-wrapped cap: wrap yarn around a small bead or bundle of chain tops, covering approximately 1 inch.
4. Attach a lobster clasp or jump ring to the top for easy attachment.
Clip or tie your tassels near the handle hardware. In the sample, they hang from the O-rings alongside the handle connection.
Optional: Adding a Fabric Lining
A lining protects your belongings and adds polish. Choose a coordinating fabric. Cotton canvas works well.
1. Measure the inside circumference and height of your bag
2. Cut fabric accordingly, adding seam allowance
3. Sew the lining into a tube shape
4. Create a circular bottom piece and attach
5. Hand-stitch the lining inside, folding the top edge under for a clean finish
This step is completely optional but elevates the finished product.
Tips for Success with This Crochet Tutorial
Keep it tight. Bags need structure. If your stitches feel loose, size down your hook.
Block the base. Wet block your circular base flat before adding walls. This ensures a truly flat bottom.
Reinforce high-stress areas. The handle attachments take strain. Stitch through multiple times. Consider adding interfacing behind the O-ring attachment points.
Test your hardware. Make sure your O-rings, clasps, and chains work together before attaching permanently.
Customization Ideas
Make this chunky tote crochet pattern your own.
Common Questions About This Pattern
Can beginners make this bag?
Yes, if you’re comfortable with basic stitches and working in rounds. The construction is straightforward. Take your time with the hardware attachment.
What if I don’t have the exact yarn?
Any super bulky yarn will work. Adjust your hook size to achieve similar gauge. Stiffer yarns hold shape better.
How do I care for the finished bag?
Spot clean with mild soap. For cotton or acrylic yarn, gentle hand washing works. Air dry flat to maintain shape. Remove hardware if possible before washing.
Can I make it bigger?
Absolutely. Add more increase rounds to the base and more rounds to the body. You’ll need additional yarn.
Wrapping Up Your Forest Green Chunky Tote
You did it. You now have a complete roadmap to create your own Forest Green Chunky Tote with Gold Chain Tassels.
This isn’t just another bag pattern. It’s a statement piece that bridges handmade charm with sophisticated style. Every time you carry it, someone will ask where you got it. And you’ll get to say the best words: “I made it.”
Thank you so much for choosing this pattern. I genuinely hope you enjoy making it as much as I enjoyed designing it. The process should feel meditative. The result should make you proud.
When you finish your tote, I’d absolutely love to see it. Share your photos on Instagram or Facebook and tag me. Seeing your creations is the highlight of my day.
Now grab that gorgeous green yarn and get hooking. You’ve got this.
Happy crocheting, friend.
