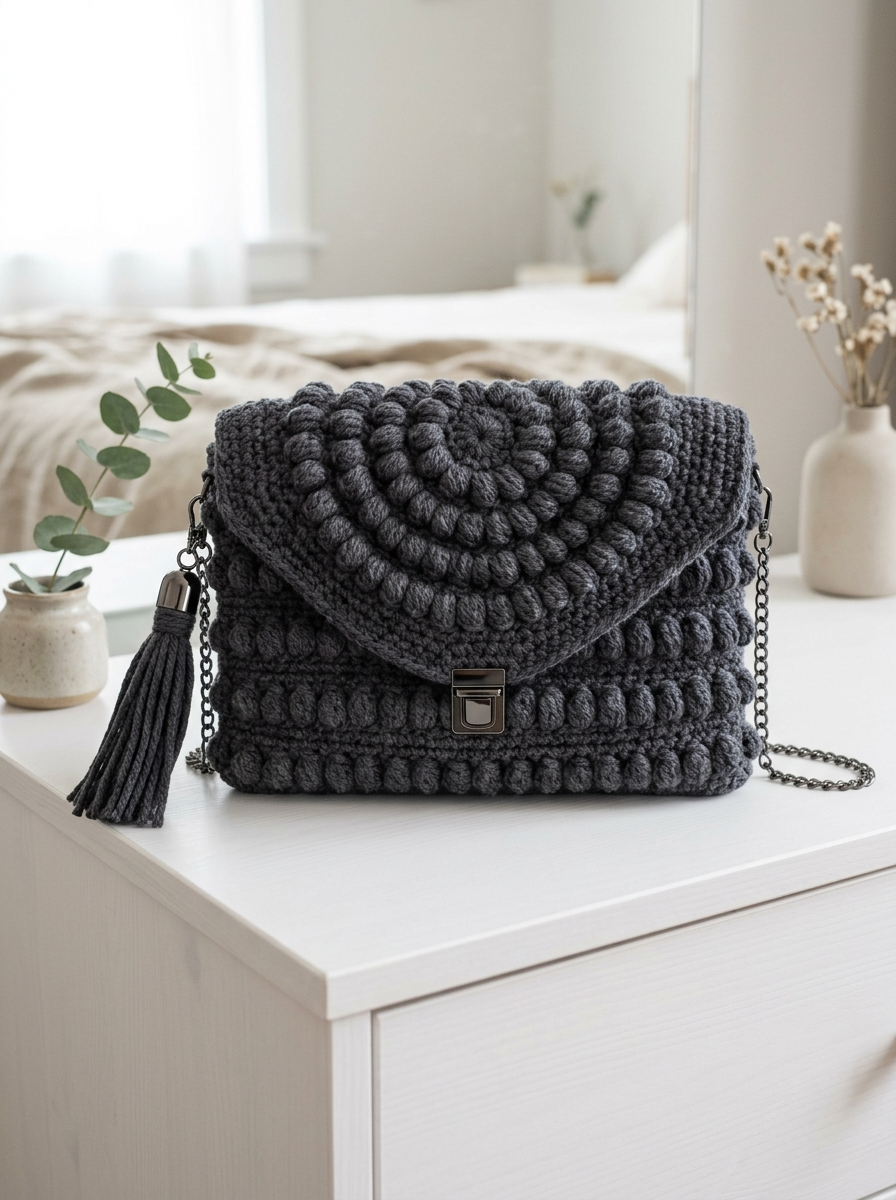
This gorgeous charcoal gray clutch bag might look like it belongs in a designer boutique, but I promise you can make it yourself. The stunning spiral pattern on the flap combined with rows of textured bobbles creates a sophisticated accessory that elevates any outfit. Whether you are comfortable with intermediate techniques or looking to challenge yourself beyond basic projects, this modern crochet pattern walks you through every single step.
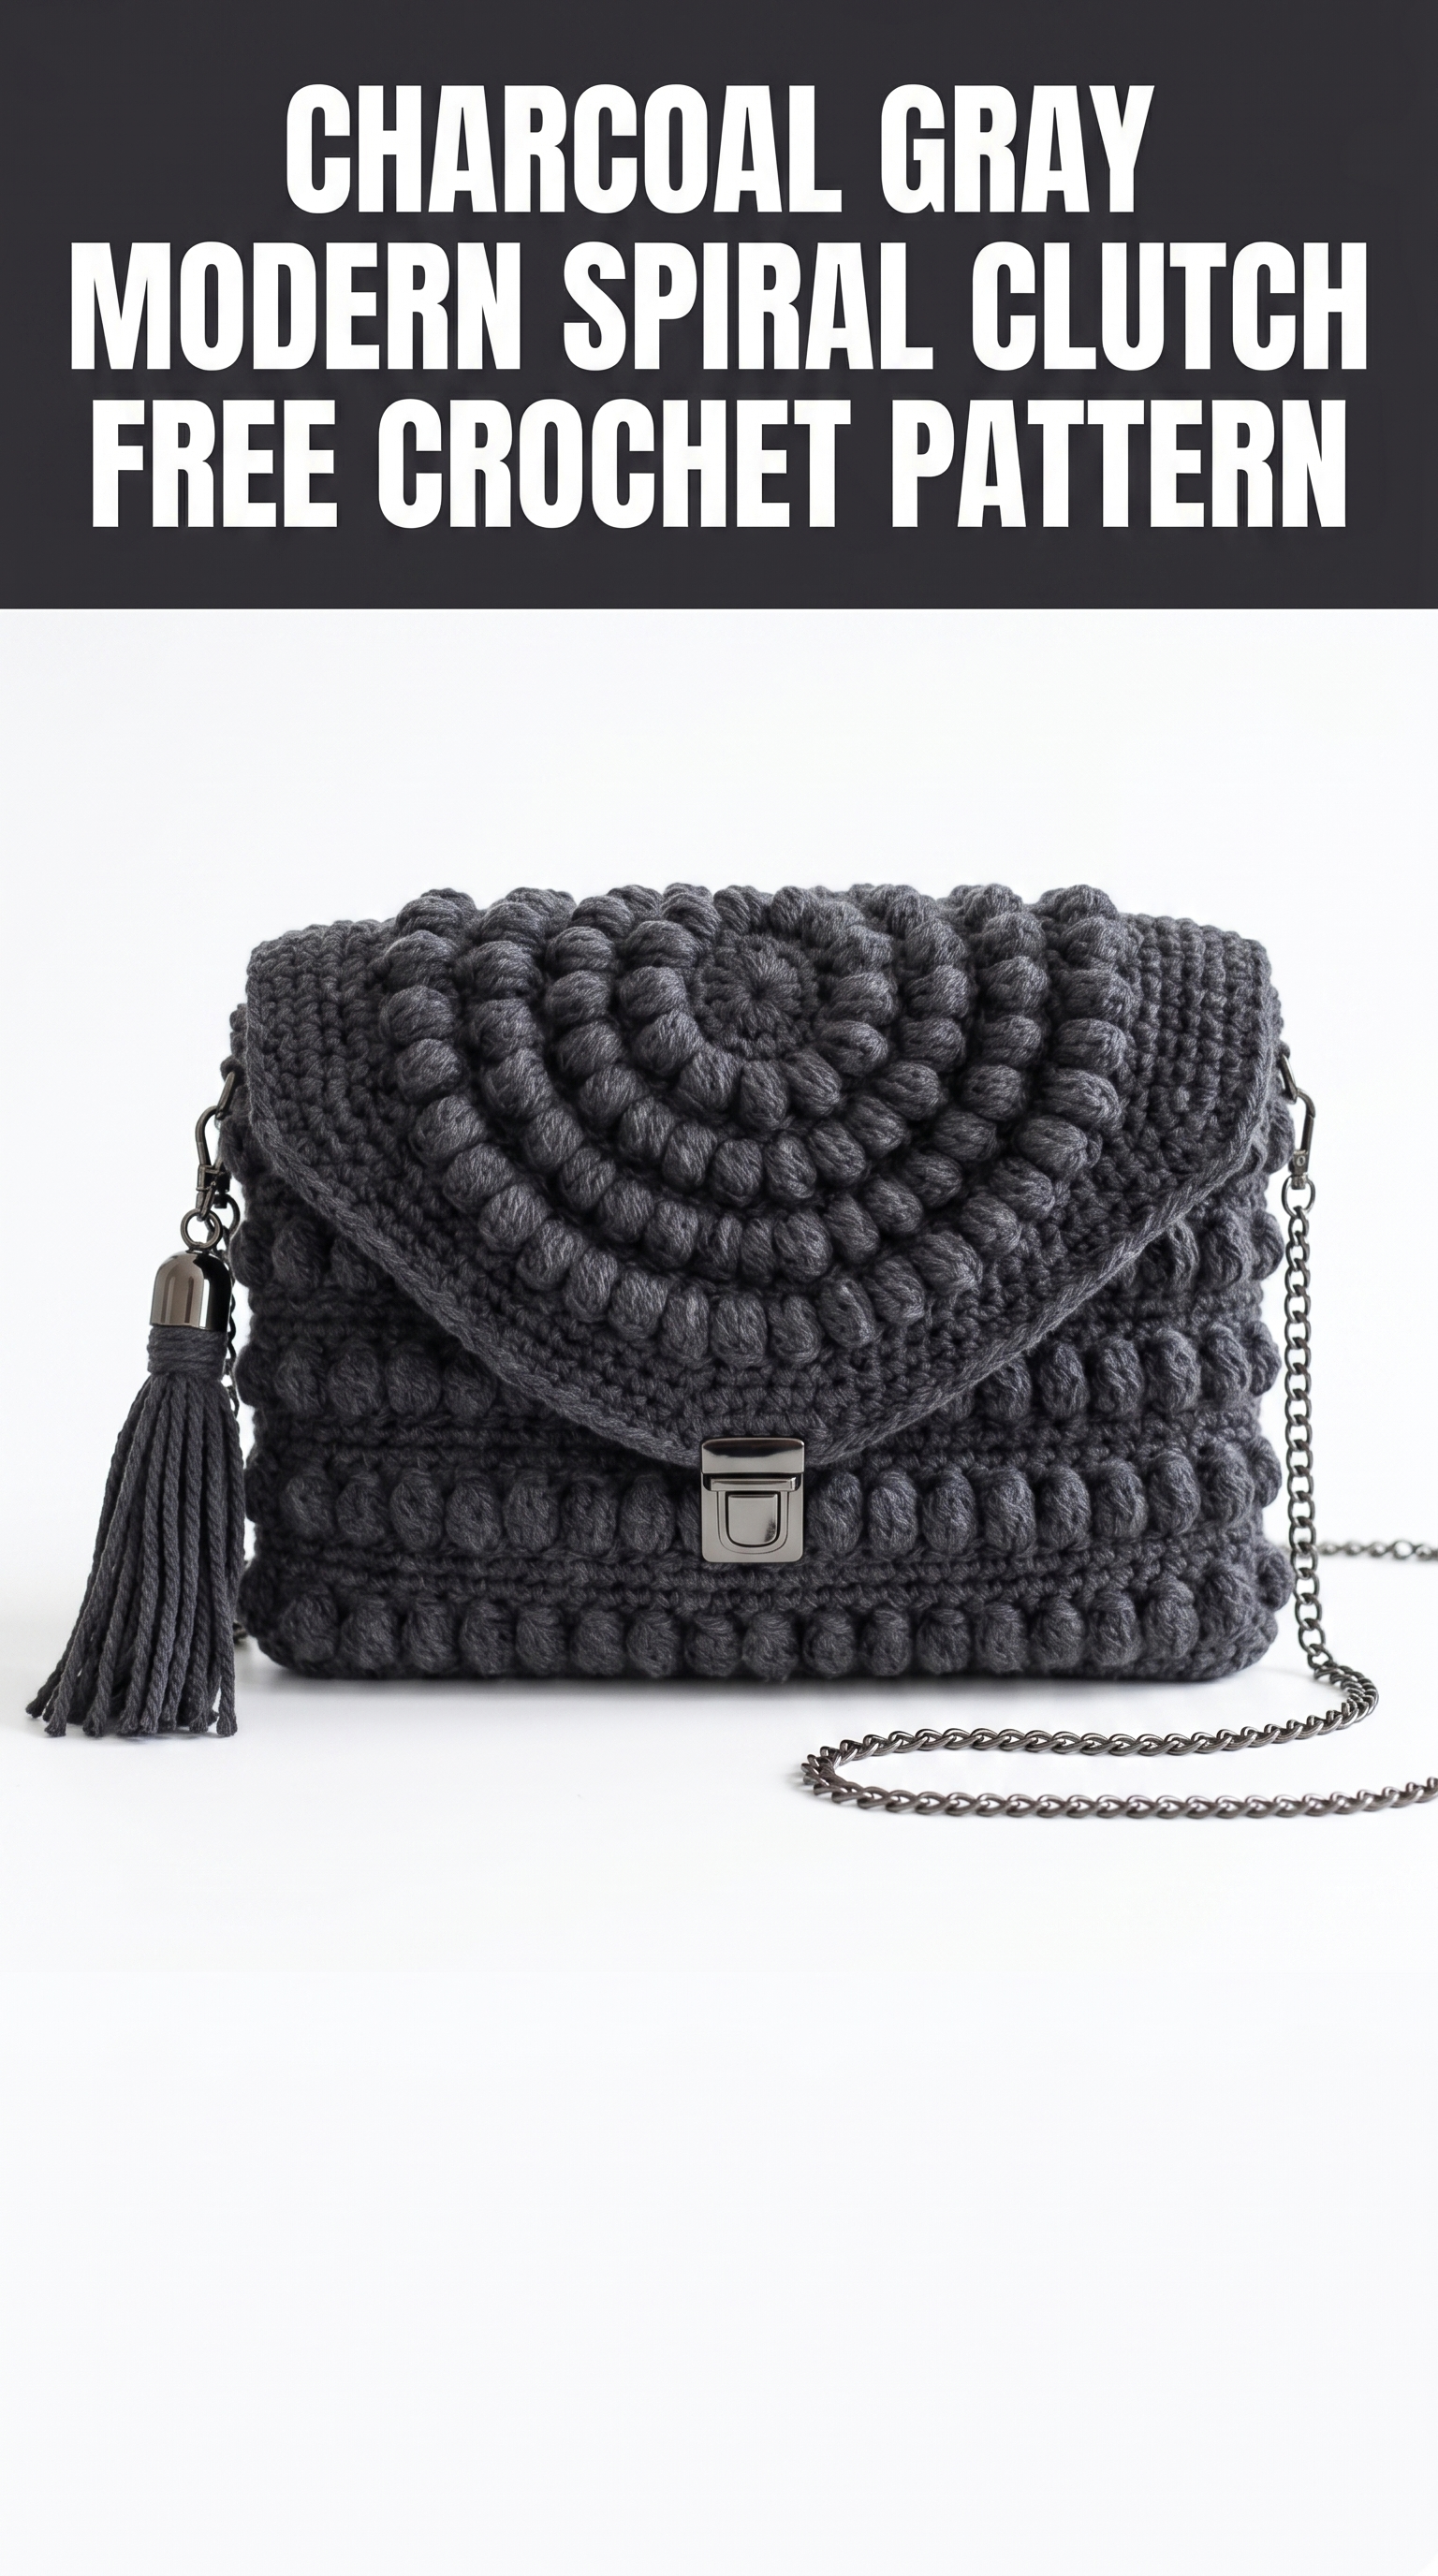
I fell in love with this design the moment I finished it. The contrast between the smooth single crochet sections and the puffy bobble stitches gives it incredible visual depth. And that spiral flap? It is easier than it looks. Trust me on this one.
Let me show you exactly how to crochet this beautiful clutch from start to finish.
Why This Spiral Clutch Crochet Pattern Works So Well
This is not your grandmother’s crocheted bag. The modern rectangular silhouette, gunmetal hardware, and elegant chain strap make this clutch perfect for date nights, weddings, or anytime you want to carry something handmade without looking crafty in the wrong way.
The bobble stitch texture creates beautiful dimension while the spiral construction on the flap adds an eye-catching focal point. Everything works together to create a polished, professional-looking accessory.
Skill level: Confident intermediate. You should be comfortable working in the round, increasing evenly, and making bobble stitches. If you have never tried bobbles before, practice a small swatch first. They are not difficult, just a bit fiddly until you get the rhythm.
Materials You Will Need for This Crochet Clutch Pattern
Gathering your supplies before you start makes the whole process smoother. Here is everything you need:
Yarn:
Hook:
Notions:
Gauge:
18 stitches and 20 rows = 4 inches in single crochet with 4.0mm hook
Gauge matters for bags because it affects the final size and sturdiness. Too loose and your clutch will be floppy. Too tight and you will fight with your yarn. Swatch first if you are unsure.
Abbreviations and Stitch Definitions
Let me explain every stitch before we begin so you never feel lost.
ch = chain: Yarn over, pull through loop on hook.
sl st = slip stitch: Insert hook, yarn over, pull through both loops at once.
sc = single crochet: Insert hook, yarn over and pull up a loop (2 loops on hook), yarn over and pull through both loops.
hdc = half double crochet: Yarn over, insert hook, yarn over and pull up a loop (3 loops on hook), yarn over and pull through all 3 loops.
inc = increase: Work 2 single crochet stitches into the same stitch. This adds one stitch to your count.
bob = bobble stitch: This creates those gorgeous puffy bumps. Here is how: *Yarn over, insert hook into stitch, yarn over and pull up a loop, yarn over and pull through 2 loops.* Repeat from * four more times in the same stitch (6 loops on hook). Yarn over and pull through all 6 loops. Push the bobble to the right side of your work.
Think of a bobble as five unfinished double crochets all squeezed into one stitch, then closed at the top. They puff out beautifully.
Step by Step Crochet Pattern for the Spiral Clutch
This clutch has four main components: the body, the spiral flap, assembly, and hardware attachment. I will walk you through each section with clear stitch counts so you always know you are on track.
Part 1: The Clutch Body
The body is worked flat in rows, then seamed at the sides. We alternate between plain single crochet rows and bobble rows for that beautiful striped texture.
Foundation:
Ch 51.
Row 1: Sc in 2nd ch from hook and in each ch across. Turn. (50 sts)
Rows 2-4: Ch 1, sc in each st across. Turn. (50 sts)
Row 5 (Bobble Row): Ch 1, sc in first 2 sts, *bob in next st, sc in next st* repeat from * to last 2 sts, sc in last 2 sts. Turn. (50 sts, 23 bobbles)
This is your first bobble row. Remember to push each bobble to the front (the side facing away from you) as you work. They naturally want to pop to the back, so give them a little nudge.
Row 6: Ch 1, sc in each st across. Turn. (50 sts)
Rows 7-8: Ch 1, sc in each st across. Turn. (50 sts)
Row 9: Repeat Row 5 (Bobble Row). (50 sts, 23 bobbles)
Row 10: Ch 1, sc in each st across. Turn. (50 sts)
Continue this pattern, working bobble rows every 4th row, until you have completed 6 bobble stripe sections. Your body should measure approximately 8.5 inches tall.
Final Rows: Work 3 more rows of sc after your last bobble row. Fasten off, leaving a long tail for seaming.
Fold the body in half with wrong sides together. The fold becomes the bottom of your clutch. Using your tapestry needle and the long tail, whip stitch or mattress stitch the side seams closed. Turn right side out.
Part 2: The Spiral Flap
This is the showstopper element. The flap is worked in a continuous spiral from the center outward, alternating between single crochet rounds and bobble rounds to create that mesmerizing circular pattern.
Magic Ring Setup:
Create a magic ring. If you are not familiar, wrap yarn around your finger twice, insert hook, pull up a loop, and chain 1 to secure.
Round 1: Work 6 sc into the magic ring. Pull tail to close ring. Do not join. Place a stitch marker in the first stitch and move it up each round. (6 sts)
Round 2: Inc in each st around. (12 sts)
Round 3: *Sc in next st, inc in next st* repeat around. (18 sts)
Round 4 (Bobble Round): *Bob in next st, sc in next st, inc in next st* repeat around. Push all bobbles to the right side. (24 sts, 6 bobbles)
The bobbles will naturally spiral outward because you are increasing while placing them. This creates that beautiful curved effect you see on the finished flap.
Round 5: *Sc in next 3 sts, inc in next st* repeat around. (30 sts)
Round 6: Sc in each st around. (30 sts)
Round 7 (Bobble Round): *Sc in next st, bob in next st, sc in next 2 sts, inc in next st* repeat around. (36 sts)
Round 8: *Sc in next 5 sts, inc in next st* repeat around. (42 sts)
Round 9: Sc in each st around. (42 sts)
Round 10 (Bobble Round): *Sc in next 2 sts, bob in next st, sc in next 3 sts, inc in next st* repeat around. (48 sts)
Continue this pattern, increasing 6 stitches per increase round and adding a bobble round every 3rd round. Keep the bobbles spiraling outward by shifting their placement slightly each bobble round.
Work until your circle measures approximately 6 inches in diameter, or about 14-16 rounds total depending on your gauge.
Edging Round: Sl st in each st around for a clean finished edge. Fasten off and weave in ends.
If your circle is ruffling, your tension is too loose. If it is cupping, your tension is too tight. A flat circle with slight natural curve is exactly what we want for a flap.
Part 3: Assembly and Construction
Now we bring everything together.
Attaching the Flap:
Position the spiral flap centered on the back of the clutch body, with the bottom edge of the flap aligned with the top back edge. The flap should extend about 4 inches down the front when folded over.
Using matching yarn and a tapestry needle, whip stitch the flap securely to the back panel. Work through both layers, keeping your stitches small and even. Reinforce the corners with extra stitches since they take the most stress.
Adding D-Rings for the Strap:
Create two small tabs for your D-rings:
Ch 8, sl st to join in a ring around your D-ring. Sc 10 sts around the chain, working around the ring to encase it. Fasten off with a long tail.
Sew one tab to each top corner of the clutch, positioning them at the side seams where the flap meets the body.
Part 4: Hardware and Finishing
Installing the Push Lock Clasp:
Mark the center front of your clutch about 1.5 inches down from the top edge. Mark the corresponding spot on your flap.
The clasp comes in two pieces. The bottom plate with the keyhole attaches to the clutch body. The top piece with the push mechanism attaches to the flap.
Carefully push the prongs through your crochet fabric at the marked spots. On the inside, use the included washers and bend the prongs flat to secure. Be gentle but firm.
If your crochet fabric feels too loose to hold the hardware securely, reinforce that area with a small piece of felt or interfacing on the inside before installing.
Attaching the Chain Strap:
Simply clip your chain strap to the D-rings on each side. I love how the gunmetal chain complements the charcoal yarn.
Optional Tassel:
That coordinating tassel adds such a nice finishing touch. You can make one by wrapping yarn around a 4-inch piece of cardboard about 40 times, tying off the top, cutting the bottom loops, and wrapping yarn around the top to create the tassel head. Attach it to one D-ring with a small chain or directly to the zipper pull if you prefer.
Optional Lining:
For extra durability and a polished interior, cut two pieces of cotton fabric to match your clutch dimensions plus seam allowance. Sew them together on three sides, fold the top edge under, and hand stitch inside the clutch along the top edge.
Tips for Success with This Crochet Tutorial
A few things I learned while making this bag:
Keep your tension consistent. This is especially important on the spiral flap where changes in tension will show as uneven rounds.
Count your stitches frequently. Bobble stitches can be sneaky. It is easy to accidentally skip the stitch right after a bobble because things get a bit crowded.
Block your pieces before assembly. Wet blocking helps even out your stitches and makes seaming much easier.
Choose quality hardware. Cheap clasps break and cheap chains tarnish. This bag deserves hardware that matches its quality.
Make It Your Own
While I love this charcoal gray version, this crochet pattern works beautifully in so many colors. Imagine it in:
You could also experiment with metallic yarn for the spiral flap while keeping the body in a solid color. Or try different hardware finishes to completely change the vibe.

Wrapping Up This Modern Spiral Clutch Pattern
There you have it. A complete step by step crochet tutorial for creating your own gorgeous textured clutch bag. The combination of bobble stitches and spiral construction makes this project special while still being totally achievable for anyone comfortable with intermediate techniques.
I genuinely love how this one turned out, and I hope you do too.
When you finish yours, I would absolutely love to see it. Tag me on Instagram or share your photo in my Facebook group. There is nothing better than seeing these patterns come to life in your hands with your color choices.
Thank you so much for choosing to make this clutch. Happy crocheting, friend. You have got this.
