I have been dreaming about designing a princess-worthy baby dress set for months now. When I finally sat down to create this Belle-inspired ensemble, I wanted something that would look stunning in photos but still be approachable for crocheters who have never tackled a baby dress before. The goal was simple: a complete outfit with a dress, matching headband bow, and adorable booties that any crafter could make with basic stitches. I am SO pleased with how this turned out, and I cannot wait for you to make one too.
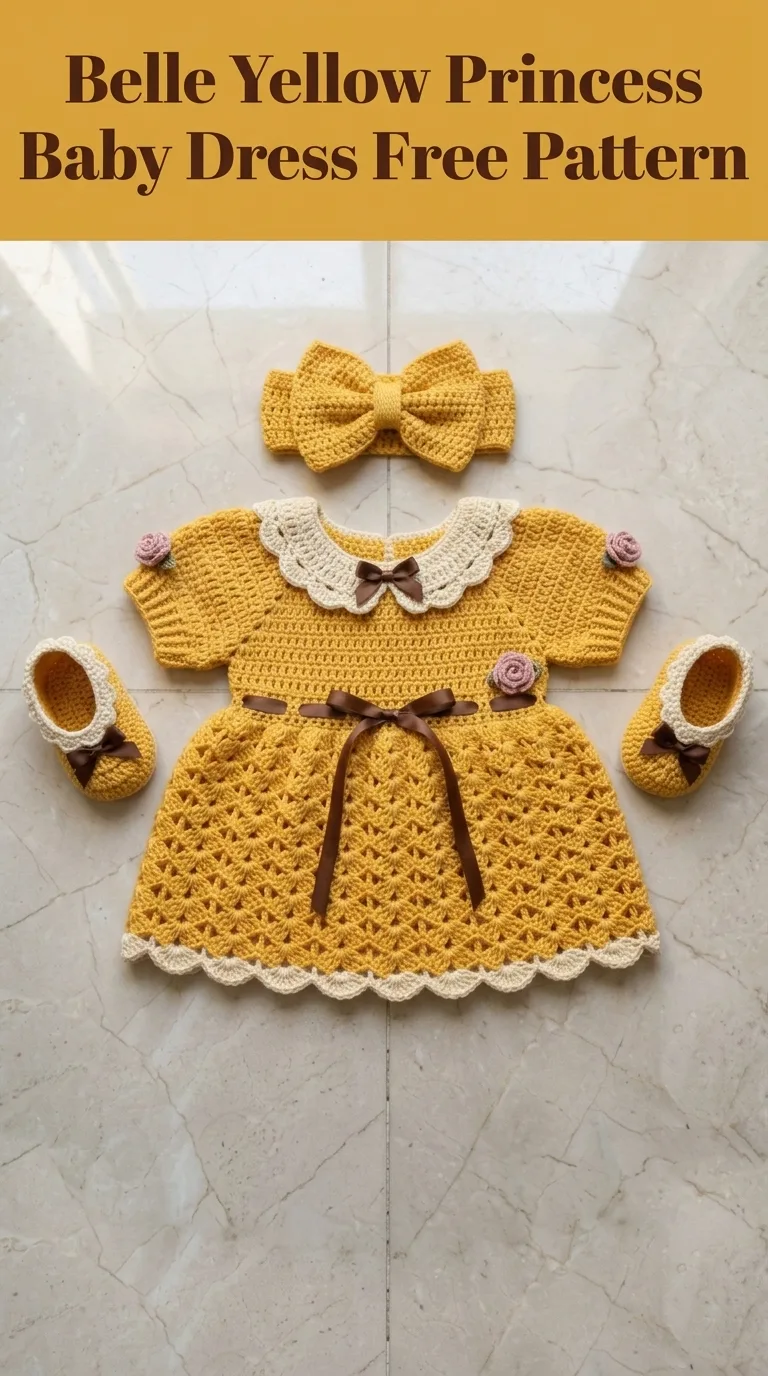
This crochet baby dress pattern creates a gorgeous golden yellow set perfect for baby showers, first birthday photos, or any occasion where your little one needs to look like royalty. The vintage-inspired Peter Pan collar in cream adds that classic Disney princess touch, while the delicate shell stitch skirt gives the dress beautiful movement and texture.
About This Belle Yellow Princess Baby Dress Crochet Pattern
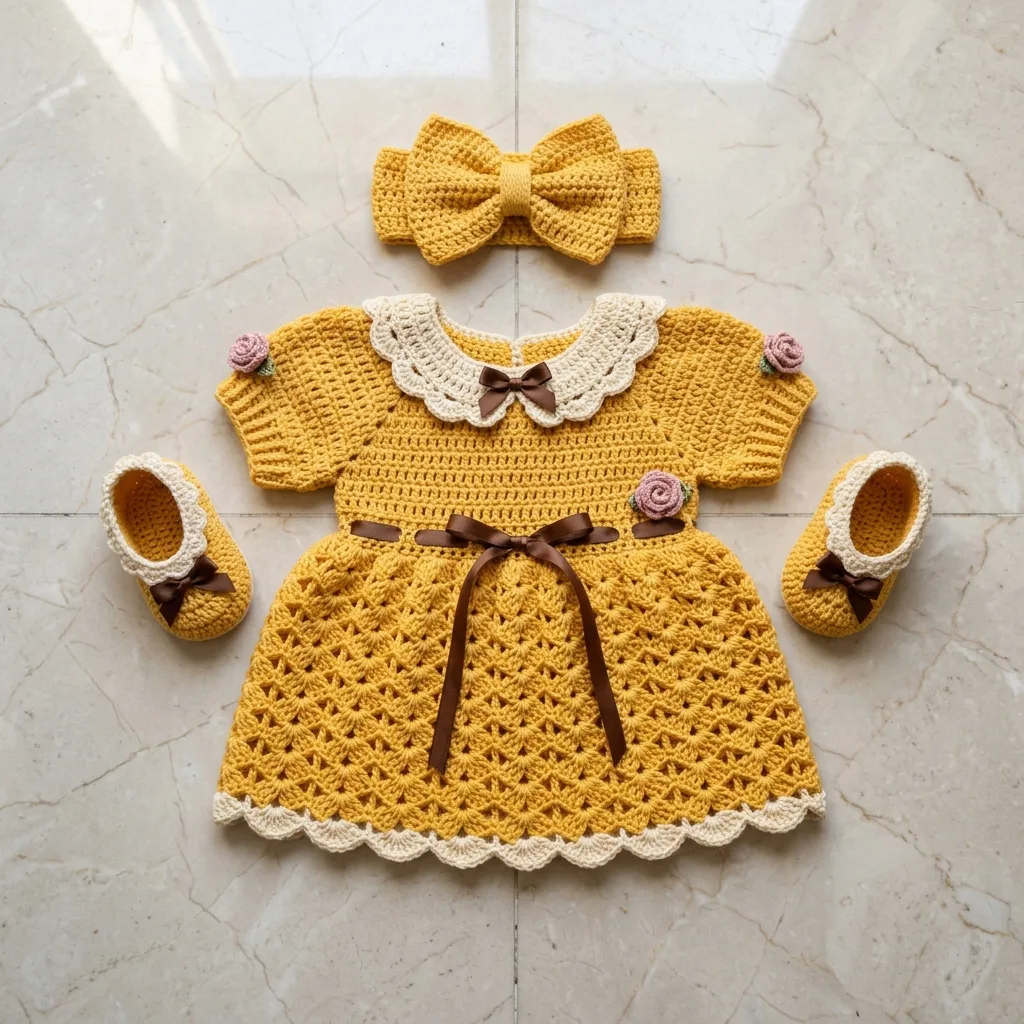
This complete baby outfit includes three matching pieces: the main dress with its iconic Peter Pan collar and shell stitch skirt, an oversized bow headband, and sweet mary jane style booties with cream trim. The entire set uses the same golden mustard yellow as the main color with cream accents throughout.
Skill Level: Intermediate beginner. If you can chain, single crochet, and double crochet confidently, you can absolutely make this dress. The shell stitch pattern for the skirt looks fancy but follows a simple repeat that becomes second nature after just a few rows.
Finished Size: 6 to 12 months (dress length approximately 14 inches from shoulder to hem, chest circumference approximately 18 inches)
Materials Needed
Yarn:
I recommend a soft cotton blend or bamboo yarn for baby garments. These fibers are gentle against delicate skin and wash beautifully. The yarn in this project appears to be a smooth, tightly plied DK weight with excellent stitch definition.
Tools:
Notions:
Abbreviations and Stitch Definitions
Before we begin, let me walk you through every stitch abbreviation you will see in this pattern.
ch = chain. Wrap yarn over hook, pull through loop on hook.
sl st = slip stitch. Insert hook, yarn over, pull through stitch and loop on hook in one motion.
sc = single crochet. Insert hook, yarn over, pull up loop, yarn over, pull through both loops. You end with one loop on your hook.
hdc = half double crochet. Yarn over, insert hook, yarn over, pull up loop (3 loops on hook), yarn over, pull through all 3 loops.
dc = double crochet. Yarn over, insert hook, yarn over, pull up loop (3 loops on hook), yarn over, pull through 2 loops, yarn over, pull through remaining 2 loops.
sk = skip. Pass over the indicated stitch without working into it.
sp = space. The gap or hole created between stitches.
Shell = 5 dc worked into the same stitch or space. This creates the pretty fan shape that gives the skirt its lovely drape.
V-stitch = (dc, ch 1, dc) worked into same stitch.
The Dress Pattern
Bodice (Worked Top Down)
The bodice is worked in rows from the neckline down to the waist. We will add the skirt afterward.
Foundation Row: With MC and 4.0mm hook, ch 53.
Row 1: Sc in 2nd ch from hook and in each ch across. (52 sc)
Row 2: Ch 1, turn. Sc in each st across. (52 sc)
Row 3 (Increase Row for Raglan Shaping): Ch 1, turn. Sc in first 8 sts, 2 sc in next st, sc in next 8 sts, 2 sc in next st, sc in next 16 sts, 2 sc in next st, sc in next 8 sts, 2 sc in next st, sc in remaining 8 sts. (56 sc)
Place stitch markers at each increase point. These mark your raglan lines where the sleeves will separate from the body.
Row 4: Ch 1, turn. Sc in each st across. (56 sc)
Row 5: Ch 1, turn. Sc to 1 st before marker, 2 sc in next st, move marker, 2 sc in next st. Repeat at each marker. Sc to end. (64 sc)
Rows 6 through 12: Repeat Rows 4 and 5 three more times, then work one plain row. You should have 88 sts total after Row 11.
Row 13 (Divide for Armholes): Ch 1, turn. Sc in first 14 sts (back), ch 4, sk next 16 sts (sleeve), sc in next 28 sts (front), ch 4, sk next 16 sts (sleeve), sc in remaining 14 sts (back). (56 body sts plus 8 ch sts = 64 sts for body)
Row 14: Ch 1, turn. Sc in each st and ch across. (64 sc)
Rows 15 through 20: Ch 1, turn. Sc in each st across. (64 sc)
This creates a fitted bodice that hits right at baby’s natural waistline. If you need a longer bodice for an older baby, add 2 to 4 more rows here.
Skirt (Shell Stitch Pattern)
Now comes the fun part. The shell stitch creates that beautiful princess-worthy fullness.
Round 1 (Join for Working in Rounds): With RS facing and continuing with MC, ch 3 (counts as dc), dc in same st, sk 2 sts, sc in next st, sk 2 sts, 5 dc in next st (shell made), sk 2 sts, sc in next st, sk 2 sts. Repeat from around. Join with sl st to top of ch 3.
You should have approximately 8 full shells around. Do not worry if you need to adjust the pattern slightly to make it work evenly. The goal is to space your shells evenly around the bodice.
Round 2: Ch 3, 2 dc in same st, sc in center dc of next shell, shell in next sc, sc in center dc of next shell. Repeat from around, ending with 2 dc in same st as beginning ch 3. Join with sl st.
Rounds 3 through 14: Repeat Round 2.
The skirt should measure approximately 8 to 9 inches from waist to hem after these rounds. Add or subtract rounds as needed for your desired length.
Skirt Edging
Final Round: With CC, join with sl st to any st. Ch 1, sc in same st, sc, ch 2, sc) in center dc of shell (creates scallop point), sc in each of next 3 sts. Repeat from around. Join with sl st. Fasten off.
This cream scalloped edge mirrors the collar and ties the whole design together beautifully.
Sleeves
Round 1: With MC, join yarn at center of underarm ch. Ch 1, sc in each ch, then sc evenly around armhole opening. Join with sl st. (Approximately 24 sc)
Rounds 2 through 8: Ch 1, sc in each st around. Join with sl st. (24 sc)
Round 9: Ch 1, sc in each st around. Join, fasten off.
Repeat for second sleeve. The sleeves are intentionally simple and fitted to keep the focus on the collar and skirt details.
Peter Pan Collar
This detachable collar is worked flat and sewn to the neckline.
Foundation: With CC and 3.5mm hook, ch 60.
Row 1: Sc in 2nd ch from hook, sc in each ch across. (59 sc)
Row 2: Ch 1, turn. Sc in first 5 sts, 2 sc in next st, sc in next 5 sts. Repeat from across. (68 sc)
Row 3: Ch 3, turn. Dc in next st, ch 1, sk 1, dc in next 2 sts. Repeat from across.
Row 4: Ch 1, turn. Sc in each dc and ch sp across.
Row 5 (Scallop Edge): Ch 1, do not turn. Working along curved outer edge, (sc, hdc, dc, hdc, sc) in corner, sc evenly along shaped edge. Repeat from for second collar piece.
The collar should lay flat with two rounded "wings" that meet at center front. Sew to neckline with cream yarn, leaving a small gap at back for closure.
Bow Headband
This oversized bow makes the perfect finishing touch.
Headband
Foundation: With MC, ch 8.
Row 1: Sc in 2nd ch from hook, sc in each ch across. (7 sc)
Rows 2 through 70: Ch 1, turn. Sc in each st across. (7 sc)
This creates a band long enough to stretch comfortably around baby’s head. Adjust length as needed by adding or removing rows.
Join short ends with sl st to form a loop. Weave in ends.
Bow Piece
Foundation: With MC, ch 25.
Row 1: Sc in 2nd ch from hook, sc in each ch across. (24 sc)
Rows 2 through 20: Ch 1, turn. Sc in each st across. (24 sc)
Fasten off, leaving a long tail. Fold piece in half widthwise and seam the short edges together to create a tube. Flatten with seam at center back.
Bow Center Wrap
Foundation: With MC, ch 6.
Row 1: Sc in 2nd ch from hook, sc in each ch across. (5 sc)
Rows 2 through 10: Ch 1, turn. Sc in each st across. (5 sc)
Fasten off.
Pinch the bow piece at center to create the bow shape. Wrap the center piece around the pinched center and the headband, securing everything together. Sew in place on the back.
Mary Jane Booties (Make 2)
Sole
Round 1: With MC, ch 10. Sc in 2nd ch from hook, sc in next 7 ch, 3 sc in last ch. Working along opposite side of foundation ch, sc in next 7 sts, 2 sc in last st. Join with sl st. (20 sc)
Round 2: Ch 1, 2 sc in first st, sc in next 7 sts, 2 sc in each of next 3 sts, sc in next 7 sts, 2 sc in each of last 2 sts. Join. (26 sc)
Round 3: Ch 1, sc in each st around. Join. (26 sc)
Sides
Rounds 4 through 6: Ch 1, working in back loops only for Round 4, then both loops for Rounds 5 and 6, sc in each st around. Join. (26 sc)
Toe Shaping
Row 7: Ch 1, sc in first 8 sts. Ch 1, turn.
Row 8: Sc2tog, sc in next 4 sts, sc2tog. Ch 1, turn. (6 sc)
Row 9: Sc2tog, sc in next 2 sts, sc2tog. (4 sc)
Fasten off.
Ankle Strap
Rejoin MC to side of bootie opening.
Row 1: Ch 1, sc evenly around opening (approximately 14 sc), ch 8 for strap extension at one side.
Row 2: Sc in 2nd ch from hook, sc in each ch and st across.
Fasten off.
Bootie Trim
With CC, join at back heel. Sc evenly around entire opening and strap. Fasten off.
Add a small brown satin bow to the strap of each bootie.
Rosette Embellishments (Make 4)
These tiny rolled roses add the perfect vintage touch.
With AC, ch 20.
Row 1: 3 dc in 4th ch from hook, 4 dc in each remaining ch across.
This creates a ruffled strip. Roll tightly from one end, securing with a few stitches as you go to create a rose shape. Sew roses to sleeve tops and one to the waist area as shown.
Assembly and Finishing
1. Weave in all ends securely.
2. Attach collar to neckline, positioning the two collar pieces to meet at center front.
3. Thread chocolate brown satin ribbon through waist area, tying in a bow at front. You can weave it through the row just above where the skirt begins.
4. Add small bows to bootie straps.
5. Sew rosettes to sleeves and bodice.
6. Add a small snap or button at back neck for closure.
Block lightly if needed by laying flat and spritzing with water. Avoid pressing with a hot iron on acrylic yarns.
Pattern Notes and Tips
Gauge matters for fit. Work a small swatch in single crochet before beginning. You should get approximately 18 stitches and 20 rows per 4 inches with DK yarn and a 4.0mm hook.
Adjusting sizes: For a smaller 0 to 6 month size, use a 3.5mm hook throughout and reduce the starting chain by 6 stitches. For a larger 12 to 18 month size, use a 4.5mm hook and add 6 stitches to the starting chain.
Ribbon safety: If this dress will be worn without supervision, consider crocheting a chain in place of the ribbon or omitting the waist tie entirely. Ribbons can pose a strangulation hazard for babies.
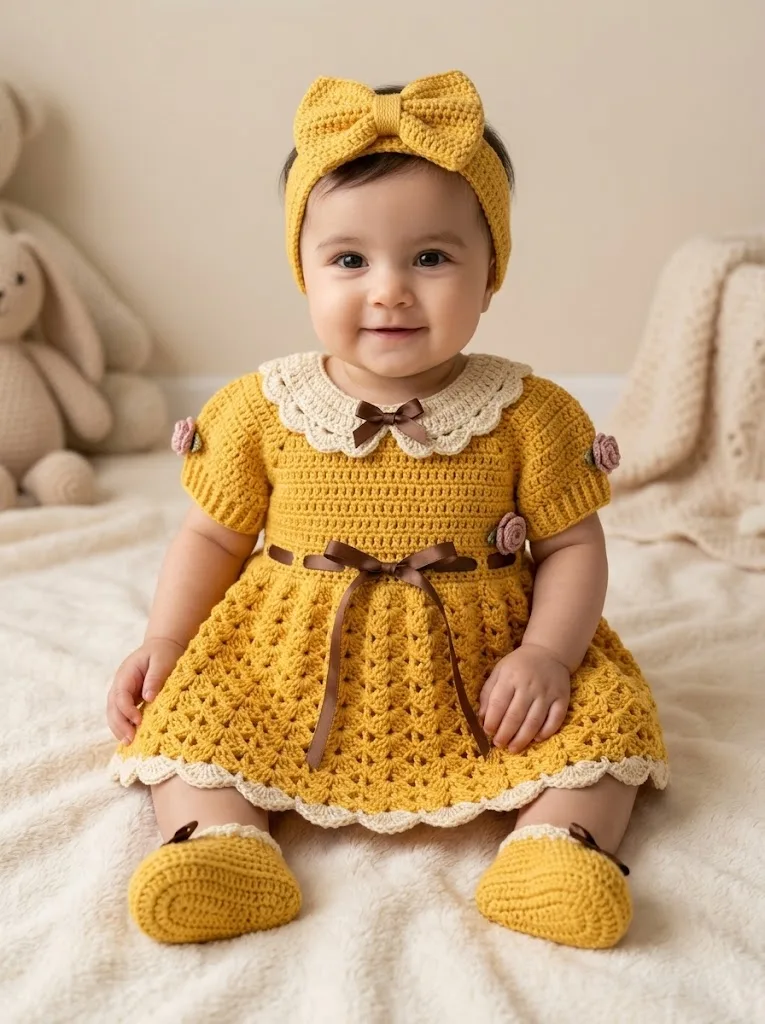
This Belle yellow princess baby dress crochet pattern creates a keepsake outfit that any family would treasure. The combination of the shell stitch skirt, elegant Peter Pan collar, and matching accessories makes this set photograph beautifully for milestone moments.
I really hope you enjoy making this sweet princess dress set as much as I enjoyed designing it. If you create one, please save this pattern to your Pinterest boards so you can find it again easily. And I would absolutely love to see your finished dresses, so drop a comment below or tag me on Instagram when you complete yours. Happy crocheting, friend!
