
This one is SUPER fun to make, and I promise it looks way more complicated than it actually is! If you have been wanting to try a structured bag project but felt intimidated, this candy cotton bow handbag is the perfect place to start.
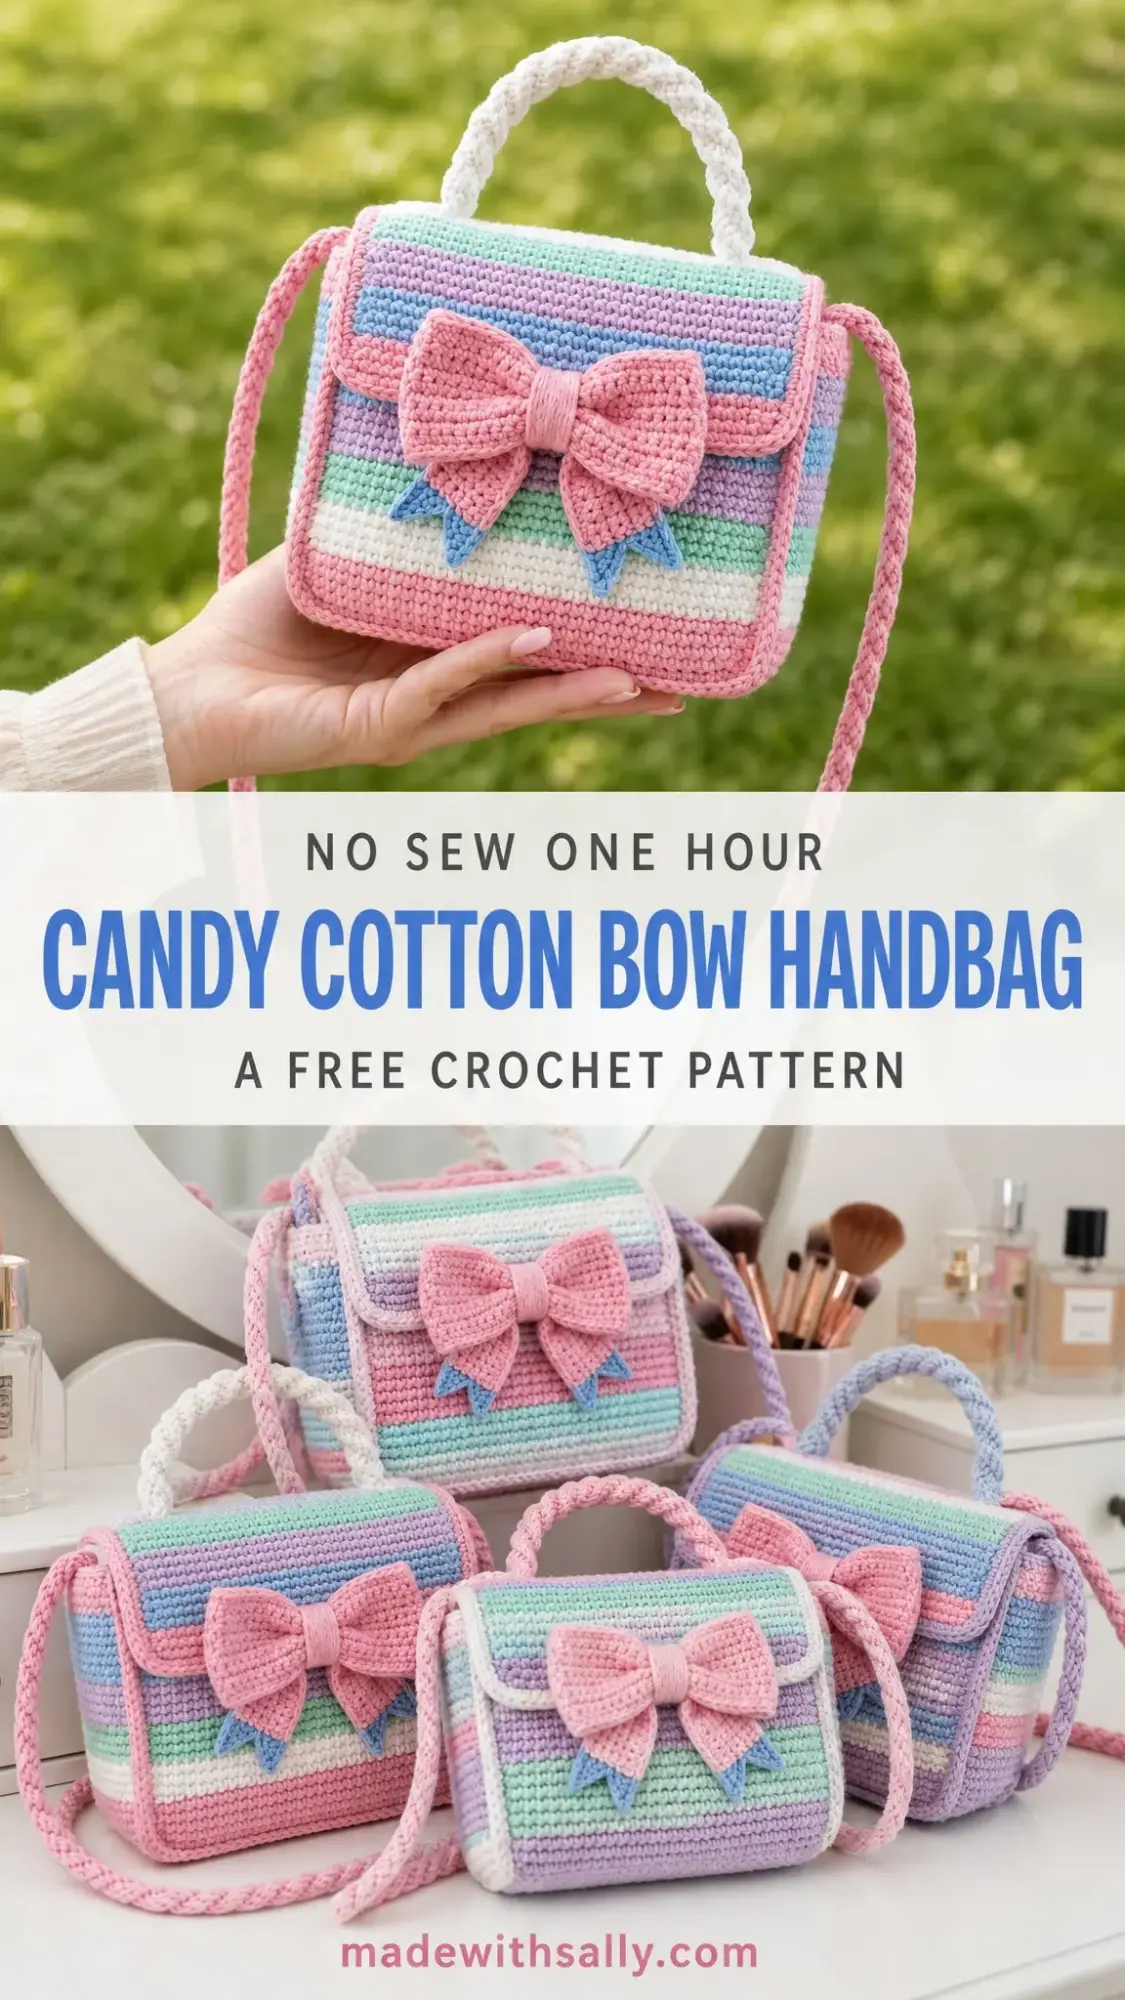
The whole thing comes together with basic single crochet panels, simple seaming, and a show-stopping dimensional bow that will make everyone ask where you bought it. You can finish this beauty in about 8 to 12 hours total, and it makes an absolutely adorable gift for the style-loving crocheter in your life.
Those pastel stripes? Those are just color changes, which I will walk you through step by step. The oversized bow? Easier than it looks. Let me show you exactly how to make this gorgeous little handbag from start to finish.
About This Candy Cotton Bow Handbag Pattern
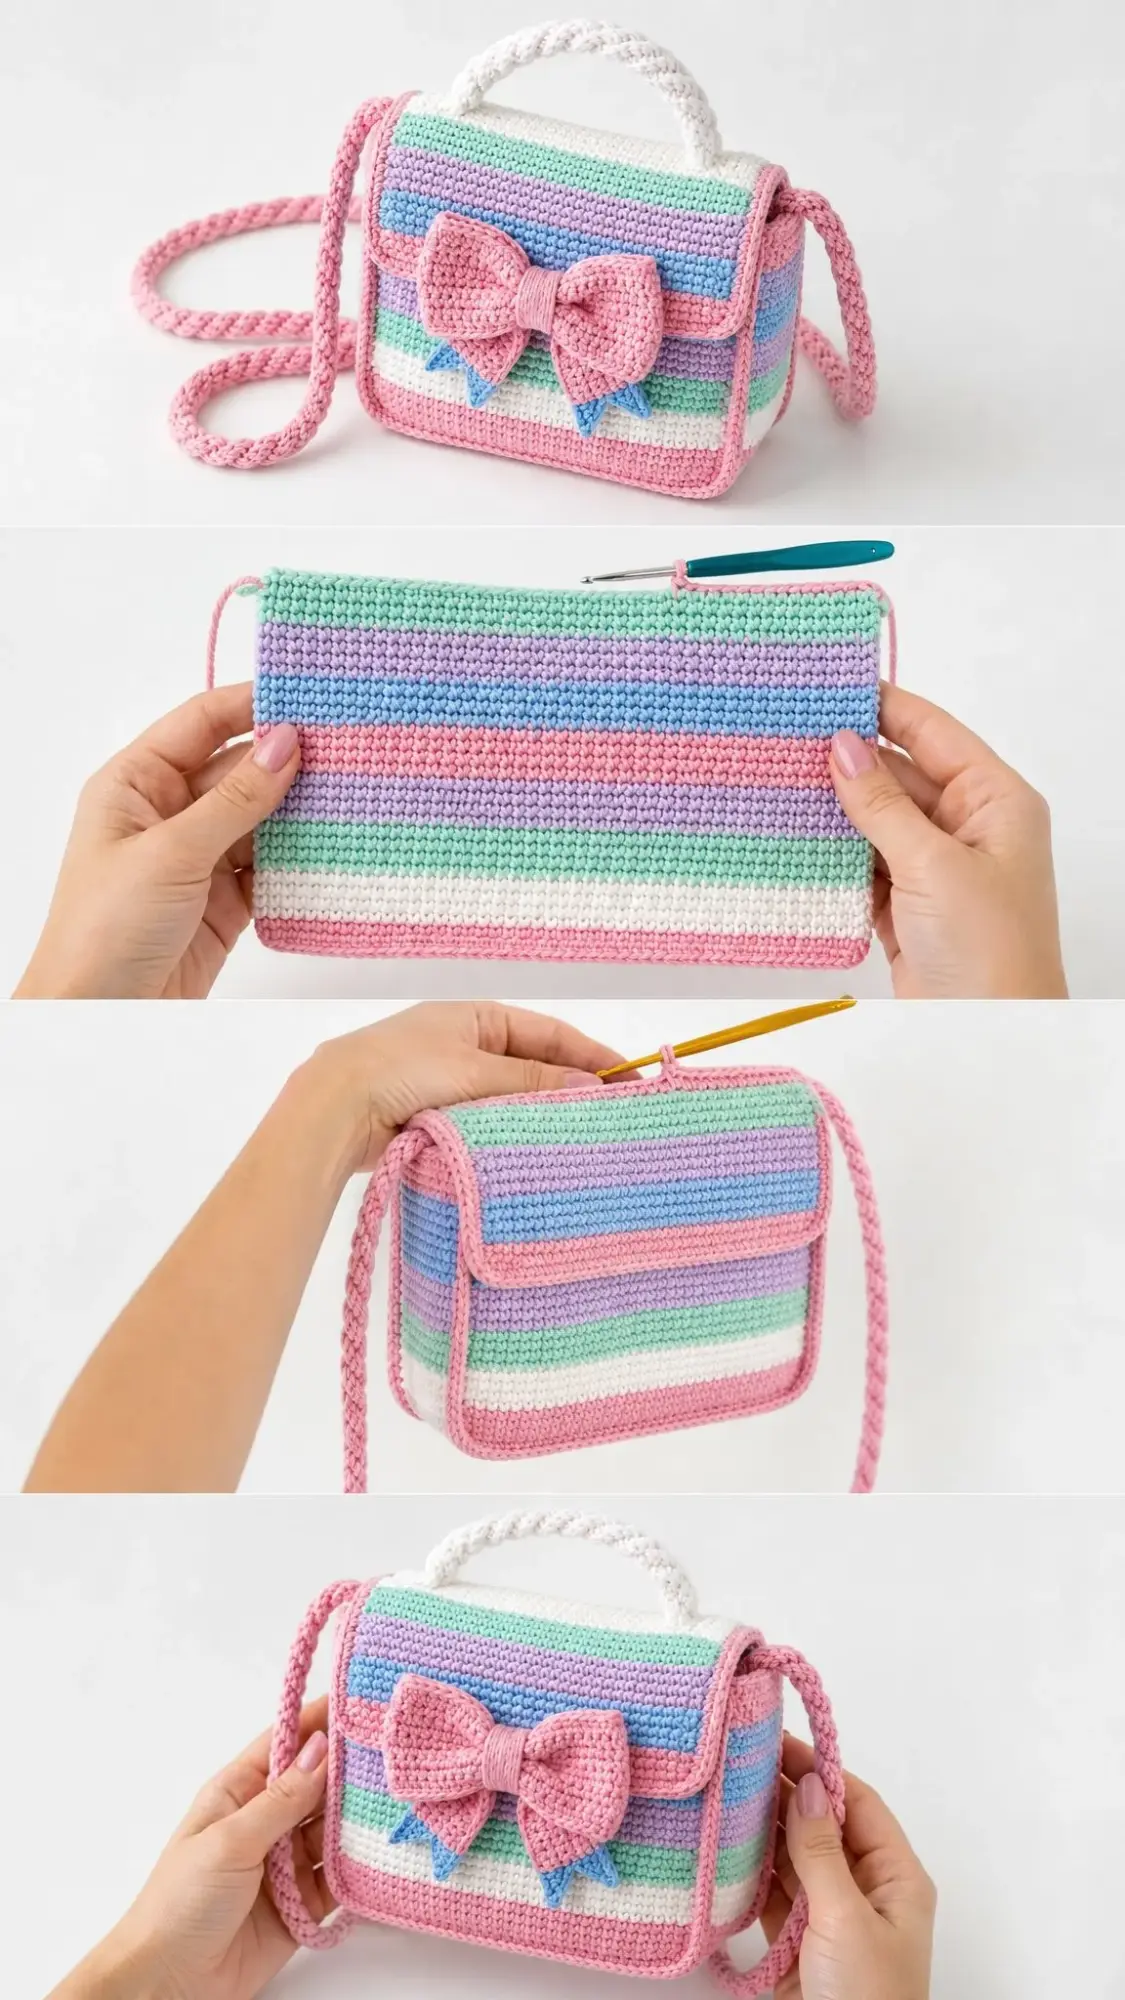
This structured mini handbag features a rectangular body with pastel stripes, a soft front flap, an oversized blush pink bow with sky blue tails, a braided shoulder cord, and a rounded cream top handle. The finished piece measures approximately 8.5 inches wide by 6.25 inches tall by 2.5 inches deep, not including the straps.
The construction is straightforward. You will make flat panels using single crochet (sc), seam them together into a box shape, add a flap, create the bow separately, and attach everything at the end. If you can crochet a rectangle and sew pieces together, you can absolutely make this bag.
I would call this a confident beginner to intermediate level project. The stitches themselves are simple, but you will need to manage color changes, keep your edges neat, and do some careful seaming to get that polished look.
Materials You Will Need
Here is everything you need to gather before you start:
Yarn: Worsted weight (medium 4) cotton or cotton blend yarn. You will need approximately 300 to 360 yards total across all colors.
Color Breakdown:
Hook: US G/6 (4.0 mm) crochet hook, or whatever size you need to achieve gauge.
Notions: Stitch markers, yarn needle, scissors, pins, measuring tape. Optional items include a magnetic snap for closure and plastic canvas or felt for lining if you want extra structure.
Yarn Suggestions: Choose a smooth cotton or cotton blend so the handbag keeps its shape and the bow edges stay crisp. Good options include Lily Sugar’n Cream Solids, Paintbox Yarns Cotton Aran, or Lion Brand 24/7 Cotton. Any sturdy worsted cotton that matches gauge and gives a firm fabric will work beautifully.
Gauge
16 sc x 18 rows = 4 inches (10 cm) in single crochet, blocked gently.
Please swatch before starting and change your hook size if needed. A firm gauge helps the bag stand up neatly on its own. If your fabric feels too loose or floppy, go down a hook size.
Checkpoint: Each main panel should measure about 8.5 inches wide and 6.25 inches tall after Row 28.
Stitch Guide and Abbreviations
This pattern uses US crochet terms. If you are a UK crocheter, remember that US single crochet equals UK double crochet, and US slip stitch equals UK slip stitch.
Special Techniques
Clean Color Change: Work the last single crochet of the old color until 2 loops remain on your hook. Yarn over with the new color and pull through both loops. This gives you a crisp color transition. You can carry the tails along the wrong side or weave them in as you go.
sc2tog (Single Crochet Decrease): Insert your hook in the next stitch, yarn over and pull up a loop. Insert your hook in the following stitch, yarn over and pull up a loop. You now have 3 loops on your hook. Yarn over and pull through all 3 loops. You have turned 2 stitches into 1.
Romanian-Style Cord: This creates a beautiful round cord for your handles. Chain 2. Single crochet in the 2nd chain from hook. Turn the work slightly clockwise, insert your hook under the left side bar, yarn over and pull up a loop, yarn over and pull through both loops. Repeat this process to your desired length, always working under the side bar. It sounds tricky but becomes rhythmic quickly.
Important Notes
Chain 1 to turn at the start of single crochet rows. The turning chain does NOT count as a stitch. Work into the first stitch unless instructed otherwise. Keep your seams snug but not too tight so the striped edges stay straight and aligned.
Individual results may vary depending on your yarn, tension, hook size, and finishing technique. You may need to make small adjustments to achieve the closest possible result to the finished project shown.
Left-handed crocheters: Work the same instructions. Your seaming direction and bow wrap may mirror the photos. Just place the bow centered on the flap before sewing.
Color Stripe Sequence
This stripe sequence applies to the Front Panel, Back Panel, and Side Panels:
Front and Back Panels (Make 2)
With blush pink, chain 35.
Row 1: Sc in 2nd ch from hook and each ch across. Ch 1, turn. (34 sc)
Rows 2 to 4: Sc across. Change to cream at the end of Row 4. Ch 1, turn. (34 sc each row)
Rows 5 to 7: With cream, sc across. Change to mint at the end of Row 7. Ch 1, turn. (34 sc each row)
Rows 8 to 10: With mint, sc across. Change to lavender at the end of Row 10. Ch 1, turn. (34 sc each row)
Rows 11 to 14: With lavender, sc across. Change to coral pink at the end of Row 14. Ch 1, turn. (34 sc each row)
Rows 15 to 17: With coral pink, sc across. Change to sky blue at the end of Row 17. Ch 1, turn. (34 sc each row)
Rows 18 to 21: With sky blue, sc across. Change to lavender at the end of Row 21. Ch 1, turn. (34 sc each row)
Rows 22 to 25: With lavender, sc across. Change to mint at the end of Row 25. Ch 1, turn. (34 sc each row)
Rows 26 to 28: With mint, sc across. FO after Row 28. (34 sc; piece measures approximately 8.5 x 6.25 inches)
Bottom Panel
With blush pink, chain 35.
Row 1: Sc in 2nd ch from hook and each ch across. Ch 1, turn. (34 sc)
Rows 2 to 10: Sc across. FO. (34 sc each row; piece measures approximately 8.5 x 2.25 inches)
Side Panels (Make 2)
With blush pink, chain 11.
Work the same 28-row stripe sequence as the main panels, following the color changes listed above.
(10 sc each row; piece measures approximately 2.5 x 6.25 inches)
Front Flap
With mint, chain 35.
Row 1: Sc in 2nd ch from hook and each ch across. Ch 1, turn. (34 sc)
Rows 2 to 3: Sc across. Ch 1, turn. (34 sc each row)
Rows 4 to 6: With lavender, sc across. Ch 1, turn. (34 sc each row)
Rows 7 to 9: With sky blue, sc across. Ch 1, turn. (34 sc each row)
Rows 10 to 12: With coral pink, sc across. FO. (34 sc each row; piece measures about 2.75 inches deep)
Flap Edging: Join blush pink at the upper right corner. Sc evenly around all 4 edges, placing 3 sc in each corner. Join with sl st. FO. The edging frames the flap and softens the corners beautifully.
Bow Components
Bow Loops (Make 2)
With blush pink, chain 14.
Row 1: Sc in 2nd ch from hook and each ch across. Ch 1, turn. (13 sc)
Rows 2 to 9: Sc across. FO, leaving a long tail for sewing. (13 sc each row; piece measures approximately 3.25 x 2 inches)
Bow Tails (Make 2)
With sky blue, chain 9.
Row 1: Sc in 2nd ch from hook and each ch across. Ch 1, turn. (8 sc)
Row 2: Sc2tog, sc 4, sc2tog. Ch 1, turn. (6 sc)
Row 3: Sc2tog, sc 2, sc2tog. Ch 1, turn. (4 sc)
Row 4: Sc2tog twice. FO. (2 sc)
Bow Center
With blush pink, chain 7.
Row 1: Sc in 2nd ch from hook and each ch across. Ch 1, turn. (6 sc)
Rows 2 to 8: Sc across. FO, leaving a long tail for wrapping. (6 sc each row)
Shaping the Bow
Pinch each bow loop at the center to create that classic gathered bow shape. Place the two loops side by side with the sky blue tails angled downward behind them. Wrap the center band around all layers tightly and sew securely on the back. Once assembled, sew the finished bow to the center of the flap.
Top Handle and Shoulder Cord
Top Handle: With cream, make a Romanian-style cord 14 inches long. Sew the ends to the top edge of the back panel, centered, about 1.5 inches in from each side so the handle arches softly.
Shoulder Cord: With blush pink, make a Romanian-style cord 42 inches long, or your desired length. Sew one end to each upper side seam. For extra strength, stitch through the cord end several times and hide the tails inside the bag.
Assembly and Finishing
Block your panels lightly before seaming. Do not stretch them. Square each rectangle and let dry flat.
Step 1: With wrong sides together, seam the bottom panel to the lower edge of the front panel using blush pink and whipstitch or mattress stitch. Seam the other long edge of the bottom panel to the lower edge of the back panel.
Step 2: Attach one side panel between the front and back along the left side edges, matching Row 1 at the bottom and Row 28 at the top. Repeat for the second side panel on the right.
Step 3: With blush pink, work one round of sc around the top opening. Place 1 sc in each stitch across front and back edges, and about 3 sc for every 4 row ends on side edges. Join with sl st.
Step 4: Sew the flap to the top back edge, centered across 34 stitches. The flap should fold over the upper front third of the bag.
Step 5: Sew the bow to the center front of the flap. Add an optional magnetic snap behind the bow and on the bag front, making sure the snap is hidden when closed.
Step 6: Weave in all remaining ends. Add optional lining or plastic canvas panels for a crisp handbag shape.
Assembly Checkpoint
After assembly, the top opening should measure about 8.5 inches across the front and 2.5 inches deep. Side seams should stand straight, and the flap should lie flat without pulling.
Blocking Tips
Steam lightly from above or wet-block gently. Pin corners square. Let the bag dry completely before adding a snap or lining.
Quick Checklist
Before you finish, make sure you have completed:
Troubleshooting Common Issues
Bag feels floppy: Use a smaller hook, firmer cotton yarn, tighter seams, or add lining and plastic canvas inside.
Panel is too wide: Check your gauge. If 16 sc is wider than 4 inches, go down a hook size.
Flap curls: Block gently and avoid tight edging. Work your corner stitches a bit more loosely.
Bow droops: Sew through all layers at the center and add a few hidden stitches at the lower corners to secure it.
Side seams twist: Pin every stripe before seaming so color bands align from front to back.
Care Instructions
Spot clean when possible. For a deeper clean, hand wash gently in cool water, press out moisture in a towel, reshape, and dry flat. Do not wring. Remove contents before washing. If you added lining, follow the care requirements of the lining fabric and any hardware.
Size Customization Tips
To adjust width: Add or subtract chains in pairs. Each 4 sc changes width by about 1 inch at gauge.
To adjust height: Add or remove full stripe rows, keeping front, back, side panels, and flap balanced.
To adjust depth: Change the side and bottom panel width. Every 4 sc changes depth by about 1 inch.
I really hope you love making this candy cotton bow handbag as much as I do! It is one of those projects that looks impressive on a vanity or as an accessory, and the pastel color palette makes it perfect for spring and summer outings.
If you found this crochet pattern helpful, I would love for you to save it to your Pinterest boards so you can find it easily when you are ready to start. And please leave a comment below if you make one. I always love seeing your finished projects and hearing which color combinations you chose!
