Let me address something right away. You might be looking at this gorgeous structured handbag with its dramatic bow and gold hardware and thinking, "There’s no way I can make that." I hear you. Bags with hardware and dimensional embellishments look intimidating. But here’s the truth. This entire bag uses single crochet. That’s it. If you can work a single crochet stitch, you can absolutely make this elegant accessory. The bow is worked flat and attached separately. The hardware clips right on. The striped handle is just alternating colors in a tube. I promise you, this project is far more approachable than it appears, and I’m going to walk you through every single step.
About This Cream White Elegant Bow Bag Crochet Pattern
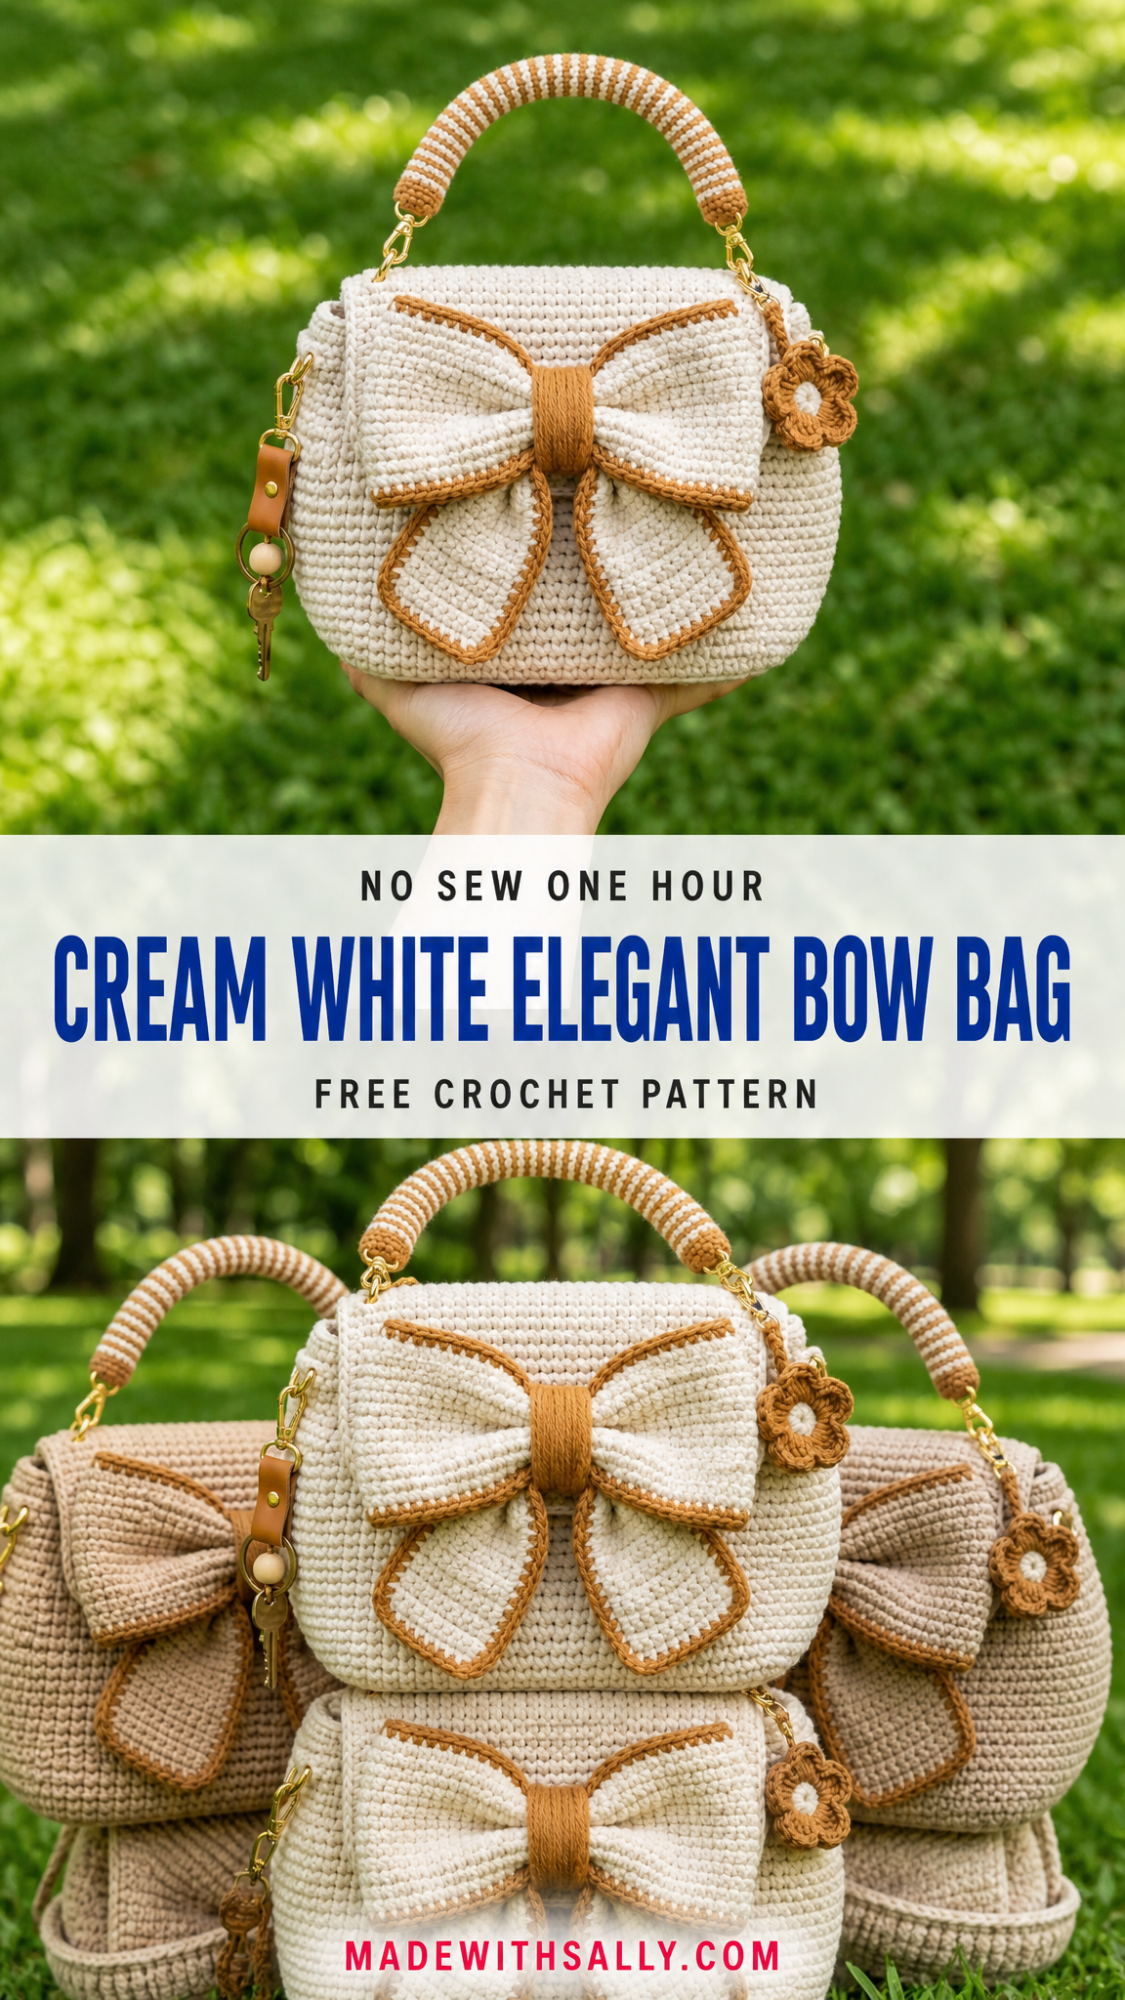
This structured handbag features a classic rounded rectangular shape with a statement oversized bow on the front. The bag body is worked entirely in single crochet (sc) using a tight gauge that creates a sturdy, professional-looking fabric. The construction is surprisingly straightforward. You’ll work the base flat, then continue in the round to build up the sides.
The detachable handle features charming caramel and cream stripes and attaches with gold swivel clasps. A small crocheted flower accent adds a sweet finishing touch. The overall effect is sophisticated enough for a night out yet handmade with love.
Finished Dimensions: Approximately 9 inches wide x 6.5 inches tall x 3.5 inches deep (not including handle)
Skill Level: Intermediate. While the stitches are beginner-friendly, the construction requires attention to detail and some assembly.
Materials Needed
Yarn:
Cotton yarn works best for bags because it holds its shape beautifully and doesn’t stretch over time. I recommend a yarn with tight twist for that polished, structured look you see in the photos.
Hook:
Hardware:
Notions:
Abbreviations and Stitch Definitions
Before we begin, let me explain every stitch abbreviation you’ll encounter:
Ch = Chain. Wrap yarn over hook, pull through loop on hook. This creates your foundation.
Sl st = Slip stitch. Insert hook, yarn over, pull through both the stitch and the loop on your hook in one motion. Used for joining rounds and creating flat surface stitches.
Sc = Single crochet. Insert hook into stitch, yarn over and pull up a loop (2 loops on hook), yarn over and pull through both loops. This is the primary stitch for the entire bag.
Inc = Increase. Work 2 single crochet stitches into the same stitch. This adds one stitch to your count.
Dec = Decrease. Insert hook into first stitch and pull up a loop, insert hook into next stitch and pull up a loop (3 loops on hook), yarn over and pull through all 3 loops. This removes one stitch from your count.
Gauge
16 sc x 18 rows = 4 inches in single crochet
Gauge matters for bags! A loose gauge will create a floppy bag that doesn’t hold its shape. If your gauge is too loose, go down a hook size. The fabric should feel dense and sturdy, not soft and drapey.
Bag Base Instructions
The base is worked flat in rows, creating an oval shape.
With cream yarn and 4.0mm hook:
Row 1: Ch 25. Sc in 2nd ch from hook and in each ch across. (24 sc)
Row 2: Ch 1, turn. 2 sc in first st (inc made), sc in next 22 sts, 2 sc in last st. (26 sc)
Row 3: Ch 1, turn. 2 sc in first st, sc in next 24 sts, 2 sc in last st. (28 sc)
Row 4: Ch 1, turn. 2 sc in first st, sc in next 26 sts, 2 sc in last st. (30 sc)
Row 5: Ch 1, turn. Sc in each st across. (30 sc)
Row 6: Ch 1, turn. 2 sc in first st, sc in next 28 sts, 2 sc in last st. (32 sc)
Rows 7-10: Ch 1, turn. Sc in each st across. (32 sc)
Row 11: Ch 1, turn. Dec, sc in next 28 sts, dec. (30 sc)
Row 12: Ch 1, turn. Sc in each st across. (30 sc)
Row 13: Ch 1, turn. Dec, sc in next 26 sts, dec. (28 sc)
Row 14: Ch 1, turn. Dec, sc in next 24 sts, dec. (26 sc)
Row 15: Ch 1, turn. Dec, sc in next 22 sts, dec. (24 sc)
Do not fasten off. You’ll continue directly into the body.
Bag Body Instructions
Now you’ll work around the entire edge of the base, then spiral upward to create the sides.
Round 1: Ch 1, do not turn. Work sc evenly around the entire base, placing 3 sc in each corner to round them nicely. Join with sl st to first sc. Place a stitch marker. (Approximately 78-82 sc, depending on your tension)
Don’t stress about hitting an exact number here. What matters is that your stitches are evenly distributed and the corners curve smoothly.
Rounds 2-24: Sc in each st around. Do not join. Work in a continuous spiral, moving your stitch marker up each round. (Same stitch count maintained)
A quick tip for spiral rounds: use a different colored piece of yarn as a running stitch marker. Move it up every round so you always know where your round begins.
Round 25: Sl st in each st around. Join with sl st. Fasten off.
This final slip stitch round creates a nice finished edge at the top of your bag.
Bag Flap Instructions
The flap gives your bag that structured closure look. It’s worked separately and attached.
With cream yarn:
Row 1: Ch 27. Sc in 2nd ch from hook and in each ch across. (26 sc)
Rows 2-12: Ch 1, turn. Sc in each st across. (26 sc)
Row 13: Ch 1, turn. Dec, sc in next 22 sts, dec. (24 sc)
Row 14: Ch 1, turn. Dec, sc in next 20 sts, dec. (22 sc)
Row 15: Ch 1, turn. Dec, sc in next 18 sts, dec. (20 sc)
Row 16: Ch 1, turn. Dec, sc in next 16 sts, dec. (18 sc)
Do not fasten off. Continue with caramel yarn for the edging.
Edging: Ch 1, sc evenly around all four sides of the flap, working 3 sc in each corner. Join with sl st. Fasten off.
Oversized Bow Instructions
The bow is the star of this bag! It’s worked in two identical pieces, then assembled.
Bow Loops (make 2):
With cream yarn:
Row 1: Ch 22. Sc in 2nd ch from hook and in each ch across. (21 sc)
Rows 2-16: Ch 1, turn. Sc in each st across. (21 sc)
Fasten off, leaving a long tail for seaming.
Fold each rectangle in half lengthwise (so the short ends meet) and whip stitch the short ends together to form a loop.
Bow Edging:
Join caramel yarn at the seam of each bow loop. Sl st around the entire outer edge of each loop, creating that beautiful golden outline you see in the photos. Fasten off.
Bow Center Wrap:
With caramel yarn:
Row 1: Ch 8. Sc in 2nd ch from hook and in each ch across. (7 sc)
Rows 2-10: Ch 1, turn. Sc in each st across. (7 sc)
Fasten off, leaving a long tail.
Assembling the Bow:
Stack both bow loops on top of each other, slightly offset. Pinch the center firmly to create that gathered bow shape. Wrap the caramel center piece around the pinched middle, pulling tight. Sew the ends of the wrap together at the back.
Striped Handle Instructions
This handle is worked in the round as a tube, then stuffed lightly with yarn scraps or left as is.
With caramel yarn:
Round 1: Ch 4. Join with sl st to form a ring. Ch 1, work 8 sc into the ring. Do not join. Work in a continuous spiral. (8 sc)
Rounds 2-3: Sc in each st around with caramel. (8 sc)
Rounds 4-5: Change to cream. Sc in each st around. (8 sc)
Continue alternating 2 rounds caramel, 2 rounds cream until handle measures approximately 10 inches or desired length.
Final round: Sl st in each st around. Fasten off.
To change colors neatly: on the last yarn over of the final stitch before the color change, pull through with the new color. This makes your stripes crisp and clean.
Flower Accent Instructions
With caramel yarn:
Magic ring: Ch 2, work 5 dc into ring, join with sl st to top of ch 2. (5 dc plus beginning chain creates 6 petal bases)
Petals: *Ch 3, sl st in same st, sl st in next st.* Repeat around. (6 petals)
Fasten off. With cream yarn, add a French knot or small ball to the center by wrapping yarn around your finger several times and securing it.
Assembly Instructions
Here’s where everything comes together. Take your time with this part.
Step 1: Attach D-rings to each side of the bag, approximately 1 inch down from the top edge. You can sew them directly onto the bag sides or crochet small tabs to hold them.
Step 2: Center the bag flap along the back top edge of the bag. Use a whip stitch to attach securely.
Step 3: Position the assembled bow on the front center of the bag, overlapping slightly onto the flap. Sew in place through all layers at the center and at the outer edges of each bow loop.
Step 4: Attach swivel clasps to each end of the striped handle using jump rings.
Step 5: Clip the handle onto the D-rings.
Step 6: Add the flower accent to one side of the bag, near the D-ring. Sew or attach with a small safety pin if you want it removable.
Optional Lining
For a truly professional finish, consider adding a fabric lining. Cut two rectangles of cotton fabric slightly smaller than your bag dimensions. Sew them together along the sides and bottom, fold the top edge under, and hand stitch the lining inside the bag. This protects your belongings and adds structure.
Styling Your Elegant Bow Bag
This versatile bag works beautifully for so many occasions. Carry it to brunch, a wedding, or a special dinner. The neutral cream and caramel color palette pairs with virtually any outfit. Try making it in different color combinations. Navy with white edging would be stunning. Black with red accents feels glamorous. Sage green with cream gives cottage core vibes.
Troubleshooting Tips
My bag is floppy: Your gauge is likely too loose. Try going down a hook size and starting fresh. Alternatively, you can stiffen the finished bag with fabric stiffener spray or add plastic canvas inserts.
The bow won’t stay centered: Add a few extra stitches at the corners of the bow to secure it firmly. You can also add a hidden snap or small Velcro dot behind the bow for extra security.
My stripes look messy: Make sure you’re changing colors on the final yarn over of the stitch before the stripe change. Carrying the unused color up inside the tube also helps keep things neat.
Care Instructions
Hand wash your cream white elegant bow bag in cool water with mild soap. Reshape while damp and lay flat to dry. Avoid wringing, which can distort the structure. Store stuffed with tissue paper to maintain shape.
I hope this crochet pattern helps you create something truly special. This elegant bow bag makes a wonderful gift for someone you love, or honestly, just treat yourself. You deserve a gorgeous handmade accessory!
If you make this bag, I would absolutely love to see your version. Tag me on Instagram or share a photo in my Facebook group. Nothing makes my day brighter than seeing your finished projects out in the world.
Go ahead and save this pattern to your Pinterest boards so you can find it when you’re ready to start stitching. And please drop a comment below if you make this bag or have any questions along the way. I read every single one!
