Let me bust a myth right now. Crocheting wearable sneakers is not as intimidating as it looks. I know, I know. You see those gorgeous mesh panels and those perfectly shaped toe caps and you think, "There’s no way I can make that." But here’s the truth. If you can single crochet and chain, you already have the skills you need. The mesh stitch that creates those beautiful open panels? It’s just chains and single crochets worked in a simple repeat. The construction breaks down into small, manageable pieces that come together like a puzzle. Whether you’re an adventurous beginner ready to level up or an experienced crocheter looking for your next obsession, these charcoal gray mesh crochet sneakers are absolutely within your reach.
Why You’ll Love This Crochet Sneakers Pattern
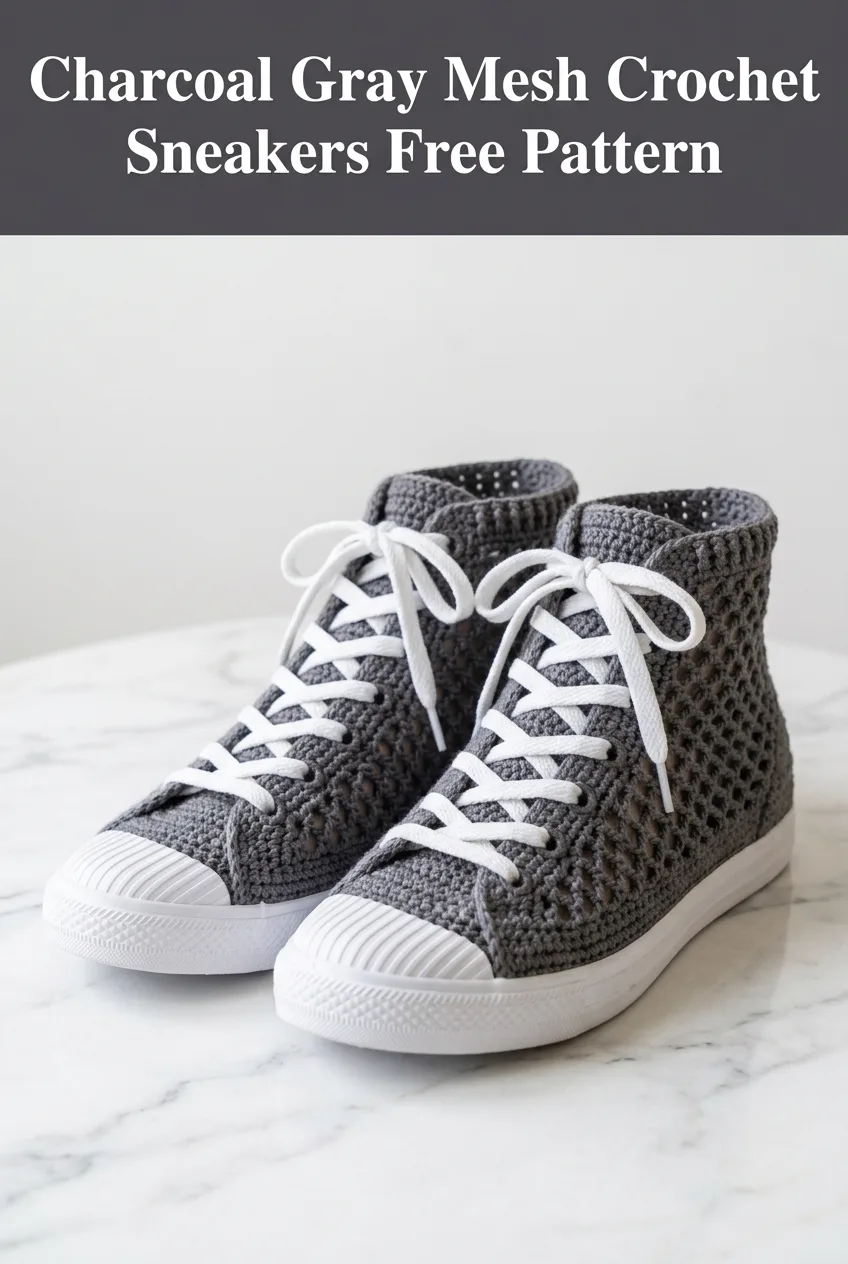
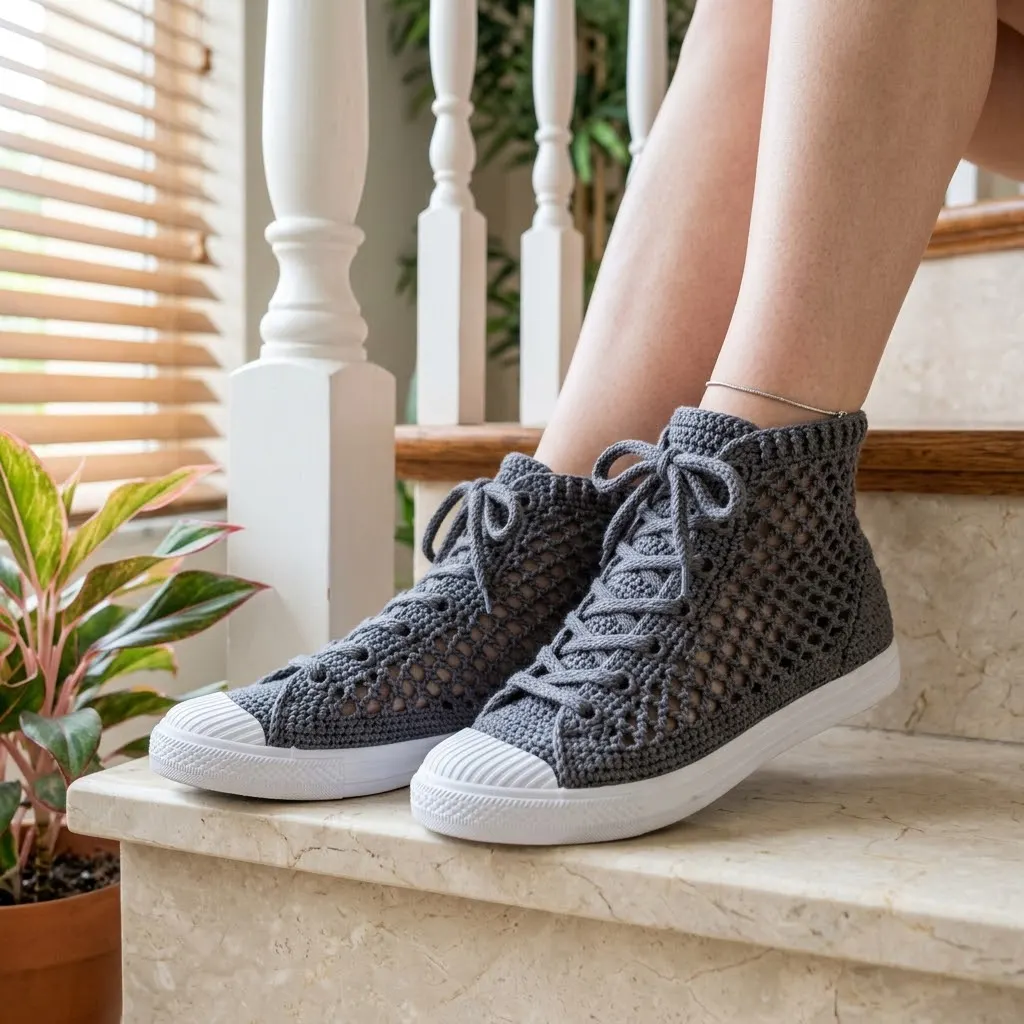
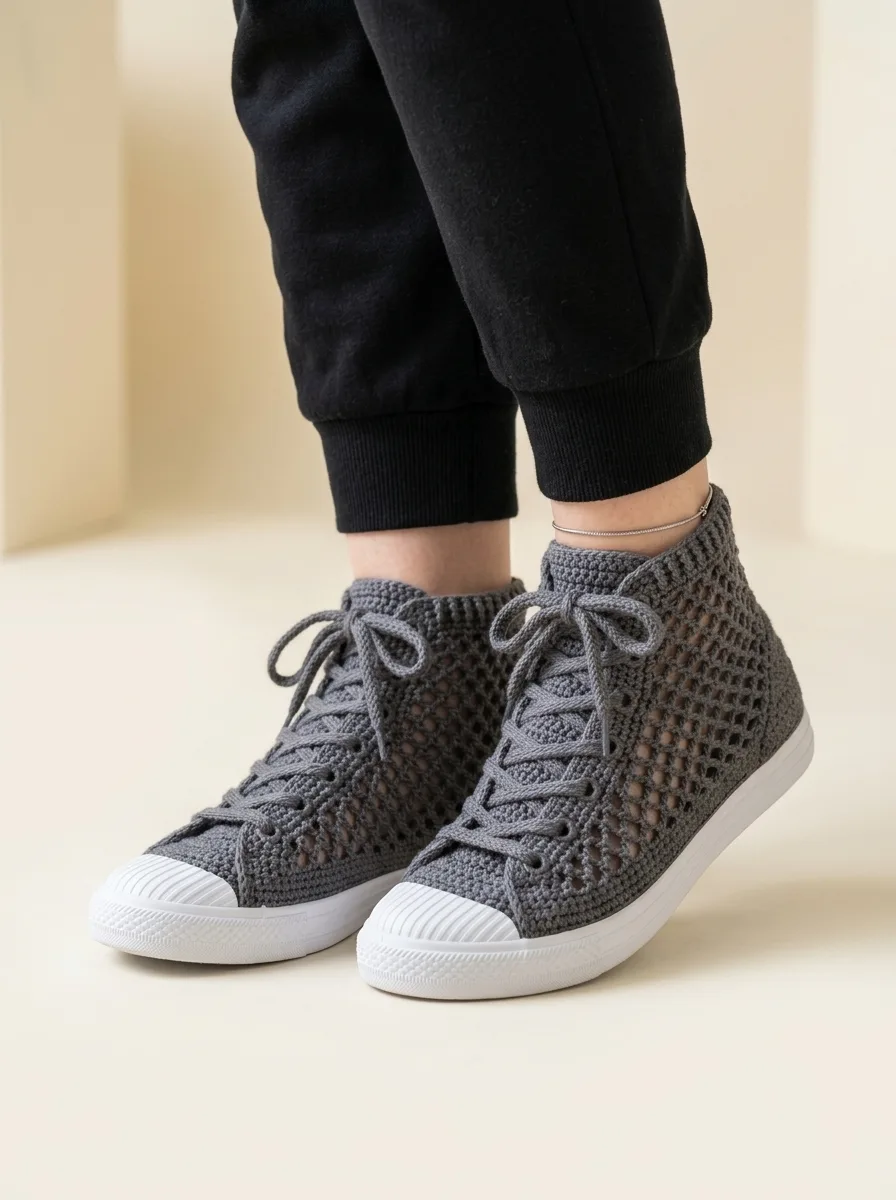
These high-top style crochet sneakers combine fashion and function in the most satisfying way. The mesh stitch pattern creates breathable panels that are perfect for warmer weather, while the sturdy construction ensures they hold their shape beautifully. Worked in a sophisticated charcoal gray, they pair with everything from jeans to sundresses.
What makes this crochet sneaker pattern special is the clever combination of dense sections for structure and open mesh sections for style. The toe area features tighter stitches for durability, while the sides showcase that gorgeous lattice effect. The result looks incredibly professional, like something you’d find in a boutique.
These sneakers are worked onto rubber soles, which means they’re actually wearable outside the house. No slipping on hardwood floors. No wearing through after a few uses. Real shoes you made with your own two hands.
Materials Needed for Your Crochet Sneakers
Yarn:
Hook:
Additional Supplies:
Gauge:
18 stitches and 20 rows = 4 inches in single crochet
Gauge matters for fit, so please check yours before starting.
Skill Level and Techniques
This pattern is rated intermediate. You should be comfortable with:
Don’t let "intermediate" scare you. If you’ve made a hat or a simple bag, you have the foundation. The techniques here just combine in new ways.
Abbreviations Used in This Pattern
Understanding the Mesh Stitch
Before we dive in, let me explain the mesh stitch you’ll use for the side panels. It’s beautifully simple.
The basic mesh pattern is worked as follows: chain 3, skip 2 stitches, single crochet in next stitch. That’s it. You’re creating little windows by chaining over gaps. On the following round, you work your single crochet into the chain-3 spaces from the previous round.
This creates that gorgeous lattice effect you see in the photos. The holes are consistent and decorative, and the fabric remains surprisingly sturdy.
Step-by-Step Crochet Sneakers Pattern
Part 1: Attaching Yarn to the Sole
Your rubber soles should have small holes punched around the perimeter. This is where you’ll anchor your crochet work.
Foundation Round:
Using charcoal gray yarn, insert your hook through the first hole at the center back of the sole. Pull up a loop.
Ch 1. Work 2 sc through each hole around the entire sole. When you reach rounded areas at the toe and heel, work 3 sc per hole to maintain a flat edge.
Sl st to first sc to join. (Approximately 70-80 sts depending on sole size)
Tip: The exact stitch count depends on your sole size. Count your stitches at the end of this round and write it down. This is your base number.
Part 2: Building the Base Structure
Round 1: Ch 1, sc in each st around. Sl st to join. (70-80 sts)
Round 2: Ch 1, working in back loops only (blo), sc in each st around. Sl st to join. (70-80 sts)
This back loop round creates a neat edge where the upper meets the sole.
Rounds 3-4: Ch 1, sc in each st around through both loops. Sl st to join. (70-80 sts)
Part 3: Creating the Toe Cap
The toe cap is worked flat, then incorporated into the round construction.
Mark the center front of your sneaker. Count 12 stitches to each side of center (24 stitches total for the toe section).
Row 1: Starting at the right marker, ch 1, sc in next 24 sts. Turn. (24 sts)
Row 2: Ch 1, dec, sc to last 2 sts, dec. Turn. (22 sts)
Row 3: Ch 1, sc in each st across. Turn. (22 sts)
Row 4: Ch 1, dec, sc to last 2 sts, dec. Turn. (20 sts)
Row 5: Ch 1, sc in each st across. Turn. (20 sts)
Rows 6-11: Repeat Rows 4-5 three more times. (14 sts after Row 11)
Row 12: Ch 1, sc in each st across. Fasten off, leaving a long tail. (14 sts)
Part 4: Side Mesh Panels
Now comes the fun part. You’ll work the mesh pattern on each side of the sneaker.
Rejoin yarn at the edge of the toe cap on the right side of the sneaker.
Round 1 (Setup): Ch 1, sc evenly along the side of the toe cap (approximately 8-10 sts), sc in each st across the side of the sneaker to the heel, sc across the back heel stitches, sc along the other side to the toe cap, sc along the other edge of the toe cap. Sl st to join at the top corner of the toe cap. Count your stitches. (Approximately 56-60 sts, not counting toe cap top)
Note: Your stitch count should be divisible by 3 for the mesh pattern to work evenly. Adjust by adding or skipping a stitch in the heel area if needed.
Round 2 (Begin Mesh): Ch 1, sc across the top edge of the toe cap (14 sts). *Ch 3, sk 2, sc in next st.* Repeat from * to * around the sides and back until you reach the toe cap again. Sl st to join.
Rounds 3-8: Sc across toe cap. *Ch 3, sc in ch-3 sp from previous round.* Repeat from * to * around. Sl st to join.
You’ll see the mesh pattern emerging beautifully on the sides while the toe cap remains solid.
Part 5: Upper Ankle Section
Continue building height while maintaining the mesh pattern on sides and adding structure near the front opening.
Rounds 9-14:
For the front opening where laces will go, you’ll begin working back and forth instead of in complete rounds.
At the center front, ch 1, turn. Work in established mesh pattern across the right side, around the back, and across the left side. Ch 1, turn.
Continue for 6 more rows, maintaining mesh on sides and single crochet along the front edges where the lace holes will be.
Part 6: Creating Lace Holes
Along each front edge, you’ll create evenly spaced holes for the laces.
Lace Hole Row (work on both front edges):
*Sc in next 2 sts, ch 2, sk 2.* Repeat from * to * for 5-6 holes on each side.
On the following row, work sc in each st and 2 sc in each ch-2 space to maintain stitch count.
Part 7: Top Ribbing
Rounds 15-18: Work sc in back loop only around the entire top opening. This creates a subtle ribbed texture that mimics the look of a traditional sneaker collar. Sl st to join each round.
Fasten off and weave in ends.
Part 8: Tongue (Make 1)
The tongue is worked separately and sewn in place.
Ch 10.
Row 1: Sc in 2nd ch from hook and each ch across. Turn. (9 sts)
Rows 2-20: Ch 1, sc in each st across. Turn. (9 sts)
Row 21 (Shaping): Ch 1, dec, sc to last 2 sts, dec. Turn. (7 sts)
Rows 22-24: Repeat Row 21. (1 st after Row 24)
Fasten off, leaving a long tail for sewing.
Part 9: Assembly and Finishing
1. Attach the tongue: Position the tongue behind the front opening, centered. Use the long tail to whip stitch the base of the tongue to the inside of the sneaker at the toe cap edge.
2. Weave in all ends: Use your tapestry needle to carefully hide all yarn tails inside the work.
3. Add laces: Thread crocheted cord or purchased shoelaces through the lace holes. If making your own, simply chain approximately 100 stitches and fasten off.
4. Block lightly: Stuff the sneakers with tissue paper and allow them to dry if you’ve dampened them for shaping.
Sizing Adjustments for Your Crochet Sneakers
The pattern above fits a women’s US size 7-8 sole. Here’s how to adjust:
For smaller sizes: Use a 3.25mm hook and reduce the toe cap starting stitches to 20.
For larger sizes: Use a 3.75mm hook and increase the toe cap starting stitches to 28.
For men’s sizes: Increase the height by adding 2-4 additional rounds in the mesh section and use a proportionally larger sole.
Always start by purchasing your soles first, then adjust the pattern to fit.
Tips for Success
Tension matters. Crochet sneakers need to be worked fairly tightly so they hold their shape. If your mesh looks floppy, go down a hook size.
Cotton is your friend. While acrylic yarn is tempting, cotton has less stretch and will maintain the sneaker shape much better over time.
Try them on as you go. After completing the base rounds, slip your foot in. You want a snug fit because cotton relaxes slightly with wear.
Don’t skip the blocking. A light steam or wet blocking helps everything settle into place and look polished.
Caring for Your Handmade Crochet Sneakers
Hand wash your sneakers in cool water with mild soap. Reshape while damp and stuff with paper towels to dry. Avoid the dryer, as heat can warp your soles and shrink the cotton yarn.
For spot cleaning, a damp cloth works wonderfully for small marks.
I truly hope you enjoy making these charcoal gray mesh crochet sneakers as much as I enjoyed designing them. They’re the kind of project that looks impressive on your feet and feels like a real accomplishment. Thank you so much for choosing this pattern and trusting me to guide you through it. If you make a pair, I would absolutely love to see them. Tag me on Instagram or share in my Facebook group. Your creations always make my day.
If this crochet sneakers pattern caught your eye, go ahead and pin it to your Pinterest boards so you can find it when you’re ready to start. And please drop a comment below if you make them or have any questions. I read every single one and love hearing from you!
