
Granny squares look intimidating. All those color changes, all that joining, all those ends to weave in. I get it. But here’s the truth: if you can double crochet and work in the round, you can absolutely make this bag.
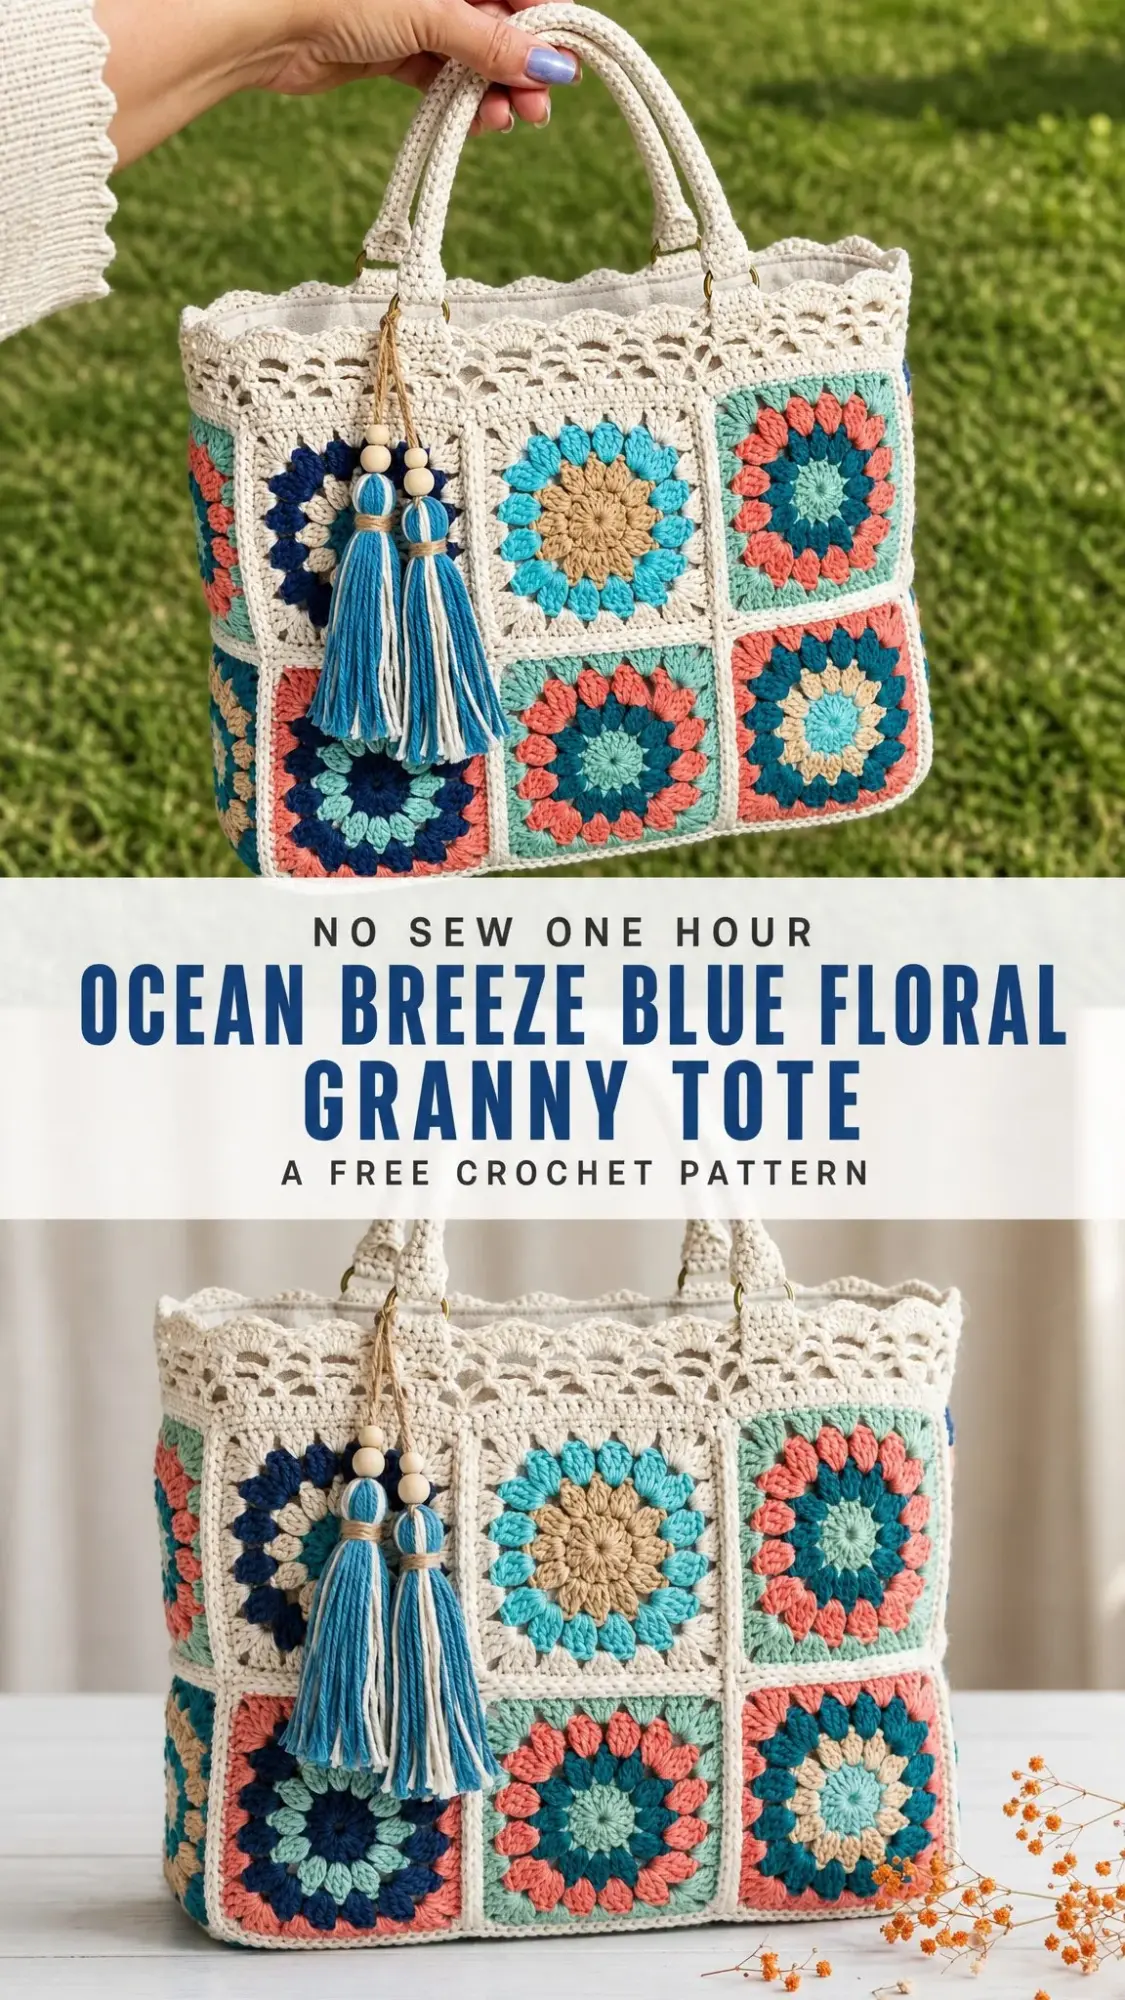
The Ocean Breeze Blue Floral Granny Tote breaks down into one simple square worked 16 times. Same recipe, different colors. Once you nail the first square, you’re just repeating. The sunburst design uses puff stitches for those plump petals, and I’ll walk you through exactly how to make them look consistent and beautiful.
Whether you’re a confident beginner ready to level up or an experienced crocheter looking for a satisfying stash buster, this tote is within your reach. The coastal palette, the vintage lace band, the beaded tassels. It all comes together into something that looks far more complicated than it actually is. Let’s break the whole thing down step by step.
About This Granny Square Tote Pattern
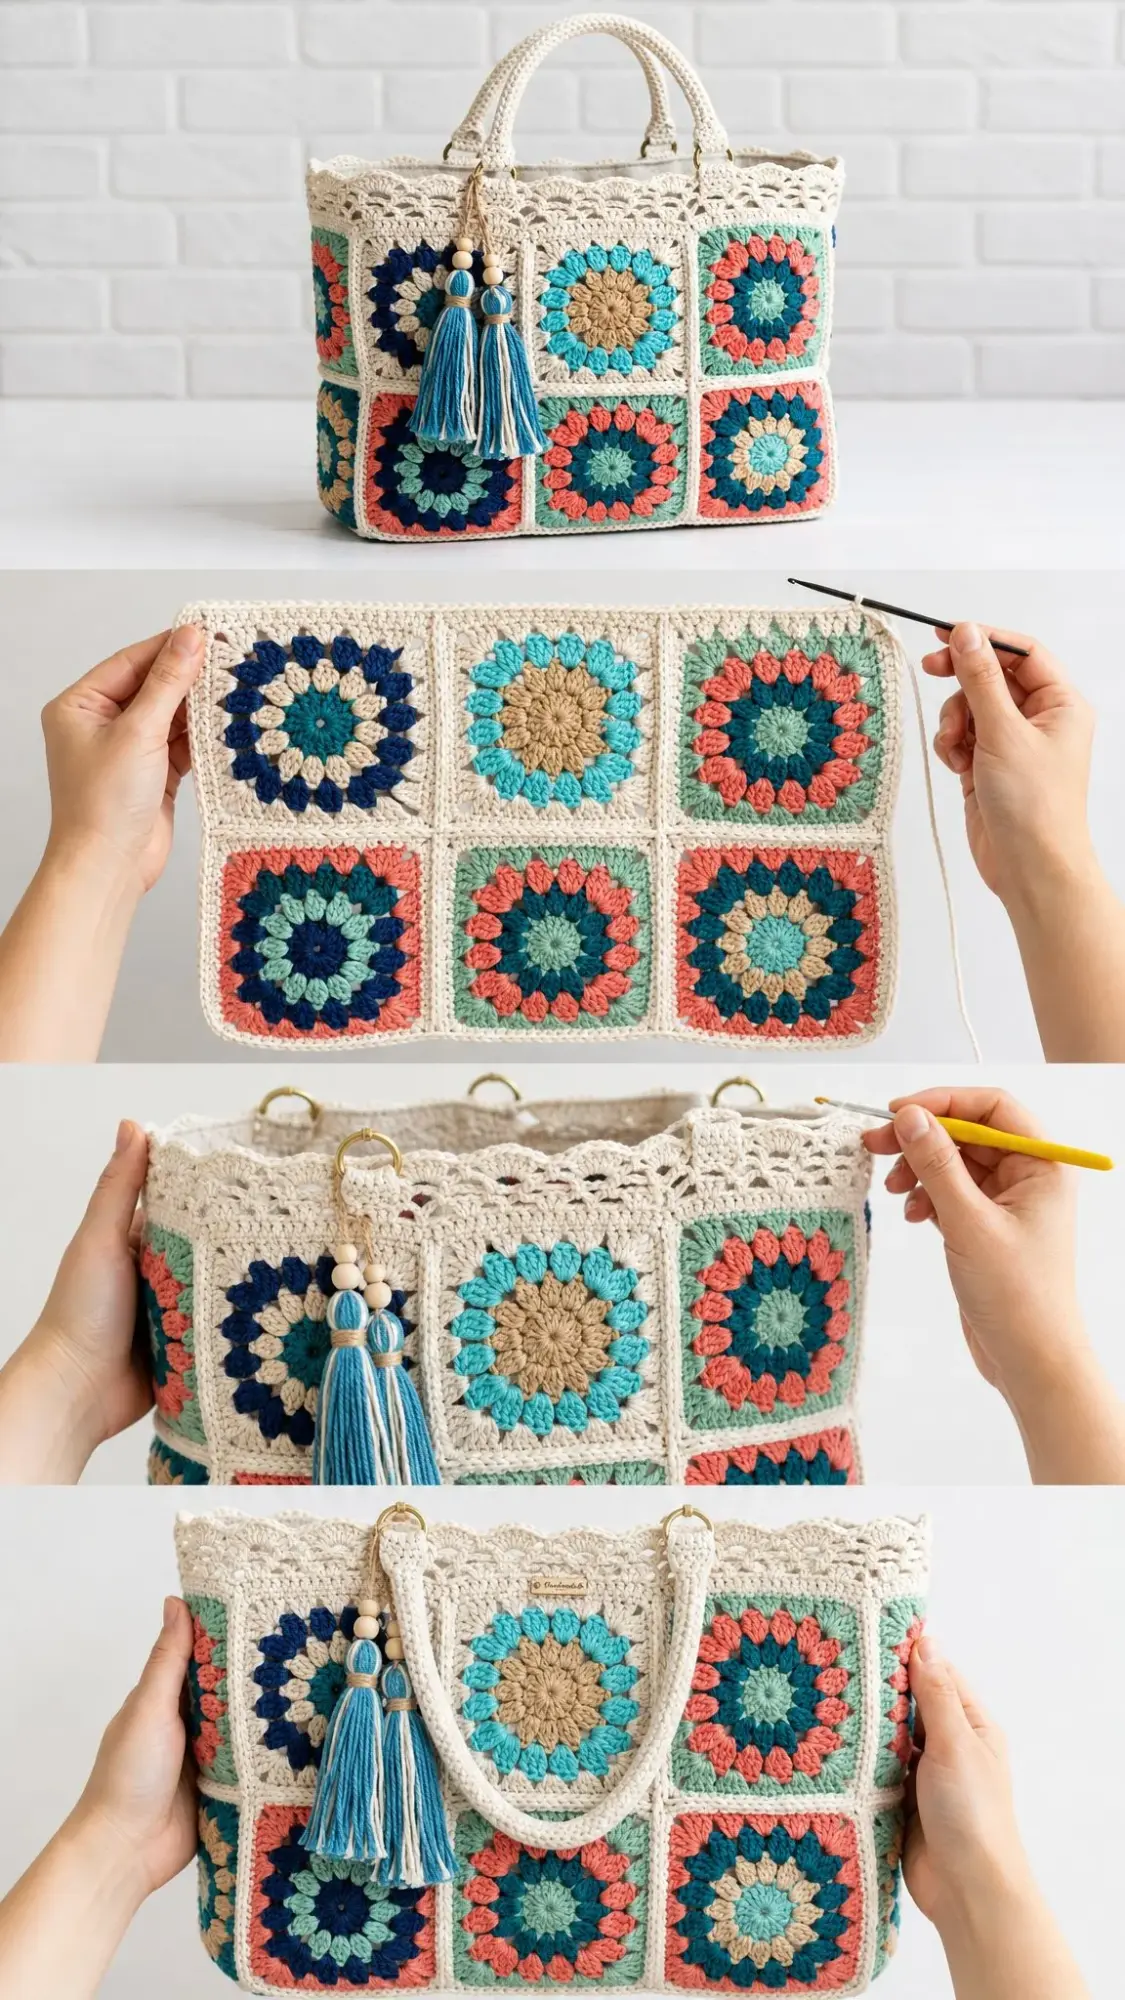
This market tote features 16 sunburst granny squares arranged in a tube formation. Eight squares wrap around the circumference, stacked two rows tall. A solid single crochet base gives the bag structure, while a delicate three-round lace band finishes the top edge with soft scallops.
The color palette draws from coastal inspiration. Deep navy and teal anchor the design, while washed turquoise, warm coral, sage, and camel create that sun-bleached, beachy feel. Ivory frames every single square, which ties the whole scrappy mix together into a cohesive grid.
Finished dimensions: Approximately 13.5 inches wide by 9 inches tall (not including handles), with a 4.5 inch deep base.
Skill level: Intermediate. You should be comfortable with basic crochet stitches, working in the round, color changes, and joining motifs.
Time to complete: 18 to 25 hours depending on your pace.
Materials and Tools You’ll Need
Gathering your supplies before you start makes the whole project flow smoothly. Here’s everything the pattern calls for:
Yarn Requirements (Aran/Worsted Weight Cotton)
| Color | Approximate Yardage |
|---|---|
| Ivory/Cream (Main Color) | 360 yards / 330 meters |
| Navy | 55 yards / 50 meters |
| Teal | 55 yards / 50 meters |
| Turquoise | 50 yards / 46 meters |
| Coral | 50 yards / 46 meters |
| Sage | 40 yards / 37 meters |
| Camel | 40 yards / 37 meters |
Ivory is your workhorse color. It covers the handles, base, all square frames, joining seams, and the lace band. Buy the most of it.
Recommended yarns: Lily Sugar’n Cream works beautifully for this project. The matte finish and sturdy construction give lovely stitch definition for the puff stitches. Paintbox Yarns Cotton Aran offers a wide, well-matched shade range if you want perfectly coordinated accents. Hobbii Rainbow Cotton 8/8 is another excellent choice with smooth texture and crisp colors.
Tools and Notions
Gauge Information
Getting gauge right sets your finished size and yarn usage. Take a few minutes to check it before diving in.
One finished sunburst square (Rounds 1 through 4) should measure 4.5 inches / 11.5 cm across with a 4.0 mm hook.
Base in single crochet: 16 stitches by 18 rows equals 4 inches / 10 cm.
Gauge isn’t critical for fit since this is a bag, not a garment. But if your squares come out significantly larger or smaller, your final tote dimensions and yarn requirements will change. Make one square first, measure it, and adjust your hook size up or down to hit that 4.5 inch target.
Abbreviations and Special Stitches
Let me define every stitch abbreviation you’ll encounter. If you’re newer to crochet patterns, bookmark this section.
| Abbreviation | Full Term | What It Means |
|---|---|---|
| ch | chain | Yarn over, pull through the loop on your hook |
| sl st | slip stitch | Insert hook, yarn over, pull through both the stitch and the loop on hook in one motion |
| sc | single crochet | Insert hook, yarn over, pull up a loop (2 loops on hook), yarn over, pull through both loops |
| dc | double crochet | Yarn over, insert hook, yarn over, pull up a loop (3 loops), yarn over, pull through 2 loops, yarn over, pull through remaining 2 loops |
| st(s) | stitch(es) | Individual stitch or multiple stitches |
| sp | space | The gap created by chain stitches |
| rnd | round | One complete trip around your work |
| rep | repeat | Do the bracketed instructions again |
| sk | skip | Pass over that stitch without working into it |
| beg | beginning | The start of a round or row |
UK crocheters, take note: This pattern uses US terminology throughout. Your UK double crochet equals the US single crochet. Your UK treble equals the US double crochet. The puff stitch works identically in both systems.
The Puff Stitch (puff)
This creates those gorgeous plump flower petals. Here’s exactly how to work it:
Yarn over, insert your hook into the stitch or space, yarn over and pull up a loop to the height of a double crochet. Repeat this sequence two more times in the same place. You now have 7 loops on your hook. Yarn over and draw through all 7 loops at once. Chain 1 to close and secure the puff.
The key to even puffs: Pull each of your three loops up to the same height, roughly matching a double crochet. Consistent loop height gives your flowers that plump, sunny look.
Beginning Puff
This stands in for the first puff of a round. Chain 2, then work the yarn over, insert, pull up a loop sequence only 2 times (instead of 3). Yarn over through all 5 loops, chain 1 to close.
Pattern Notes Before You Begin
Read through these tips before starting. They’ll save you headaches later.
Suggested Color Map for the 16 Squares
You want a relaxed, scrappy mix where no two neighboring squares look quite alike. Here’s the combination shown in the finished tote. Feel free to swap colors based on your stash.
| Center (Rounds 1-2) | Outer Petals (Round 3) | Quantity |
|---|---|---|
| Camel | Turquoise | 3 squares |
| Navy | Coral | 3 squares |
| Sage | Coral | 3 squares |
| Coral | Teal | 3 squares |
| Turquoise | Navy | 2 squares |
| Camel | Teal | 2 squares |
Remember, all 16 squares get framed in Ivory on Round 4.
The Sunburst Square Pattern
This is the heart of your tote. Make 16 of these beauties.
Round 1 (Center Color)
Begin with a magic ring in your center color.
Into the magic ring: Chain 3 (this counts as your first double crochet), then work 11 double crochet into the ring.
Pull the ring closed and join with a slip stitch to the top of the chain 3.
Stitch count: 12 dc
Round 2 (Inner Petals, Same Color)
Work a beginning puff in the same stitch as the join, chain 1.
Work a puff stitch in each of the next 11 stitches, chaining 1 after each puff.
Join with a slip stitch to the top of the first puff.
Stitch count: 12 puffs, 12 chain-1 spaces
Each puff sits in one double crochet from Round 1. Those chain-1 spaces between the puffs are where Round 3 begins.
Round 3 (Outer Petals, Contrast Color)
Join your outer petal color in any chain-1 space.
In that same space, work: puff, chain 1, puff, chain 1.
Work (puff, chain 1, puff, chain 1) in each of the remaining 11 chain-1 spaces around.
Join with a slip stitch to the top of the first puff.
Stitch count: 24 puffs, 24 chain-1 spaces
Two puffs in every space doubles the petals into a full sunburst. This is where the flower really blooms.
Round 4 (Ivory Frame and Corners)
Join Ivory in any chain-1 space. This first space becomes a corner.
Chain 3, then work (2 dc, chain 2, 3 dc) in the same space. First corner made.
Work 3 dc in each of the next 5 chain-1 spaces. Then work (3 dc, chain 2, 3 dc) in the next chain-1 space for the corner.
Repeat from to two more times.
Work 3 dc in each of the last 5 chain-1 spaces.
Join with a slip stitch to the top of the chain 3.
Stitch count: 84 dc and 4 chain-2 corner spaces (21 dc per side)
Fasten off and weave in all ends. Block each square lightly to a true 4.5 inch square. Blocking makes the grid line up beautifully when you join later.
The Base
A solid single crochet rectangle gives your tote a firm, flat bottom that holds its shape even when loaded. Work this entirely in Ivory.
Foundation
With Ivory, chain 55. (55 chains)
Row 1
Single crochet in the 2nd chain from hook and in each chain across. Turn.
Stitch count: 54 sc
Rows 2 through 20
Chain 1, single crochet in each stitch across. Turn.
Stitch count: 54 sc each row
Your finished rectangle should measure approximately 13.5 inches wide by 4.5 inches deep (34 cm by 11.5 cm). Add or remove rows to hit that 4.5 inch depth if needed.
Edging Round
Do not fasten off. Chain 1 and single crochet evenly all the way around the rectangle. Work 3 single crochet into each corner to help the fabric turn smoothly.
Aim for approximately 168 single crochet around the perimeter. This number matches the 8 square edges of the body for easy joining.
Join with a slip stitch. Fasten off.
Why single crochet for the base? It creates a dense, sturdy fabric that resists sagging when the bag gets heavy. For an even firmer base, you can hold the yarn double and go up half a hook size.
Joining the Squares
Your 16 squares form a tube: 8 squares around by 2 rows tall. Lay them all out before joining so you can shuffle any color combinations that clash.
Step 1: Arrange Your Layout
Set out the lower ring of 8 squares in this order: 3 front, 1 side, 3 back, 1 side.
Place the upper ring of 8 squares above it in the same arrangement.
Step back and look at the whole layout. Shuffle any two neighboring squares that feel too similar or clash.
Step 2: Join with Ivory
Hold two squares with wrong sides together.
Join Ivory and single crochet through both back loops along one edge. Work 21 single crochet per seam, placing one single crochet into each stitch and the corner spaces.
Stitch count: 21 sc per seam
This creates a pretty raised ridge on the right side. A flat-braid join or whipstitch works equally well if you prefer a different look.
Step 3: Build the Rings
Join all 8 lower squares side to side, then join the ends together to close the lower ring.
Repeat for the upper ring.
Then join the upper ring onto the lower ring all the way around.
Step 4: Add the Base
With wrong sides together, single crochet the base edging round to the bottom edge of the tube. Ease to fit, working one single crochet into each stitch around.
Join and fasten off.
Stitch count: Approximately 168 sc
Top Lace Band
This three-round Ivory lace band rises from the top of the squares and finishes in a soft scalloped edge. It’s what gives the tote that vintage, heirloom quality.
Round 1 (Foundation)
Join Ivory at the top edge of the tube.
Single crochet evenly all the way around the opening. Aim for about 21 single crochet per square edge.
Join with a slip stitch.
Stitch count: 168 sc
Round 2 (Loops)
Chain 1, single crochet in the first stitch.
Chain 3, skip 2 stitches, single crochet in the next stitch.
Repeat from * around, ending with chain 3, skip 2, and join to the first single crochet.
Stitch count: 56 chain-3 loops
Round 3 (Scallops)
Slip stitch into the center of the first loop, chain 1, single crochet in that same loop.
Chain 3. In the next loop, work (3 dc, chain 2, 3 dc) to create a shell. Chain 3, single crochet in the next loop.
Repeat from * around.
Join and fasten off.
Stitch count: 28 shells
Lightly block the band so the scallops open and lie flat.
Handles (Make 2)
Work both handles in Ivory.
Row 1
Chain 9. Single crochet in the 2nd chain from hook and across. Turn.
Stitch count: 8 sc
Rows 2 through 84
Chain 1, single crochet in each stitch across. Turn.
Stitch count: 8 sc each row
After completing all 84 rows, fold each strap in half lengthwise. Whipstitch the long edge closed to form a firm, rounded handle approximately 18 inches / 46 cm long.
Make two handles total.
Beaded Tassels (Make 2)
These twin tassels add the perfect finishing touch.
1. Wind Ivory and a soft blue yarn together approximately 40 times around a 5 inch / 13 cm piece of cardboard.
2. Slide a length of jute under the top and tie it tightly. Cut the loops at the bottom.
3. Wrap the "neck" several times about 3/4 inch down from the top. Secure the wrap and trim the skirt level.
4. Thread two wooden beads onto the jute tails above the neck.
5. Loop the jute onto a D-ring or split ring so the pair of tassels hangs together.
Finishing and Assembly
Take your time with this final stage. Good finishing makes the difference between a nice bag and a stunning one.
Attach the handles: Pin the handle ends to the inside of the front lace band. Position them roughly above the seams between the 1st and 2nd squares and between the 2nd and 3rd squares, leaving an even gap in the center. Stitch securely with doubled Ivory yarn, reinforcing each attachment point with several extra passes. Repeat on the back.
Add a lining (optional but recommended): Cut a fabric rectangle to match the body’s inner dimensions plus 1/2 inch seam allowance on all sides. Stitch it into a pouch, press the top edge under, and hand-sew it just below the lace band. A lining keeps small items from slipping through the stitches and adds structure.
Hang the tassels: Fix the ring of the twin tassels to the front lace band near one handle base so they swing freely.
Final blocking: Give the whole bag a gentle steam or wet block. Shape the base so it sits square, and let the tote dry standing upright stuffed with a towel.
Weave in any last ends and trim them closely.
Care Instructions for Your Finished Tote
Cotton holds up beautifully with proper care.
Customizing the Size
Your yarn choice, hook size, and personal tension all affect the final dimensions. Make one square first, measure it, and adjust from there.
Want a bigger tote? Add a third row of squares (12 around by 3 tall equals 24 squares) for a deep beach bag. Lengthen the base rows to match.
Prefer a smaller pouch? Work 6 squares around by 1 tall for a sweet little clutch. Skip the handles and add a wrist strap instead.
Need longer handles? Add more rows to the handle straps for shoulder carry. About 110 rows gives a comfortable shoulder drop.
Want a calmer palette? Hold one or two accent colors constant across all squares for a more uniform, modern look.
You’ve Got This
The Ocean Breeze Blue Floral Granny Tote looks impressive, but now you know the secret. It’s really just one four-round square repeated 16 times, joined into a tube, and finished with some thoughtful details. The puff stitches might feel unfamiliar at first, but after a couple of squares, your hands will know exactly what to do.
This pattern works wonderfully for using up cotton odds and ends from your stash. The finished bag is sturdy enough for the farmer’s market, the beach, or a day running errands around town. And those beaded tassels? Pure charm.
Thank you so much for choosing this pattern for your next project. I hope you love making it as much as I loved designing it.
If you make this tote, I would absolutely love to see your color choices. Save this pattern to your Pinterest boards so you can find it when you’re ready to start, and please leave a comment below to share which colors you’re planning to use. Happy crocheting!
