
A handmade backpack makes such a thoughtful gift for little ones heading off to preschool or daycare. This cheerful sky blue design features an open granny mesh texture, adorable rainbow appliques with puffy clouds, and sturdy crocheted straps that hold up to everyday adventures. The project uses basic single crochet and double crochet stitches, so confident beginners can absolutely tackle it with a bit of patience.
Get the Ad-Free PDF Pattern
You can find the free pattern below, or you can purchase the ad-free printable PDF from my shop.
Get the Printable PDF →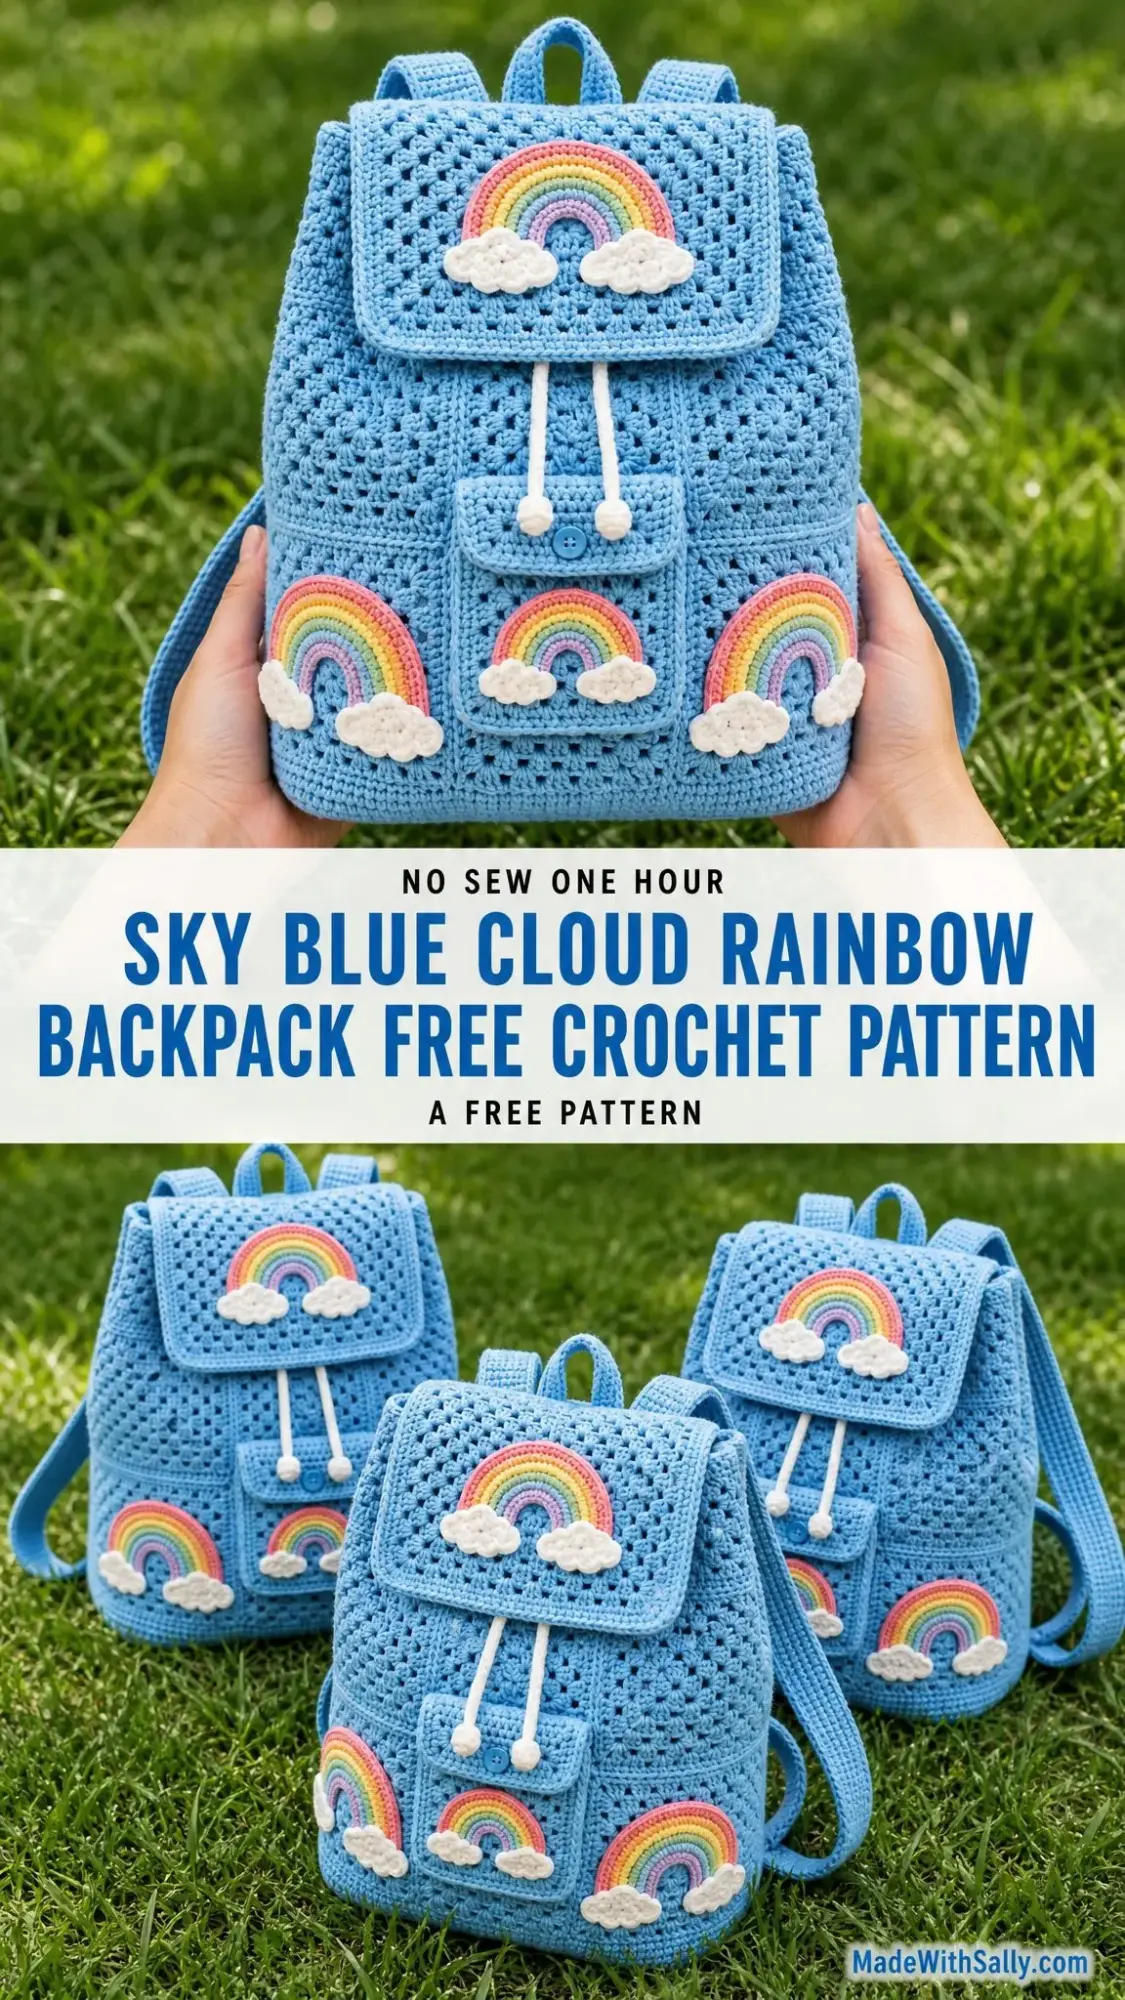
Working up in about 10 to 14 relaxed hours, this backpack is perfect for weekend crafting sessions or a satisfying long-term project. The finished bag measures roughly 11.8 inches tall, 9.8 inches wide, and 4.7 inches deep. That is just the right size for snacks, a small toy, and a change of clothes.
Whether you are making this for your own child, a grandchild, or a charity donation, the whimsical rainbow and cloud details are sure to bring smiles. Let me walk you through everything you need to create this darling backpack from start to finish.
Materials You Will Need
Gather these supplies before you begin. Having everything ready makes the process so much smoother.
Yarn:
Hook:
Notions:
Yarn Suggestions:
Paintbox Yarns Cotton Aran gives crisp stitch definition and bright colors. Lily Sugar’n Cream Solids offers a sturdy cotton with a handmade feel. Knit Picks Dishie Worsted provides smooth cotton that holds up beautifully for accessories.
If you substitute with soft acrylic yarn, consider lining the bag or using a smaller hook to maintain durability.
Gauge Information
Getting your gauge right ensures your backpack turns out the correct size. Take time to swatch before diving in.
Single crochet gauge: 14 sc x 12 rows = 4 inches (10 cm)
Open granny mesh gauge: 11 granny groups and 11 open spaces = about 9.8 inches (25 cm) wide. 10 rows = about 4 inches (10 cm) tall after light blocking.
Make a 6 inch (15 cm) square swatch in both single crochet (sc) and open granny mesh. Wash and dry your swatch the same way you plan to treat the finished bag. Adjust your hook size up or down if needed.
Abbreviations and Special Stitches
Here are all the abbreviations used in this pattern. I have included plain English definitions so nothing feels confusing.
| Abbreviation | Meaning |
|---|---|
| ch | chain |
| dc | double crochet |
| RS | right side |
| sc | single crochet |
| sl st | slip stitch |
| st(s) | stitch(es) |
| sp | space |
| WS | wrong side |
Open Granny Mesh: This stitch pattern creates the lovely textured body of the backpack. You work an edge double crochet (dc), then groups of 3 dc worked into the spaces from the previous row. The bag panels use 11 groups across with straight side edges.
Invisible Join: Cut your yarn and pull the tail through the last stitch. Thread your yarn needle under both loops of the first stitch, then back through the last stitch. Tighten gently for a seamless finish.
Standing Single Crochet: Make a slip knot on your hook. Insert the hook where instructed, yarn over and pull up a loop, yarn over and pull through both loops. This lets you join yarn without a visible chain.
Left-Handed Note: Work the same stitch counts and rows. Applique placement will mirror naturally. Pin all rainbows before sewing so the layout looks balanced from the front.
Main Panels (Make 2)
These panels form the front and back of your backpack. Use sky blue yarn.
Chain 36 to begin.
| Row(s) | Instruction | Count |
|---|---|---|
| 1 | Sc in 2nd ch from hook and each ch across. Ch 1, turn. | 35 sc |
| 2-5 | Sc in each st across. Ch 1, turn. | 35 sc each row. Lower band about 1.3 in (3.3 cm) |
| 6 | Ch 3, sk next 2 sts, (3 dc in next st, sk next 2 sts) 10 times, 3 dc in next st, dc in last st. Turn. | 2 edge dc + 11 groups = 35 dc |
| 7 | Ch 3, 3 dc in each of the 11 open spaces across, dc in top of turning ch. Turn. | 2 edge dc + 11 groups = 35 dc |
| 8 | Repeat Row 7. | 2 edge dc + 11 groups = 35 dc |
| 9-28 | Repeat Row 7 twenty times. | 2 edge dc + 11 groups = 35 dc each row |
| 29 | Ch 1, sc in each dc across. | 35 sc. Panel about 10 x 11.8 in (25.5 x 30 cm) |
Panel Checkpoint: Each panel should be flat, rectangular, and nearly the same size. Block lightly before assembly so the mesh opens evenly.
Side and Bottom Gusset
This long strip connects your front and back panels, creating the depth of the backpack. Use sky blue yarn.
Chain 18 to begin.
| Row(s) | Instruction | Count |
|---|---|---|
| 1 | Sc in 2nd ch from hook and each ch across. Ch 1, turn. | 17 sc |
| 2-85 | Sc in each st across. Ch 1, turn. | 17 sc each row |
| 86 | Sc across, do not turn. Work sc evenly around the long strip, placing 2 sc in each corner. Join. | Long strip about 28.3 in (72 cm) long and 4.8 in (12 cm) wide |
Front Pocket
This sweet little pocket sits on the lower front of your backpack. Use sky blue yarn.
Chain 18 to begin.
| Row(s) | Instruction | Count |
|---|---|---|
| 1 | Sc in 2nd ch from hook and each ch across. Ch 1, turn. | 17 sc |
| 2-12 | Sc in each st across. Ch 1, turn. | 17 sc |
| Edging | Sc evenly around, placing 2 sc in each corner. Join invisibly. Sew button centered on pocket. | About 4.4 x 3.8 in (11 x 9.5 cm) |
Top Flap
The flap folds over the top of your backpack and fastens with a button loop. Use sky blue yarn.
Chain 30 to begin.
| Row(s) | Instruction | Count |
|---|---|---|
| 1 | Sc in 2nd ch from hook and each ch across. Ch 1, turn. | 29 sc |
| 2-4 | Sc in each st across. Ch 1, turn. | 29 sc |
| 5 | Ch 3, sk next 2 sts, (3 dc in next st, sk next 2 sts) 8 times, 3 dc in next st, dc in last st. Turn. | 2 edge dc + 9 groups = 29 dc |
| 6-13 | Ch 3, 3 dc in each of the 9 open spaces across, dc in top of turning ch. Turn. | 2 edge dc + 9 groups = 29 dc |
| 14 | Sc in each dc across. | 29 sc |
| Edging | Sc around all sides. At front corners work 3 sc. At center front make button loop: ch 7, sl st in same st, continue edging. | Flap about 8.2 x 4.3 in (21 x 11 cm) |
Straps and Handle
These sturdy pieces let your little one wear their backpack comfortably.
Shoulder Straps (Make 2):
Chain 72. Sc in 2nd ch from hook and across (71 sc). Work 5 more rows of sc. Edge around with sc. Finished length about 22 inches (56 cm).
Top Handle:
Chain 28. Sc in 2nd ch from hook and across (27 sc). Work 5 more rows of sc. Edge around with sc.
Drawstring Cords (Make 2):
Chain 72 and slip stitch back through each chain. Alternatively, make two 24 inch (61 cm) twisted cords.
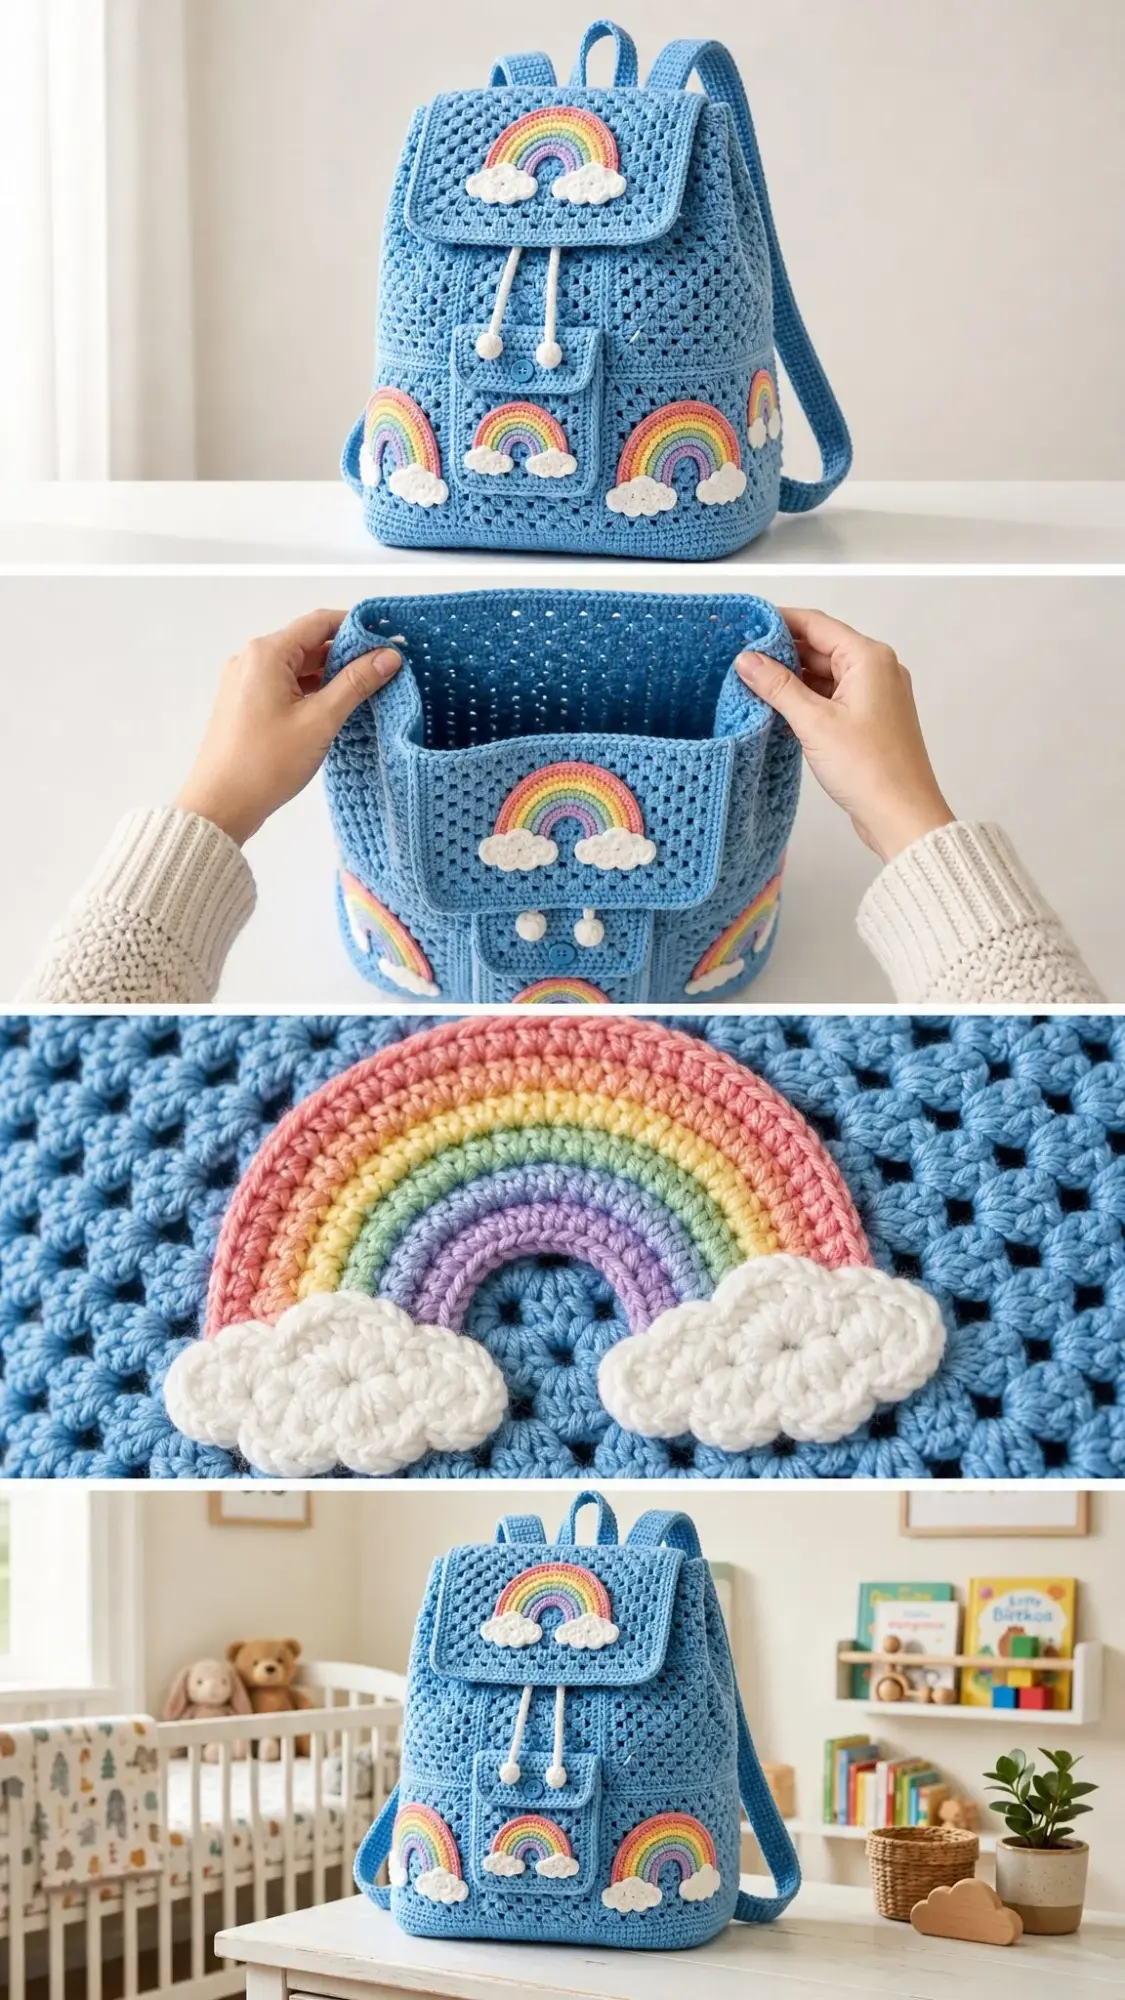
Rainbow Applique
Make 1 large rainbow for the flap, 1 medium for the pocket, and 3 medium or small rainbows for the lower front and side accents. Work from the inner arc outward.
| Arc Row | Instruction | Count |
|---|---|---|
| 1 purple | Ch 9. Sc in 2nd ch and next 6 ch, 3 sc in last ch, rotate. Sc in 7 unused loops. Fasten off. | 17 sc |
| 2 blue | Join at first st. 2 sc in first st, sc 7, 2 sc in each of next 3 sts, sc 7, 2 sc in last st. Fasten off. | 22 sc |
| 3 green | Join at first st. 2 sc in first st, sc 9, 2 sc in each of next 3 sts, sc 9, 2 sc in last st. Fasten off. | 27 sc |
| 4 yellow | Join at first st. 2 sc in first st, sc 11, 2 sc in each of next 3 sts, sc 11, 2 sc in last st. Fasten off. | 32 sc |
| 5 orange | Join at first st. 2 sc in first st, sc 13, 2 sc in each of next 3 sts, sc 13, 2 sc in last st. Fasten off. | 37 sc |
| 6 red | Join at first st. 2 sc in first st, sc 15, 2 sc in each of next 3 sts, sc 15, 2 sc in last st. Fasten off. | 42 sc |
Size Options: For a smaller rainbow, stop after Row 5. For a larger flap rainbow, start Row 1 with ch 11 and add 2 sc to each straight side in every later row.
Cloud Applique
These puffy clouds attach to the ends of each rainbow.
With white yarn, ch 4 and join to form a ring.
Round 1: Ch 2, 10 dc in ring, join.
Round 2: Ch 1, sc in first st, 3 dc in next st, sc in next, 5 dc in next, sc in next, 4 dc in next, sc in next 4, join.
Shape with your fingers while damp. Add a tiny bit of fiberfill under each cloud before sewing for a puffy look.
Sew one cloud to each end of every rainbow, slightly overlapping the arc ends.
Assembly Instructions
Use locking stitch markers before sewing. Keep your seams firm because this is what gives the backpack its shape.
| Step | Assembly Action | Placement Checkpoint |
|---|---|---|
| 1 | Mark the center top of front, back, and gusset. Pin gusset around front panel with RS out. Seam using mattress stitch or sc seam. Repeat for back. | Gusset should cover one side, bottom, and second side without stretching. |
| 2 | Sew front pocket centered on lower front. Leave top open. | Pocket lower edge sits about 1.5 in (4 cm) above bottom seam. |
| 3 | Sew flap to back top edge, then let it fold over the front. | Flap covers drawstring channel and reaches the button. |
| 4 | Attach shoulder straps to upper back and lower back corners. Attach handle between strap tops. | Reinforce each point with a square of stitching. |
| 5 | Weave two drawstrings through top mesh openings in opposite directions. Knot ends or add small crochet balls. | Bag cinches evenly from both sides. |
| 6 | Sew rainbow motifs: large on flap, medium on pocket, three accents across lower front and sides. | Pin first, then sew invisibly through back loops. |
Photo-Style Placement: Use five visible rainbows total. Place one large rainbow on the flap, one on the front pocket, two on the lower front corners, and one wrapping slightly toward a side panel.
Finishing Your Backpack
Weave in all ends on the inside of the bag. Split your yarn tails through nearby stitches for extra security.
Steam block very lightly or wet block flat. Do not over-stretch the open mesh.
For a sturdier bag, hand sew a simple lining inside after all crochet seams are complete.
Add the button last so the flap loop lands naturally when the bag is filled.
Care Instructions
Spot clean when possible. For cotton yarn, hand wash in cool water and reshape while damp.
Dry flat with the bag stuffed lightly with towels to preserve the backpack shape.
Remove any inserted base or pouch before washing.
Troubleshooting Common Issues
| Issue | Likely Cause | Fix |
|---|---|---|
| Panel is too narrow | Gauge is tighter than stated | Go up a hook size or add one 3-st repeat: ch 37 for 36 sc |
| Panel flares | Skipped spaces or row alternation changed | Count groups every row. Each mesh row uses 11 groups between 2 edge dc |
| Gusset is short | Row gauge is tight | Add sc rows until strip fits side, bottom, side without pulling |
| Flap misses button | Button placed too low or high | Pin the filled bag closed, then sew button at the natural loop point |
| Clouds look flat | No stuffing or too tight stitches | Add a wisp of fiberfill and sew only around the cloud edge |
Simple Size Adjustments
Width: Add or remove 3 foundation stitches on the main panels. Each 3-stitch repeat changes width by about 0.9 inches (2.3 cm).
Height: Add or remove mesh rows before Row 29. Two rows change height by about 0.8 inches (2 cm).
Depth: Add or remove chains on the gusset. Keep the strip long enough to travel side, bottom, side.
Strap Length: Hold the bag on the intended wearer and adjust strap chains before adding the edging.
Maker Checkpoints
Use these measurements to verify your pieces before assembly.
| After This Part | Measurement to Check |
|---|---|
| Main panel | About 10 in (25.5 cm) wide and 11.8 in (30 cm) tall |
| Gusset strip | About 4.8 in (12 cm) wide and 28.3 in (72 cm) long |
| Flap | About 8.2 in (21 cm) wide and 4.3 in (11 cm) deep |
| Assembled bag | Front is smooth, sides are even, and bottom sits flat |
You Did It!
Thank you so much for choosing this pattern for your next crochet project. I hope you love making this cheerful rainbow backpack as much as I enjoyed designing it. The combination of open granny texture with those sweet cloud and rainbow details creates something truly special that any child would treasure.
If you found this pattern helpful, please save it to your Pinterest boards so you can find it easily later. And I would absolutely love to see your finished backpack! Drop a comment below or tag me on social media with your photos. Happy stitching!
Want a Quick & Easy Printable Version?
Get a clean, beautifully formatted PDF of this pattern — easy to follow step by step, ready to print or save on any device. No scrolling, no distractions, just the pattern.
Get the Printable PDF →