
I don’t know about you, but I have a serious weakness for handbags that actually look like something you’d find in a boutique. All the style with the satisfaction of making it yourself.
Get the Ad-Free PDF Pattern
You can find the free pattern below, or you can purchase the ad-free printable PDF from my shop.
Get the Printable PDF →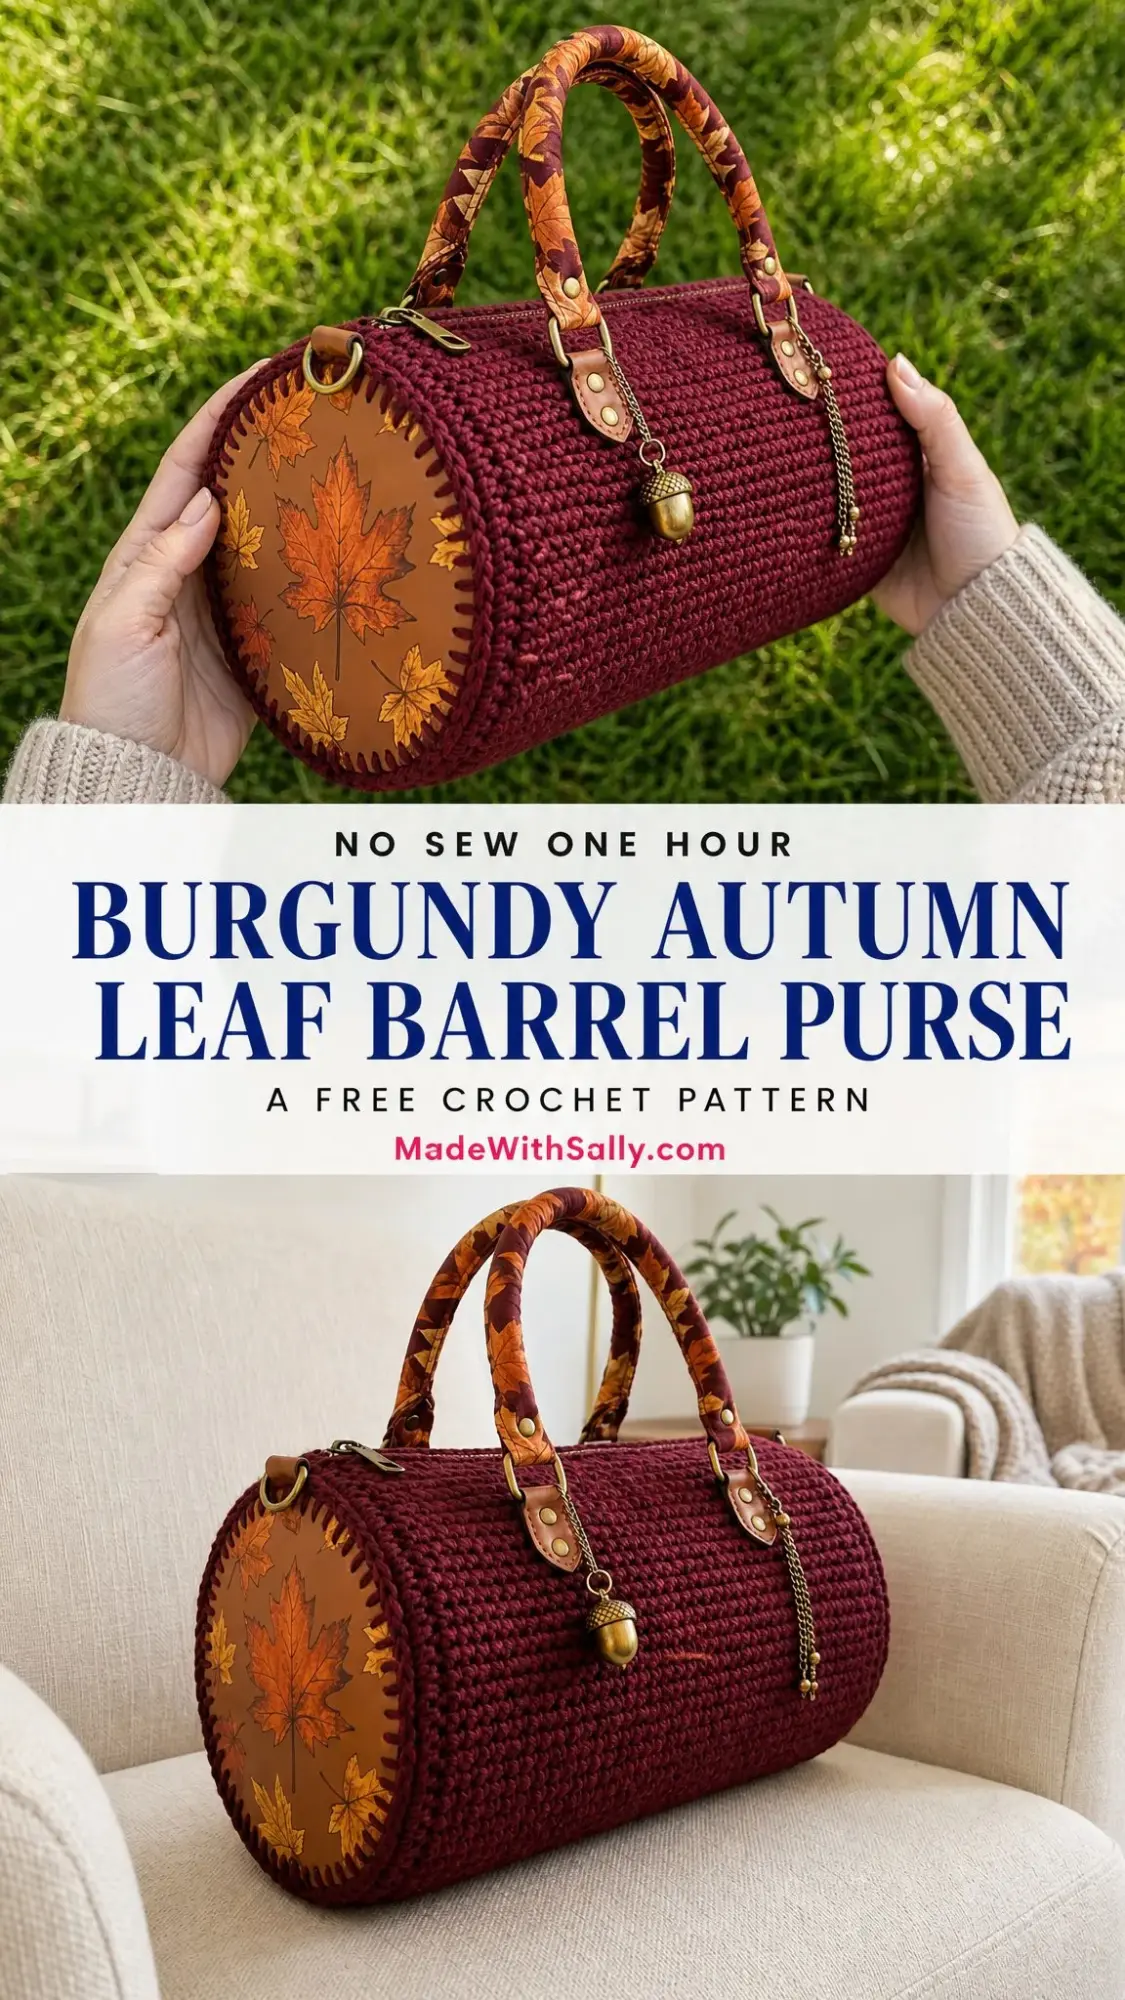
This barrel purse has been living rent free in my head since I first sketched it out. The deep burgundy yarn, the autumn leaf fabric panels, that little acorn charm dangling off the front. It just screams cozy fall vibes without being too on the nose.
The best part? The crochet itself is surprisingly straightforward. We’re talking rows and rows of simple single crochet. The intermediate elements come from the finishing details like the zipper, fabric panels, and handle tabs. If you’ve been wanting to level up from basic projects to something that looks truly polished, this is your sign.
About This Crochet Pattern
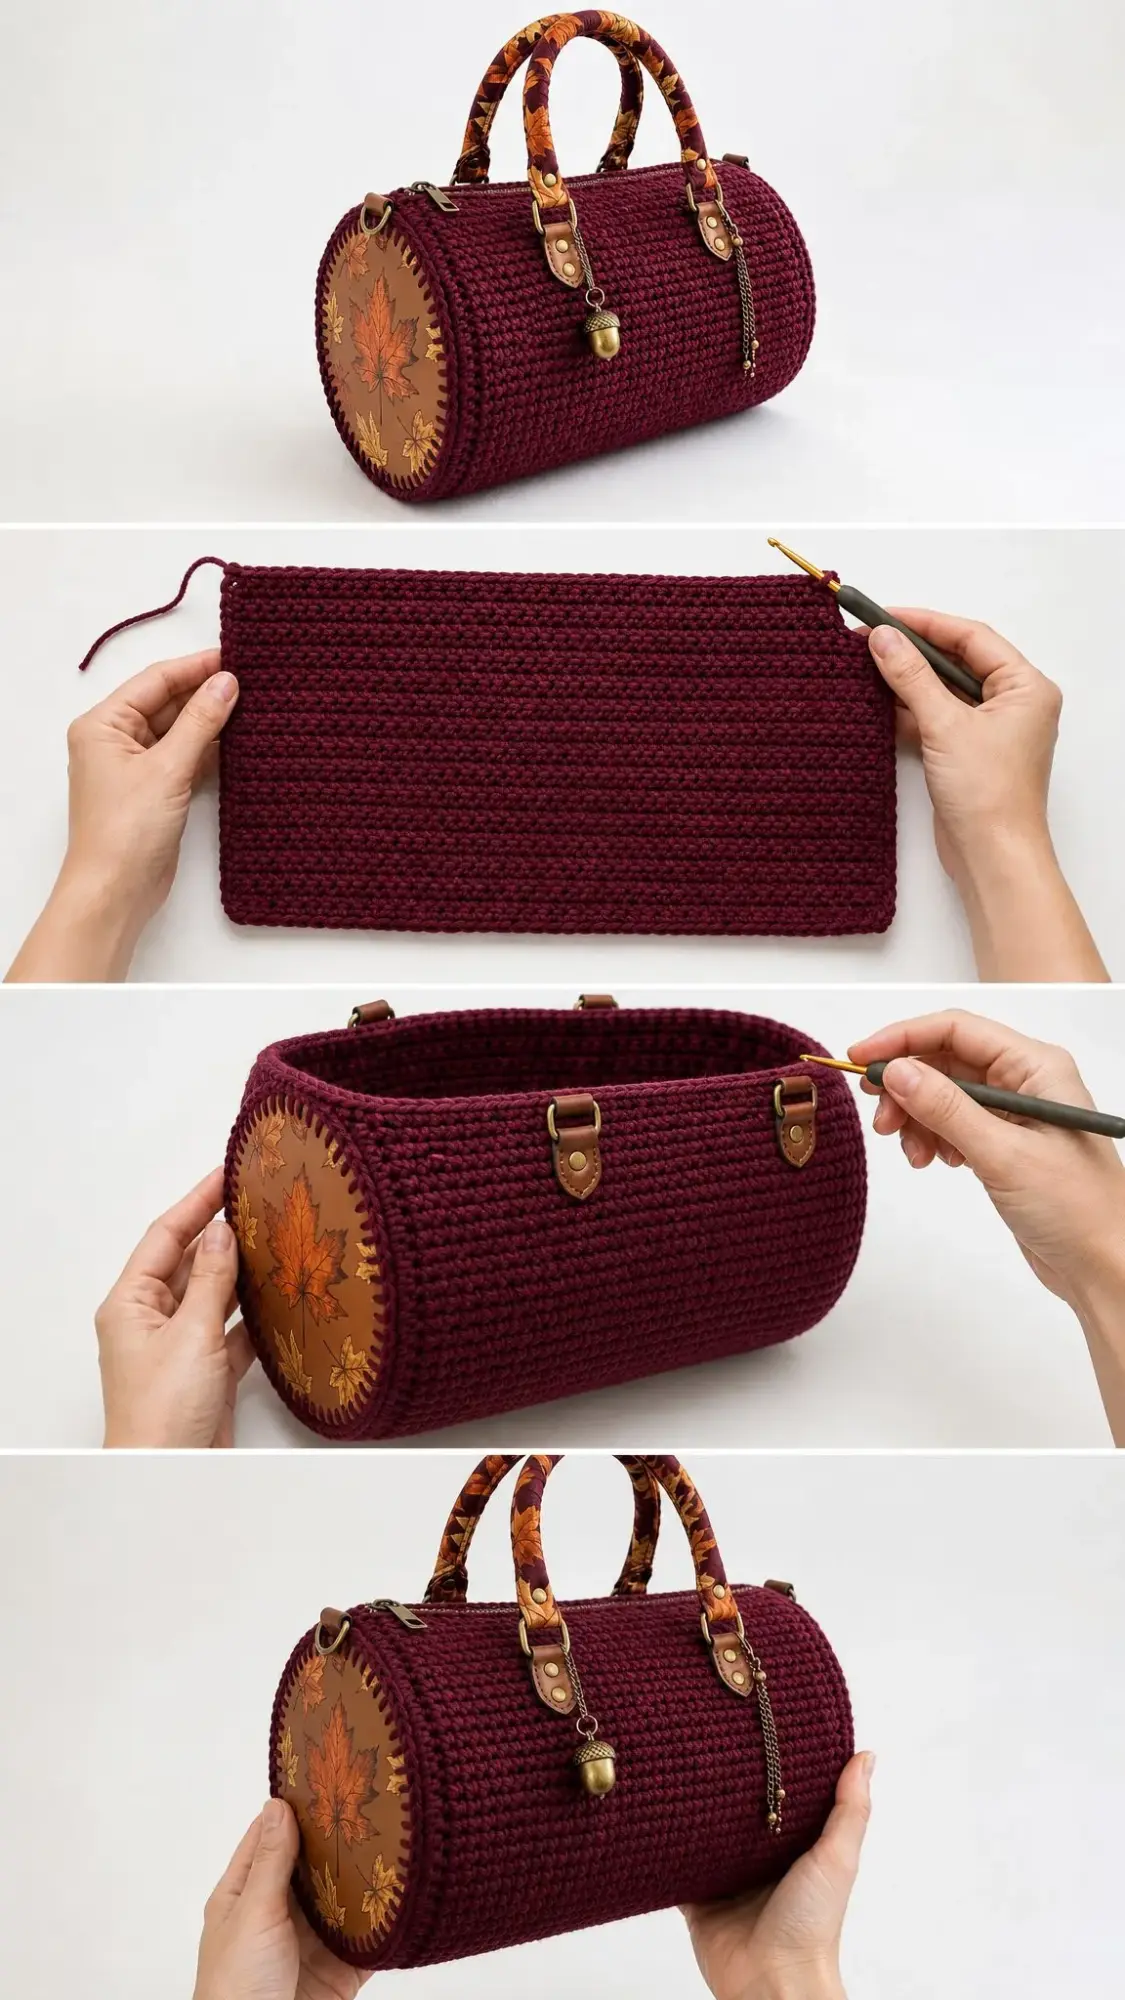
This Burgundy Autumn Leaf Barrel Purse is a structured crochet accessory featuring fabric leaf panels on each end, wrapped handles, a zipper closure, and an adorable acorn charm detail. The construction method is clever but not complicated. You crochet a firm rectangle, zip it into a cylinder, and finish it with two fabric circles on the ends.
The skill level sits at adventurous beginner to intermediate. If you can work single crochet confidently and you’re willing to do some hand sewing, you can absolutely make this purse. The trickier parts are accuracy, zipper placement, and neat finishing rather than complex stitches.
Finished Dimensions:
Time to Complete: 6 to 9 hours of crochet, plus additional time for hand sewing and drying if you use glue.
Materials You’ll Need
Gather everything before you start. There’s nothing worse than getting halfway through a project and realizing you’re missing a crucial supply.
Yarn:
Hook:
Notions:
Yarn Suggestions:
Lion Brand 24/7 Cotton gives crisp stitch definition. Choose a deep wine shade for a sturdy, polished body.
Paintbox Yarns Cotton Aran is smooth, affordable, and firm enough for bag projects.
Lily Sugar’n Cream Solids is easy to find and structured. Swatch carefully because it can work up slightly larger.
Substitution Note: Choose a firm worsted yarn that creates a dense, non-stretchy fabric. Cotton or cotton blend yarn gives the cleanest barrel shape. Acrylic can work if your gauge is firm and you line the finished body.
Gauge
15 sc x 15 rows = 4 inches / 10 cm in single crochet after blocking.
Match both stitch and row gauge before starting. The row gauge is especially important because it determines the purse diameter. If your gauge is off, your end panels won’t fit properly, and you’ll end up frustrated. Trust me on this one.
Abbreviations and Stitch Definitions
Let me walk you through the terms you’ll see throughout this pattern. Even if you know these stitches well, a quick refresher never hurts.
Single Crochet (sc): Insert your hook in the next stitch, yarn over and pull up a loop (2 loops on hook), yarn over and draw through both loops on hook. This is the workhorse stitch of the entire purse body.
Slip Stitch (sl st): Insert your hook in the indicated stitch, yarn over, and pull through the stitch and the loop on your hook in one motion. Used mainly for joining rounds.
Blanket Stitch Foundation: This is a hand sewing technique. With sewing thread or yarn, make evenly spaced blanket stitches around the raw edge of your fabric circles. This creates loops that your crochet hook can work into later.
A Quick Note Before You Begin
This pattern is designed to help you create a similar crochet project, but individual results may vary depending on your yarn, tension, hook size, and finishing technique. You may need to make small adjustments on your end to achieve the closest possible result to the finished project shown.
Left-Handed Crocheters: You can follow the same stitch counts throughout. Just work mirror-image placement for the zipper pull, charm, and handle tabs so the finished purse opens comfortably for you.
Body Panel Instructions
The body is worked flat in rows. Keep your side edges neat because they become the circular openings for the end panels.
Foundation: Ch 43.
Row 1: Sc in 2nd ch from hook and in each ch across. Turn. (42 sc)
Rows 2 through 80: Ch 1, sc in each st across. Turn. (42 sc per row)
That’s it for the crochet portion of the body. Just 80 rows of single crochet. The key is maintaining consistent tension throughout so your rectangle stays nice and flat.
Checkpoint: Your panel should measure about 11.2 inches / 28.5 cm wide and 21.25 inches / 54 cm long. When curved into a tube, the diameter should be close to 6.75 inches / 17 cm.
If your measurements are significantly off, check your gauge again. Row gauge controls circumference. If 80 rows don’t measure close to 21.25 inches / 54 cm, change your hook size before continuing.
Creating the Barrel Opening
Now we transform that flat rectangle into a cylinder.
Place Row 1 and Row 80 together with the right side facing out and the rows forming the top opening. Think of it like rolling a piece of paper into a tube.
Pin the zipper between Row 1 and Row 80. The zipper teeth should sit centered along the gap, with the zipper tape lying inside the purse.
Hand sew the zipper to the first and last rows using small backstitches. Take your time here. Catch the crochet fabric without pulling it out of shape.
Close the short ends of the zipper tape neatly at each side opening. Do not gather the body edges.
Troubleshooting Tip: If your zipper waves or ripples, baste it first before doing your final stitching. Do not stretch the crochet edge while stitching the zipper tape.
End Panels and Side Assembly
Make two matching end panels. Each panel has a finished diameter of 6.75 inches / 17 cm and gets joined to one side opening of the barrel.
Cut: Cut two fabric circles 7.25 inches / 18.5 cm across. Turn or press a 0.25 inch / 6 mm seam allowance to the wrong side so the finished visible circle is 6.75 inches / 17 cm.
Mark: Mark 80 evenly spaced points around each finished circle. Use quarter marks of 20 points each to keep things even.
Blanket Stitch: Work one blanket stitch at each point around the folded edge. (80 loops)
Crochet Edging Round 1: Join burgundy yarn in any blanket stitch loop. Ch 1, sc in each loop around, sl st to first sc. (80 sc)
Round 2: Ch 1, sc in each st around, sl st to first sc. Fasten off, leaving a 36 inch / 91 cm tail for sewing. (80 sc)
Join to Body: Match the panel quarter marks to the body side edge quarter marks. That’s 20 rows per quarter. Whipstitch through one panel stitch and one row-end edge at a time. (80 joins)
Checkpoint: Each side seam should use 80 even joins. The end panel should lie flat, with no puckers at the quarters and no rippling around the circle.
If Your End Panel Puckers: Check that the panel has 80 marked points and the body side has 80 row ends. Match quarters before sewing.
If Your End Panel Ripples: Your fabric circle may be too large or the blanket stitches may be too close together. Re-mark evenly and keep the finished circle at 6.75 inches / 17 cm.
Handles, Tabs, and Details
Use the same autumn leaf fabric as the end panels to wrap the handles. This creates that gorgeous cohesive look. Tabs can be faux leather, cotton canvas, or stabilized fabric.
Wrapped Handles: Cut two handle strips 1.75 inches / 4.5 cm wide by 15 inches / 38 cm long. Fold around cord or a purse handle base, overlap the long edge, and sew or glue neatly. Finished handle arch should be about 6 inches / 15 cm high.
Handle Tabs: Cut four tabs 1 inch x 3 inches / 2.5 x 7.5 cm. Fold each around the handle end and down onto the body. Position the tabs 2.25 inches / 5.5 cm from each side opening and about 1 inch / 2.5 cm below the zipper line.
Secure: Stitch tabs firmly by hand, then add rivets or Chicago screws if using faux leather. Avoid placing metal hardware through the zipper tape.
D-rings: Place one D-ring near each upper side edge. Attach with short folded tabs and strong hand stitches or rivets.
Charm: Attach the acorn charm to the front handle tab with a short chain. Add a second decorative chain to one D-ring if desired.
If Handle Tabs Pull: Add backing patches inside the purse under each tab, then stitch or rivet through all layers for extra stability.
Color Palette
The suggested colors for this purse create that perfect autumn aesthetic:
Size Customization
Want to make this purse larger or smaller? Here’s how the math works.
To Change Length: Adjust the foundation chain. At this gauge, each 15 stitches adds about 4 inches / 10 cm to the purse length.
To Change Diameter: Adjust the row count. At this gauge, 15 rows adds about 4 inches / 10 cm to circumference, which changes diameter by about 1.27 inches / 3.2 cm.
For Larger or Smaller End Panels: Mark the same number of fabric edge points as body rows so the panel joins one-for-one.
Finishing and Blocking
Weave in all yarn ends securely on the inside. Take your time with this step.
Steam lightly from the wrong side, keeping the iron above the fabric. Do not press the crochet flat or you’ll lose the texture.
Insert a soft towel inside the purse while shaping. Let it dry completely in a rounded barrel shape.
Optional: Add a lightweight fabric lining before sewing the second end panel in place. This gives the interior a polished look and protects your belongings.
Care Instructions
Spot clean with a damp cloth.
Do not machine wash once hardware, zipper, fabric panels, and charm are attached. All those lovely details don’t play well with washing machines.
Store stuffed lightly with tissue to preserve the cylinder shape between uses.
Troubleshooting Quick Reference
Body is too soft: Use a smaller hook, firmer yarn, or add a lining/interfacing layer. Bag projects need a dense fabric.
End panel puckers: Check that the panel has 80 marked points and the body side has 80 row ends. Match quarters before sewing.
End panel ripples: Your fabric circle may be too large or the blanket stitches may be too close together. Re-mark evenly and keep the finished circle at 6.75 inches / 17 cm.
Zipper waves: Baste first. Do not stretch the crochet edge while stitching the zipper tape.
Handle tabs pull: Add backing patches inside the purse under each tab, then stitch or rivet through all layers.
Diameter is off: Row gauge controls circumference. If 80 rows are not close to 21.25 inches / 54 cm, change hook size before continuing.
Maker Checkpoints
Use this quick reference to make sure you’re on track:
UK Terms Note
This pattern uses US crochet terms. If you’re working from UK terminology, remember that US single crochet equals UK double crochet.
Wrapping Up Your Burgundy Autumn Leaf Barrel Purse
I hope you love making this barrel purse crochet pattern as much as I loved designing it. There’s something incredibly satisfying about creating an accessory that looks store-bought but carries all the warmth of handmade.
The combination of simple single crochet stitches with those beautiful fabric details and hardware accents makes this project feel special without being overwhelming. It’s the kind of piece that gets compliments every time you carry it.
Thank you so much for choosing this pattern. I genuinely appreciate you trusting me with your crafting time. If you make this purse, I would absolutely love to see it! Tag me on Instagram or share a photo in my Facebook group. Seeing your finished projects truly makes my day.
If this pattern caught your eye, go ahead and save it to your Pinterest boards so you can find it when you’re ready to start. And if you do make this purse, drop a comment below. I love hearing about your yarn choices, any modifications you made, and how the finished bag turned out. Happy crocheting!
Want a Quick & Easy Printable Version?
Get a clean, beautifully formatted PDF of this pattern — easy to follow step by step, ready to print or save on any device. No scrolling, no distractions, just the pattern.
Get the Printable PDF →