
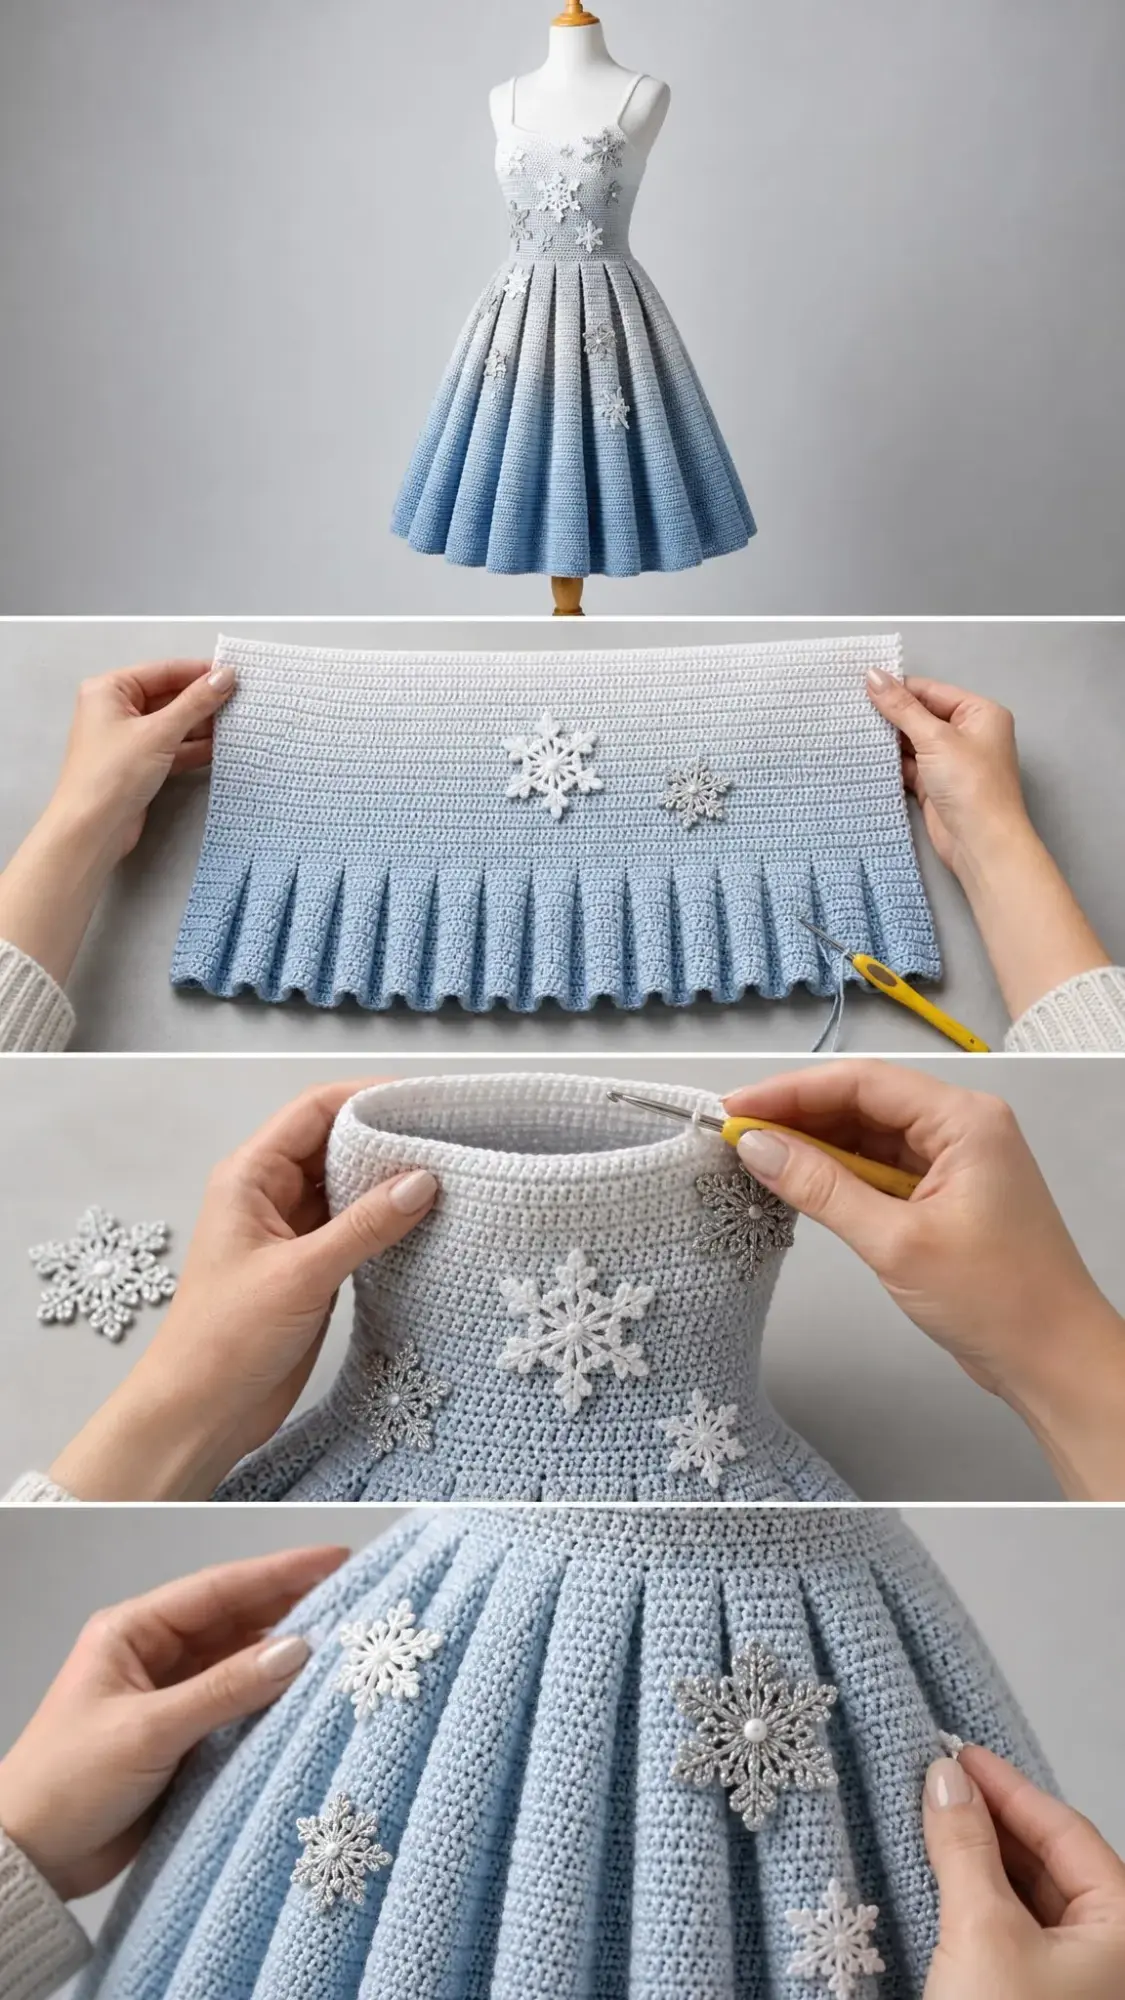
A cozy dress for the little one in your life is always a good idea. This Winter Snowflake Frost Dress keeps tiny shoulders warm with a fitted bodice while the flared skirt allows plenty of room to twirl. The construction uses split single crochet for a smooth, dense fabric on the bodice and regular single crochet for the flowing skirt panels. It works up in about 18 to 24 hours depending on your pace with the snowflake details.
Get the Ad-Free PDF Pattern
You can find the free pattern below, or you can purchase the ad-free printable PDF from my shop.
Get the Printable PDF →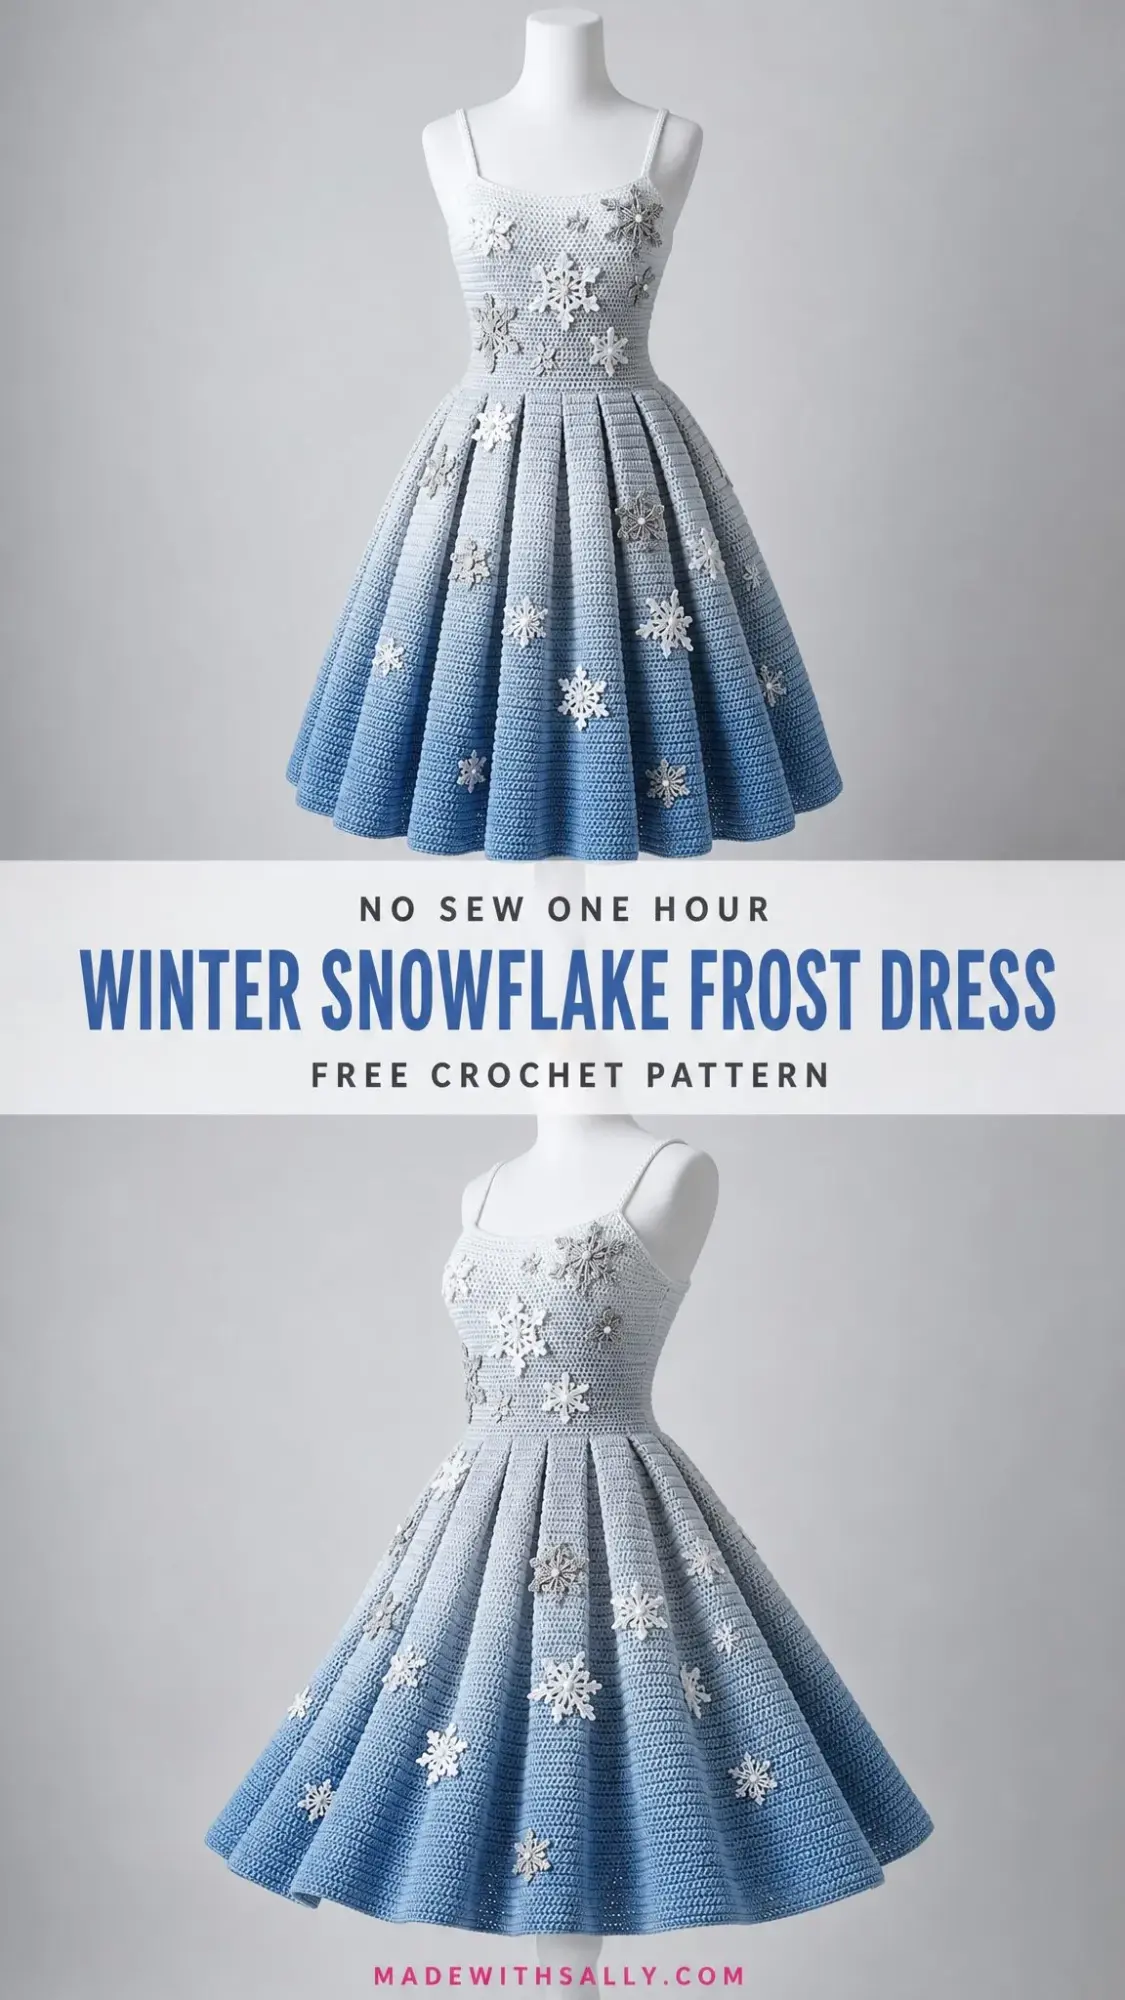
This pattern fits a child size 4 to 5 years with about 1 to 2 inches of positive ease at the chest. The finished dress measures 22 inches around the chest, 6 inches for the bodice height, and 9.25 inches for the skirt length. Total shoulder to hem length comes to about 17 inches after the straps are attached. The ombre effect from snow white to pale glacier to frost blue makes this perfect for winter photos, holiday parties, or a special gift.
If you have been looking for a project that combines garment construction with decorative appliques, this is a wonderful choice. The snowflake motifs are crocheted separately and sewn on after blocking, so you can place them exactly where you want them. This pattern works beautifully for intermediate crocheters ready to try garment gauge, joined rounds, and surface slip stitch techniques.
Materials You Will Need
Gathering your supplies before you begin makes the whole process smoother. Here is everything the pattern calls for.
Yarn: DK or sport weight cotton or cotton blend yarn with crisp stitch definition. You will need approximately 900 yards or 823 meters total, broken down as follows:
Add 10 to 15 percent extra if you plan on longer straps, extra snowflake motifs, or if you tend to crochet with looser tension.
Hooks: US E/4 or 3.5 mm for the main dress. US D/3 or 3.25 mm for the snowflakes. Use whatever sizes you need to match gauge.
Notions: 12 locking stitch markers, yarn needle, removable fabric clips, tape measure, rustproof pins, blocking mat. Optional items include 8 to 10 mm white buttons or snaps for a back opening, and clear beads or tiny pearl beads for snowflake centers.
Suggested Yarns:
| Yarn | Why It Works |
|---|---|
| Scheepjes Catona | Sport weight mercerized cotton with excellent stitch definition for crisp bodice texture and snowflakes |
| Premier Cotton Fair | Cotton and acrylic blend with soft drape perfect for a wearable child dress |
| Hobbii Rainbow Cotton 8/4 | Smooth cotton with many icy color options for planning your ombre |
When substituting yarn, choose one that matches gauge after washing and blocking. A springy acrylic may widen the skirt more than expected. Firm cotton gives the cleanest pleat lines.
Gauge Information
Checking your gauge before starting a garment is essential. The finished dress depends on matching these numbers.
For the bodice: 22 single crochet stitches and 24 rounds equals 4 inches or 10 cm in split single crochet, washed and blocked.
For the skirt: 24 single crochet stitches and 24 rows equals 4 inches or 10 cm in regular single crochet.
Match both stitch gauge and row gauge before starting. If your swatch is too small, go up a hook size. If it is too large, go down a hook size.
Stitch Abbreviations and Definitions
Understanding these terms will help you work through the pattern smoothly.
UK Crocheters: This pattern uses US terms. US sc equals UK dc. US hdc equals UK htr. US dc equals UK tr.
Special Stitches Explained
These techniques appear throughout the pattern. Take a moment to practice them if they are new to you.
Foundation Single Crochet (fsc): Chain 2, insert hook in second chain from hook, pull up a loop, chain 1 to make the base chain, yarn over and pull through both loops. For each next fsc, insert hook under both strands of the base chain you just made, pull up a loop, chain 1, yarn over and pull through both loops. This creates a stretchy foundation row that works beautifully for garments.
Split Single Crochet: Insert your hook between the two vertical legs of the stitch below instead of under the top loops. Pull up a loop, yarn over and pull through both loops. Keep your tension relaxed so the fabric does not become stiff. This stitch creates a dense, smooth fabric that looks almost knitted.
Surface Slip Stitch: With yarn held behind the fabric, insert your hook from front to back at a marked line. Pull the loop to the front and through the loop on your hook. Work upward in a straight line without pulling tight. This creates the vertical pleat lines on the skirt.
Picot: Chain 3, slip stitch in the first chain you made. This creates a small decorative point, perfect for snowflake tips.
Invisible Join: Cut your yarn and pull the tail through the last stitch. Thread your needle, insert it under both loops of the first stitch of the round, then back into the center of the last stitch. Weave in securely. This eliminates the visible jog at the end of rounds.
Pattern Notes Before You Begin
The chain 1 at the start of a round does not count as a stitch. Join rounds with a slip stitch to the first stitch unless the pattern says otherwise. Keep your seam at center back throughout. Use stitch markers for the twelve skirt panels and move them upward as you work. Snowflake placement happens after blocking so the motifs sit neatly over the pleats.
Left Handed Makers: Work the same stitch counts and rounds. Your joined rounds will travel in the opposite direction. Place your motif and pleat markers by measurement rather than by visual slant.
Bodice Instructions
Work the bodice from the waist upward to the top edge using Color A. Use the larger hook unless your split single crochet gauge requires a different size.
| Step | Instruction | Count |
|---|---|---|
| Foundation | Fsc 120. Join to first fsc without twisting. The seam is at center back. | 120 sts |
| Rnd 1 | Ch 1, sc in each st around, join. | 120 sc |
| Rnds 2-8 | Ch 1, sc BLO in each st around, join. This creates the waistband texture. | 120 sc |
| Rnds 9-36 | Ch 1, split sc in each st around, join. | 120 sc each rnd |
| Top edging | With smaller hook, sl st loosely around top edge. Fasten off. | 120 sl sts |
Bodice Checkpoint: After Round 36, your bodice should measure about 21.75 to 22 inches or 55 to 56 cm around and 6 inches or 15 cm tall from the waist foundation to the top edge.
Optional Back Opening: For easier dressing, leave the back seam open from Round 25 to the top edge by turning those rounds into rows instead of joining. Edge both sides with single crochet, then add 3 button loops on one side and matching buttons on the other.
Straps
Make 2 straps using Color A.
Row 1: Chain 6, sc in second chain from hook and each chain across. (5 sc)
Rows 2-42: Chain 1, turn, sc BLO across. (5 sc)
Your strap should measure about 7 inches or 18 cm. Fasten off with a long tail for sewing.
Pin straps 3 inches or 7.5 cm in from each side edge at front and back. Try the dress on or measure carefully before sewing. Sew securely through several rows for a strong attachment.
Skirt Instructions: Waist Fullness and Panels
Join Color B to the lower edge of the waist foundation with the right side facing. Work downward from here. Twelve panels create the softly pleated shape. Place a marker after every 20 stitches on Round 1.
| Rnd | Instruction | Count |
|---|---|---|
| 1 | Ch 1, 2 sc in each waist foundation st around, join. Pm every 20 sts for 12 panels. | 240 sc |
| 2-6 | Ch 1, sc in each st around, join. | 240 sc |
| 7 | For each panel: sc 5, inc, sc 8, inc, sc 5. Rep for 12 panels. | 264 sc |
| 8-13 | Sc in each st around. | 264 sc |
| 14 | For each panel: sc 6, inc, sc 8, inc, sc 6. Rep for 12 panels. | 288 sc |
| 15-18 | Sc in each st around. | 288 sc |
| 19-20 | Change to Color B/C blend or pale blue. Sc in each st around. | 288 sc |
Keep your panel markers aligned at the spaces between panels. On increase rounds, each panel gains 2 stitches. The marker stays at the panel boundary.
Skirt Instructions: Lower Ombre and Hem
| Rnd | Instruction | Count |
|---|---|---|
| 21 | For each panel: sc 7, inc, sc 8, inc, sc 7. Rep for 12 panels. | 312 sc |
| 22-27 | Sc in each st around. | 312 sc |
| 28 | For each panel: sc 8, inc, sc 8, inc, sc 8. Rep for 12 panels. | 336 sc |
| 29-34 | Change fully to Color C as desired. Sc in each st around. | 336 sc |
| 35 | For each panel: sc 9, inc, sc 8, inc, sc 9. Rep for 12 panels. | 360 sc |
| 36-41 | Sc in each st around. | 360 sc |
| 42 | For each panel: sc 10, inc, sc 8, inc, sc 10. Rep for 12 panels. | 384 sc |
| 43-56 | Sc in each st around. | 384 sc |
| Hem | Reverse sc in each st around, invisible join. | 384 sts |
Skirt Checkpoints: After Round 28, your skirt should measure about 4.5 inches or 11.5 cm from the waist. After Round 56, your skirt should measure about 9.25 inches or 23.5 cm from the waist. The hem circumference is about 70 inches or 178 cm before pleat blocking.
Surface Pleat Lines: Using Color C or a matching pale blue, work surface slip stitch from waist to hem along each of the 12 panel boundaries. Do not tighten. Steam block each line into a soft fold for the dimensional skirt effect.
Snowflake Appliques
Use the smaller hook and Color A for white flakes. Use pale gray or silver for accent flakes. Make 6 large snowflakes and 8 small snowflakes. For a balanced layout, place 4 large and 4 small on the bodice, then scatter the remaining motifs on skirt pleats from upper left to lower right.
Large Snowflake (make 6):
Rnd 1: Magic ring, ch 1, 12 sc in ring, join. (12 sc)
Rnd 2: Sl st in next sc, ch 6, sl st in 2nd ch from hook, sc in next ch, hdc in next ch, dc in next ch, tr in next ch, picot, sl st in same base sc, sl st in next sc; rep from 5 more times. Fasten off and block flat with six points.
Small Snowflake (make 8):
Rnd 1: Magic ring, ch 1, 6 sc in ring, join. (6 sc)
Rnd 2: Ch 4, sl st in 2nd ch from hook, sc in next ch, hdc in next ch, sl st in next sc; rep from 5 more times. Fasten off and block flat.
Motif Placement Guide: Pin all flakes before sewing anything down. Keep at least 1 inch or 2.5 cm away from underarms and strap joins. Sew only through the center ring and two or three arm tips so the points remain delicate. Add optional tiny pearl beads at motif centers after laundering test swatches.
Finishing Your Winter Snowflake Frost Dress
Weave in all ends on the wrong side. Block the bodice flat to gauge. For the skirt, arrange the twelve surface lines into soft folds and steam from above without pressing the texture flat. Let everything dry completely before attaching the final motifs. Sew straps firmly and reinforce the inside with a few duplicate stitches.
Final Measurements:
Customizing the Fit
Chest Size: Add or remove waist foundation stitches in multiples of 12. At gauge, every 12 stitches changes the chest by about 2.2 inches or 5.5 cm. Keep the stitch count divisible by 12 so skirt panel markers divide evenly.
Bodice Height: Add or remove split single crochet rounds before the top edging. At row gauge, 6 rounds equals about 1 inch or 2.5 cm.
Skirt Length: Add or remove plain single crochet rounds after Round 43. If adding more than 2 inches or 5 cm, add extra yarn before beginning.
Straps: Lengthen or shorten in 2 row increments. Pin straps and check fit before sewing.
Ombre Changes: For a smoother frost fade, work 2 rounds alternating Color B and Color C before changing fully to Color C.
Troubleshooting Common Issues
| Issue | Fix |
|---|---|
| Bodice feels stiff | Use a larger hook for split sc or loosen the pull up loop. Recheck blocked gauge. |
| Top edge gapes | Move straps inward 0.5 inch or 1.25 cm, or add one round of sc around the top with 4 decreases spaced at back. |
| Skirt ruffles too much | Block pleat lines into vertical folds. If still too full, omit the Round 42 increase. |
| Skirt looks narrow | Check that Round 1 doubled every waist stitch and that each panel gained 2 stitches on each increase round. |
| Snowflakes curl | Wet block each motif with pins at all points before sewing. |
Care Instructions
Hand wash your finished dress in cool water with gentle soap. Press out water in a towel but do not wring. Reshape the bodice, arrange skirt pleats, and dry flat. Store flat or lightly folded so snowflake points do not crease.
Final Thoughts on the Winter Snowflake Frost Dress Crochet Pattern
This dress brings together so many satisfying techniques. The fitted bodice in split single crochet, the flowing paneled skirt with its soft pleats, and those delicate snowflake appliques all combine into something truly special. Whether you are making this for a holiday celebration, winter photo session, or just because a little one deserves something beautiful, I hope you enjoy every stitch.
Thank you so much for choosing this pattern for your next project. I would absolutely love to see your finished dress! Tag me on Instagram or share it in our Facebook group so I can admire your work.
If this pattern inspires you, go ahead and save it to your Pinterest boards so you can find it when you are ready to start. And please drop a comment below if you make one. I love hearing how your projects turn out and seeing the color combinations you choose!
Want a Quick & Easy Printable Version?
Get a clean, beautifully formatted PDF of this pattern — easy to follow step by step, ready to print or save on any device. No scrolling, no distractions, just the pattern.
Get the Printable PDF →