
Amigurumi jellyfish look intimidating, right? All those curly tentacles, that perfectly domed bell, the delicate ruffled collar. I get it. But here is the truth: if you can single crochet in a circle and chain a straight line, you can absolutely make this adorable lavender jellyfish keychain.
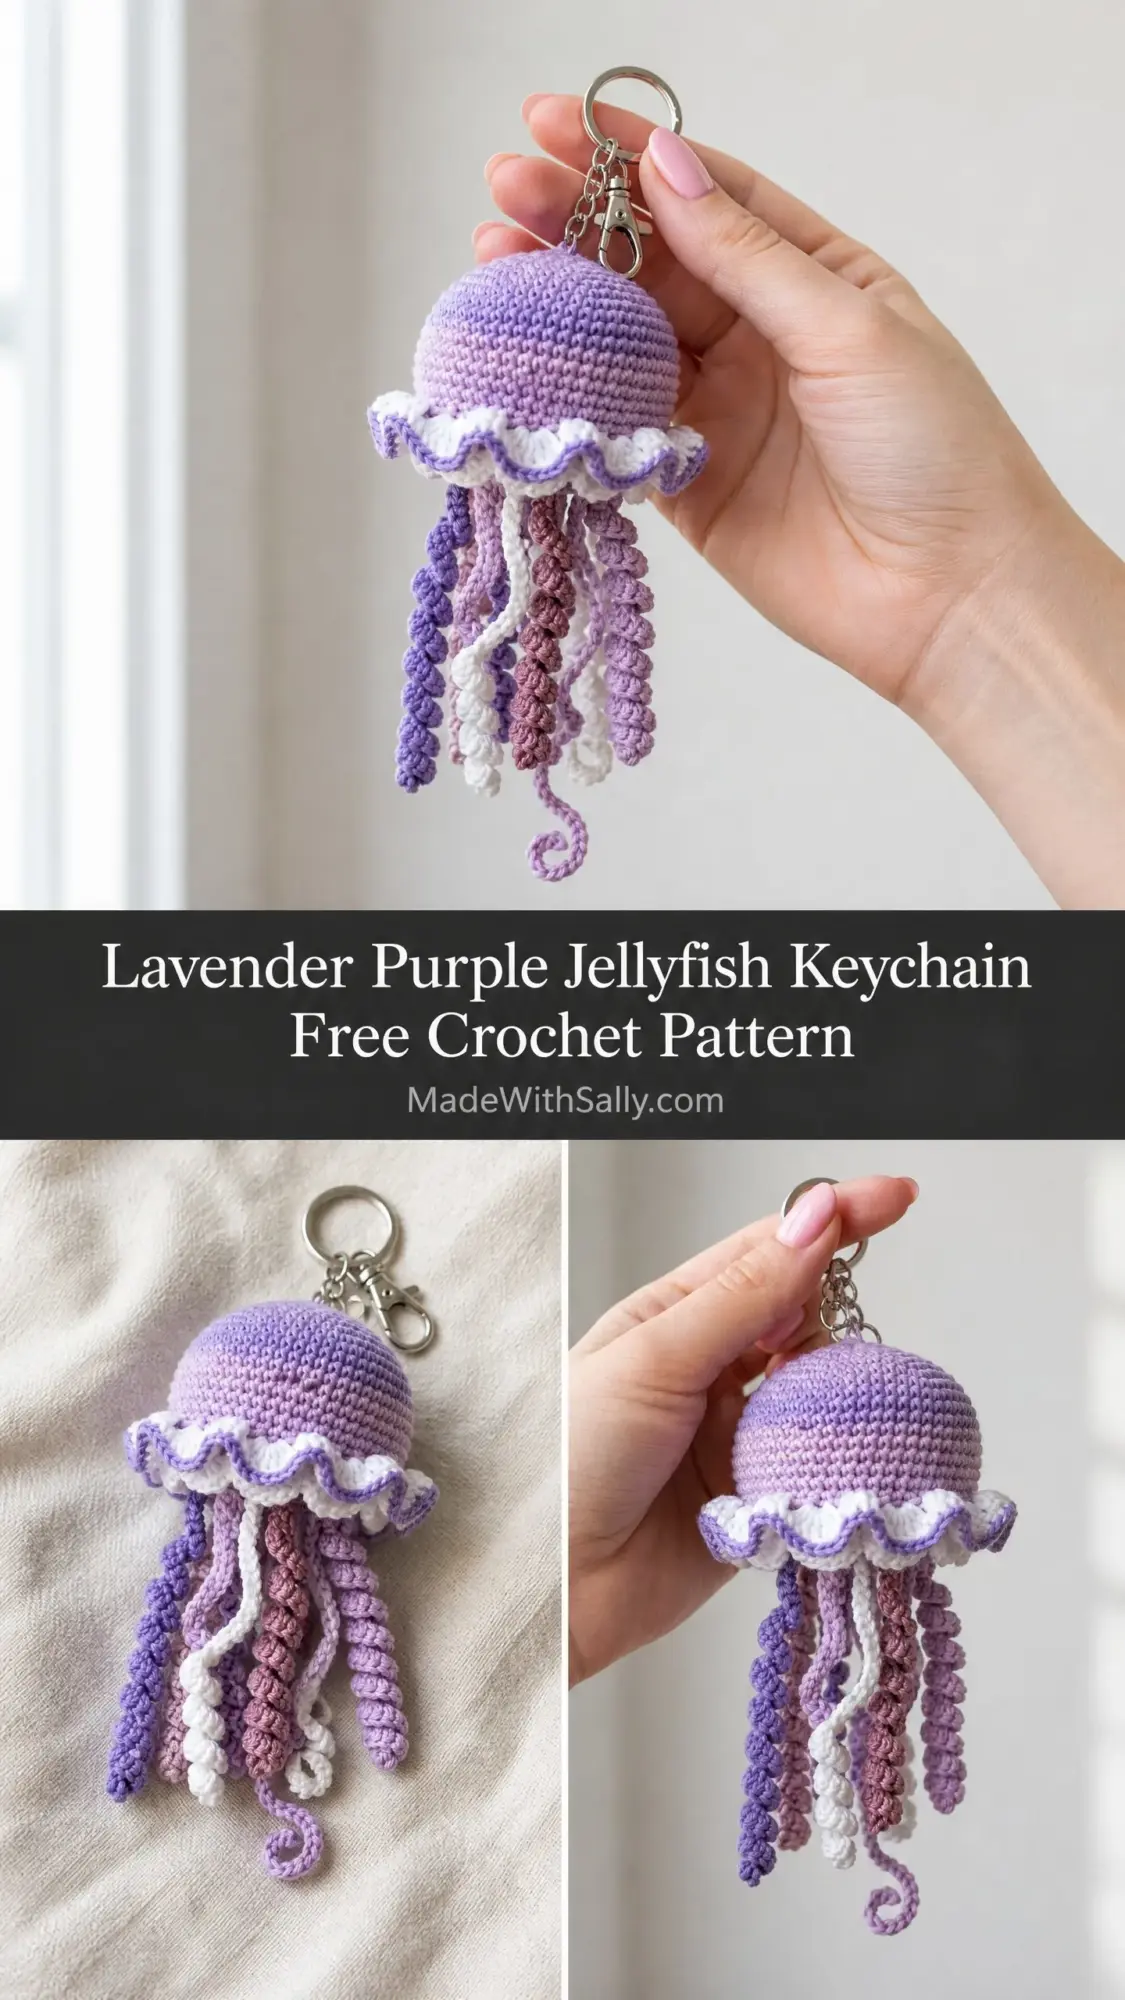
The bell is just a basic amigurumi sphere worked from the top down. The spiral tentacles? They practically make themselves when you work three stitches into each chain. And that fancy ruffle is simply a repeated pattern around one round of your finished bell. Nothing scary here.
Whether you are an amigurumi veteran looking for a quick project or a curious beginner ready to try something new, this crochet pattern breaks everything down into manageable pieces. Let me walk you through every single step.
Why You Will Love This Jellyfish Keychain Crochet Pattern
This little sea creature makes the perfect bag charm, zipper pull, or keychain accessory. The finished piece measures approximately 2.5 inches across the bell and 5.5 to 6 inches total length including those dreamy tentacles. It is small enough to be practical but detailed enough to make people ask, "Did you make that?"
The color palette combines soft lavender, white, medium purple, mauve, and pale lilac for a cohesive ocean-inspired look. You will need only small amounts of each color, making this an excellent stash buster project. Those mini yarn packs you have been hoarding? Perfect for this.
Construction is straightforward: make the bell first, add the ruffle collar directly onto the bell, create the tentacles separately, then attach everything together. No complicated assembly, no confusing joins.
Materials You Will Need
Yarn (DK or Fingering Weight):
Hook: US size D/3 (3.25 mm) crochet hook
Notions:
Yarn Suggestions
Lion Brand Bonbons work beautifully for this project. The party pack includes several coordinating purples and neutrals that match all five colors, and you avoid buying full skeins for a small project.
Paintbox Yarns Simply DK offers excellent color range at an affordable price. Look for Pansy Purple, Dusty Rose, White, and Lilac.
Scheepjes Catona is a mercerized cotton option that gives the bell a slightly stiffer, crisper appearance. Cotton holds up well to regular handling, which matters for a keychain that will live on your bag.
Any fingering to DK weight yarn works as long as you match gauge. Avoid bulky or highly textured yarns because they obscure the stitch definition and distort the ruffle.
Gauge
7 single crochet stitches = 1 inch / 2.5 cm
7 rows or rounds = 1 inch / 2.5 cm
Work a quick gauge swatch by making a magic ring, working 6 single crochet into the ring, then continuing in continuous rounds with increases until you reach approximately 24 stitches. Measure across the flat circle. Adjust your hook size up or down until your gauge matches.
Gauge matters here because it affects both size and appearance. If your stitches are too loose, the stuffing will show through gaps in the fabric. If they are too tight, you will struggle to insert your hook.
Abbreviations and Stitch Definitions
Let me define every abbreviation before we start so you never have to guess:
ch = chain: Yarn over, pull through the loop on your hook. One chain made.
sl st = slip stitch: Insert hook into stitch, yarn over, pull through both the stitch and the loop on your hook in one motion. Used for joining and moving yarn position without adding height.
sc = single crochet: Insert hook into stitch, yarn over, pull up a loop (2 loops on hook), yarn over, pull through both loops. One single crochet complete.
sc2tog = single crochet two together, also called invisible decrease: This creates a tighter, less visible decrease than the standard method. Insert hook into the front loop only of the next stitch. Without pulling through, insert hook into the front loop only of the following stitch. You now have two front loops on your hook. Yarn over, pull through both loops (2 loops remain). Yarn over, pull through both remaining loops.
inc = increase: Work 2 single crochet stitches into the same stitch. For example, if the pattern says "inc in next st," you work two sc into that one stitch.
MR = magic ring: Create an adjustable loop, work stitches into it, then pull the tail to close the center hole. This eliminates the gap you get with chain-based circles.
st/sts = stitch/stitches
rnd = round
rep = repeat
BLO = back loop only
FLO = front loop only
Special Techniques
The Spiral Tentacle Method
This is what creates those gorgeous curly tentacles. Chain the stated number, then work 3 single crochet into each chain stitch going back toward your hook. Because you are cramming triple the normal number of stitches into each chain, the strip has nowhere to go but spiral back on itself. The curls happen automatically. Magic, but also just math.
Keep your tension even throughout each tentacle for consistent curl size. If your curls are too loose, tighten up on the single crochet stitches. If the strip is not spiraling at all, double check that you are working 3 single crochet per chain, not 2.
The Ruffled Collar Method
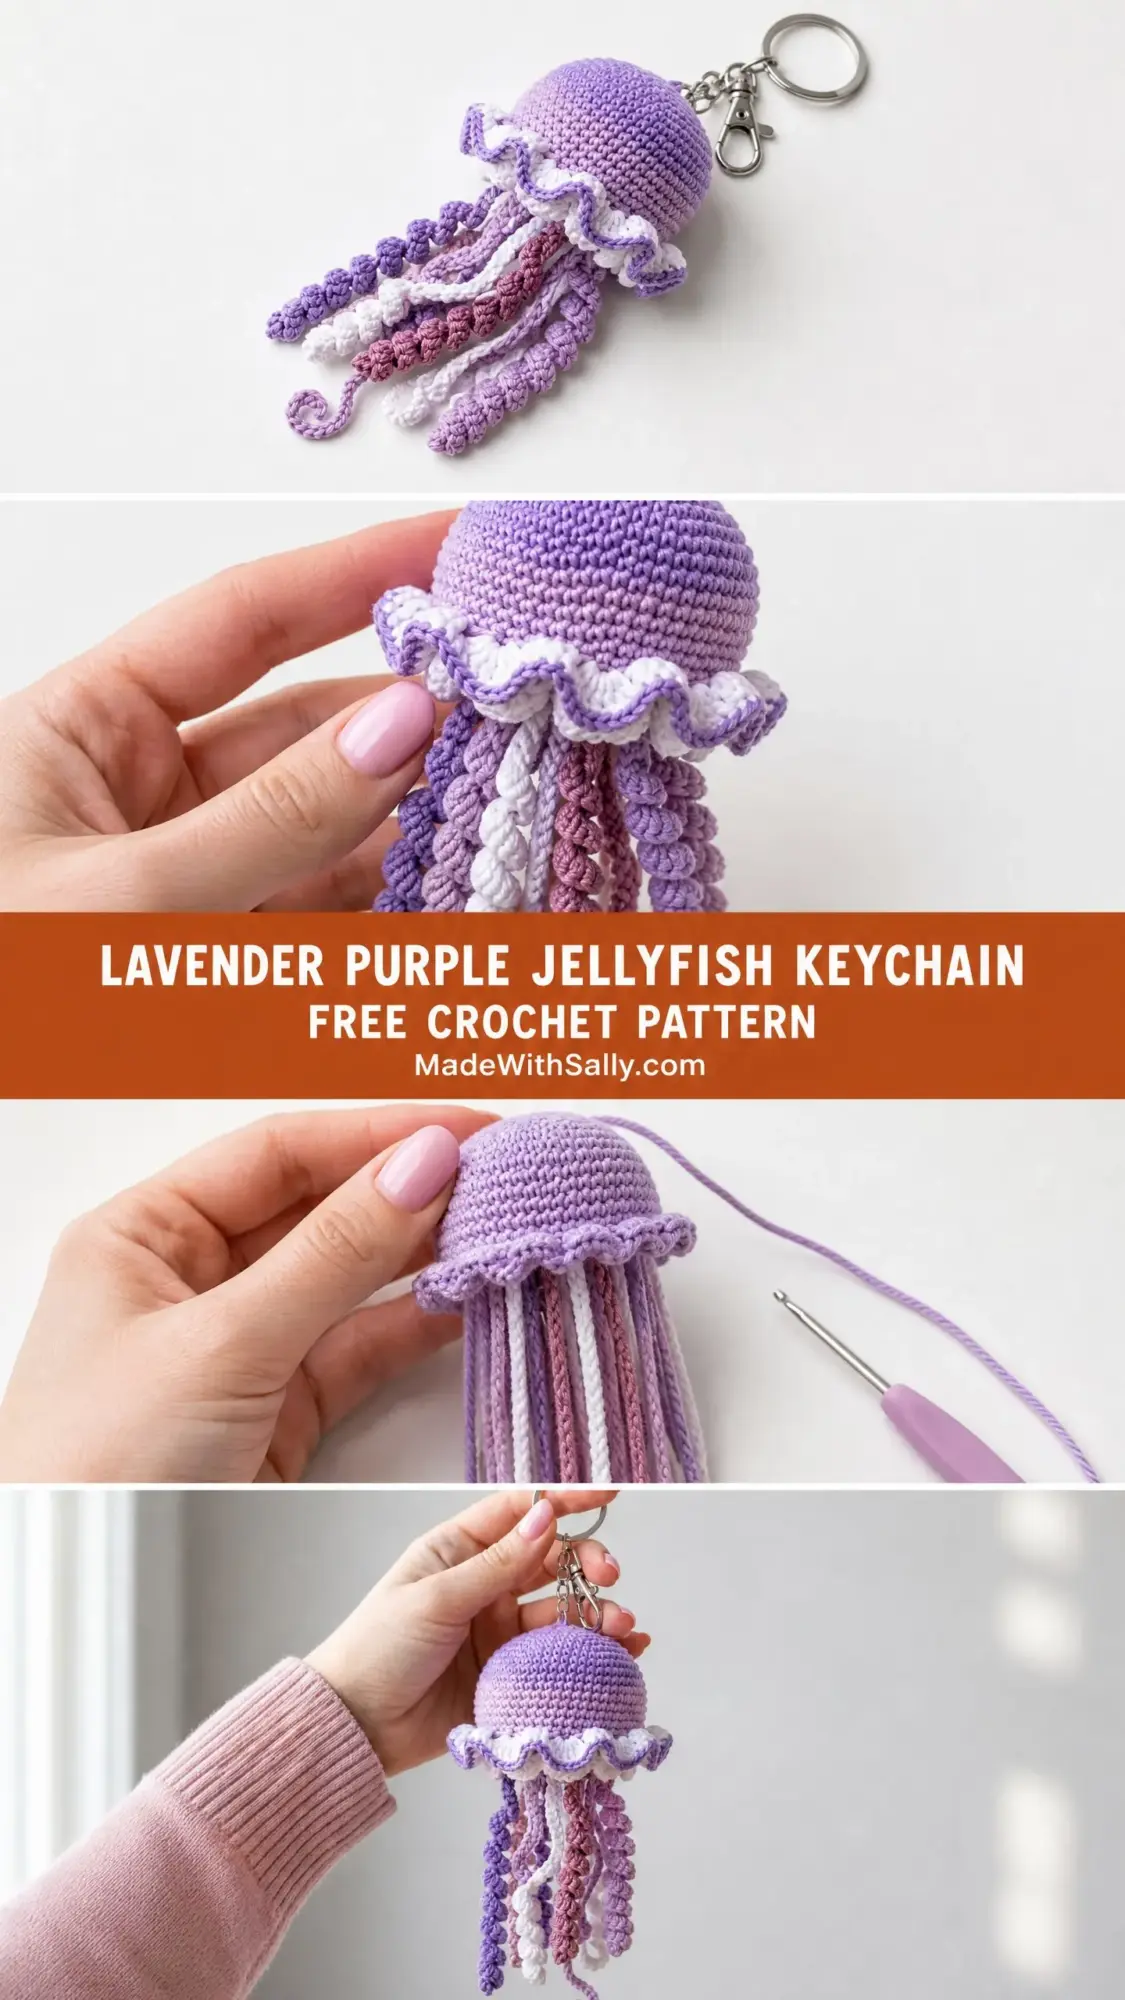
Join yarn to the stated round on your finished bell. Work (slip stitch, chain 2, 3 single crochet, chain 2, slip stitch) all into the same stitch, then move to the next stitch and repeat. This creates scallop-shaped ruffles that bunch up and fan outward naturally because you are crowding so many stitches onto the foundation round.
Pattern Notes Before You Begin
1. The bell is worked in continuous rounds, which means you spiral upward without joining at the end of each round. Use a stitch marker in the first stitch and move it up as you go.
2. Do not chain 1 at the start of rounds unless the pattern specifically tells you to.
3. Keep the right side of the fabric facing outward throughout. The visible V of each single crochet should face you.
4. The keychain loop forms at the crown of the bell during construction. Do not skip this step before stuffing or you will need to add it later with more difficulty.
5. Leave a 6-inch yarn tail when fastening off for sewing. Leave a 10-inch tail for attaching tentacles.
6. Stuff the bell firmly but not so tight that the fabric distorts. Think stress ball: solid but with slight give.
Step by Step Instructions
Part One: The Bell (Color A, Lavender)
Round 1: Make a magic ring. Work 6 sc into the ring. Pull the ring closed. (6 sc)
Round 2: Inc in each stitch around. (12 sc)
Round 3: (Sc in next st, inc in next st) repeat 6 times. (18 sc)
Round 4: (Sc in next 2 sts, inc in next st) repeat 6 times. (24 sc)
Round 5: (Sc in next 3 sts, inc in next st) repeat 6 times. (30 sc)
Round 6: (Sc in next 4 sts, inc in next st) repeat 6 times. (36 sc)
Round 7: (Sc in next 5 sts, inc in next st) repeat 6 times. (42 sc)
Round 8: Sc in each st around. (42 sc)
Round 9: Sc in each st around. (42 sc)
Round 10: Sc in each st around. (42 sc)
Round 11: Sc in each st around. (42 sc)
Checkpoint: Your bell should measure approximately 2.5 inches across at the widest point. It should look like a domed hemisphere with the open edge facing downward.
Round 12: (Sc in next 5 sts, sc2tog) repeat 6 times. (36 sc)
Round 13: (Sc in next 4 sts, sc2tog) repeat 6 times. (30 sc)
Round 14: (Sc in next 3 sts, sc2tog) repeat 6 times. (24 sc)
Important: Before continuing, insert stuffing into the bell. Fill firmly and evenly, pushing fiberfill into the dome. Do not close the bottom yet.
Round 15: (Sc in next 2 sts, sc2tog) repeat 6 times. (18 sc)
Round 16: (Sc in next st, sc2tog) repeat 6 times. (12 sc)
Round 17: Sc2tog 6 times. (6 sc)
Fasten off, leaving a 6-inch tail. Thread the tail onto your yarn needle, run it through the front loops of all 6 remaining stitches, pull to close, and weave in. This closing point is the bottom center of the bell and will be hidden by tentacles.
Creating the Keychain Loop
Before closing Round 17, cut a 10-inch piece of Color A yarn. Fold it in half to form a loop approximately 1 inch long. Thread both tails down through the center of the crown (the original magic ring point at Round 1) using a yarn needle. Go from outside the bell to inside. Tie the two tails together securely inside the bell with a square knot. Trim to 1 inch inside the bell.
The folded loop at the crown should stick up approximately 0.75 inch above the bell surface. Thread your keychain lobster clasp and ring through this loop. Adding a metal jump ring for extra security is optional but recommended.
Part Two: The Collar Ruffle
The collar attaches directly onto Round 11 of your bell. This is the last even round before decreasing begins, sitting at the widest equator of the bell.
Join Color B (White) with a slip stitch to any stitch of Round 11.
Foundation Ruffle Round: Working into Round 11 stitches, (sl st into next st, ch 3, 4 sc into the 3rd ch from hook, sl st into the same st of Round 11) repeat around all 42 sts. Join with sl st to first sl st. (42 ruffle petals)
This creates a tight, scalloped ruffle. Each petal shares its base stitch with a slip stitch entry and exit. The petals will naturally fold and bunch together.
Collar Edging Round: Join Color A (Lavender) with a sl st to the top of any petal. (Sl st, ch 1, sl st) into the tip of each petal around. Join. Fasten off and weave in ends.
This edging traces a lavender outline along the white ruffle edge, adding that beautiful two-tone detail.
Part Three: Making the Tentacles
All tentacles use the Spiral Tentacle method. Work each as a separate piece, fasten off with a long tail for attaching. The varying chain lengths create natural depth when they hang together.
Color A (Lavender), make 4:
Color C (Medium Purple), make 3:
Color D (Mauve), make 3:
Color E (Pale Lilac), make 2:
Color B (White), make 2:
You will have 14 tentacles total across 5 colors. This creates the full, dense cluster shown in the finished piece.
Part Four: Attaching the Tentacles
Thread each tentacle tail onto a yarn needle. Insert the needle up through the closed bottom of the bell, spacing tentacles evenly around the underside opening area. Bring the needle out through the bottom and back in twice to secure each one. The tentacles should hang from the underside with the unsewn chain-start end spiraling freely.
Arrangement tip: Place Color A and Color C tentacles toward the front and sides. Place Color D and Color E in the middle cluster. Space the white Color B tentacles evenly for contrast, visible from front and back. The different chain lengths will create natural variation automatically.
Once all tentacles are attached, weave in remaining tails securely inside the bell. Give the cluster a gentle shake to let them fall naturally.
Final Checkpoint: Your complete jellyfish should measure approximately 5.5 to 6 inches from the top of the keychain loop to the tip of the longest tentacle.
Finishing and Care
This project does not require wet blocking. The stuffing holds the three-dimensional shape on its own. If your ruffle is not lying as open and free as you want, lightly mist with water, use your fingers to open each petal outward, then let it air dry before handling.
Weave all ends securely, running each tail in two directions through the wrong side before trimming. For cotton yarn, a small dab of fabric glue at knot points inside the bell adds extra security.
Care instructions: Hand wash in cool water with mild soap. Do not wring or twist. Gently squeeze out excess water and reshape by hand. Lay flat or hang to dry away from direct sunlight and heat. Do not machine wash.
If tentacles tangle during use, hold the bell and let the tentacles hang freely. They will separate under their own weight. A gentle shake resolves most tangling.
Size Customization Tips
For a larger jellyfish: Work 2 to 3 additional even rounds between Rounds 11 and 12. Add 6 stitches to each tentacle starting chain. The ruffle stays on the last even round before decreasing.
For a smaller jellyfish: Stop increasing after Round 5 (30 stitches) instead of Round 7 (42 stitches). Work 3 even rounds, then begin decreasing. Subtract 4 to 6 chains from each tentacle.
For different yarn weights: Use fingering weight and a US B/1 (2.25 mm) hook for a tiny 1.5-inch charm bracelet size. Use worsted weight and a US G/6 (4.0 mm) hook for a larger 4-inch bag charm.
You Did It!
Thank you so much for making this jellyfish keychain crochet pattern with me. I hope you love your finished sea creature as much as I loved designing it. If you make one, please share a photo on Instagram or Facebook and tag me. I absolutely love seeing your versions.
If you enjoyed this crochet tutorial, go ahead and save it to your Pinterest boards so you can find it again later. And drop a comment below if you make one. I would love to hear which color combination you chose!
